

On busy afternoons, No Bake Chocolate Oat Bars are the treat I reach for because this no bake chocolate oat bars recipe is chocolatey and so easy to make. It is a budget friendly batch that you can make with about 15 minutes of hands-on work. Make these chewy bars for dessert tonight.
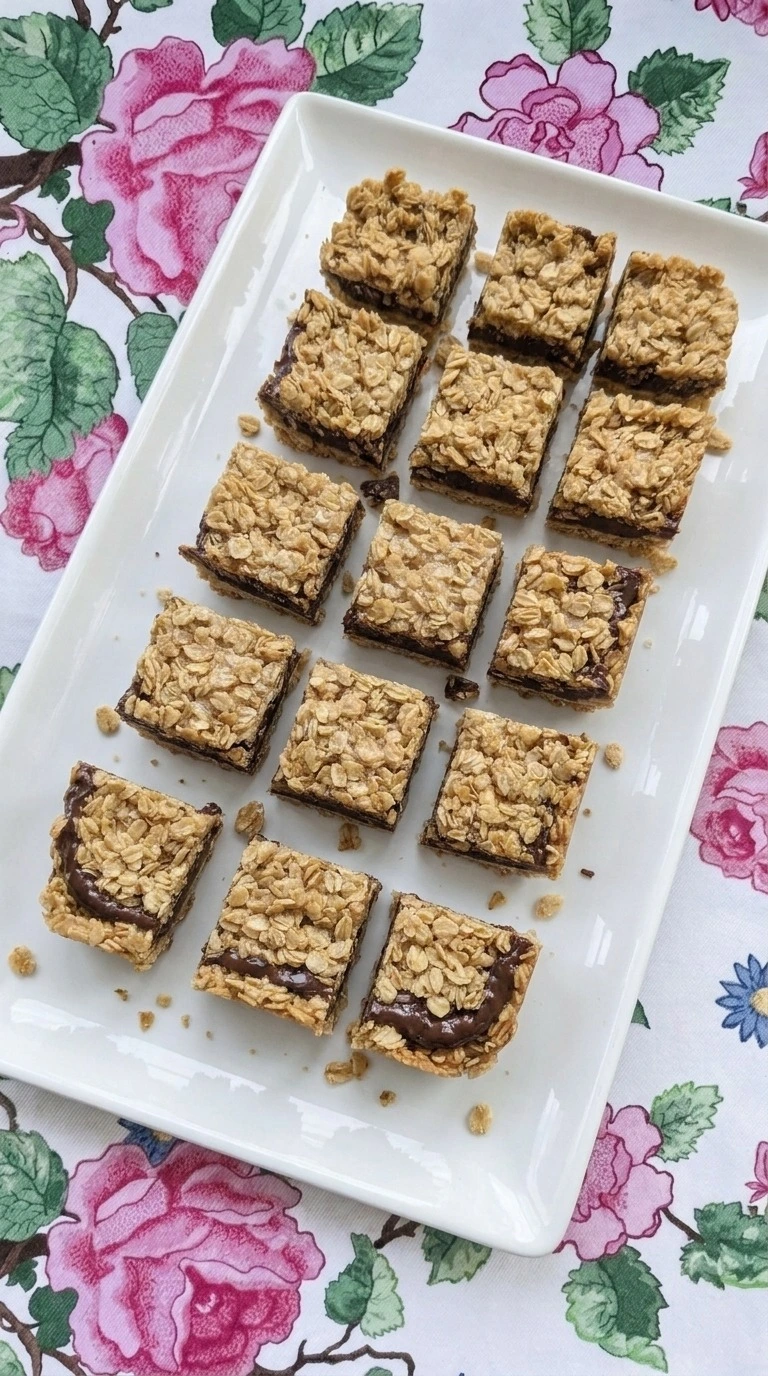
If you love easy no bake dessert bars, you’re going to love this chocolate oat bar recipe. It’s a pantry staple dessert that is rich, chewy and wonderfully satisfying. With a fudgy chocolate peanut butter layer like this, you’re going to want every crumb left in the pan.
If you’re looking for other simple sweets with the same low-effort feel, these chocolate oatmeal bars fit beautifully into meal prep, lunchbox treats or a casual party tray. No oven needed. Chill them until firm and cut them cold for the neatest edges.
Ingredients
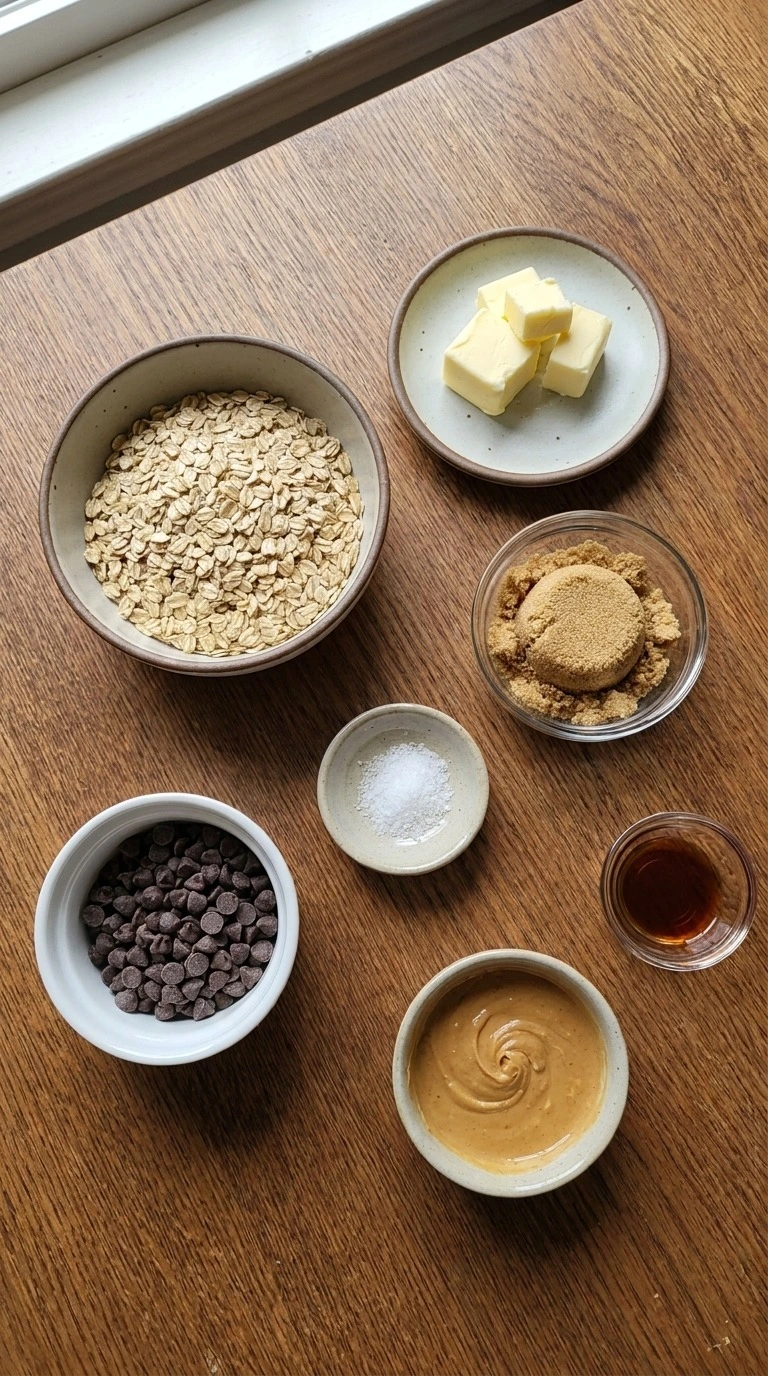
- unsalted butter: Melted with the sugar to coat the oats and help the chilled layers bind.
- light brown sugar: Adds caramel flavor and enough moisture to keep the oat layers chewy.
- old-fashioned rolled oats: Use intact rolled flakes for a chewy structure that still holds together after chilling.
- pure vanilla extract: Stirred into the warm oat mixture off the heat for a rounded sweet aroma.
- Diamond Crystal kosher salt: Balances the brown sugar and chocolate without making the bars taste salty.
- semisweet chocolate chips: Use chips around 50 to 60 percent cacao for a firm but biteable chilled center.
- creamy peanut butter: Use a smooth shelf-stable style so the chocolate layer sets evenly without oily separation.
Tools You’ll Need
- 2-quart heavy-bottomed saucepan: A heavy 2-quart saucepan spreads low heat evenly for the oat base and chocolate filling, while a thin pan can hot-spot and scorch the sugar.
- 8×8-inch square pan: An 8×8-inch pan gives the right layer thickness for 16 bars, while a 9×9-inch pan makes them noticeably thinner and changes the chill time.
- parchment paper: Use a sheet wide enough to leave a 2-inch overhang on two sides so the chilled slab lifts cleanly without breaking.
- heatproof rubber spatula: A flexible heatproof spatula scrapes the pan cleanly during low-heat stirring, while a rigid spoon can leave sugar collecting in hot spots.
- chef’s knife: An 8-inch sharp chef’s knife makes clean cold cuts through all three layers, while a dull blade drags the chocolate and compresses the oats.
Instructions
Step 1: Toast the oat mixture
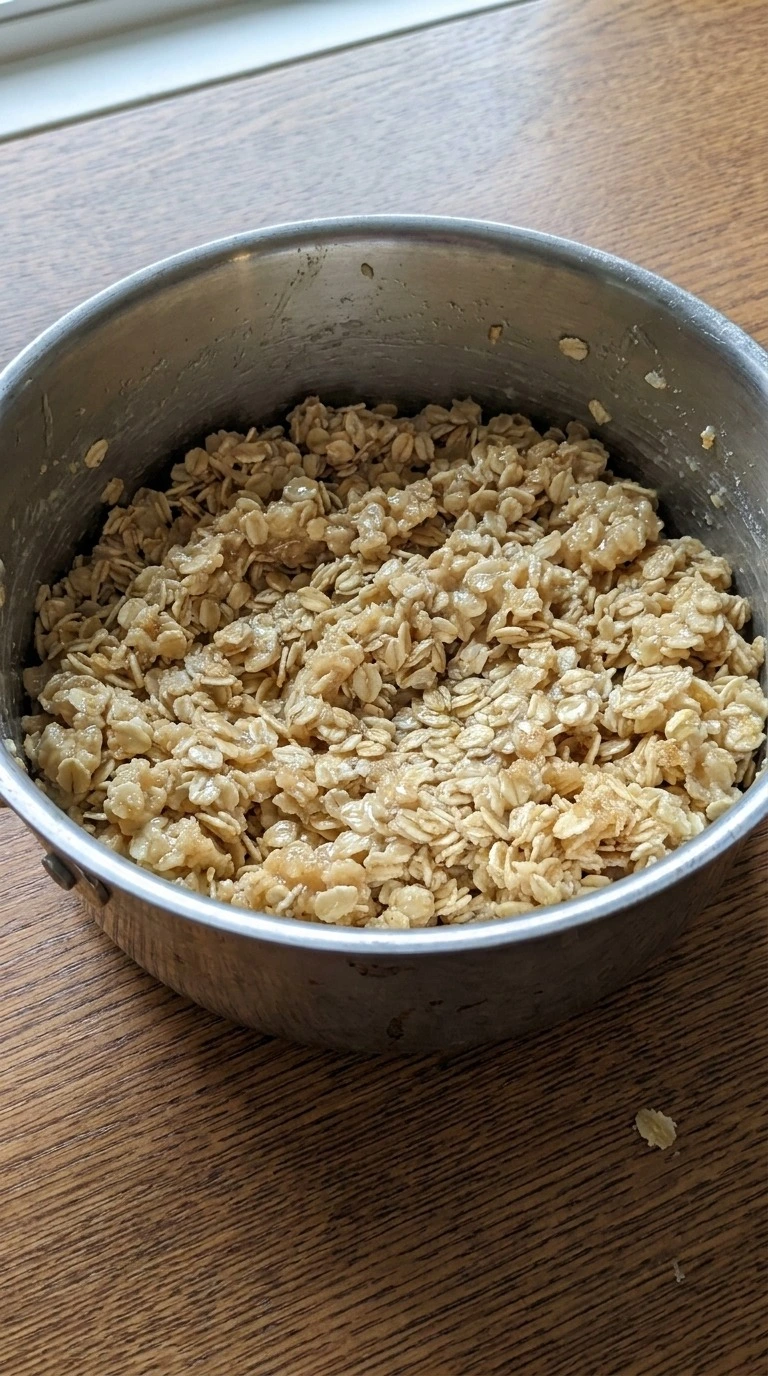
Melt 1 cup unsalted butter with 1/2 cup packed light brown sugar over medium-low heat, about 3 on a 10-dial, for 2 minutes. Stir with a heatproof spatula until the sugar looks wet. Then fold in 3 cups old-fashioned rolled oats and cook for 4 to 5 minutes, scraping the bottom every 20 seconds so the oats toast evenly.
The mixture should turn from pale beige to light golden and smell buttery with a faint caramel note. You’ll hear a soft sizzle that quiets as the oats absorb the butter. Go past 5 minutes and the sugar can catch on the bottom.
Toast gently because dry oats need time to absorb fat without scorching.
Tip: Use old-fashioned rolled oats, not steel-cut oats, because the flatter flakes soften evenly within the 5-minute stovetop window.
Step 2: Press the first oat layer
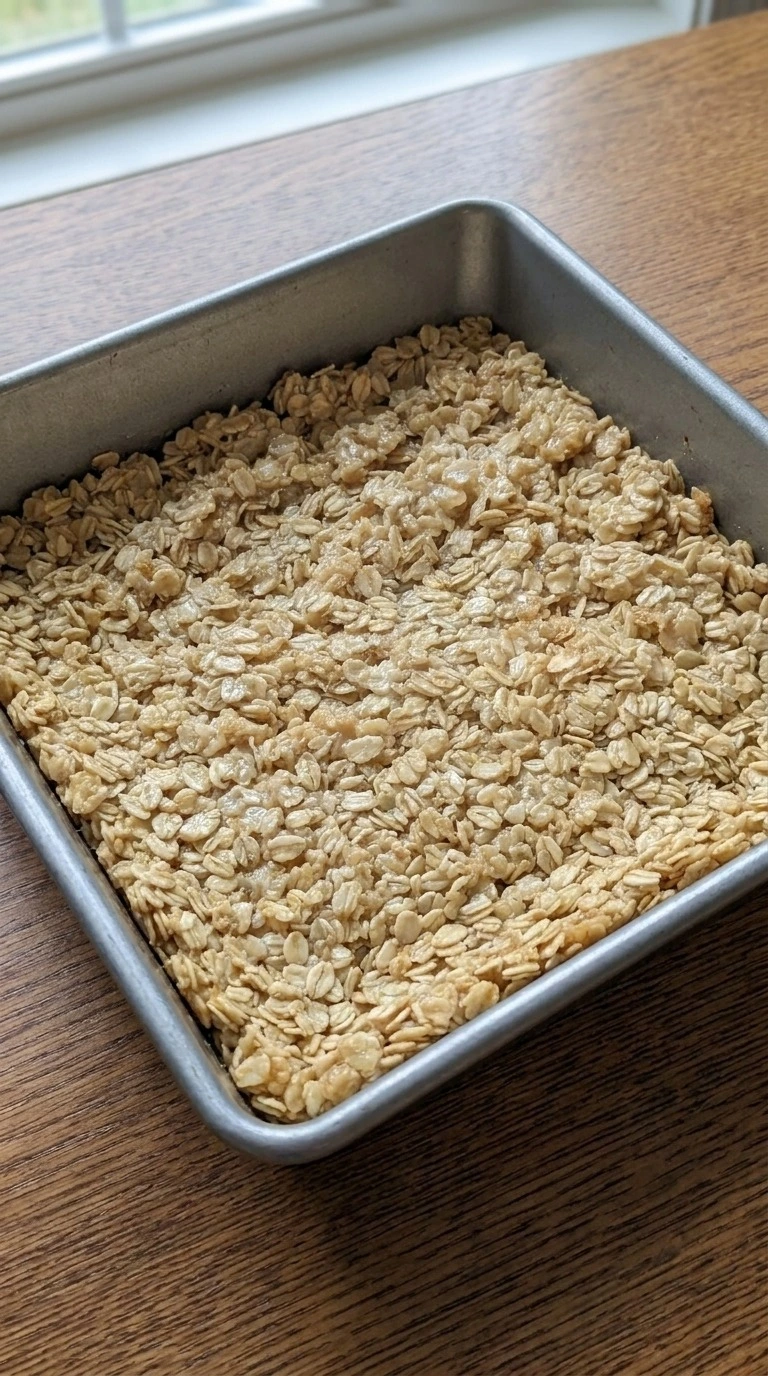
Take the oat mixture off the heat when it is about 140°F and stir in 1 teaspoon pure vanilla extract plus 1/4 teaspoon Diamond Crystal kosher salt for 20 seconds. Spoon half into a parchment-lined 8×8-inch square pan. Then press it firmly for 2 minutes with the flat bottom of a measuring cup, working from the center toward the corners.
The layer should look compact but still show distinct oat flakes, with a few uneven ridges near the edges. For No Bake Chocolate Oat Bars, don’t crush until pasty or the base turns dense instead of chewy. If the mixture cools below about 110°F before pressing, it won’t bind as cleanly.
Press while warm because softened sugar helps the oat layer hold together.
Tip: Leave a 2-inch parchment overhang on two opposite sides so the chilled slab lifts out cleanly before slicing.
Step 3: Melt the chocolate peanut butter filling
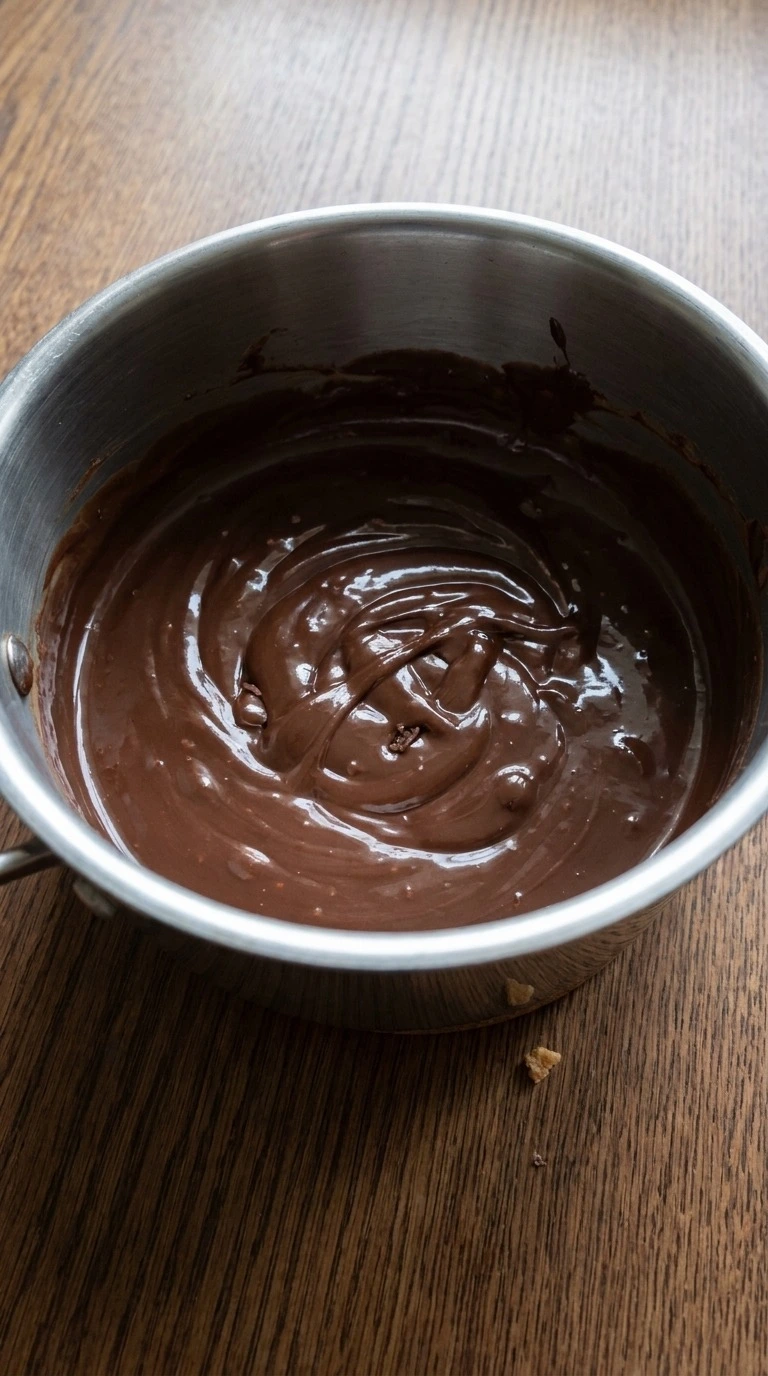
Combine 1 cup semisweet chocolate chips with 1/2 cup creamy peanut butter over medium-low heat, about 2 on a 10-dial. Stir slowly in tight circles for 2 to 3 minutes and scrape the sides twice. Pull it from the heat when the mixture reaches about 115°F and only a few tiny chocolate flecks remain, then stir another 20 seconds off heat.
The filling should shift from chunky chips to a thick glossy ribbon that falls smoothly from the spatula. You’ll smell warm cocoa before the peanut aroma becomes stronger. (I once heated it to 140°F and the filling turned oily after chilling.
Lower heat fixed it. ) Overheat it and the fat can separate. Gentle heat keeps the cocoa butter and peanut fat emulsified.
Tip: Choose standard semisweet chocolate chips around 50 to 60 percent cacao so the filling stays soft enough to bite when cold.
Step 4: Layer the chocolate and remaining oats
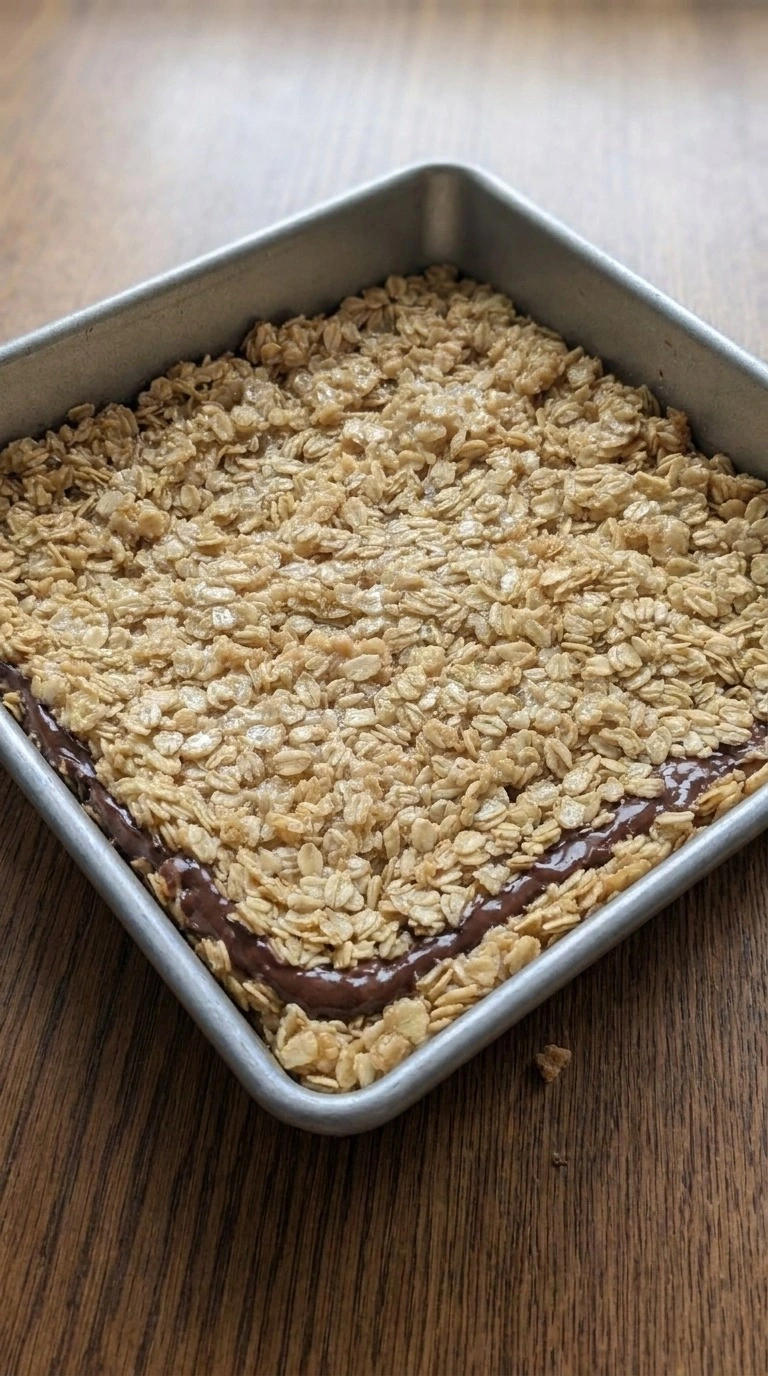
Pour the chocolate peanut butter filling over the pressed oat base while it is still about 100 to 110°F. Spread it to within 1/4 inch of every edge in 60 to 90 seconds. Then scatter the remaining warm oat mixture over the top and press lightly for another 60 seconds so the flakes touch the chocolate without disappearing into it.
You should see three clear textures now, a compact oat base, a glossy dark center and a rougher golden oat top with irregular gaps. No Bake Chocolate Oat Bars won’t cut neatly if the filling sits in thick pools, so level obvious mounds before chilling. Work before the chocolate thickens below 90°F.
Even layering prevents soft pockets that squeeze out during slicing.
Tip: Reserve about 2 tablespoons of the top oat mixture for the corners, where thin spots often appear after spreading.
Step 5: Chill and cut into sixteen bars
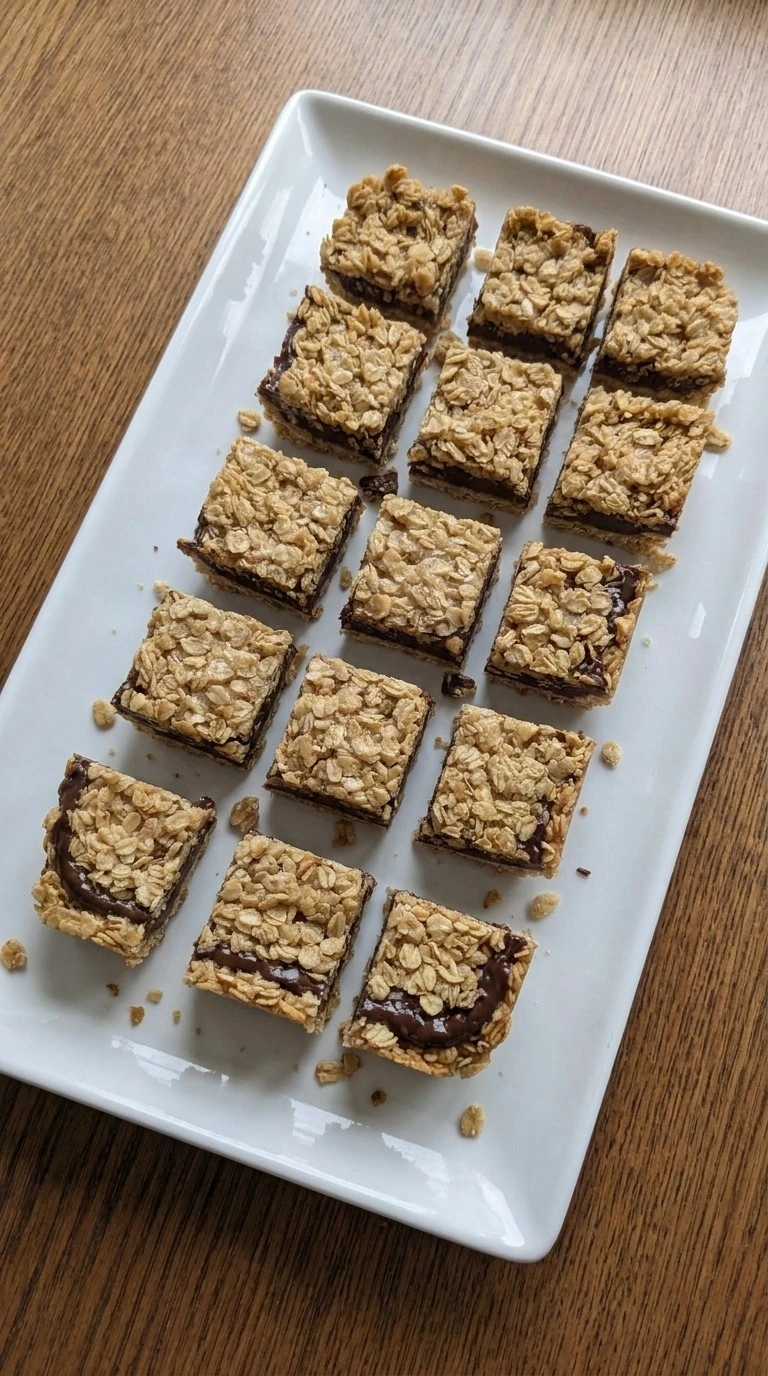
Refrigerate the assembled pan at 38 to 40°F for at least 2 hours, or up to 24 hours, without covering until the surface feels firm. Lift the slab out by the parchment. Let it stand for 3 minutes, then cut into 16 bars with four straight cuts each direction, wiping the knife after every second cut.
The chocolate center should look set and matte at the cut edge while remaining slightly soft under finger pressure. The oat layers should hold together with a few natural crumbs. No Bake Chocolate Oat Bars cut cleanest cold, so don’t wait longer than 10 minutes before slicing.
Chill fully because the fats must crystallize enough to support clean layers.
Tip: For extra tidy squares, mark the chilled slab at 2-inch intervals before making the final 16 cuts.
Pro Tips
- Cook the oat mixture for the full 4 to 5 minutes over medium-low heat. Stop when the flakes smell lightly toasted and look one shade darker.
- Use old-fashioned rolled oats rather than quick oats. Three cups of intact flakes give the bars a chewy bite instead of a soft oatmeal texture.
- Line the 8×8-inch pan with parchment extending about 2 inches above two sides. That overhang makes the cold slab much easier to lift cleanly.
- Keep the chocolate mixture near 115°F and stir constantly for 2 to 3 minutes. Higher heat can make the peanut butter oils separate from the chocolate.
- Chill the assembled bars for at least 2 hours at 38 to 40°F. Cutting sooner leaves the center too soft to hold sharp layers.
- Wipe the knife after every second cut when dividing the slab into 16 bars. A clean blade prevents chocolate streaks across the golden oat tops.
- Add 1/4 teaspoon flaky sea salt over the chocolate layer before adding the final oats if you want stronger sweet-salty contrast without changing the set.
- Stir 1/2 teaspoon ground cinnamon into the warm oat mixture for a gently spiced version that works especially well during fall.
- Replace 1/4 cup of the semisweet chocolate chips with 1/4 cup butterscotch chips for a sweeter caramel-like center.
- Fold 1/3 cup finely chopped dried cranberries into the top oat portion for tart pockets that cut through the rich chocolate filling.
- Add 1/2 teaspoon instant espresso powder to the melting chocolate for a deeper cocoa flavor without making the bars taste strongly like coffee.
Storage Instructions
Keep No Bake Chocolate Oat Bars in an airtight container in the refrigerator for up to 7 days. Separate stacked bars with parchment.
For longer storage, wrap each cold bar tightly and freeze for up to 2 months. These bars don’t need reheating.
Thaw frozen bars in the refrigerator for 4 to 6 hours, then serve cold. Discard them if they develop a sour smell, wet oat layers or visible mold.
Print
No Bake Chocolate Oat Bars
- Total Time: 2 hours 15 minutes
- Yield: 16 servings 1x
Description
These No Bake Chocolate Oat Bars are an easy treat with chewy oats, a soft chocolate peanut butter center and crisp cold edges. They’re quick enough for meal prep and simple enough for a kid friendly party or potluck. The best part is the fudgy texture and deep cocoa smell after chilling. What makes this version different is the warm oat base, which lightly toasts the oats before they set. It’s a healthy leaning dessert idea when you want pantry staple ideas without the oven.
Ingredients
- 1 cup unsalted butter (Melted with the sugar to coat the oats and help the chilled layers bind.)
- 1/2 cup packed light brown sugar (Adds caramel flavor and enough moisture to keep the oat layers chewy.)
- 3 cups old-fashioned rolled oats (Use intact rolled flakes for a chewy structure that still holds together after chilling.)
- 1 teaspoon pure vanilla extract (Stirred into the warm oat mixture off the heat for a rounded sweet aroma.)
- 1/4 teaspoon Diamond Crystal kosher salt (Balances the brown sugar and chocolate without making the bars taste salty.)
- 1 cup semisweet chocolate chips (Use chips around 50 to 60 percent cacao for a firm but biteable chilled center.)
- 1/2 cup creamy peanut butter (Use a smooth shelf-stable style so the chocolate layer sets evenly without oily separation.)
Instructions
- Melt 1 cup unsalted butter with 1/2 cup packed light brown sugar over medium-low heat, about 3 on a 10-dial, for 2 minutes. Stir with a heatproof spatula until the sugar looks wet. Then fold in 3 cups old-fashioned rolled oats and cook for 4 to 5 minutes, scraping the bottom every 20 seconds so the oats toast evenly. The mixture should turn from pale beige to light golden and smell buttery with a faint caramel note. You’ll hear a soft sizzle that quiets as the oats absorb the butter. Go past 5 minutes and the sugar can catch on the bottom. Toast gently because dry oats need time to absorb fat without scorching.
- Take the oat mixture off the heat when it is about 140°F and stir in 1 teaspoon pure vanilla extract plus 1/4 teaspoon Diamond Crystal kosher salt for 20 seconds. Spoon half into a parchment-lined 8×8-inch square pan. Then press it firmly for 2 minutes with the flat bottom of a measuring cup, working from the center toward the corners. The layer should look compact but still show distinct oat flakes, with a few uneven ridges near the edges. For No Bake Chocolate Oat Bars, don’t crush until pasty or the base turns dense instead of chewy. If the mixture cools below about 110°F before pressing, it won’t bind as cleanly. Press while warm because softened sugar helps the oat layer hold together.
- Combine 1 cup semisweet chocolate chips with 1/2 cup creamy peanut butter over medium-low heat, about 2 on a 10-dial. Stir slowly in tight circles for 2 to 3 minutes and scrape the sides twice. Pull it from the heat when the mixture reaches about 115°F and only a few tiny chocolate flecks remain, then stir another 20 seconds off heat. The filling should shift from chunky chips to a thick glossy ribbon that falls smoothly from the spatula. You’ll smell warm cocoa before the peanut aroma becomes stronger. (I once heated it to 140°F and the filling turned oily after chilling. Lower heat fixed it.) Overheat it and the fat can separate. Gentle heat keeps the cocoa butter and peanut fat emulsified.
- Pour the chocolate peanut butter filling over the pressed oat base while it is still about 100 to 110°F. Spread it to within 1/4 inch of every edge in 60 to 90 seconds. Then scatter the remaining warm oat mixture over the top and press lightly for another 60 seconds so the flakes touch the chocolate without disappearing into it. You should see three clear textures now, a compact oat base, a glossy dark center and a rougher golden oat top with irregular gaps. No Bake Chocolate Oat Bars won’t cut neatly if the filling sits in thick pools, so level obvious mounds before chilling. Work before the chocolate thickens below 90°F. Even layering prevents soft pockets that squeeze out during slicing.
- Refrigerate the assembled pan at 38 to 40°F for at least 2 hours, or up to 24 hours, without covering until the surface feels firm. Lift the slab out by the parchment. Let it stand for 3 minutes, then cut into 16 bars with four straight cuts each direction, wiping the knife after every second cut. The chocolate center should look set and matte at the cut edge while remaining slightly soft under finger pressure. The oat layers should hold together with a few natural crumbs. No Bake Chocolate Oat Bars cut cleanest cold, so don’t wait longer than 10 minutes before slicing. Chill fully because the fats must crystallize enough to support clean layers.
Notes
Pro Tips:
- Cook the oat mixture for the full 4 to 5 minutes over medium-low heat. Stop when the flakes smell lightly toasted and look one shade darker.
- Use old-fashioned rolled oats rather than quick oats. Three cups of intact flakes give the bars a chewy bite instead of a soft oatmeal texture.
- Line the 8×8-inch pan with parchment extending about 2 inches above two sides. That overhang makes the cold slab much easier to lift cleanly.
- Keep the chocolate mixture near 115°F and stir constantly for 2 to 3 minutes. Higher heat can make the peanut butter oils separate from the chocolate.
- Chill the assembled bars for at least 2 hours at 38 to 40°F. Cutting sooner leaves the center too soft to hold sharp layers.
- Wipe the knife after every second cut when dividing the slab into 16 bars. A clean blade prevents chocolate streaks across the golden oat tops.
- Add 1/4 teaspoon flaky sea salt over the chocolate layer before adding the final oats if you want stronger sweet-salty contrast without changing the set.
Storage: Keep No Bake Chocolate Oat Bars in an airtight container in the refrigerator for up to 7 days. Separate stacked bars with parchment. For longer storage, wrap each cold bar tightly and freeze for up to 2 months. These bars don’t need reheating. Thaw frozen bars in the refrigerator for 4 to 6 hours, then serve cold. Discard them if they develop a sour smell, wet oat layers or visible mold.
- Prep Time: 7 minutes
- Cook Time: 8 minutes
- Category: Dessert
- Cuisine: American
Nutrition
- Serving Size: 1 serving
Frequently Asked Questions
Yes. Assemble the bars up to 2 days before serving and refrigerate them in the 8×8-inch pan after the first 2-hour uncovered chill. Then cover the pan tightly once the surface feels firm, and cut the bars cold shortly before serving for the cleanest layers.
Store the cut bars in an airtight container for up to 7 days at 38 to 40°F. Place parchment between stacked layers so the chocolate centers don’t stick together, and keep them cold because the butter and peanut butter soften noticeably at room temperature.
The filling may have been overheated or the bars may not have chilled long enough. Keep the chocolate and peanut butter near 115°F while melting, then refrigerate the finished pan for at least 2 hours before cutting. If your kitchen is warm, an extra 30 to 60 minutes helps.
Yes. Double every ingredient and use a 9×13-inch pan for a similar layer thickness, then chill for about 3 hours instead of 2. Press the oat layers evenly into the corners because a thicker mound in the center can make the finished bars harder to slice uniformly.
Freeze individual bars for up to 2 months after they have chilled completely. Wrap each square tightly and place the wrapped pieces in a freezer-safe container, then thaw them in the refrigerator for 4 to 6 hours so the oat layers stay firm instead of becoming damp.
Serve one cold bar with fresh strawberries or sliced banana for a simple dessert plate. For brunch, cut the slab into 1-inch bites and serve them straight from the refrigerator because the smaller pieces soften faster after about 15 minutes at room temperature.
Yes. Replace the 1/2 cup creamy peanut butter with the same amount of almond butter or sunflower seed butter. Sunflower seed butter gives a slightly softer center, so refrigerate the bars for about 30 minutes longer before slicing if you want very clean edges.
Final Thoughts
A recipe like this is the kind I wish I had found years ago because no bake chocolate oat bars make homemade dessert feel almost effortless. It would have saved me plenty of afternoons when I wanted something sweet without heating the kitchen, and these easy no bake dessert bars now solve that problem beautifully.
But now that I have this version, I make the chocolate oatmeal bars often and I think you will too. If you try No Bake Chocolate Oat Bars, leave a comment and share how your batch turned out because I read every one.
But now that I have it, I make it all the time and I think you will too. If you enjoyed this, check out some of my other popular recipes on the blog.