If you have ever had a warm slice of Homemade Apple Pie you know that it is a dessert that stands out with its cozy flavors. In this article we have the Homemade Apple Pie recipe for you to try in the comfort of your own home with this easy step by step guide.

This classic fruit filled dessert has tender apple slices in a rich buttery cinnamon filling that is both sweet and warmly spiced. This recipe is great for special occasions or a holiday dessert and this recipe is sure to impress your family and friends.
Ingredients
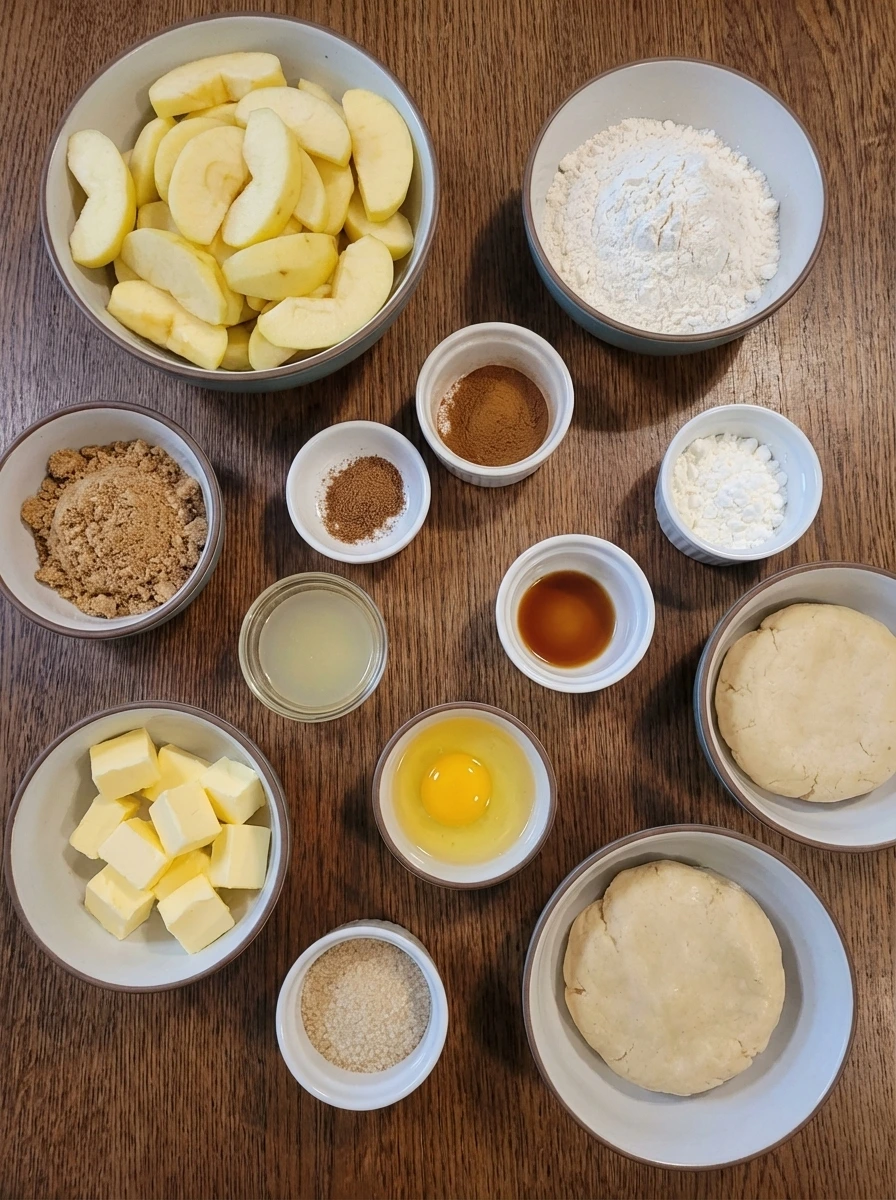
Here’s what I use for this recipe and you can always make substitutions if you prefer.
- all purpose flour: forms the pie crust
- granulated sugar: lightly sweetens the crust
- salt: balances flavor in the crust
- unsalted butter: creates flaky layers in the crust
- ice water: brings the dough together
- apples: main filling with soft sweet texture
- brown sugar: sweetens the filling with deeper flavor
- ground cinnamon: adds warm spice
- ground nutmeg: adds gentle depth
- lemon juice: brightens the apples and helps keep their color
- vanilla extract: rounds out the filling
- cornstarch: thickens the juices
- unsalted butter: melts into the filling during baking
- egg: gives the crust a glossy finish
- coarse sugar: adds sparkle and light crunch
- whipped cream: soft garnish for plating
- caramel sauce: light finishing drizzle
Tools You’ll Need
- mixing bowl: for combining the dough and the filling
- rolling pin: for shaping the crust
- 9 inch pie dish: for baking and serving the pie
- pastry brush: for applying the egg wash
Instructions
Step 1: Measure and mix the crust ingredients
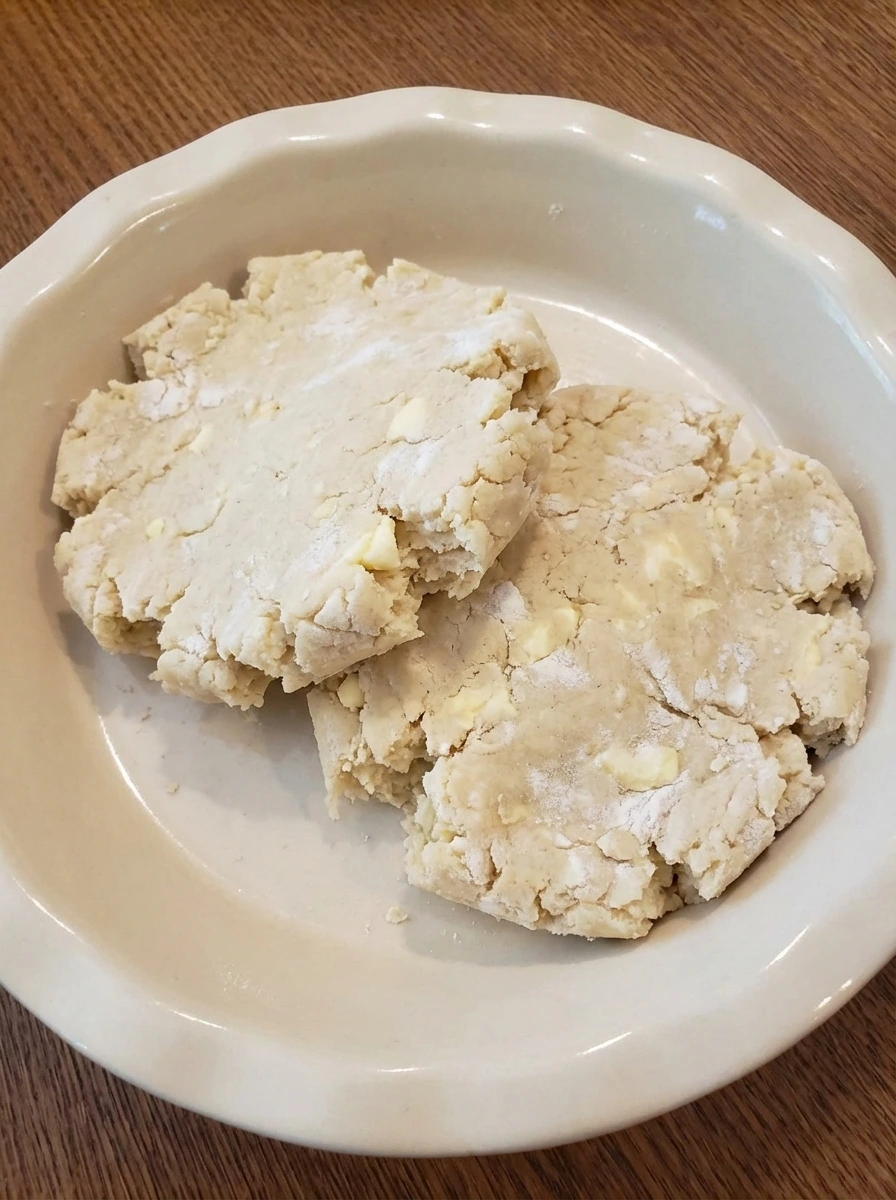
Flour and sugar and salt are combined until the mixture looks evenly pale and loose. Cold butter pieces are worked in until rough crumbs form with some larger buttery pieces still visible so the mixture looks shaggy and uneven. Ice water is added a little at a time until the dry crumbs turn into soft clumps that hold together when pressed. The dough still looks rustic rather than smooth and that visible variation helps create a flaky crust.
Tip: Stop adding water as soon as the dough holds together so the crust stays tender and flaky.
Step 2: Cut and season the apples
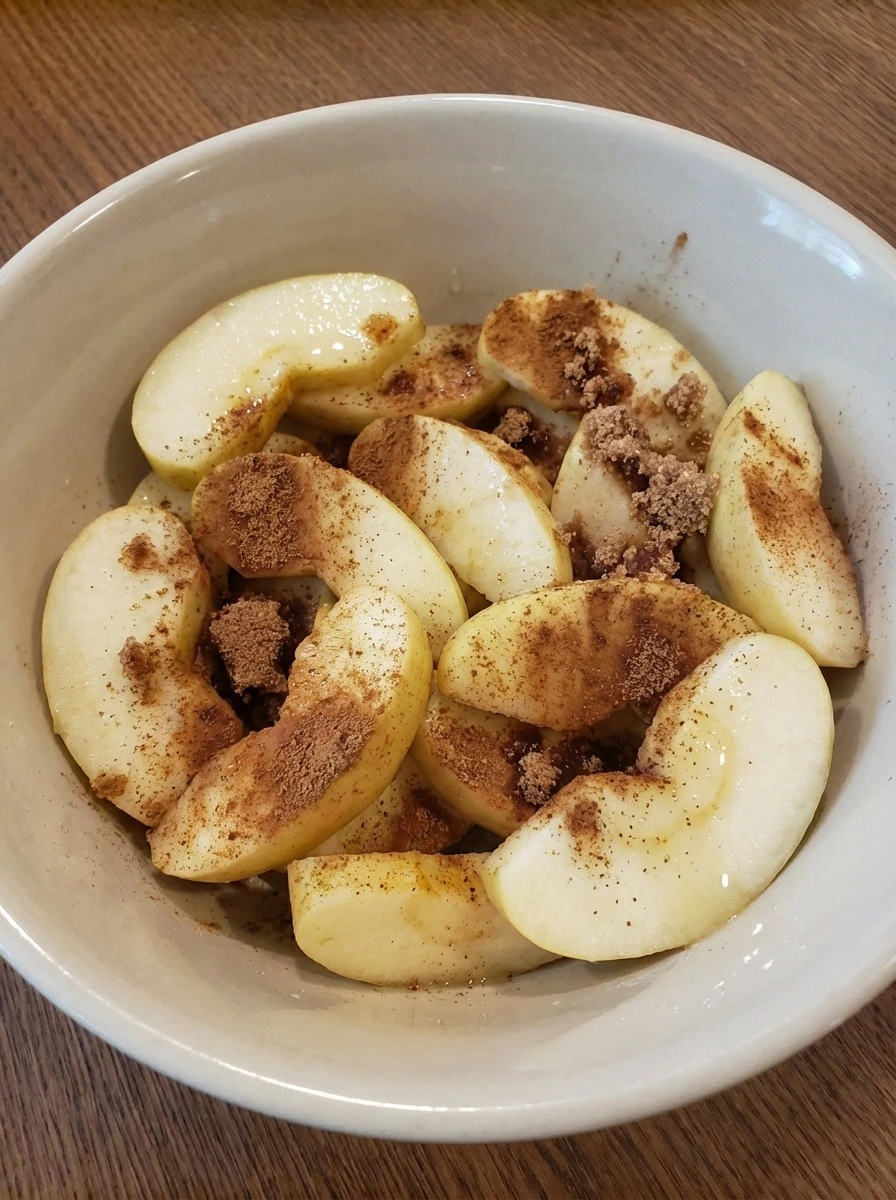
The apples are peeled and cut into slices with natural variation in thickness so the filling looks homemade and not uniform. Lemon juice is poured over the slices and the fruit takes on a fresh glossy look. Brown sugar and cinnamon and nutmeg are scattered over the apples in an uneven layer. Some slices stay partly bare while others get more spice so the bowl clearly shows a first stage of seasoning before full mixing.
Tip: Keep the slices close in size so they soften evenly while still looking naturally hand cut.
Step 3: Mix the filling until coated
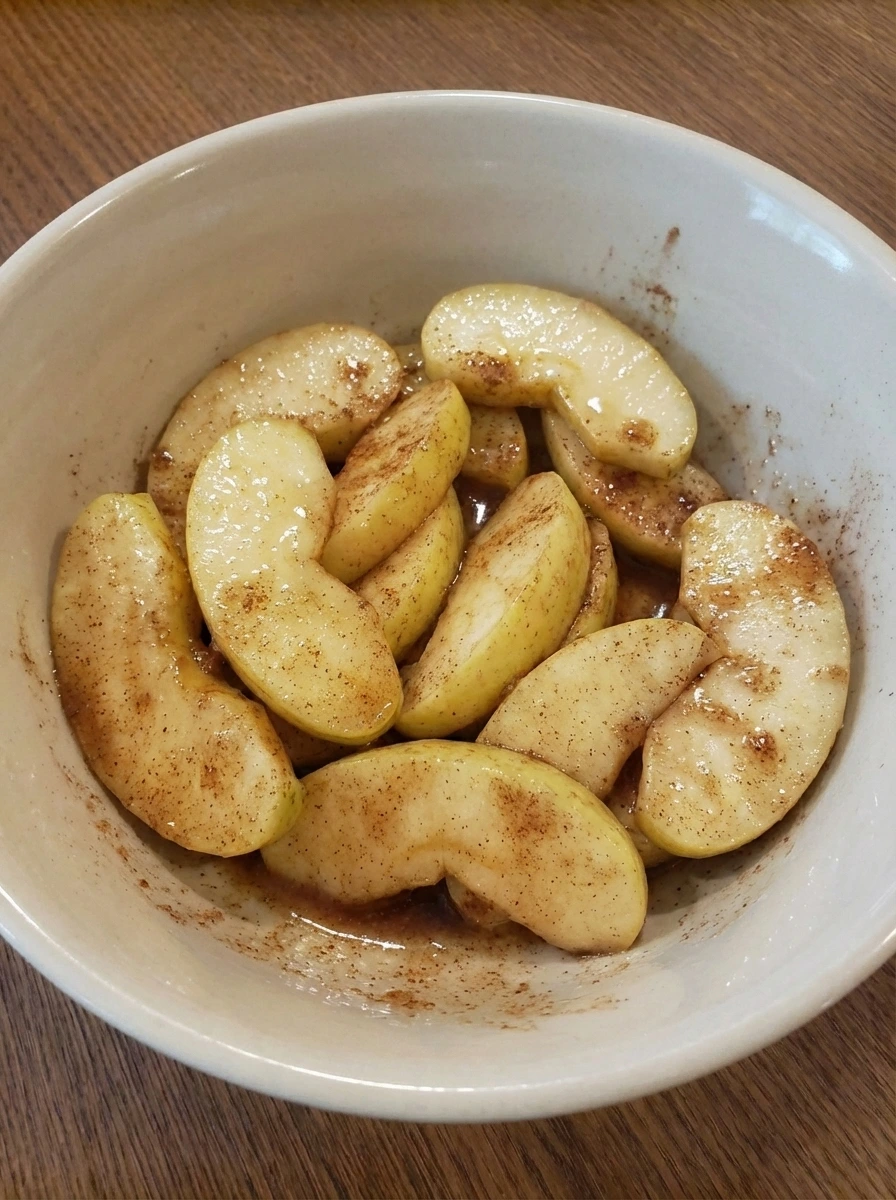
Vanilla and cornstarch are added and the apples are tossed until the slices change from lightly dusted to fully coated. The sugar clings to the fruit and the spices spread more evenly so the filling takes on a darker warmer color. As the mixture rests the apples release a little juice and a thin syrup starts to gather around the slices. The filling should look moist and glossy with no dry pockets left behind.
Tip: Let the apples sit for a few minutes so the juices start to release before assembling the pie.
Step 4: Shape the base crust
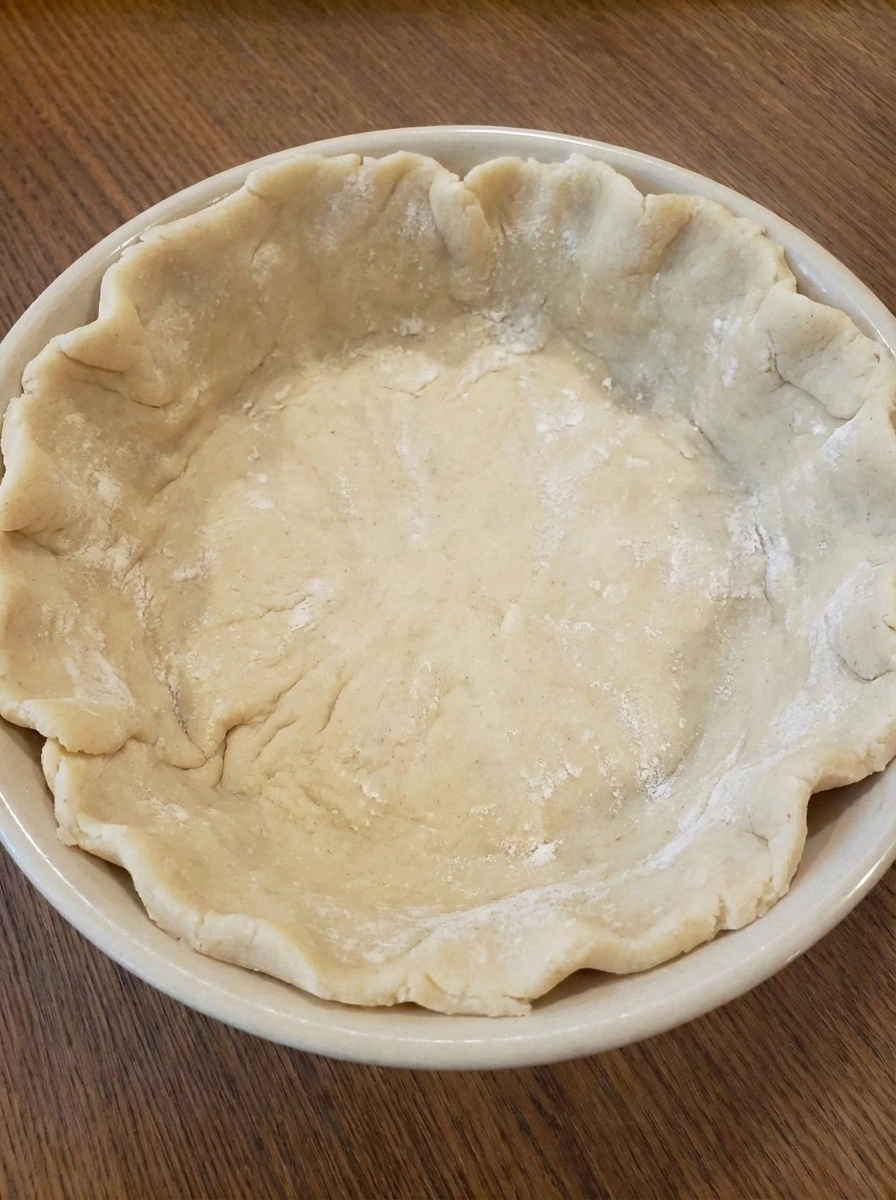
One portion of dough is rolled into a wide round and then laid into the pie dish. The dough settles into the bottom and up the sides with soft folds and a natural overhang around the rim. The crust looks handmade with slight thickness variation and a few rough edges rather than perfectly even lines. This becomes the first visible layer that will hold the filling.
Tip: Leave a little overhang so the top crust can seal well later.
Step 5: Assemble and layer the filling

The coated apple slices are spooned into the crust and loosely piled rather than packed in a perfect pattern. Some slices lean in different directions while the syrupy juices settle in small pockets between them. A small piece of butter is scattered over the top so it can melt into the filling as it bakes. The pie now looks generously filled and slightly uneven with natural gaps and overlaps throughout.
Tip: Pile the apples a little higher in the center because the filling settles as it softens during baking.
Step 6: Cover and finish the unbaked pie
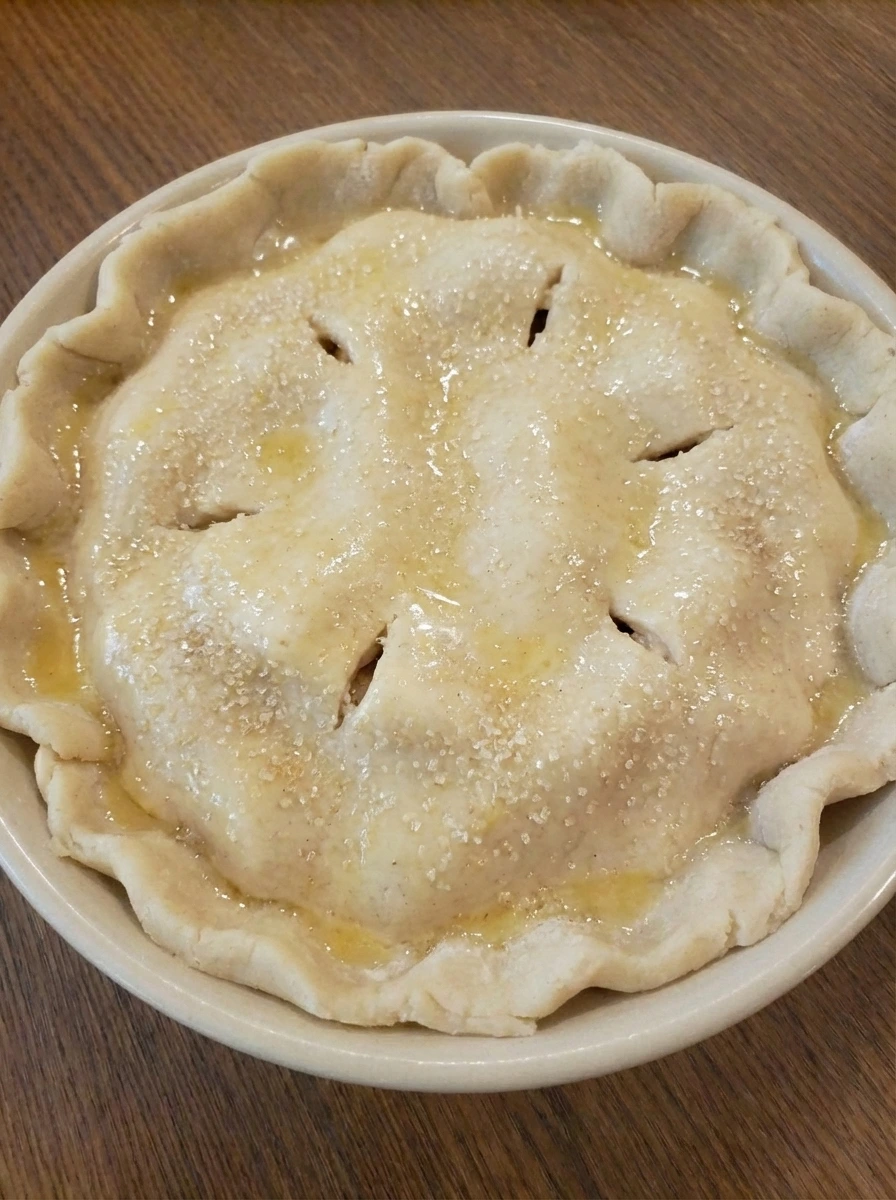
The second dough round is draped over the apples and settles naturally over the uneven mound. The edges are pressed together and folded with a rough handmade finish while small vents are cut across the top. Egg wash is brushed over the crust and coarse sugar is scattered on top in a casual way. The crust changes from matte to lightly glossy and the sugar catches across the surface without covering every area.
Tip: Cut enough vents so steam can escape and the filling can bubble without breaking the crust.
Step 7: Bake until the filling softens
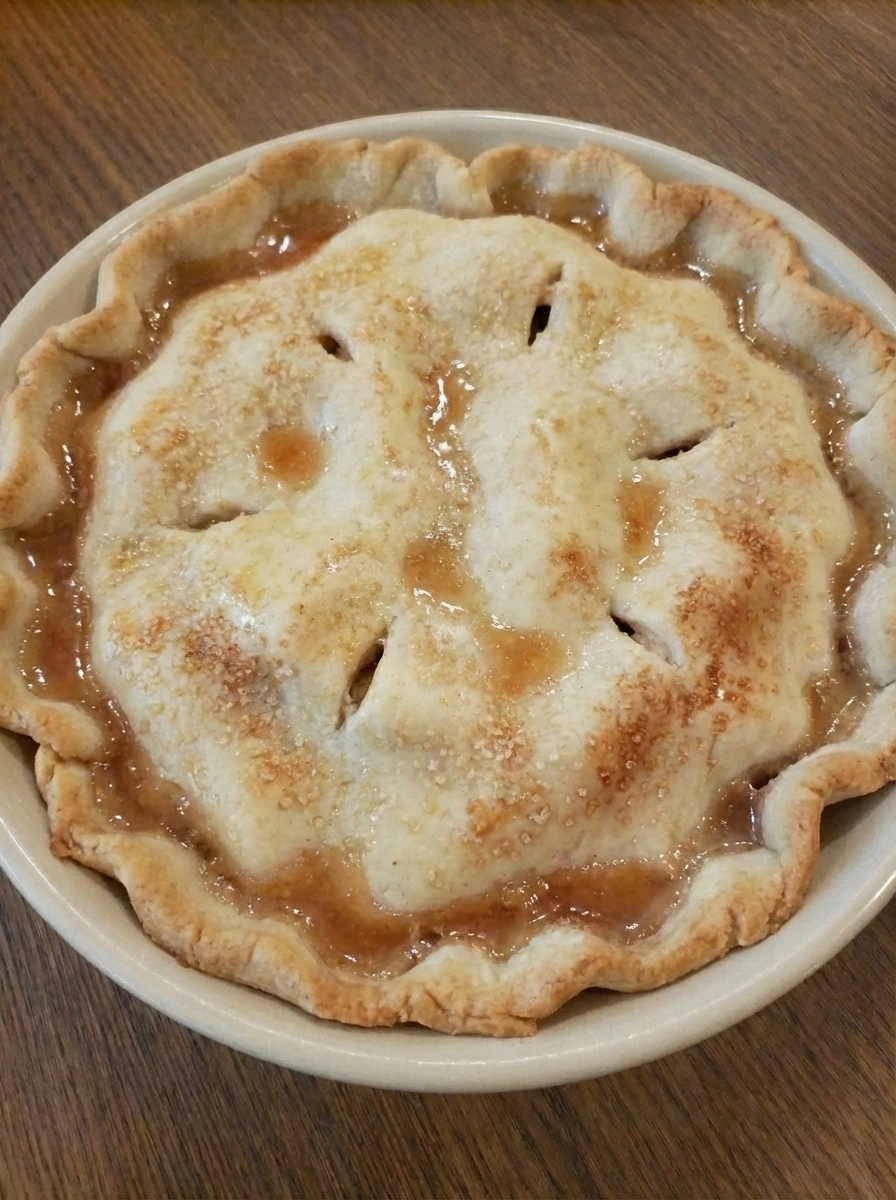
As the pie bakes the crust firms and the butter inside the dough melts into flaky layers. The apples begin to soften and the juices change from thin liquid into a glossy filling that starts bubbling up through some vents. The surface moves from pale dough to a light golden color with a few slightly deeper areas forming first around the ridges and edges. At this stage the pie clearly looks partially cooked and no longer raw.
Tip: If the edges color too quickly protect them while the center continues to bake.
Step 8: Finish baking until golden brown
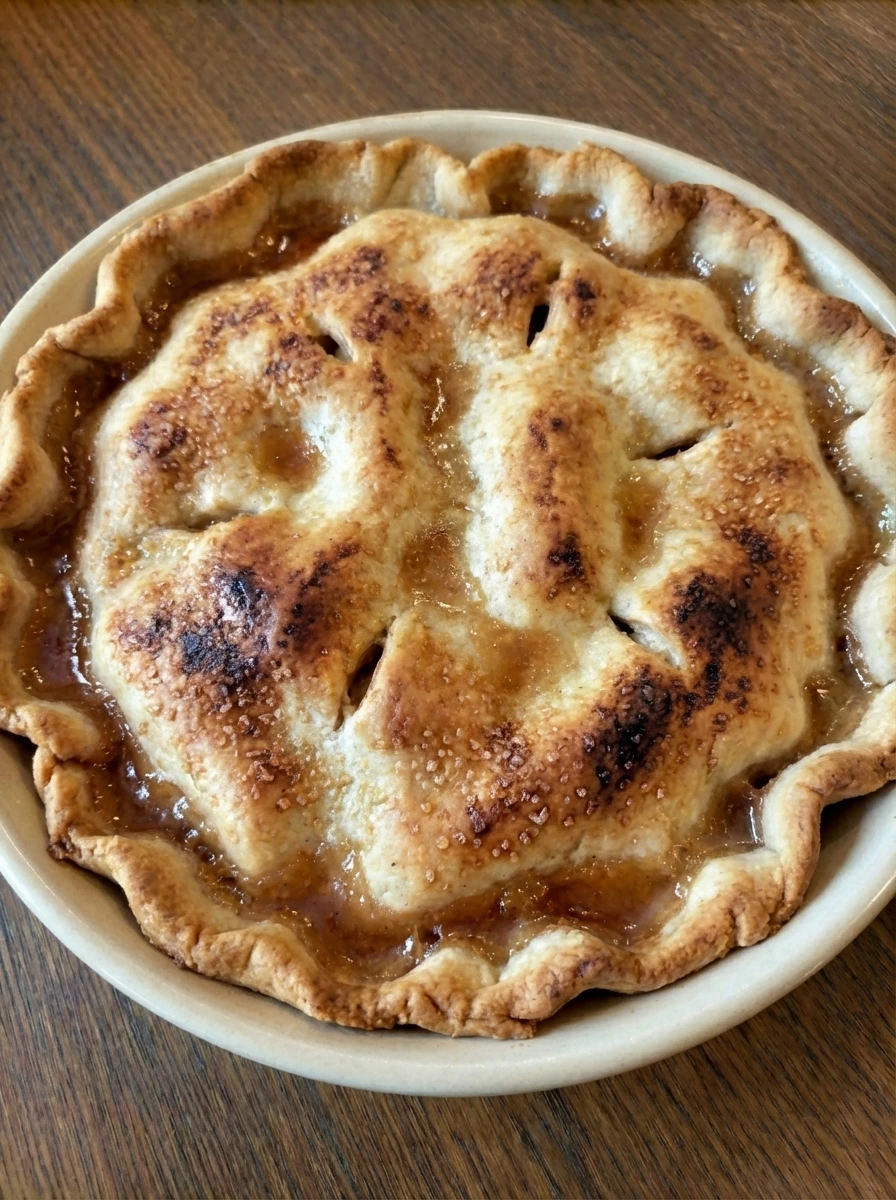
The crust deepens to a rich golden brown with uneven toasted spots that make it look truly homemade. The filling thickens further and the bubbling slows near the vents which shows the juices are setting. The apples are now tender and the butter and sugar have melted fully into a rich spiced filling. The top looks flaky and crisp with natural color variation across the surface instead of one flat shade.
Tip: The pie is ready when the crust is deeply golden and the filling looks thick rather than watery.
Step 9: Plate and garnish the pie
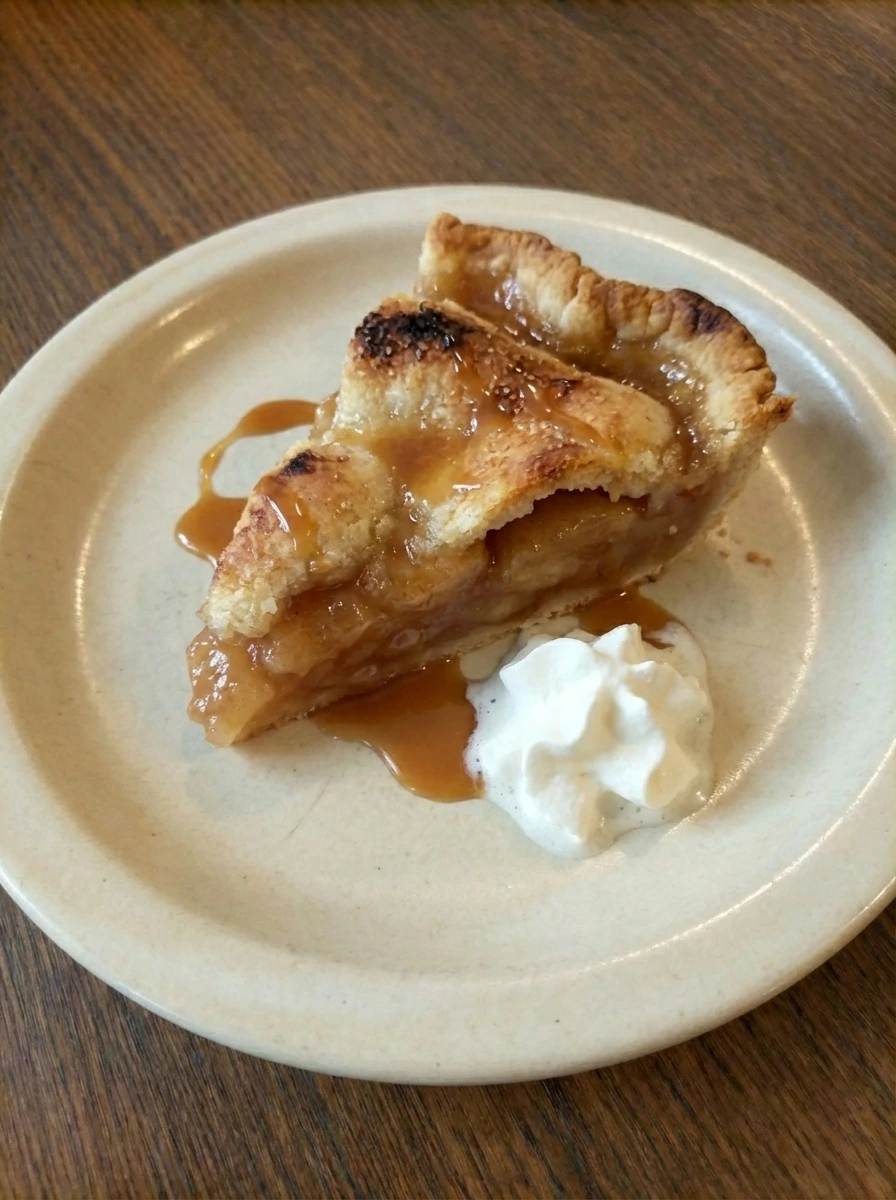
After resting the filling settles into a sliceable texture and the cut piece holds together while still looking soft and juicy. A slice is lifted out and plated so the tender apples and thick cinnamon filling show clearly between the flaky layers. The plated pie is finished with a loose dollop of whipped cream or a light drizzle of caramel for extra richness. The final dish looks fully cooked and warmly golden with slight uneven browning and natural imperfections that make it inviting and real.
Tip: Let the pie rest before slicing so the filling can thicken and plate neatly without turning runny.
Pro Tips
- Use a mix of sweet and tart apples for deeper flavor and better texture.
- Keep the butter cold so the crust bakes up flaky and layered.
- Let the filling sit briefly after mixing so the apples release some juice before assembling.
- Cool the pie before slicing so the filling thickens and the slices hold their shape.
Storage Instructions
Store leftover Homemade Apple Pie covered at room temperature for up to 2 days or in the refrigerator for up to 4 days. Reheat slices until warm so the crust crisps slightly again and the filling loosens just a bit.
Frequently Asked Questions
What are the best apples for Homemade Apple Pie
A mix of tart and sweet apples gives the best balance. Firm apples work especially well because they soften nicely without turning mushy.
Can I make Homemade Apple Pie ahead of time
Yes. You can bake it a day in advance. Let it cool fully and keep it covered then warm slices before serving if you like.
How do I keep the bottom crust from getting soggy
Avoid an overly wet filling and bake until the juices look thick and bubbly. That helps the bottom crust set properly.
Can I freeze Homemade Apple Pie
Yes. You can freeze it baked or unbaked. Wrap it well and thaw in the fridge before reheating or baking for the best texture.
Final Thoughts
This is the kind of recipe I wish I had found years ago. It would have saved me so many stressful holiday baking days.
But now that I have it I make it all the time and I think you will too. If you enjoyed this check out some of my other popular recipes on the blog.
And leave a comment because I read every single one and it really makes my day.
Print
Homemade Apple Pie
- Total Time: 1 hour 30 minutes
- Yield: 8 servings 1x
Description
This easy Homemade Apple Pie is one of the best dessert ideas when you want a quick and simple bake that still feels special and comforting. It uses healthy fruit filling and a flaky crust so it fits a holiday table and a potluck spread and a brunch treat and a party dessert. It also works well for meal prep because the slices hold nicely and taste just as delicious the next day.
Ingredients
- 2 1/2 cups all purpose flour
- 1 tablespoon granulated sugar
- 1 teaspoon salt
- 1 cup cold and cut into uneven cubes unsalted butter
- 6 to 8 tablespoons ice water
- 6 medium peeled cored and sliced apples
- 2/3 cup brown sugar
- 1 1/2 teaspoons ground cinnamon
- 1/4 teaspoon ground nutmeg
- 1 tablespoon lemon juice
- 1 teaspoon vanilla extract
- 3 tablespoons cornstarch
- 1 tablespoon unsalted butter
- 1 large egg
- 1 tablespoon coarse sugar
- optional for serving whipped cream
- optional for serving caramel sauce
Instructions
- Flour and sugar and salt are combined until the mixture looks evenly pale and loose. Cold butter pieces are worked in until rough crumbs form with some larger buttery pieces still visible so the mixture looks shaggy and uneven. Ice water is added a little at a time until the dry crumbs turn into soft clumps that hold together when pressed. The dough still looks rustic rather than smooth and that visible variation helps create a flaky crust.
- The apples are peeled and cut into slices with natural variation in thickness so the filling looks homemade and not uniform. Lemon juice is poured over the slices and the fruit takes on a fresh glossy look. Brown sugar and cinnamon and nutmeg are scattered over the apples in an uneven layer. Some slices stay partly bare while others get more spice so the bowl clearly shows a first stage of seasoning before full mixing.
- Vanilla and cornstarch are added and the apples are tossed until the slices change from lightly dusted to fully coated. The sugar clings to the fruit and the spices spread more evenly so the filling takes on a darker warmer color. As the mixture rests the apples release a little juice and a thin syrup starts to gather around the slices. The filling should look moist and glossy with no dry pockets left behind.
- One portion of dough is rolled into a wide round and then laid into the pie dish. The dough settles into the bottom and up the sides with soft folds and a natural overhang around the rim. The crust looks handmade with slight thickness variation and a few rough edges rather than perfectly even lines. This becomes the first visible layer that will hold the filling.
- The coated apple slices are spooned into the crust and loosely piled rather than packed in a perfect pattern. Some slices lean in different directions while the syrupy juices settle in small pockets between them. A small piece of butter is scattered over the top so it can melt into the filling as it bakes. The pie now looks generously filled and slightly uneven with natural gaps and overlaps throughout.
- The second dough round is draped over the apples and settles naturally over the uneven mound. The edges are pressed together and folded with a rough handmade finish while small vents are cut across the top. Egg wash is brushed over the crust and coarse sugar is scattered on top in a casual way. The crust changes from matte to lightly glossy and the sugar catches across the surface without covering every area.
- As the pie bakes the crust firms and the butter inside the dough melts into flaky layers. The apples begin to soften and the juices change from thin liquid into a glossy filling that starts bubbling up through some vents. The surface moves from pale dough to a light golden color with a few slightly deeper areas forming first around the ridges and edges. At this stage the pie clearly looks partially cooked and no longer raw.
- The crust deepens to a rich golden brown with uneven toasted spots that make it look truly homemade. The filling thickens further and the bubbling slows near the vents which shows the juices are setting. The apples are now tender and the butter and sugar have melted fully into a rich spiced filling. The top looks flaky and crisp with natural color variation across the surface instead of one flat shade.
- After resting the filling settles into a sliceable texture and the cut piece holds together while still looking soft and juicy. A slice is lifted out and plated so the tender apples and thick cinnamon filling show clearly between the flaky layers. The plated pie is finished with a loose dollop of whipped cream or a light drizzle of caramel for extra richness. The final dish looks fully cooked and warmly golden with slight uneven browning and natural imperfections that make it inviting and real.
Notes
Pro Tips:
- Use a mix of sweet and tart apples for deeper flavor and better texture.
- Keep the butter cold so the crust bakes up flaky and layered.
- Let the filling sit briefly after mixing so the apples release some juice before assembling.
- Cool the pie before slicing so the filling thickens and the slices hold their shape.
Storage: Store leftover Homemade Apple Pie covered at room temperature for up to 2 days or in the refrigerator for up to 4 days. Reheat slices until warm so the crust crisps slightly again and the filling loosens just a bit.
- Prep Time: 35 minutes
- Cook Time: 55 minutes
- Category: Dessert
- Cuisine: American
Nutrition
- Serving Size: 1 serving