I honestly havent really shared many pie based recipes in my blog but this Easy Lemon Cream Pie was one I had to share. This recipe is inspired by classic homemade desserts and is easy to prepare and make.
It’s a super tasty pie with a bright lemon flavor and a creamy filling that feels light yet still satisfying. When people think about lemon pie they probably assume it takes a lot of effort and extra steps.
But trust me on this when it’s made the right way it gives you a smooth and tangy bite that feels fresh and comforting. This recipe is super tasty and quick to make and I recommend this dessert for anyone who wants something simple and homemade with a little bakery style charm.
Ingredients
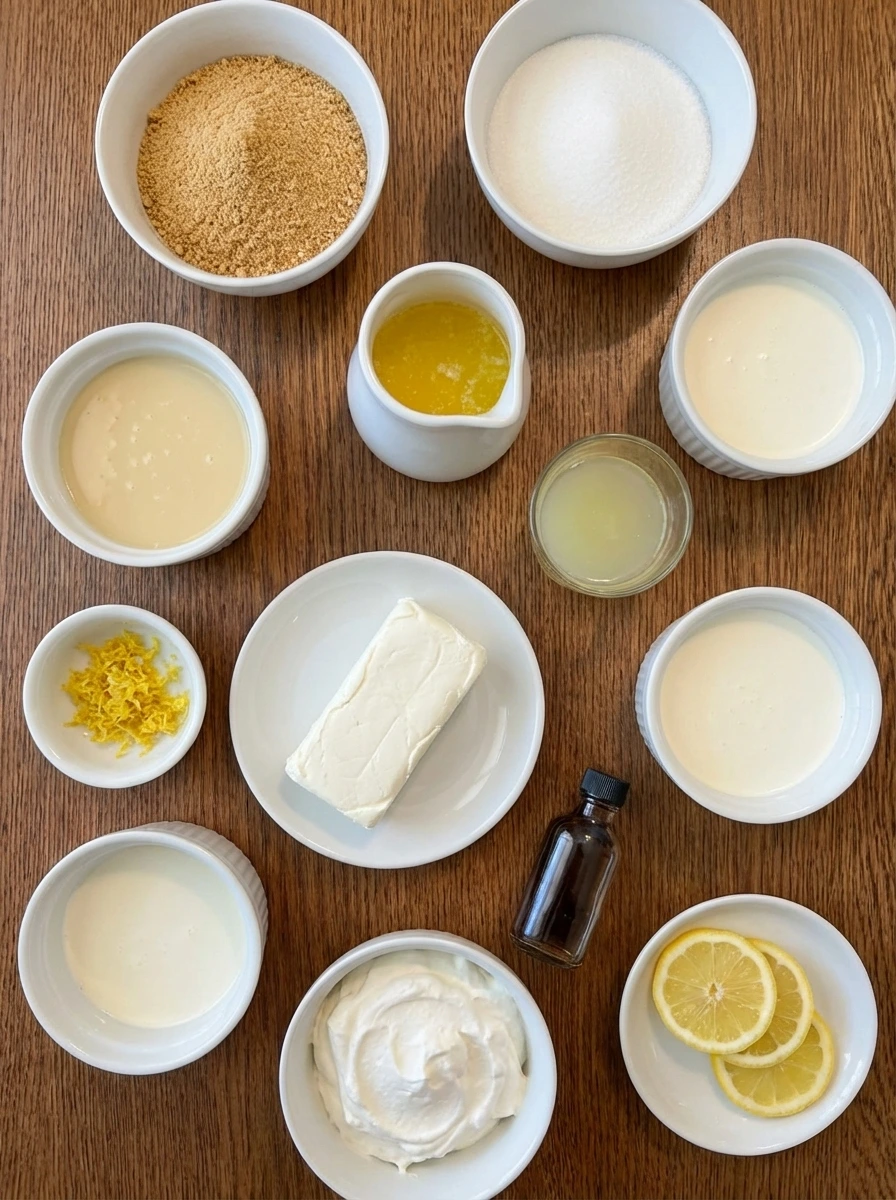
Here’s what I use for this recipe and you can always make substitutions if you prefer.
- graham cracker crumbs: forms the buttery crust base
- granulated sugar: sweetens the crust and filling
- unsalted butter melted: binds the crust together
- sweetened condensed milk: creates a rich creamy filling
- fresh lemon juice: adds bright tart flavor
- lemon zest: boosts fresh citrus aroma
- cream cheese softened: adds body and smooth texture
- heavy cream: lightens the filling
- vanilla extract: rounds out the flavor
- whipped cream: finishes the pie with a soft topping
- thin lemon slices: adds a simple garnish
Tools You’ll Need
- mixing bowl: for combining the crust and filling
- pie dish: for shaping and chilling the pie
- spatula: for folding and spreading the filling
Instructions
Step 1: Press the crumb crust into the dish
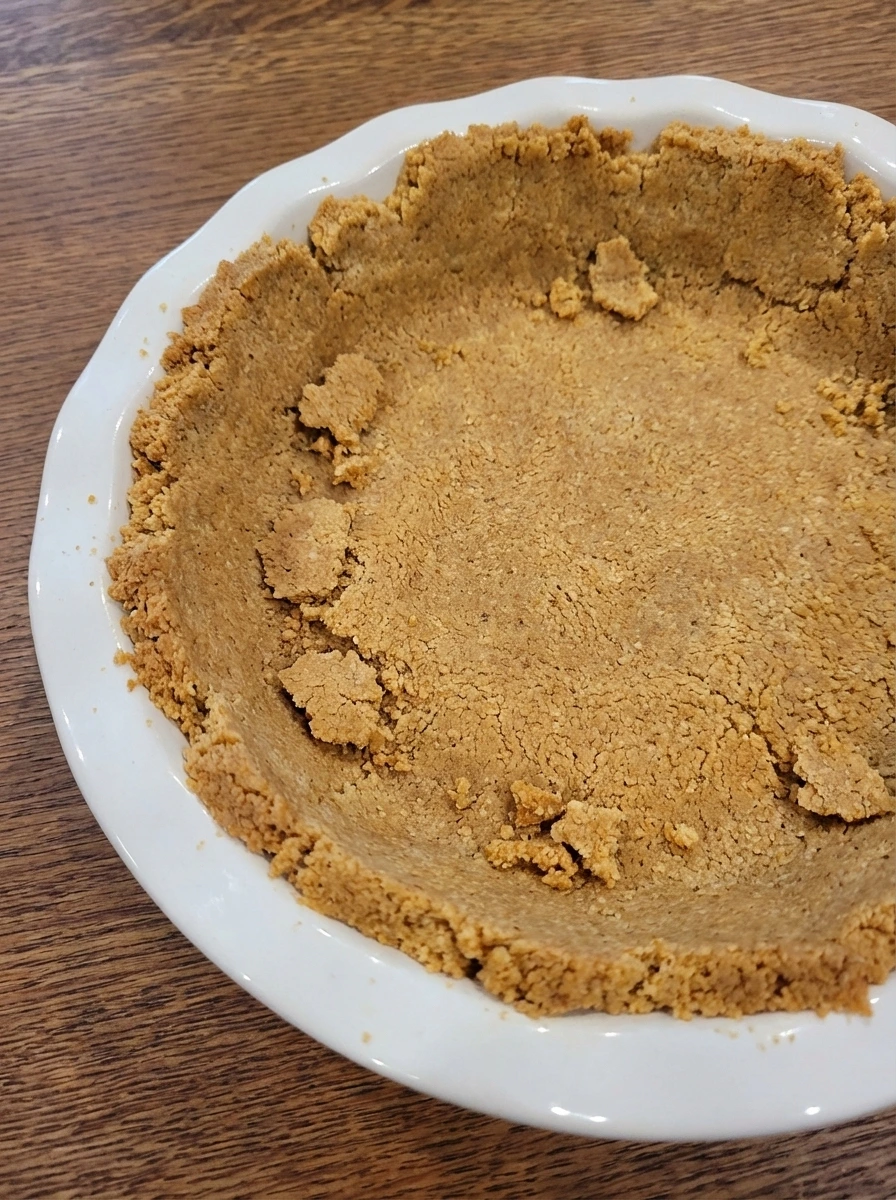
The graham cracker crumbs and sugar and melted butter are mixed until the texture looks like damp sand and the color turns slightly deeper. The mixture is then pressed into a natural white dish where it looks loosely packed with uneven edges and a few rough crumb patches showing. At this stage the loose dry crumbs have changed into a firm crust shape. The surface looks rustic rather than perfectly smooth and the sides rise a little unevenly which makes it feel homemade.
Tip: Press a little more firmly on the bottom than the sides so the crust holds together after chilling.
Step 2: Blend the lemon cream filling
The cream cheese and condensed milk and lemon juice and lemon zest and vanilla are combined until the mixture changes from separate thick pieces into a glossy pale yellow filling. Small streaks disappear and the texture becomes smooth though it still has a few airy ripples. This step creates the main visual jump from separate ingredients to one rich mixture. The filling looks creamy and fluid enough to spread yet still thick enough to hold soft folds.
Tip: Make sure the cream cheese is fully softened so the filling turns smooth without little lumps.
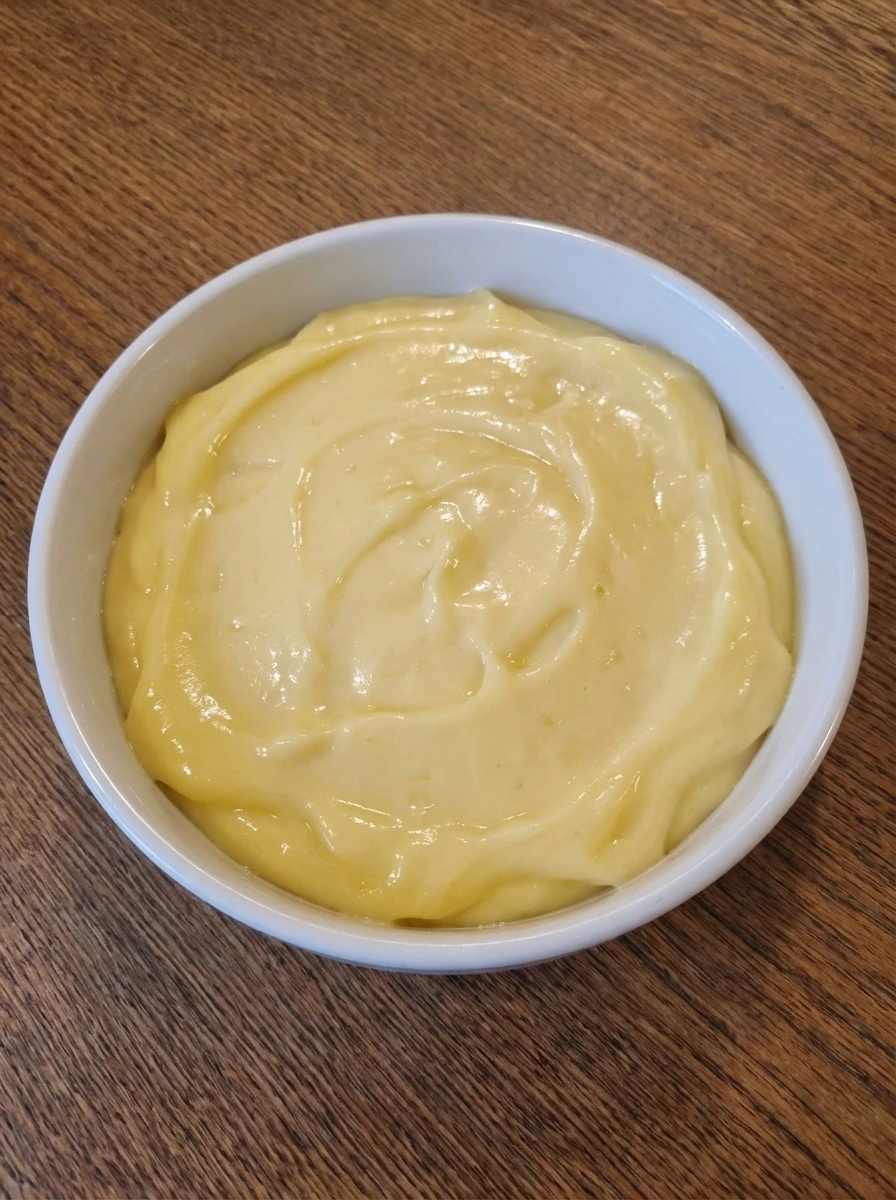
Step 3: Fold in the whipped cream

The heavy cream is whipped and then folded into the lemon base until the color turns lighter and the texture looks fluffier. The mixture keeps some soft streaks at first and then settles into a cloudier cream with gentle swirls and a slightly uneven body. Now the filling no longer looks dense and glossy alone. It has changed into a softer and airier mixture that looks lighter and more pillowy with natural folds across the top.
Tip: Fold gently so the filling stays light and does not lose its airy texture.
Step 4: Spread the filling into the crust
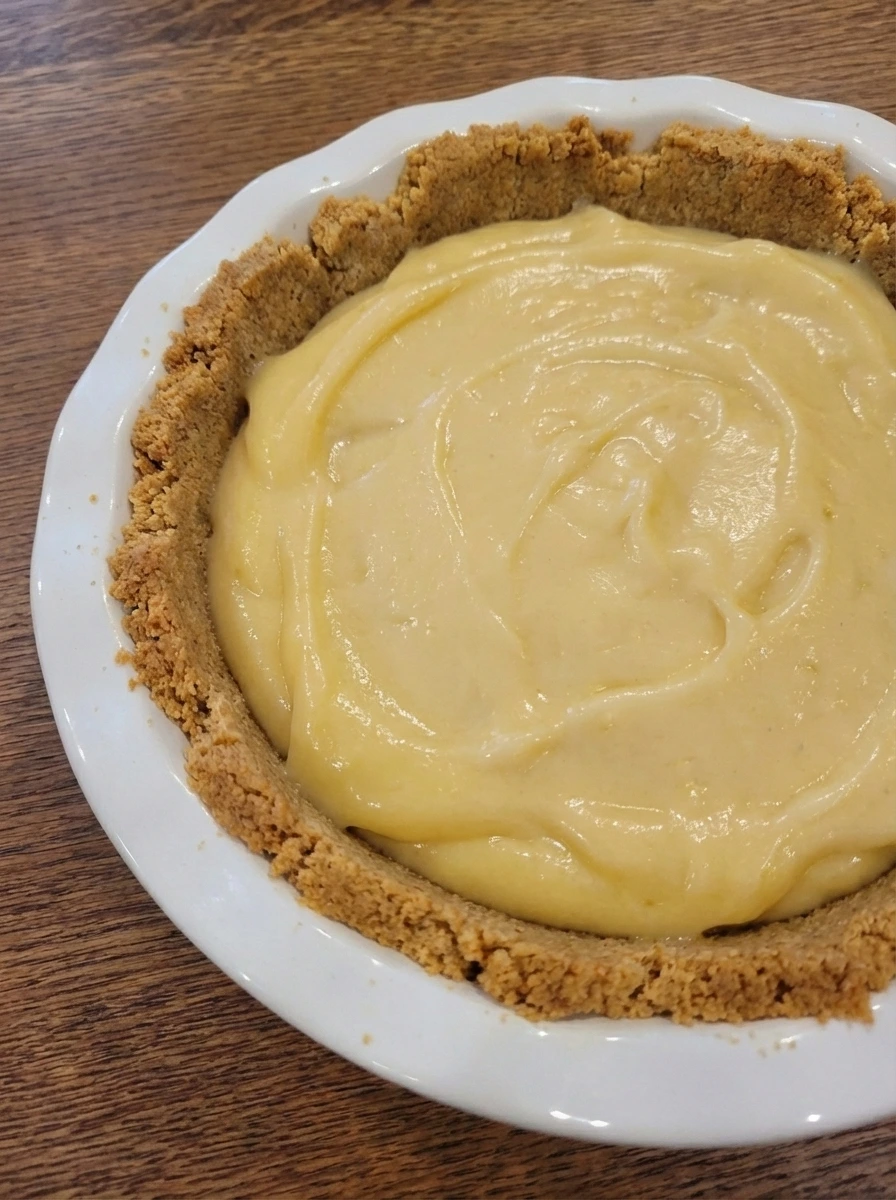
The airy lemon cream is spread into the crust and the pie takes on its full shape. The pale filling settles into the golden shell with loose swirls on top and slight dips near the edges where the cream meets the crust. This is the first moment the dessert looks like a pie instead of separate parts. The crust and filling now interact clearly and the contrast between the crumbly edge and creamy center becomes visible.
Tip: Leave the top softly swirled instead of flattening it so the finished pie keeps a natural look.
Step 5: Chill until the pie sets
As the pie chills the soft filling changes into a firmer sliceable center. The swirls remain on top but the surface looks more structured and the edges hold their shape better while the middle stays creamy rather than stiff. This visual change is subtle but important because the pie now looks settled and finished enough to cut. The filling has gone from airy and loose to cool and stable with a gentle matte sheen.
Tip: Give the pie enough chilling time so the slices hold cleanly without turning hard.
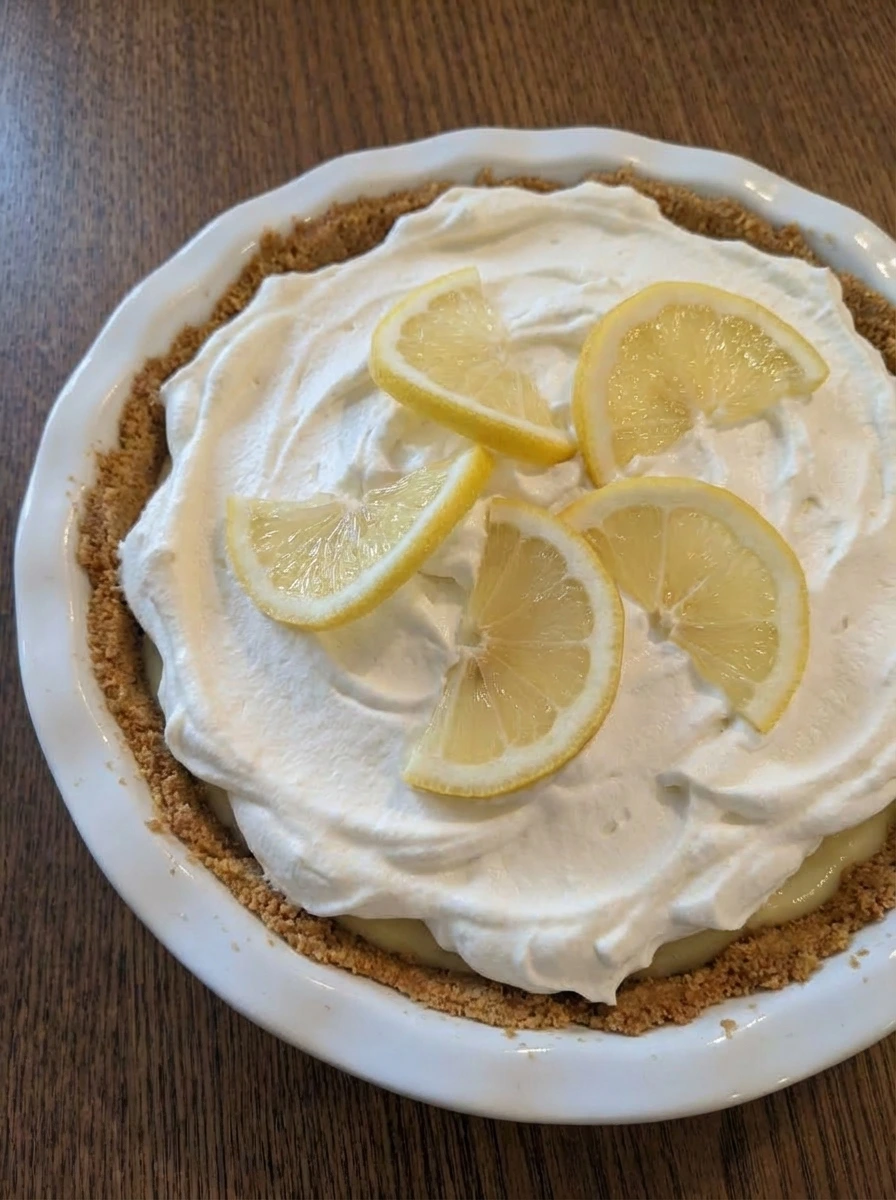
Step 6: Finish with whipped cream and lemon slices
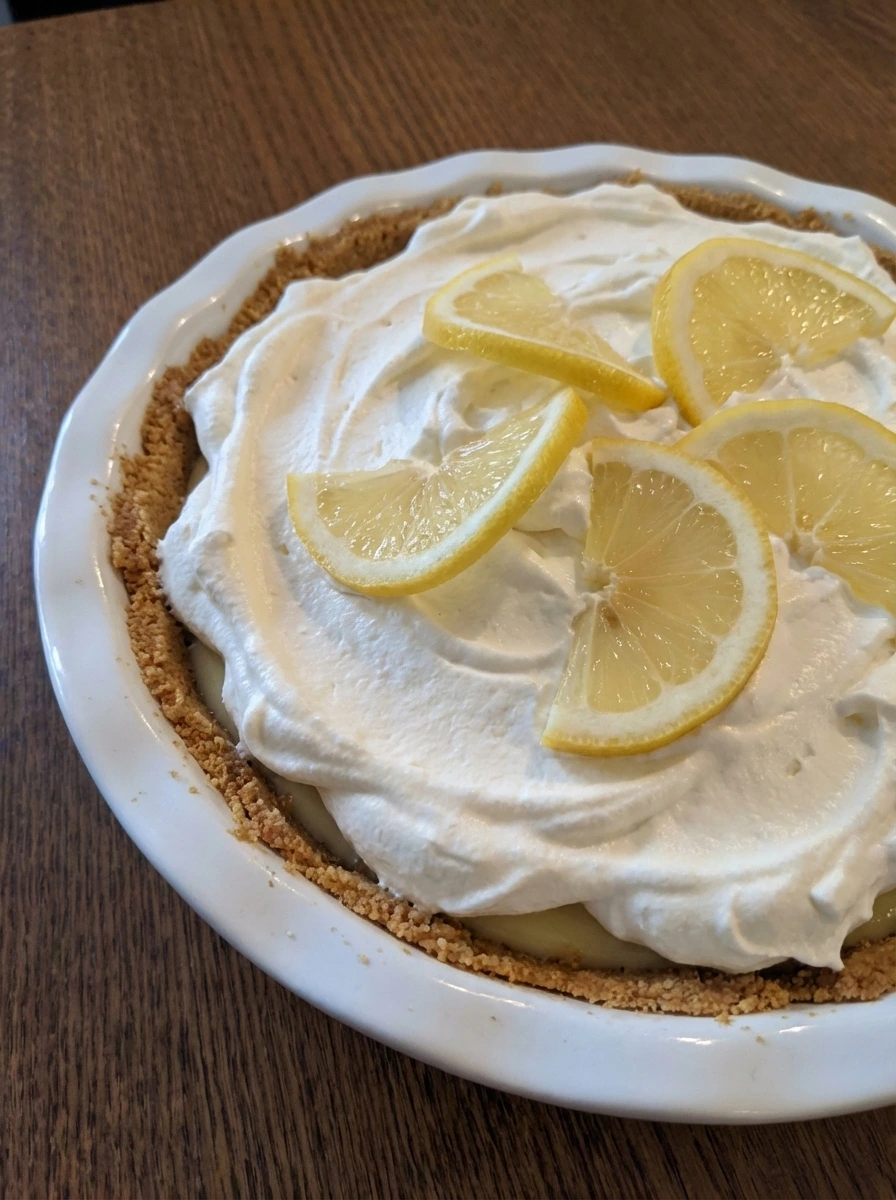
The chilled pie is topped with soft whipped cream and thin lemon slices that sit a little off center with natural spacing and slight overlap. The top looks fuller and more inviting and the white topping contrasts with the pale yellow filling and golden crust. The finished pie looks homemade and ready to serve with casual swirls and uneven placement that keep it from looking too polished. The textures are creamy and crumbly and soft all at once which gives the final dish real character.
Tip: Place the topping casually so the pie keeps that relaxed homemade style.
Pro Tips
- Use fresh lemon juice for the brightest flavor and the cleanest finish.
- Let the cream cheese soften fully so the filling blends smooth and creamy.
- Chill the pie until the center feels set but still soft for the best slice.
- Add the whipped cream topping just before serving if you want the freshest look.
Storage Instructions
Store the pie covered in the refrigerator for up to 3 days and keep the slices chilled so the filling stays firm and creamy.
Frequently Asked Questions
Can I make Easy Lemon Cream Pie ahead of time?
Yes and it actually tastes even better after a longer chill because the filling sets nicely and the lemon flavor settles in.
Can I use bottled lemon juice?
You can and fresh lemon juice gives a brighter flavor and a fresher finish so I always recommend it when possible.
How do I keep the filling smooth?
Start with softened cream cheese and blend until no thick bits remain and then fold in the whipped cream gently.
Can I freeze this pie?
Yes and the texture will be a little firmer after thawing. Let it soften slightly before serving for the creamiest bite.
Final Thoughts
This is the kind of recipe I wish I had found years ago. It would have saved me so many last minute dessert worries.
But now that I have it I make it all the time and I think you will too. If you enjoyed this check out some of my other popular recipes on the blog.
And leave a comment and I read every single one and it really makes my day.
Print
Easy Lemon Cream Pie
- Total Time: 45 minutes
- Yield: 4 servings 1x
Description
Easy Lemon Cream Pie is one of my best dessert ideas when I need something quick and simple yet still special enough to share. The creamy lemon filling tastes bright and smooth while the crust stays tender and crisp. It is a healthy feeling treat in the sense that it tastes fresh and light. I love serving it for brunch and holiday tables and potluck nights and party spreads and even as a sweet finish after weeknight dinner or meal prep days.
Ingredients
- 1 1/2 cups graham cracker crumbs
- 1/3 cup granulated sugar
- 6 tablespoons unsalted butter melted
- 1 can 14 ounces sweetened condensed milk
- 1/2 cup fresh lemon juice
- 1 tablespoon lemon zest
- 8 ounces cream cheese softened
- 1 cup heavy cream
- 1 teaspoon vanilla extract
- 1/2 cup whipped cream
- 4 to 5 slices thin lemon slices
Instructions
- The graham cracker crumbs and sugar and melted butter are mixed until the texture looks like damp sand and the color turns slightly deeper. The mixture is then pressed into a natural white dish where it looks loosely packed with uneven edges and a few rough crumb patches showing. At this stage the loose dry crumbs have changed into a firm crust shape. The surface looks rustic rather than perfectly smooth and the sides rise a little unevenly which makes it feel homemade.
- The cream cheese and condensed milk and lemon juice and lemon zest and vanilla are combined until the mixture changes from separate thick pieces into a glossy pale yellow filling. Small streaks disappear and the texture becomes smooth though it still has a few airy ripples. This step creates the main visual jump from separate ingredients to one rich mixture. The filling looks creamy and fluid enough to spread yet still thick enough to hold soft folds.
- The heavy cream is whipped and then folded into the lemon base until the color turns lighter and the texture looks fluffier. The mixture keeps some soft streaks at first and then settles into a cloudier cream with gentle swirls and a slightly uneven body. Now the filling no longer looks dense and glossy alone. It has changed into a softer and airier mixture that looks lighter and more pillowy with natural folds across the top.
- The airy lemon cream is spread into the crust and the pie takes on its full shape. The pale filling settles into the golden shell with loose swirls on top and slight dips near the edges where the cream meets the crust. This is the first moment the dessert looks like a pie instead of separate parts. The crust and filling now interact clearly and the contrast between the crumbly edge and creamy center becomes visible.
- As the pie chills the soft filling changes into a firmer sliceable center. The swirls remain on top but the surface looks more structured and the edges hold their shape better while the middle stays creamy rather than stiff. This visual change is subtle but important because the pie now looks settled and finished enough to cut. The filling has gone from airy and loose to cool and stable with a gentle matte sheen.
- The chilled pie is topped with soft whipped cream and thin lemon slices that sit a little off center with natural spacing and slight overlap. The top looks fuller and more inviting and the white topping contrasts with the pale yellow filling and golden crust. The finished pie looks homemade and ready to serve with casual swirls and uneven placement that keep it from looking too polished. The textures are creamy and crumbly and soft all at once which gives the final dish real character.
Notes
Pro Tips:
- Use fresh lemon juice for the brightest flavor and the cleanest finish.
- Let the cream cheese soften fully so the filling blends smooth and creamy.
- Chill the pie until the center feels set but still soft for the best slice.
- Add the whipped cream topping just before serving if you want the freshest look.
Storage: Store the pie covered in the refrigerator for up to 3 days and keep the slices chilled so the filling stays firm and creamy.
- Prep Time: 15 minutes
- Cook Time: 30 minutes
- Category: Dessert
- Cuisine: American
Nutrition
- Serving Size: 1 serving