I honestly havent really shared many banana bread recipes on my blog but this Easy Banana Bread was one I had to share. This recipe is inspired by classic homemade baking and is easy to prepare and make. It’s a super tasty loaf packed full of banana flavor and is quite comforting.
When people think about banana bread they probably wait until the bananas get too soft and then still feel unsure about making it. But trust me on this when it’s prepared in the right way it offers a rich and cozy taste that’s very satisfying. This recipe is super tasty and quick to make.
I recommend this bake for those who want to enjoy a simple homemade treat for breakfast or snack time.
Ingredients
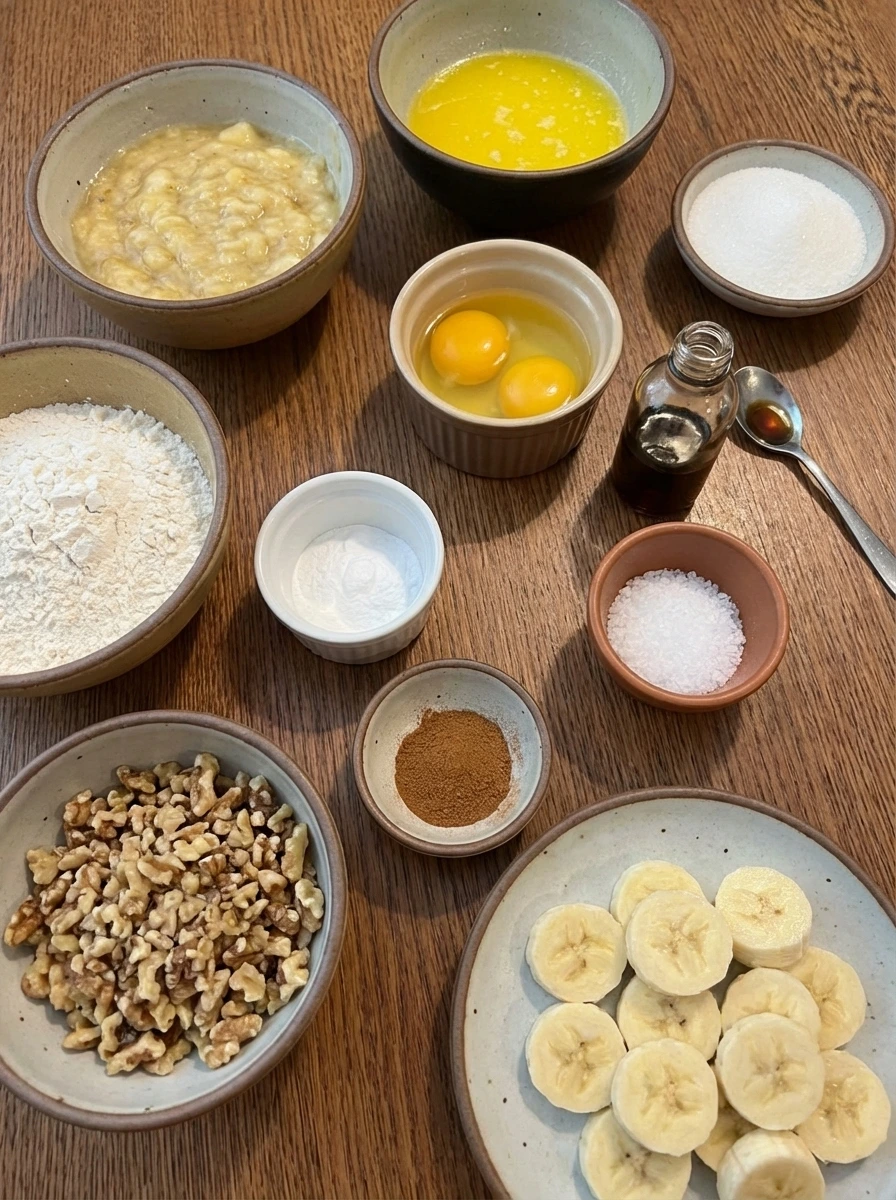
Here’s what I use for this recipe and you can always make substitutions if you prefer.
- ripe bananas: mashed for natural sweetness and moisture
- unsalted butter: melted for rich flavor and tender texture
- granulated sugar: sweetens the loaf
- large eggs: bind and enrich the batter
- vanilla extract: adds warm sweet aroma
- all purpose flour: forms the structure
- baking soda: helps the loaf rise
- fine salt: balances and seasons the sweetness
- ground cinnamon: adds warm spiced flavor
- chopped walnuts: adds texture and nutty crunch optional
- banana slices: scattered on top for garnish optional
Tools You’ll Need
- mixing bowl: for combining the batter in stages
- measuring cups and spoons: for accurate ingredient portions
- rectangular baking dish or loaf pan: for shaping and baking the bread
- cooling rack: for letting the loaf set before slicing
Instructions
Step 1: Mash the bananas
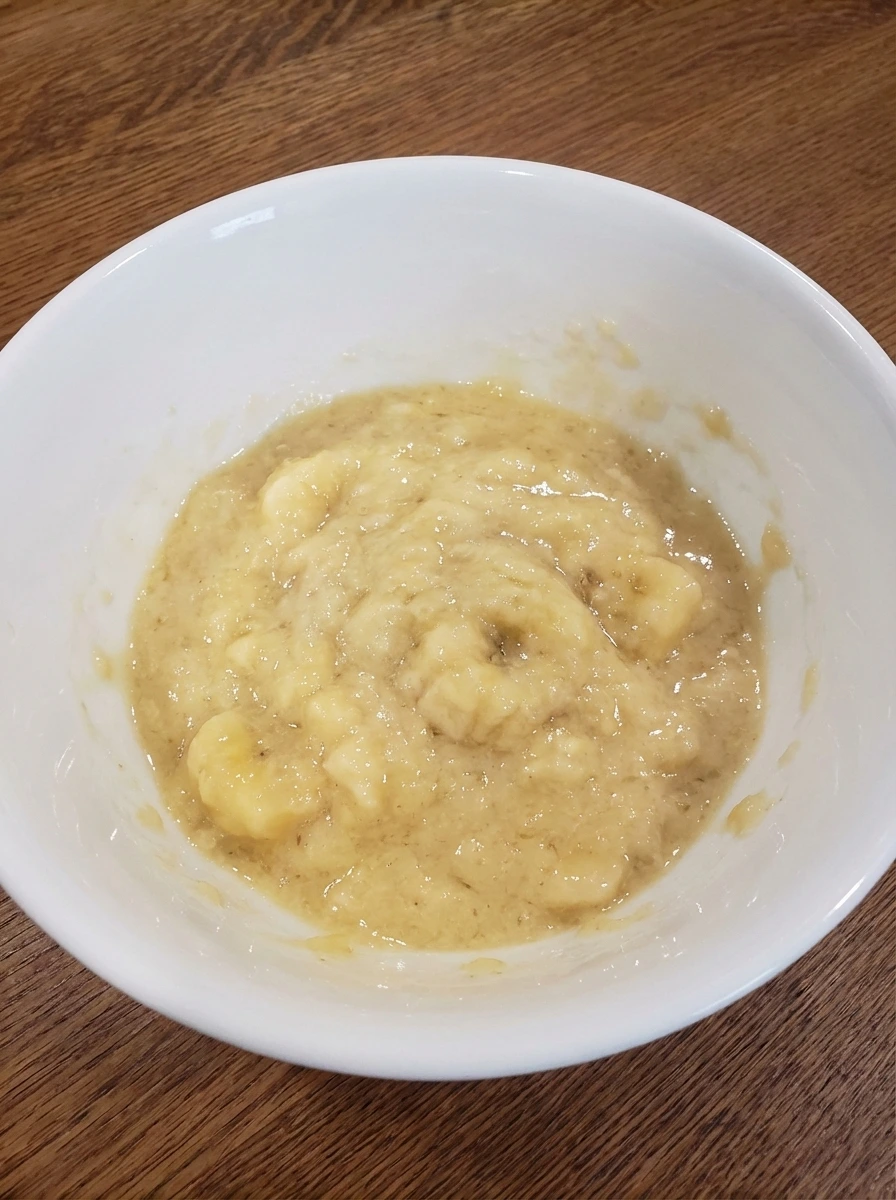
Peel the ripe bananas and break them into chunks in a wide bowl. Press and mash them until the larger pieces soften into a thick chunky mixture with a few small lumps still visible and a glossy pale yellow texture. At this stage the bananas should look loose and naturally uneven rather than perfectly smooth. Those soft pockets help the finished loaf stay moist and rich.
Tip: Use very ripe bananas with plenty of brown spots for the sweetest flavor and the softest texture.
Step 2: Blend in the melted butter
Pour the melted butter over the mashed bananas and stir until the mixture turns glossier and slightly looser. The butter should streak through at first and then disappear into the fruit as the color deepens a little. The mixture should now look richer and silkier with a soft shine across the top. Small banana lumps can still remain for a homemade texture.
Tip: Warm melted butter blends in more easily and helps the banana mixture look smooth and rich.
Step 3: Mix in the sugar and vanilla
Add the sugar and vanilla to the banana mixture and stir until the grains begin to disappear. The batter will look slightly thicker for a moment and then turn glossy again as the sugar absorbs into the wet mixture. You should see a smooth golden beige base with a faint shine and only a little texture from the mashed fruit. This is where the sweetness starts to settle into the batter.
Tip: Stir just until the sugar looks mostly dissolved and the mixture appears evenly sweetened.
Step 4: Add the eggs
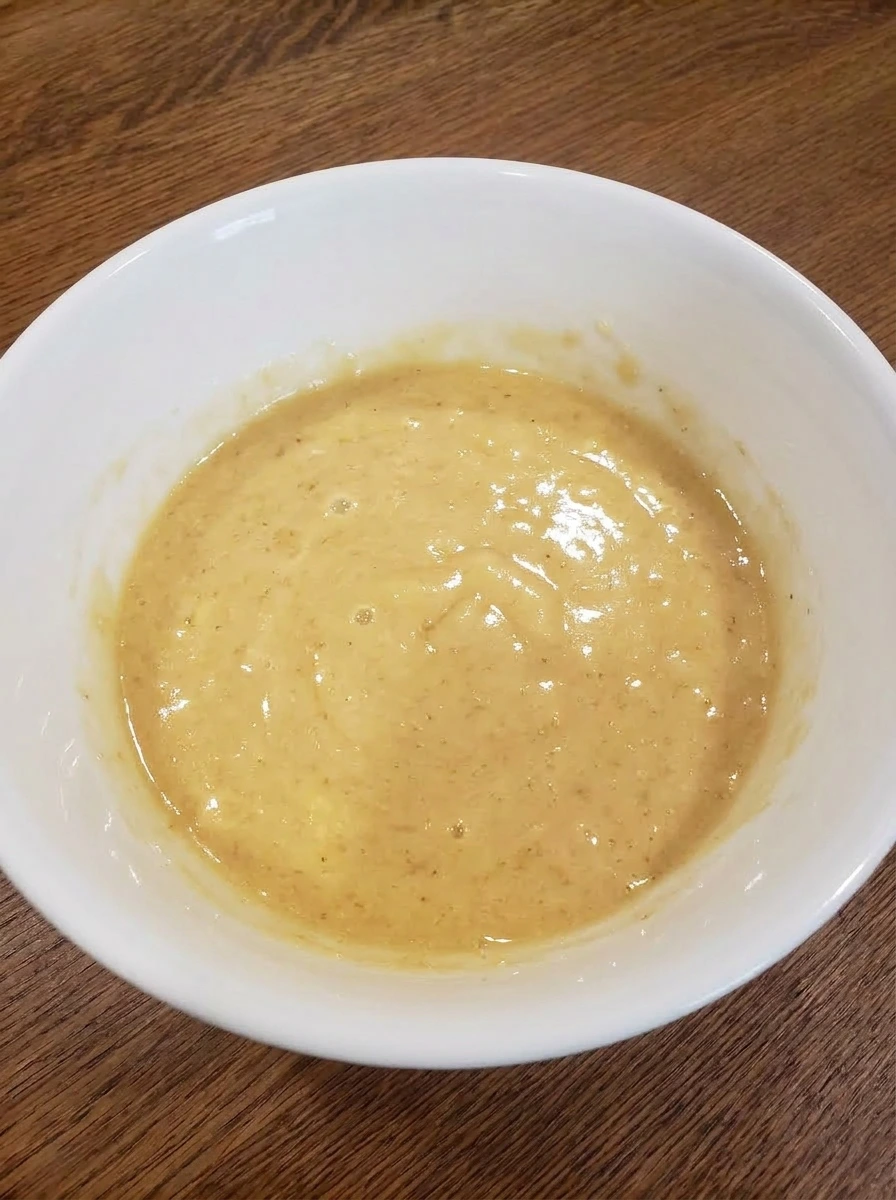
Crack in the eggs and stir until the yellow streaks fully blend into the banana mixture. The batter changes from loose and grainy to smoother and more cohesive with a creamier golden color. Once mixed the wet base should look glossy and unified with no separate egg ribbons left behind. The texture becomes fuller and more custardy looking.
Tip: Mix only until the eggs are fully blended so the batter stays tender.
Step 5: Season and add the dry ingredients
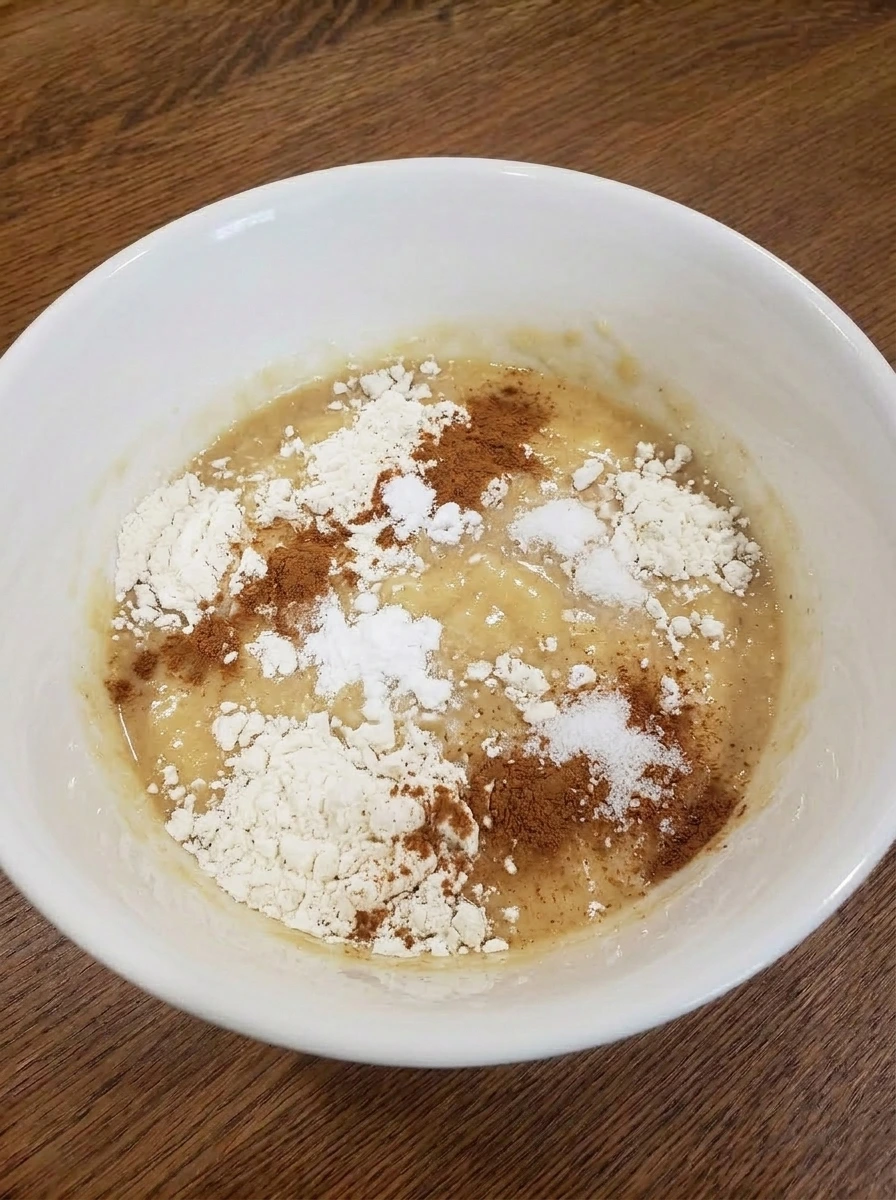
Scatter the flour and baking soda and salt and cinnamon over the wet mixture in an uneven layer. The pale flour sits loosely on top while the cinnamon creates soft brown patches across the surface. Nothing is fully mixed yet and the batter should clearly show a dry top over the glossy wet base. This stage sets up the visual shift from separate ingredients to a true batter.
Tip: Spread the dry ingredients over the surface so they combine more evenly in the next step.
Step 6: Fold to form the batter
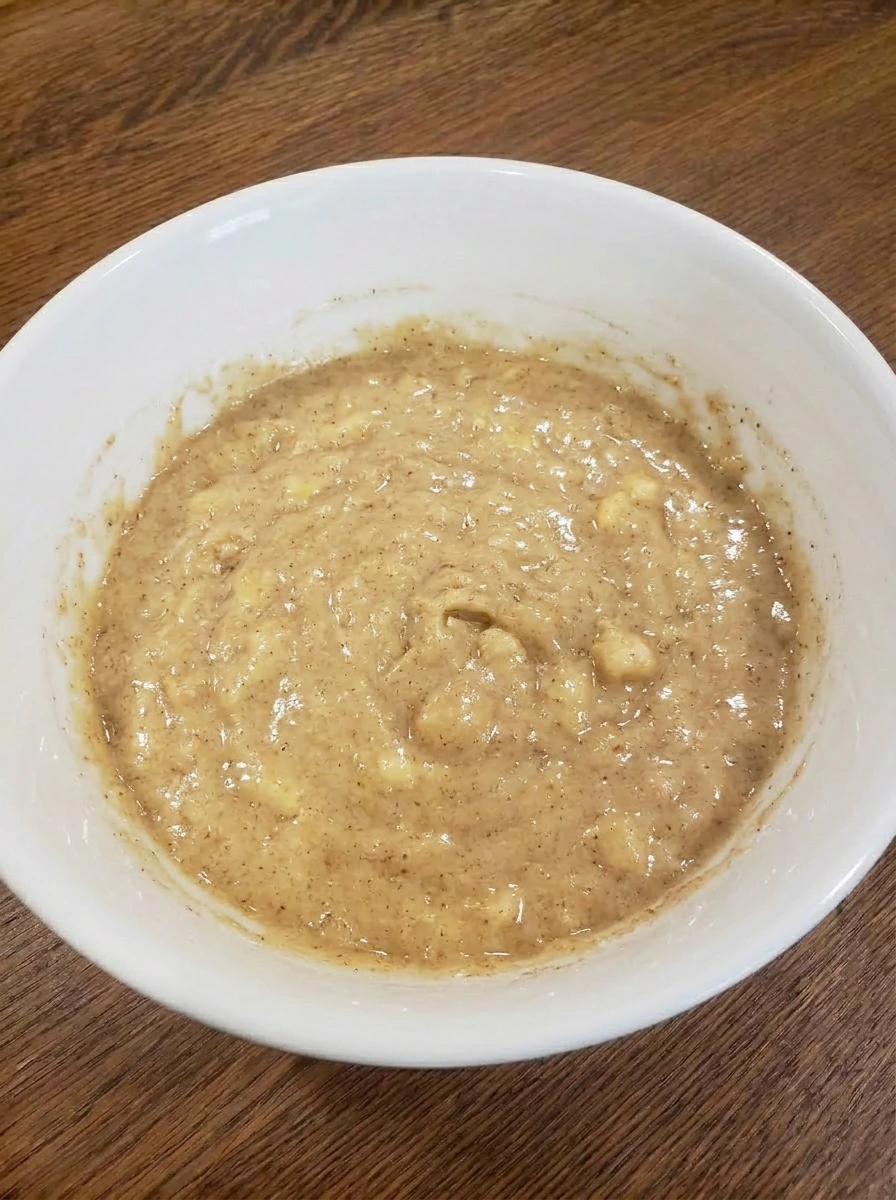
Fold the dry ingredients into the wet mixture until no obvious flour pockets remain. The batter thickens noticeably and turns into a soft spoonable mixture with banana flecks and a warm tan color. A few tiny lumps are fine and help keep the loaf tender. The batter should look fully combined yet still rustic rather than perfectly whipped smooth.
Tip: Stop folding as soon as the flour disappears so the bread stays soft.
Step 7: Scatter in the walnuts
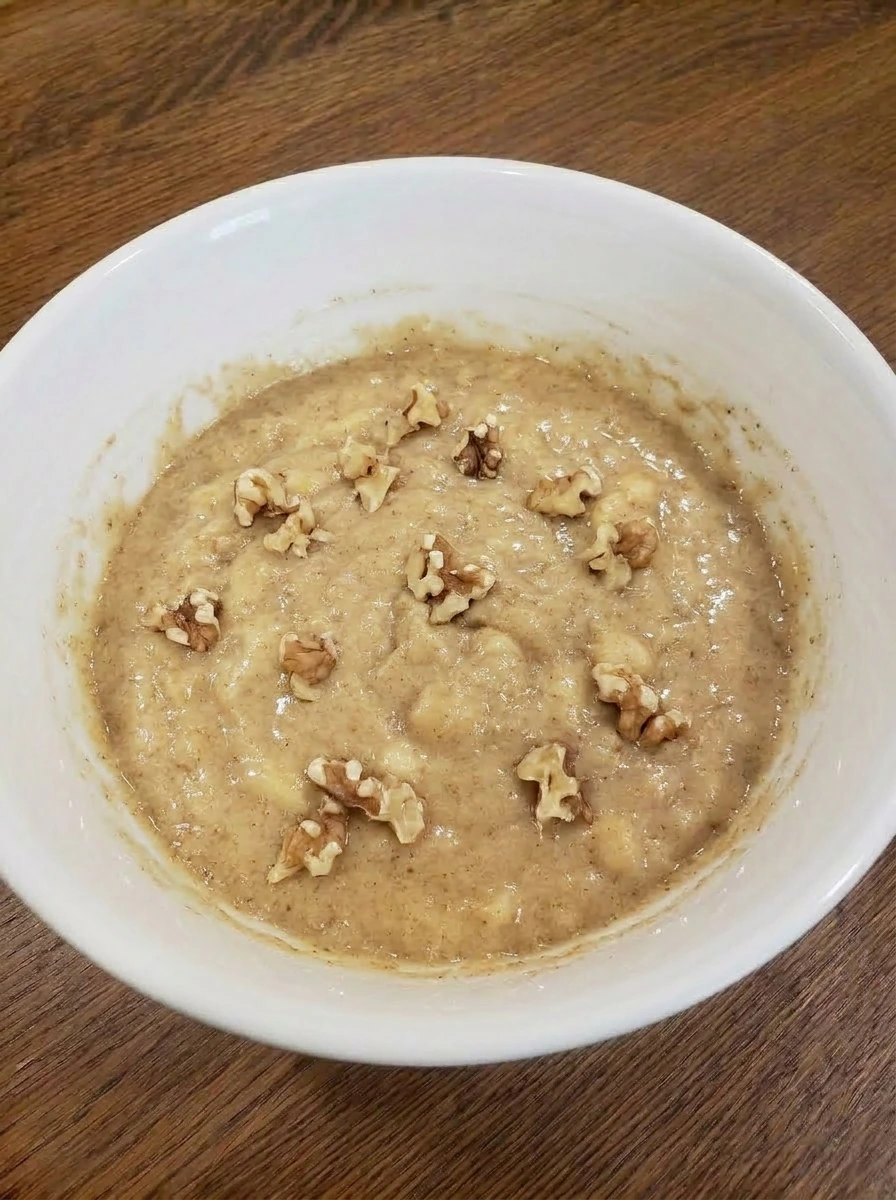
Add the chopped walnuts and fold them through the batter so they are unevenly distributed. Some pieces sink in while others remain visible near the top which gives the mixture a more textured homemade look. The batter should now look studded and slightly rougher with nutty bits breaking up the smooth surface. Keep the distribution casual rather than even.
Tip: Hold back a small spoonful of walnuts for the top if you want extra texture after baking.
Step 8: Arrange the batter and top it
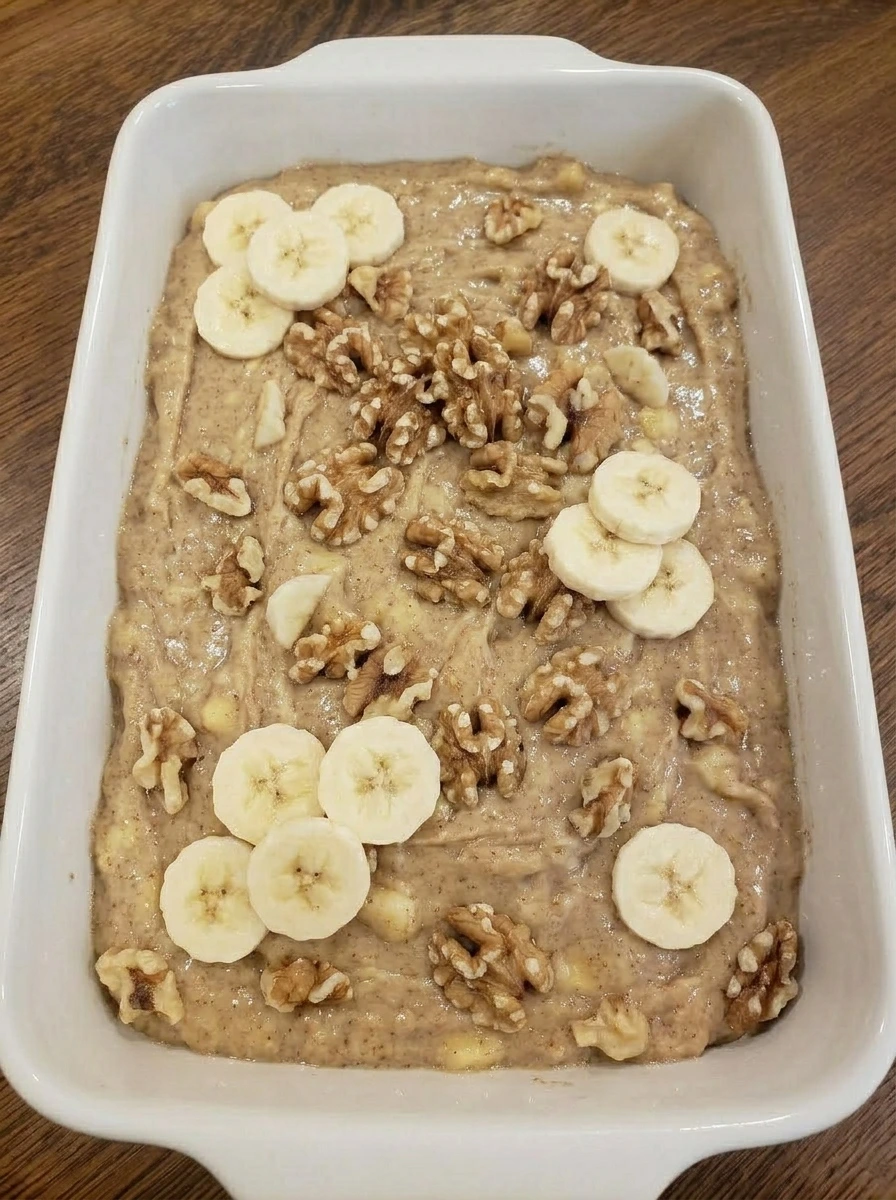
Transfer the batter into a rectangular ceramic baking dish and spread it loosely into the corners without smoothing it perfectly flat. The surface should have soft ridges and little swirls where the batter settled naturally. Scatter banana slices and the reserved walnuts over the top with slight overlap and irregular spacing. The topping should look casual and homemade rather than centered or patterned.
Tip: A rough batter surface helps create more natural texture and color on the finished loaf.
Step 9: Bake until puffed and lightly browned
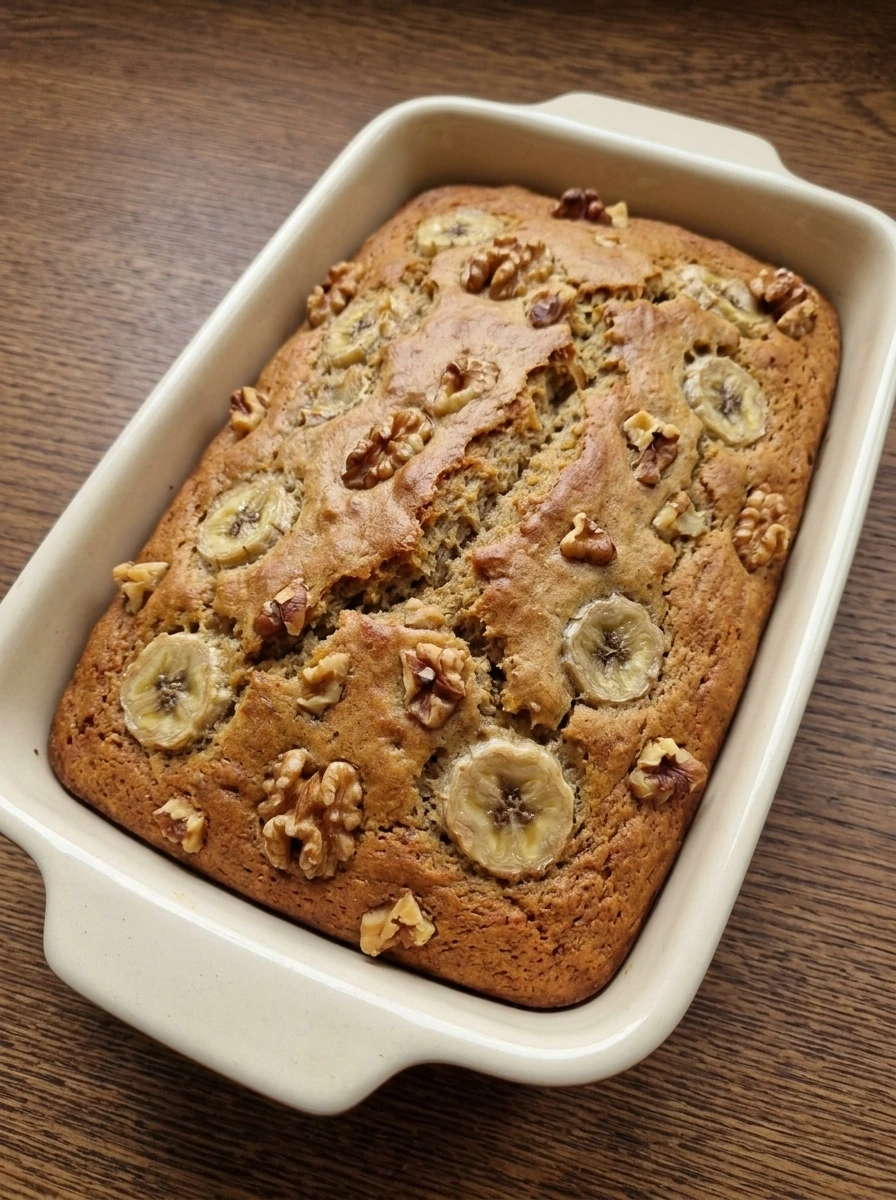
As the bread bakes the batter rises and the center sets from glossy to matte. The banana slices soften and darken at the edges while the top develops an uneven golden brown surface with deeper color along a few ridges and corners. The loaf should look fully baked with a gently domed top and natural cracking through the center. Some walnut pieces toast more deeply than others which adds realistic variation.
Tip: Look for a golden brown top and a set center rather than a pale surface.
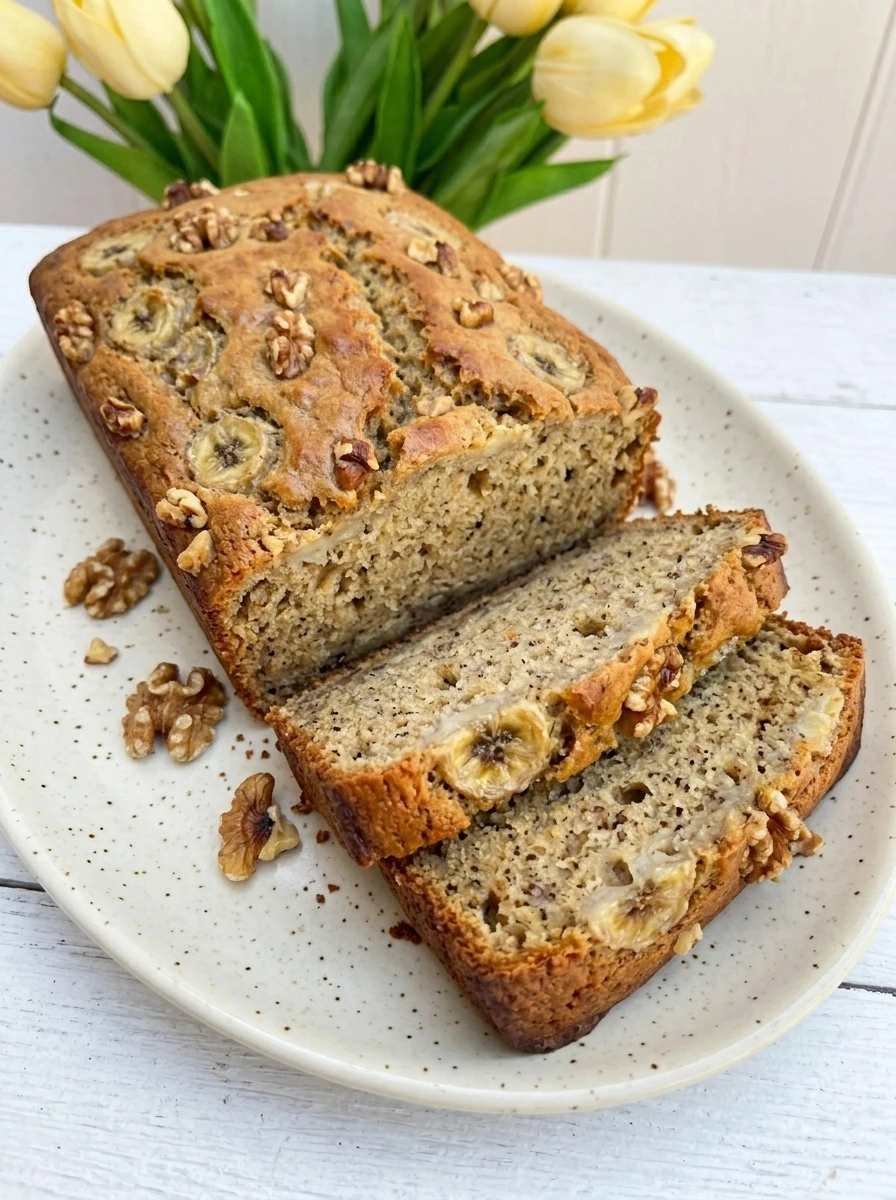
Step 10: Cool then slice and plate
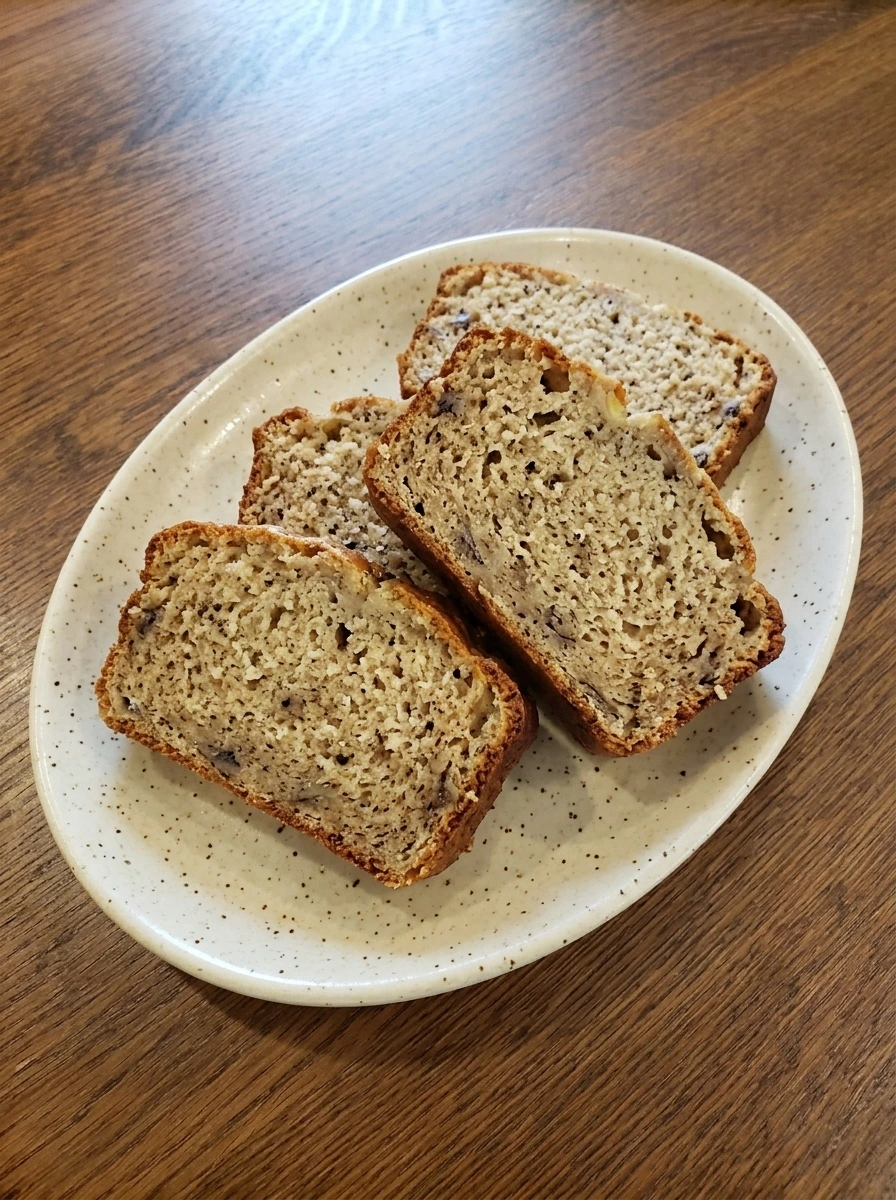
Let the loaf cool until the crumb firms slightly and the top settles. Slice it into thick pieces so the inside shows a moist tender texture with banana specks and a warm golden tan color against the darker crust. Plate the slices on a speckled oval cream ceramic plate with one or two pieces leaning casually against the rest. The final dish should look fully cooked and ready to serve with uneven browning and a soft homemade crumb.
Tip: Cooling for a bit helps the slices hold together while still staying moist.
Pro Tips
- Use bananas that are deeply speckled for stronger flavor and a softer crumb.
- Do not overmix after adding the flour or the loaf can turn dense.
- Scatter toppings naturally instead of placing them in neat rows for a more realistic homemade finish.
- Let the loaf cool slightly before slicing so the crumb stays moist yet holds its shape.
Storage Instructions
Keep the banana bread covered at room temperature for up to 3 days or refrigerate it for up to 1 week. For longer storage wrap slices well and freeze them for up to 2 months.
Frequently Asked Questions
Can I make Easy Banana Bread without walnuts?
Yes you can leave the walnuts out and the bread will still bake up soft and flavorful. The loaf will simply have a smoother texture.
How do I know when banana bread is fully cooked?
The top should look golden brown and set with a natural crack through the center. The loaf should not look wet or pale in the middle.
Can I use frozen bananas?
Yes just thaw them first and mash them well. Their extra softness works very well in this recipe and adds rich banana flavor.
Can I add chocolate chips?
Yes you can fold in a small handful along with or instead of the walnuts. Scatter them unevenly for a casual homemade look.
Final Thoughts
This is the kind of recipe I wish I had found years ago. It would have saved me so many disappointing overripe bananas.
But now that I have it I make it all the time and I think you will too. If you enjoyed this check out some of my other popular recipes on the blog.
And leave a comment because I read every single one and it really makes my day.
Print
Easy Banana Bread
- Total Time: 45 minutes
- Yield: 4 servings 1x
Description
This easy banana bread is one of the best quick ideas when you want a simple homemade bake that still feels special and healthy enough for everyday slices. It works for brunch and meal prep and holiday tables and potluck trays and even a cozy party spread. The tender loaf uses ripe bananas for sweet flavor and keeps the method easy and quick while giving you simple results every single time.
Ingredients
- 3 medium ripe bananas
- 1/2 cup unsalted butter
- 3/4 cup granulated sugar
- 2 large eggs
- 1 teaspoon vanilla extract
- 1 1/2 cups all purpose flour
- 1 teaspoon baking soda
- 1/2 teaspoon fine salt
- 1/2 teaspoon ground cinnamon
- 1/2 cup chopped walnuts
- 6 to 8 thin slices banana slices
Instructions
- Peel the ripe bananas and break them into chunks in a wide bowl. Press and mash them until the larger pieces soften into a thick chunky mixture with a few small lumps still visible and a glossy pale yellow texture. At this stage the bananas should look loose and naturally uneven rather than perfectly smooth. Those soft pockets help the finished loaf stay moist and rich.
- Pour the melted butter over the mashed bananas and stir until the mixture turns glossier and slightly looser. The butter should streak through at first and then disappear into the fruit as the color deepens a little. The mixture should now look richer and silkier with a soft shine across the top. Small banana lumps can still remain for a homemade texture.
- Add the sugar and vanilla to the banana mixture and stir until the grains begin to disappear. The batter will look slightly thicker for a moment and then turn glossy again as the sugar absorbs into the wet mixture. You should see a smooth golden beige base with a faint shine and only a little texture from the mashed fruit. This is where the sweetness starts to settle into the batter.
- Crack in the eggs and stir until the yellow streaks fully blend into the banana mixture. The batter changes from loose and grainy to smoother and more cohesive with a creamier golden color. Once mixed the wet base should look glossy and unified with no separate egg ribbons left behind. The texture becomes fuller and more custardy looking.
- Scatter the flour and baking soda and salt and cinnamon over the wet mixture in an uneven layer. The pale flour sits loosely on top while the cinnamon creates soft brown patches across the surface. Nothing is fully mixed yet and the batter should clearly show a dry top over the glossy wet base. This stage sets up the visual shift from separate ingredients to a true batter.
- Fold the dry ingredients into the wet mixture until no obvious flour pockets remain. The batter thickens noticeably and turns into a soft spoonable mixture with banana flecks and a warm tan color. A few tiny lumps are fine and help keep the loaf tender. The batter should look fully combined yet still rustic rather than perfectly whipped smooth.
- Add the chopped walnuts and fold them through the batter so they are unevenly distributed. Some pieces sink in while others remain visible near the top which gives the mixture a more textured homemade look. The batter should now look studded and slightly rougher with nutty bits breaking up the smooth surface. Keep the distribution casual rather than even.
- Transfer the batter into a rectangular ceramic baking dish and spread it loosely into the corners without smoothing it perfectly flat. The surface should have soft ridges and little swirls where the batter settled naturally. Scatter banana slices and the reserved walnuts over the top with slight overlap and irregular spacing. The topping should look casual and homemade rather than centered or patterned.
- As the bread bakes the batter rises and the center sets from glossy to matte. The banana slices soften and darken at the edges while the top develops an uneven golden brown surface with deeper color along a few ridges and corners. The loaf should look fully baked with a gently domed top and natural cracking through the center. Some walnut pieces toast more deeply than others which adds realistic variation.
- Let the loaf cool until the crumb firms slightly and the top settles. Slice it into thick pieces so the inside shows a moist tender texture with banana specks and a warm golden tan color against the darker crust. Plate the slices on a speckled oval cream ceramic plate with one or two pieces leaning casually against the rest. The final dish should look fully cooked and ready to serve with uneven browning and a soft homemade crumb.
Notes
Pro Tips:
- Use bananas that are deeply speckled for stronger flavor and a softer crumb.
- Do not overmix after adding the flour or the loaf can turn dense.
- Scatter toppings naturally instead of placing them in neat rows for a more realistic homemade finish.
- Let the loaf cool slightly before slicing so the crumb stays moist yet holds its shape.
Storage: Keep the banana bread covered at room temperature for up to 3 days or refrigerate it for up to 1 week. For longer storage wrap slices well and freeze them for up to 2 months.
- Prep Time: 15 minutes
- Cook Time: 30 minutes
- Category: Breakfast
- Cuisine: American
Nutrition
- Serving Size: 1 serving