This Blueberry Grilled Cheese recipe is packed with flavor and so easy to make. It is a budget friendly recipe that you can make in 15 minutes or less! Make this sweet and savory grilled cheese recipe for breakfast today.
If you love cozy breakfast recipes then you are going to love this Blueberry Grilled Cheese recipe. It is a warm crispy sandwich that feels hearty flavorful and a little addictive. With juicy blueberries and melty cheese in every bite you are going to want something like Creamy Old Fashioned Oatmeal on the side for an extra cozy morning.
If you are looking for other easy breakfast recipes like this Blueberry Grilled Cheese then why not also try my Strawberry Cream Cheese Muffins or Egg and Cheese Breakfast Sandwich. Both of these recipes are simple to make and perfect for a quick morning meal.
Ingredients
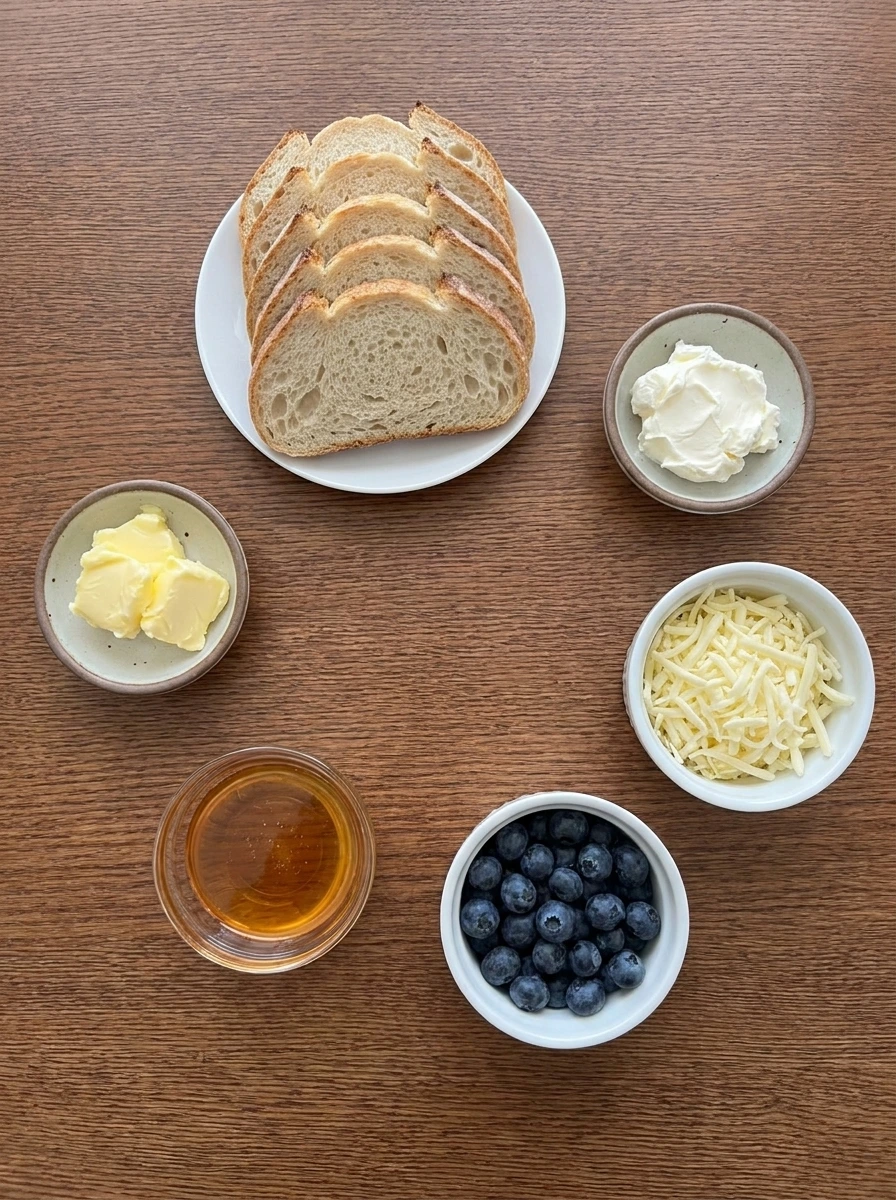
Here’s what I use for this recipe and you can always make substitutions if you prefer.
- sourdough bread: Forms the crisp sturdy outside and holds the filling together.
- cream cheese: Adds tangy richness and helps the blueberries stay in place.
- mozzarella cheese: Melts into stretchy pockets and softens the fruit filling.
- blueberries: Bring juicy bursts of sweetness and a deep purple color.
- honey: Lightly sweetens the filling and helps the berries glisten.
- butter: Coats the bread for even browning and a crisp finish.
Tools You’ll Need
- mixing bowl: Combines the blueberry filling.
- wooden cutting board: Supports assembling and slicing the sandwiches.
- cast iron skillet: Browns the bread and melts the filling.
- white plate: Holds the final served portion.
Instructions
Step 1: Mix the blueberry filling
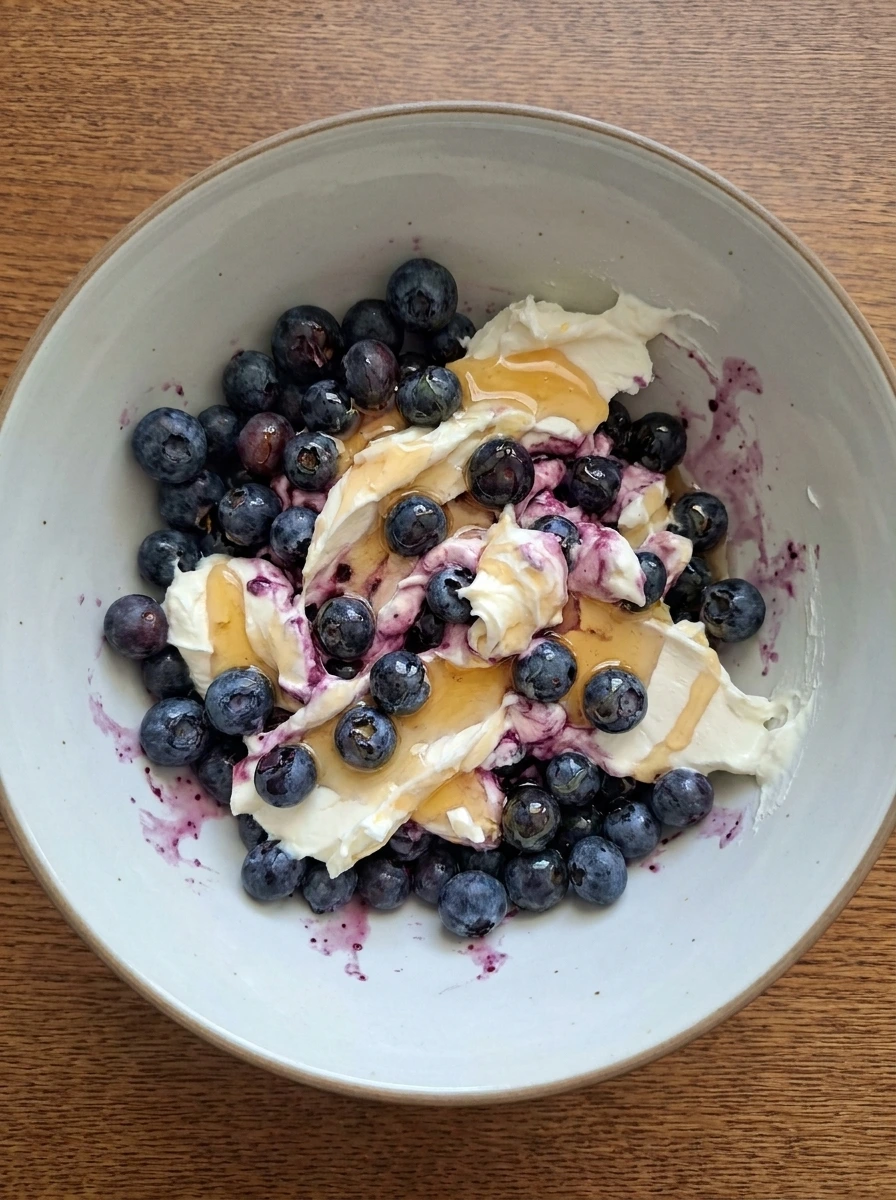
Blueberries are folded with cream cheese and honey until the berries look lightly coated and the cream cheese sits in soft uneven streaks between them. Some berries stay whole while a few begin to split and tint the mixture with little purple smudges. The filling should look chunky rather than smooth so every bite keeps distinct pockets of fruit and creamy richness. Leave natural gaps and uneven berry sizes so the mixture looks homemade and relaxed.
Tip: Do not mash the berries too much or the filling can turn watery.
Step 2: Spread and layer the sandwiches
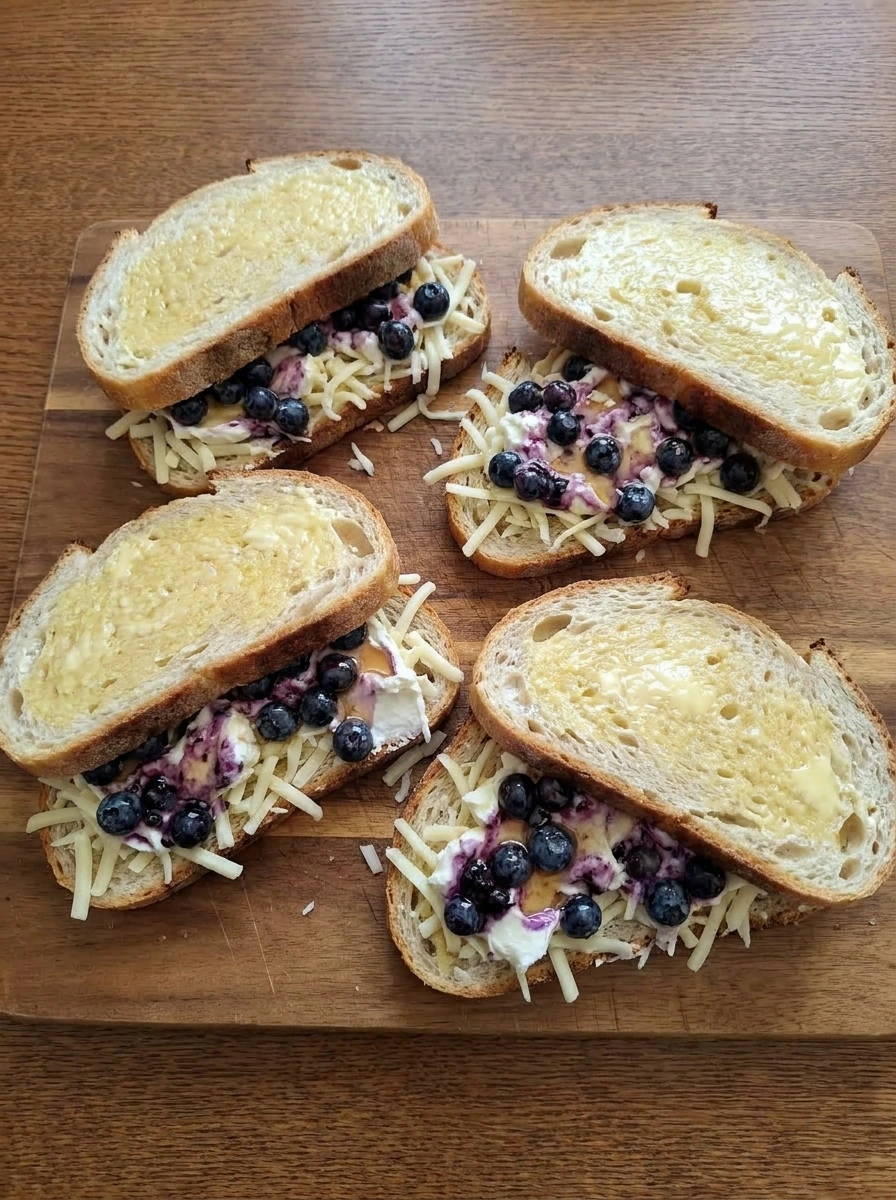
The bread slices are spread with butter on the outside and then layered with shredded mozzarella and spoonfuls of the blueberry mixture inside. The cheese falls in loose uneven piles while the berries sit in casual patches with slight overlap and open spots near the edges. Once topped with the second slices the sandwiches look thick and slightly uneven with filling creating gentle bumps under the bread. The stack should not look perfectly centered because a homemade sandwich always shifts a little.
Tip: Keep the filling in an even layer with a small border so less leaks out later.
Step 3: Cook the first side until golden
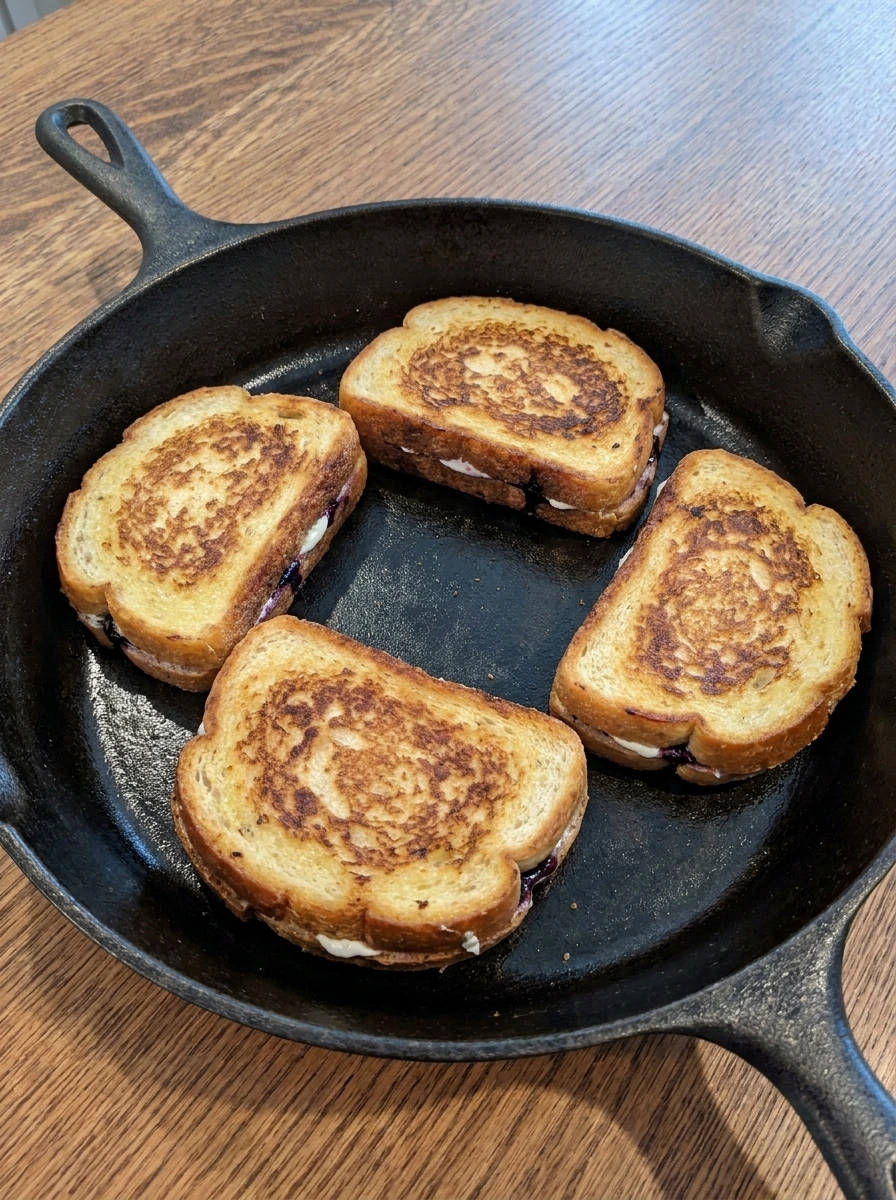
As the sandwiches cook the bottom slices deepen from pale to golden with darker toasted patches forming in irregular spots. The filling starts to soften so a little cream cheese loosens and a few blueberries slump toward the edges. The structure stays intact yet the sandwiches settle lower as the cheese begins to melt between the slices. You should see a slight crispness along the rim and a few glossy berry juices where the filling meets the bread.
Tip: Cook gently so the bread browns at the same pace the cheese softens.
Step 4: Flip and finish until the cheese melts
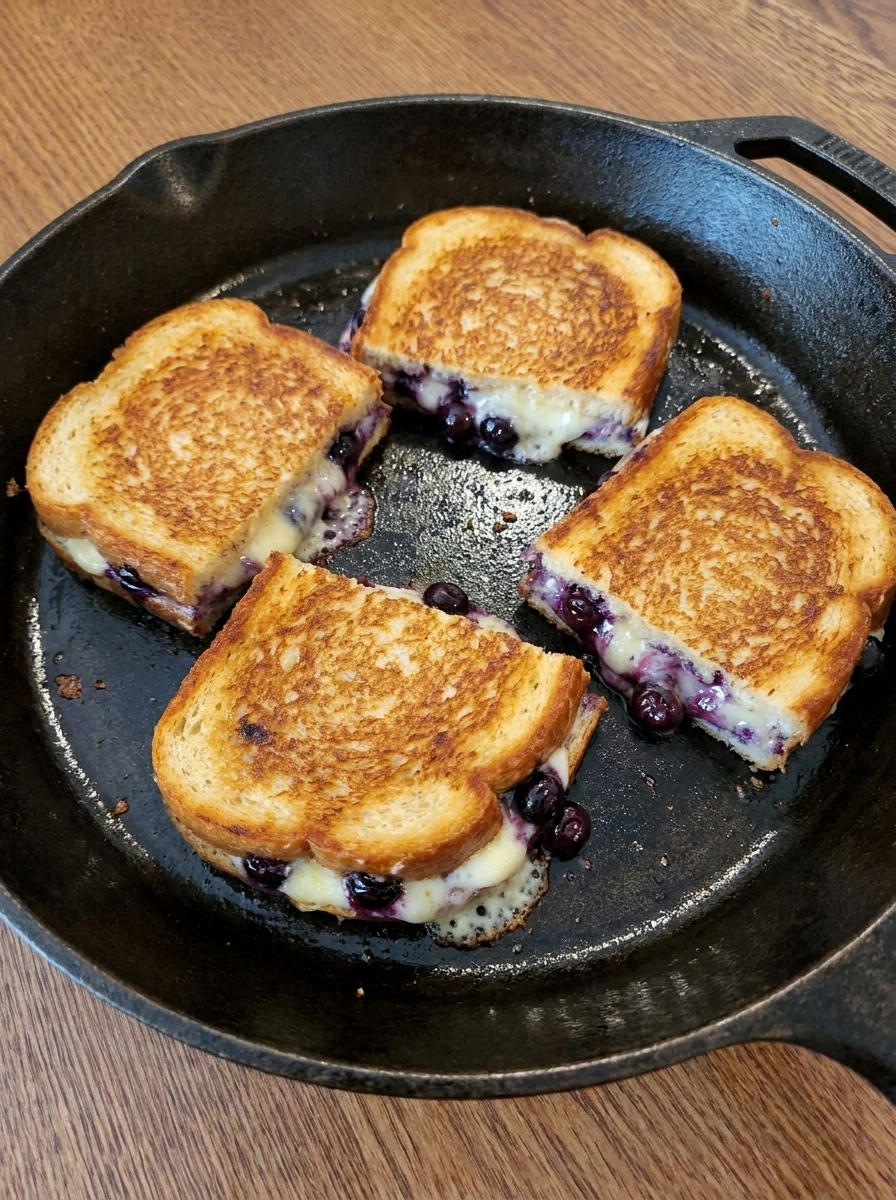
After flipping the browned side faces up and the sandwiches shift into new positions with slightly flattened centers and fuller edges. The second side picks up color while the inside turns visibly gooey and the blueberries look softer with more burst skins and glossy purple streaks. This is the stage where the sandwich becomes unified because the melted mozzarella stretches into the cream cheese and berries. The outside should look crisp with uneven color and the filling should peek out in messy little spots.
Tip: Press lightly only if needed so the filling warms through without squeezing it out.
Step 5: Slice and serve warm
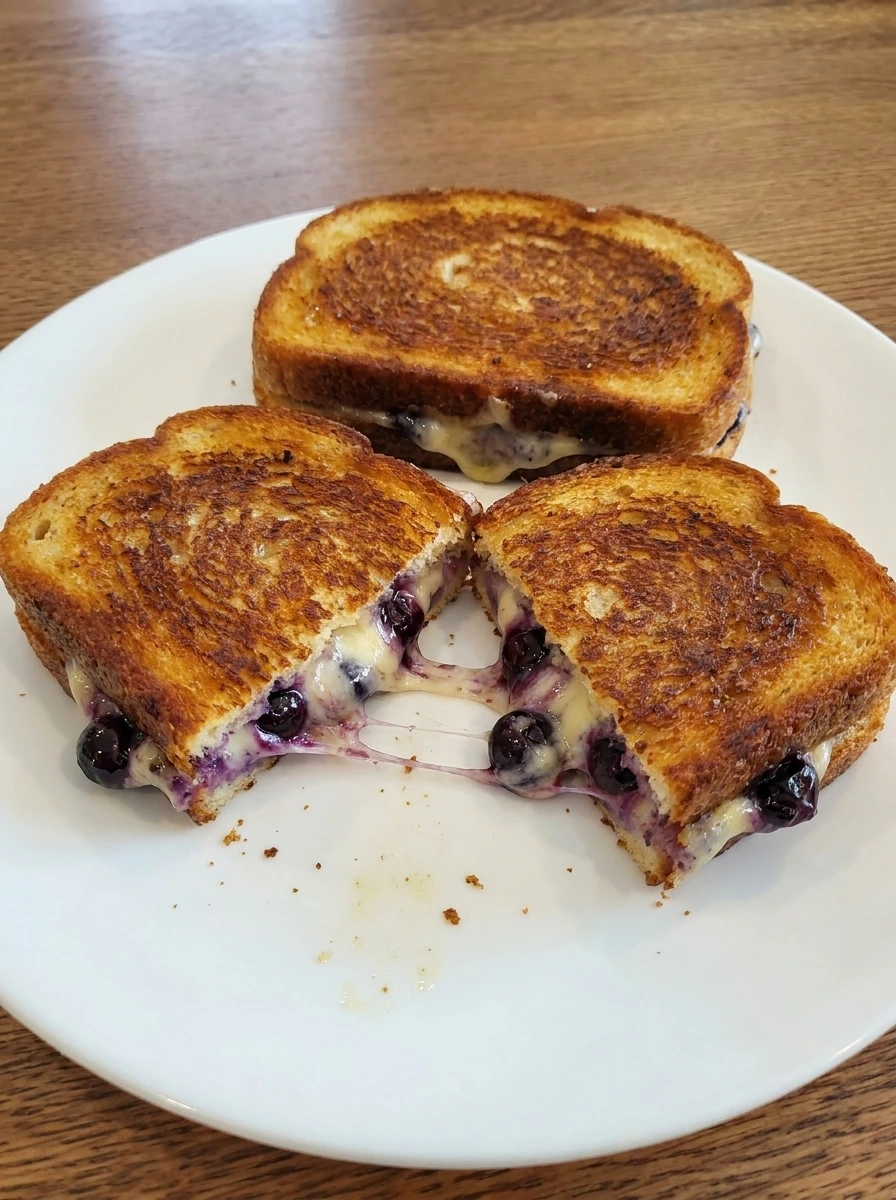
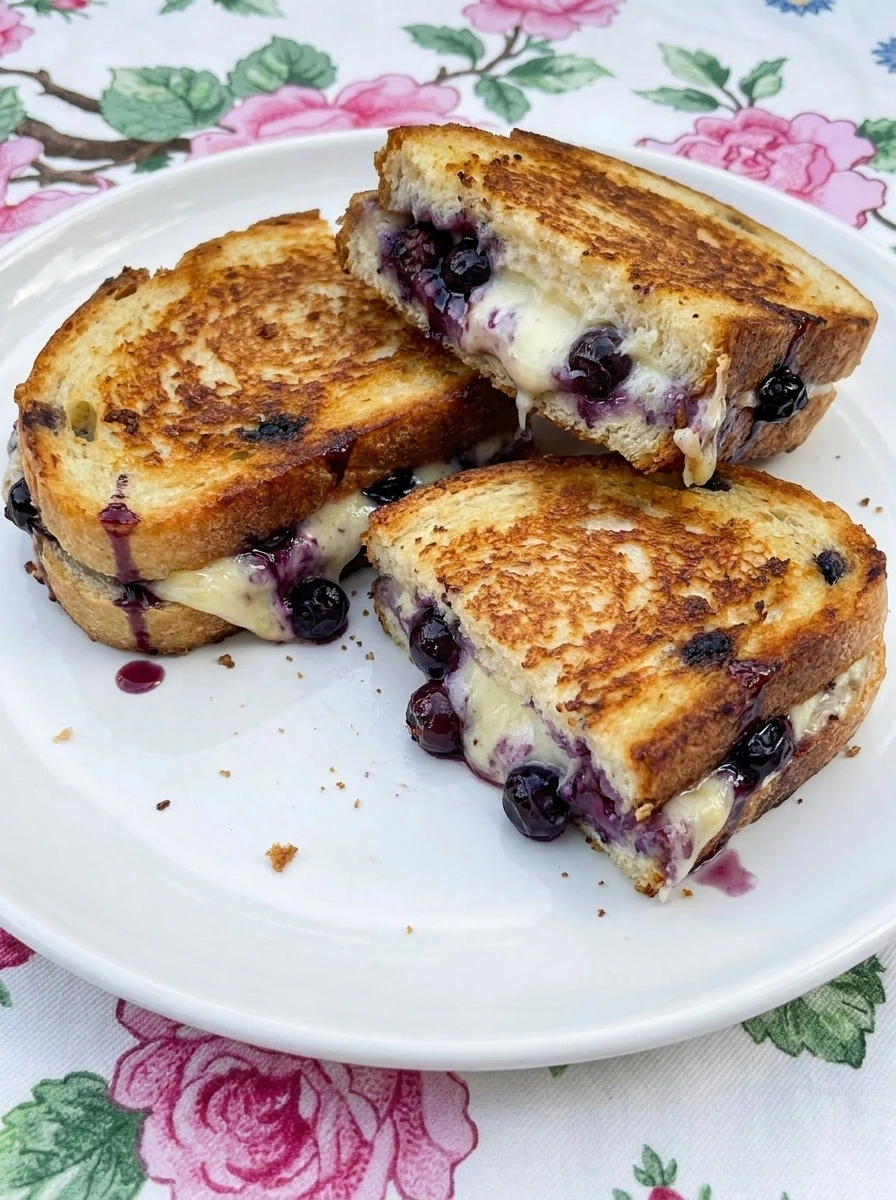
The finished sandwiches are moved to a plate and one is cut open so the center shows melted cheese tangled with creamy filling and warm blueberries. The toast has deep golden edges and a few darker spots while the cut line reveals uneven layers and little drips of purple juice. The final look should feel inviting rather than perfect with crumbs on the plate and slightly offset halves. That contrast of crisp bread creamy cheese and juicy fruit is what makes the sandwich look ready to eat.
Tip: Let the sandwiches rest briefly so the filling stays creamy but does not run too fast.
Pro Tips
- Use sturdy bread so the filling stays tucked inside while the outside crisps.
- Mix the cream cheese filling just enough so the berries still keep their shape.
- Shred the mozzarella yourself for softer melting and better stretch.
- Cook over medium low heat so the bread browns before the filling leaks too much.
Storage Instructions
Store leftover sandwiches in a covered container in the refrigerator for up to 2 days. The bread will soften as it sits and the filling may thicken once chilled. To reheat place the sandwich back in a skillet over low heat until the bread crisps again and the center softens. Avoid the microwave if possible because it can make the bread chewy rather than crisp.
Frequently Asked Questions
Yes although fresh berries work best for a less watery filling. If you use frozen berries thaw and drain them first so the sandwich does not get soggy.
Mozzarella and cream cheese make the best balance here because one melts well and the other adds tang. Mild brie can also work if you want a richer finish.
It is best fresh although you can mix the filling ahead and keep it chilled. Assemble and cook the sandwiches right before serving for the crispiest texture.
It sits right in the middle with juicy sweet berries creamy tangy filling and buttery toasted bread. That balance is what makes it work so well for breakfast or brunch.
Final Thoughts
If you try this recipe then I really hope you love it as much as my family does. It has become one of those breakfasts we just keep coming back to and it fits cozy weekends just as well as busy mornings.
If you want another sweet breakfast bake then try Strawberry Lemon Cream Scones and if you need something extra simple for mornings then save Simple Avocado Toast. And if you are looking for more easy breakfast ideas then make sure to bookmark this page.
I am always adding new recipes that are simple satisfying and perfect for busy mornings.
Print
Blueberry Grilled Cheese
- Total Time: 45 minutes
- Yield: 4 servings 1x
Description
Blueberry Grilled Cheese is an easy recipe packed with sweet berries and gooey cheese in crisp golden bread. It is one of the best quick breakfast ideas for busy mornings and relaxed brunch at home. This simple sandwich feels special yet stays budget friendly and healthy enough to fit into a balanced day when served with fruit. Keep this recipe for meal prep plans and holiday brunch spreads when you need something warm fast and satisfying.
Ingredients
- 8 slices sourdough bread
- 4 ounces cream cheese
- 1 cup shredded mozzarella cheese
- 1 cup blueberries
- 2 tablespoons honey
- 3 tablespoons butter
Instructions
- Blueberries are folded with cream cheese and honey until the berries look lightly coated and the cream cheese sits in soft uneven streaks between them. Some berries stay whole while a few begin to split and tint the mixture with little purple smudges. The filling should look chunky rather than smooth so every bite keeps distinct pockets of fruit and creamy richness. Leave natural gaps and uneven berry sizes so the mixture looks homemade and relaxed.
- The bread slices are spread with butter on the outside and then layered with shredded mozzarella and spoonfuls of the blueberry mixture inside. The cheese falls in loose uneven piles while the berries sit in casual patches with slight overlap and open spots near the edges. Once topped with the second slices the sandwiches look thick and slightly uneven with filling creating gentle bumps under the bread. The stack should not look perfectly centered because a homemade sandwich always shifts a little.
- As the sandwiches cook the bottom slices deepen from pale to golden with darker toasted patches forming in irregular spots. The filling starts to soften so a little cream cheese loosens and a few blueberries slump toward the edges. The structure stays intact yet the sandwiches settle lower as the cheese begins to melt between the slices. You should see a slight crispness along the rim and a few glossy berry juices where the filling meets the bread.
- After flipping the browned side faces up and the sandwiches shift into new positions with slightly flattened centers and fuller edges. The second side picks up color while the inside turns visibly gooey and the blueberries look softer with more burst skins and glossy purple streaks. This is the stage where the sandwich becomes unified because the melted mozzarella stretches into the cream cheese and berries. The outside should look crisp with uneven color and the filling should peek out in messy little spots.
- The finished sandwiches are moved to a plate and one is cut open so the center shows melted cheese tangled with creamy filling and warm blueberries. The toast has deep golden edges and a few darker spots while the cut line reveals uneven layers and little drips of purple juice. The final look should feel inviting rather than perfect with crumbs on the plate and slightly offset halves. That contrast of crisp bread creamy cheese and juicy fruit is what makes the sandwich look ready to eat.
Notes
Pro Tips:
- Use sturdy bread so the filling stays tucked inside while the outside crisps.
- Mix the cream cheese filling just enough so the berries still keep their shape.
- Shred the mozzarella yourself for softer melting and better stretch.
- Cook over medium low heat so the bread browns before the filling leaks too much.
Storage: Store leftover sandwiches in a covered container in the refrigerator for up to 2 days. The bread will soften as it sits and the filling may thicken once chilled. To reheat place the sandwich back in a skillet over low heat until the bread crisps again and the center softens. Avoid the microwave if possible because it can make the bread chewy rather than crisp.
- Prep Time: 15 minutes
- Cook Time: 30 minutes
- Category: Breakfast
- Cuisine: American
Nutrition
- Serving Size: 1 serving