

Seriously, no joke, these are the best Raspberry Breakfast Bars. They’re the ones I make when I want something simple and comforting without a fussy morning. It’s a classic oat bar with basic, delicious ingredients. Buttery oat crumbs sandwich a glossy raspberry filling made with fresh berries and preserves. Perfect with coffee or cold milk and just sweet enough to feel like a treat without turning breakfast into dessert.
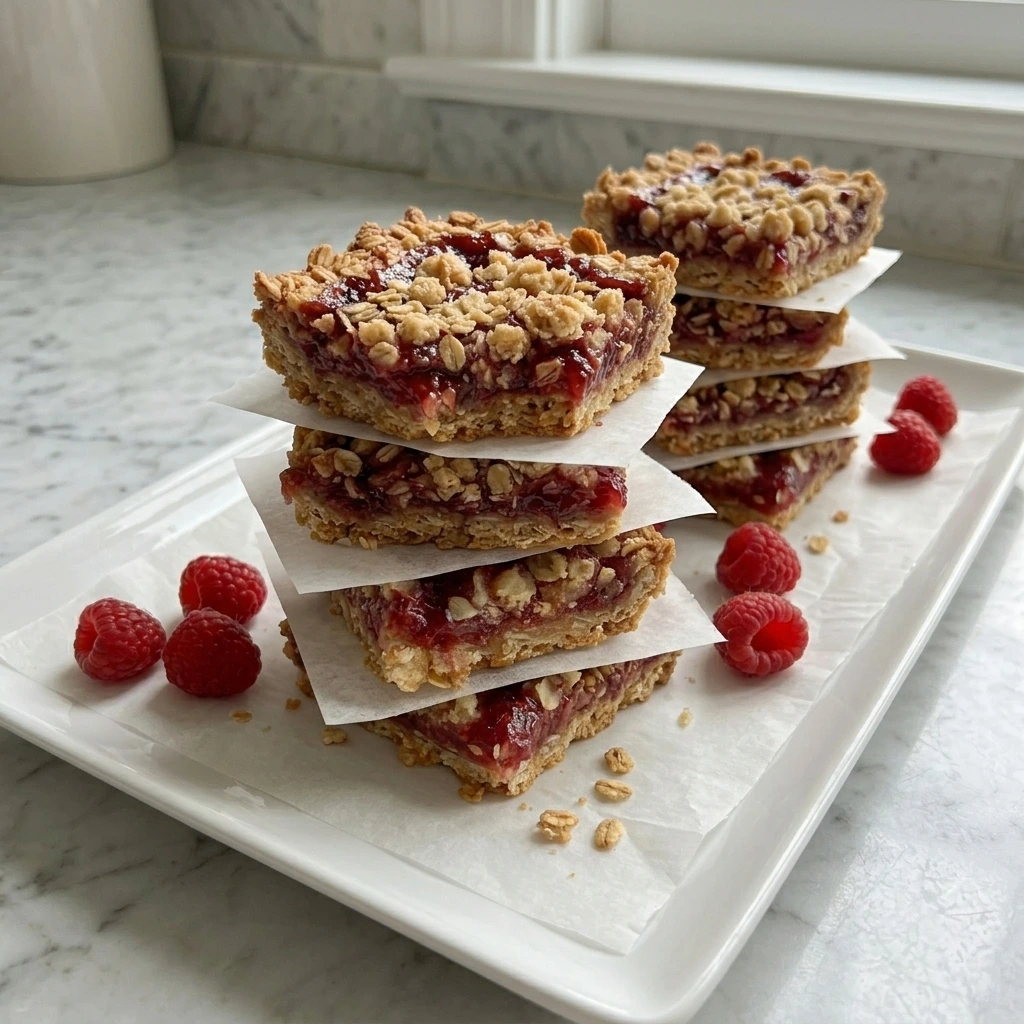
A pan of raspberry breakfast bars is one of my go-to easy breakfasts. Not only do they make a super satisfying morning snack, but they hold together well for packing. Also, there’s no complicated method or unusual ingredient needed. And meal prep’s a cinch. I often bake them on Sunday and keep a few ready for Monday and Tuesday.
If you love berry breakfasts, try our Strawberry Cream Cheese Muffins next. With just a few basic ingredients probably already in the fridge and pantry, you can bake a pan for breakfast or brunch or afternoon snacking. Cut them into neat squares after cooling or leave the edges a little rustic. Either way, that bright ruby filling and golden oat crumble make every piece feel homemade. They’re especially good tucked into lunch boxes when mornings get busy.
Ingredients
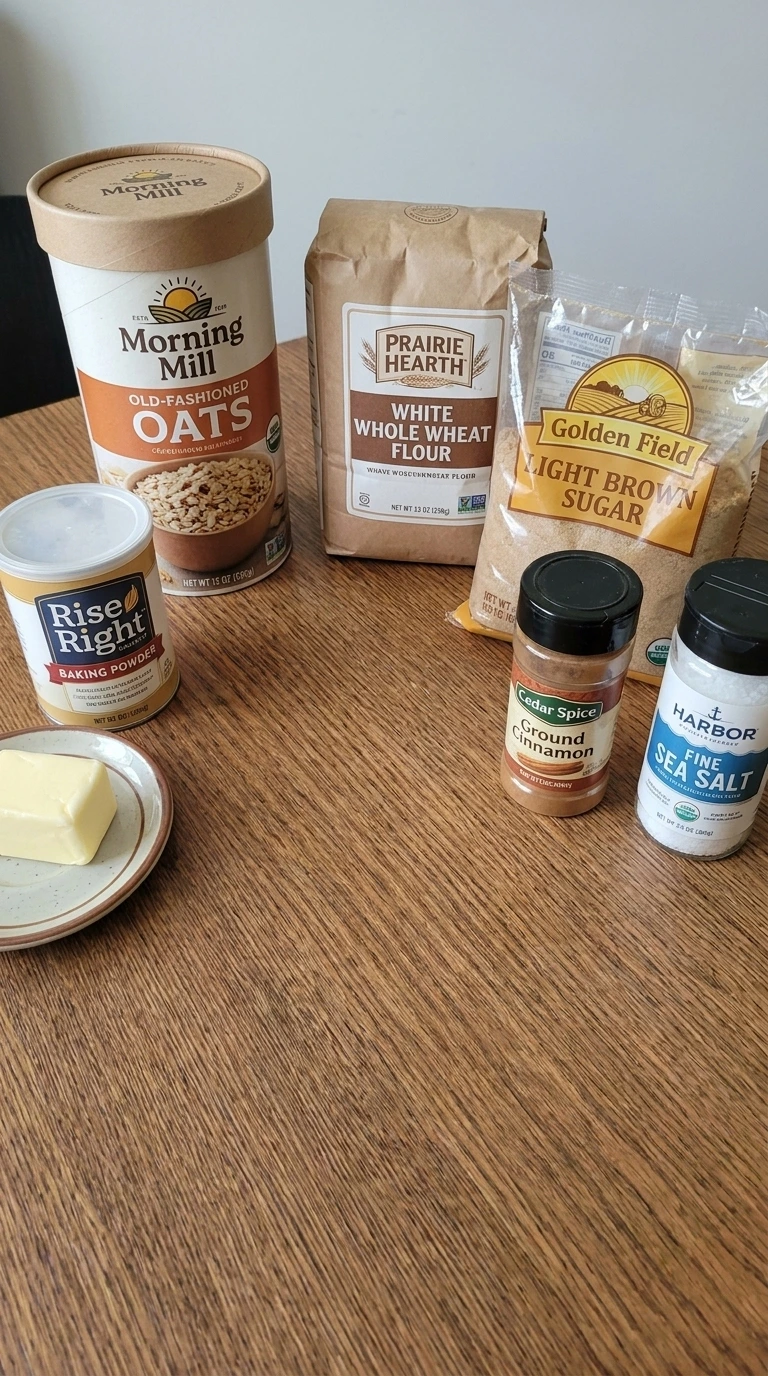
Here’s what I use for this recipe and you can always make substitutions if you prefer.
- old-fashioned rolled oats: Use whole rolled flakes for a chewy base and a visibly rustic crumble.
- white whole wheat flour: Spoon into the measuring cup and level it so the crust stays tender.
- light brown sugar: Pack it lightly to add moisture and a gentle caramel flavor.
- baking powder: Adds a little lift so the base doesn’t bake into a hard sheet.
- ground cinnamon: Adds warm fragrance without covering the raspberry flavor.
- fine sea salt: Distributes evenly through the crumb and balances the sweet preserves.
- unsalted butter: Chilled near 40°F and cut into 1/2-inch cubes for distinct crumb clusters.
- large egg: Use it cold so the butter stays firm while the mixture binds.
- pure vanilla extract: Rounds out the oats and softens the sharp edge of the berries.
- fresh raspberries: Reserve nine whole berries and lightly crush the rest for rough fruit pockets.
- seedless raspberry preserves: Use a thick preserve to give the fresh berries a glossy and sliceable body.
- fresh lemon juice: Squeeze it just before mixing to brighten the raspberry filling.
- cornstarch: Stir it into the berries until no white streaks remain so the filling sets cleanly.
Tools You’ll Need
- 9-inch square light-colored metal baking pan: A 9-inch light-colored metal pan sets the base evenly and limits dark edges, while a dark nonstick pan can overbrown the sugar before the center firms.
- Parchment paper: Two crossed parchment strips with 2-inch overhangs lift the slab cleanly, while bare metal can hold the sticky raspberry edges and tear the bars.
- Large clear glass mixing bowl: A 4-quart glass bowl leaves enough room to pinch the cold butter into crumbs, while a shallow bowl sends dry oats over the rim.
- Medium mixing bowl: A 2-quart bowl gives the berry filling room to thicken evenly, while a narrow cup crushes the raspberries too aggressively.
- Rubber spatula: A firm silicone spatula folds the egg through the crumbs and scrapes sticky preserves cleanly, while a weak flexible blade leaves unmixed pockets.
- Instant-read thermometer: A fast thermometer confirms the center reaches about 195°F, while relying only on color can leave the berry layer loose or the edges overbaked.
Instructions
Step 1: Mix the oat crumble
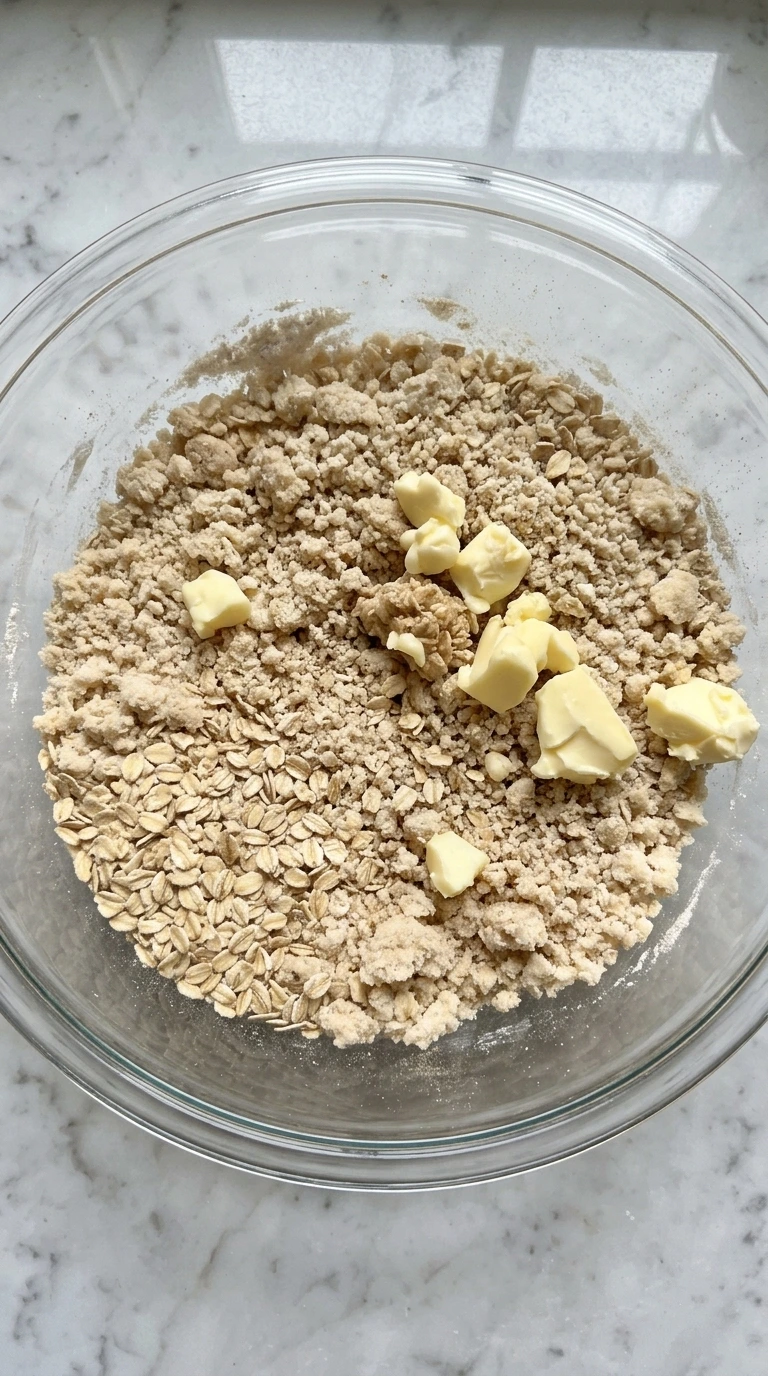
Set the oven to 350°F and keep the cubed butter near 40°F. Stir the rolled oats, white whole wheat flour, light brown sugar, baking powder, cinnamon and sea salt for 30 seconds. Then work in the butter with quick pinching motions for 3 minutes.
Fold in the egg and vanilla for another 60 to 90 seconds. The mixture should look sandy with uneven pea-size clumps and a few larger walnut-size pieces. You’ll smell cinnamon and brown sugar before the dough starts holding when squeezed.
Stop within 5 minutes after adding the egg because extra mixing makes the base tough. Cold butter keeps the crumble tender instead of greasy.
Tip: Spoon the flour into the cup and level it. A packed cup can add 20 grams and leave the bars dry.
Step 2: Press the base and layer the berries
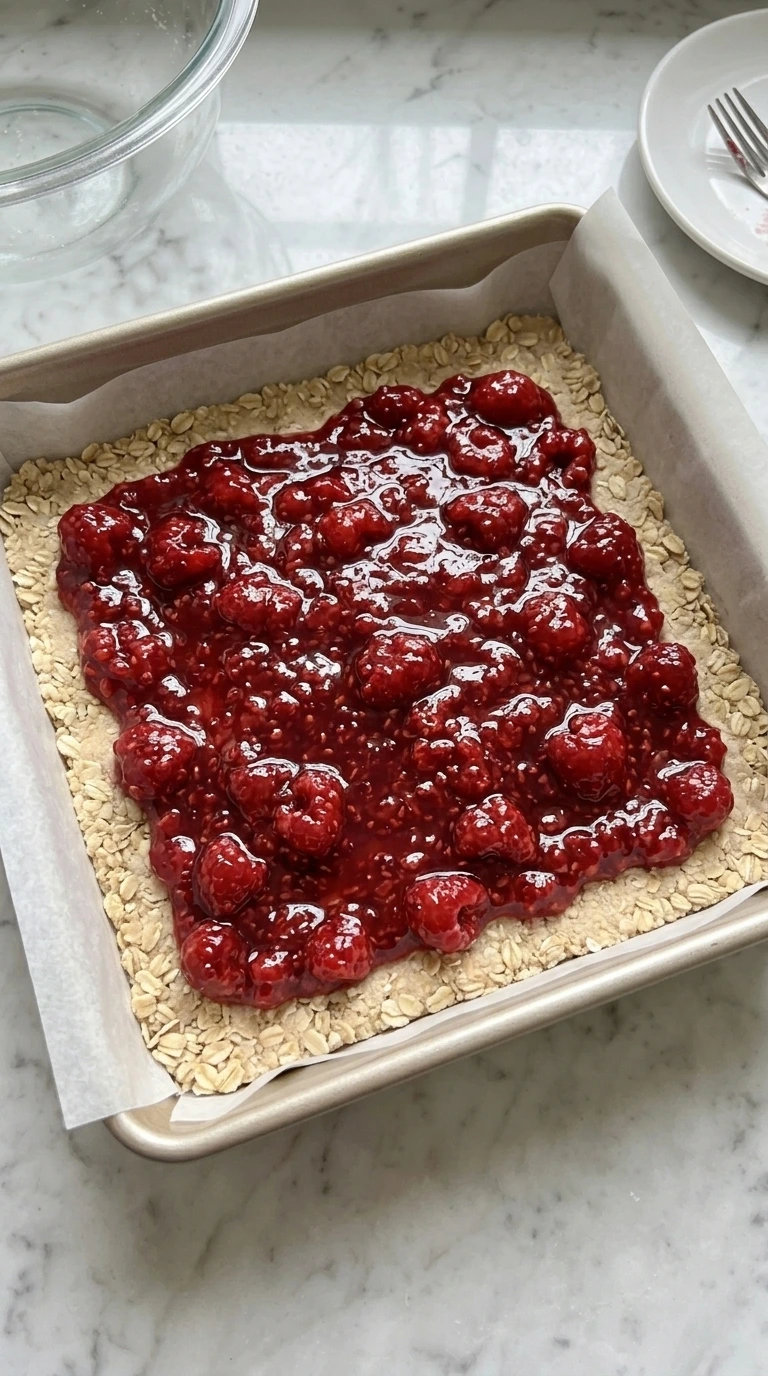
Keep the oven at 350°F. Press two thirds of the oat mixture into the lined 9-inch pan for 2 minutes using firm overlapping fingertip presses. Reserve nine whole raspberries. Then crush the remaining raspberries lightly and stir them with preserves, lemon juice and cornstarch for 45 seconds.
Spread the filling over the base within 1/2 inch of every edge. The base should look compact but still show individual oat flakes. Meanwhile, the berry layer should turn thick and glossy with rough raspberry pockets and deep ruby streaks. Finish this step within 5 minutes so the butter stays cool.
Push filling against the pan edge and it can bubble underneath the crust. A sealed oat border keeps the berry layer from soaking through.
Tip: Warm very firm preserves for 10 seconds before mixing. They’ll spread without tearing the compact oat base.
Step 3: Scatter the crumble topping
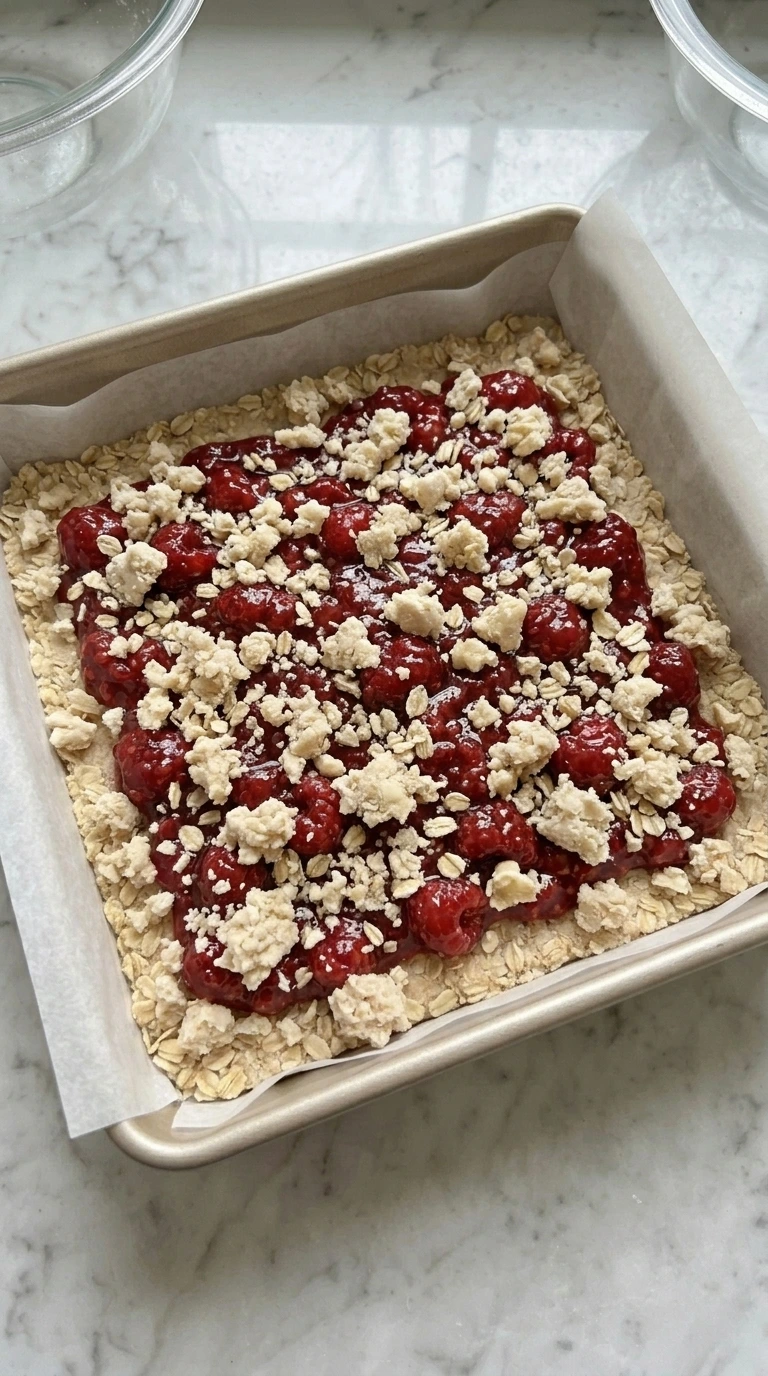
Keep the oven steady at 350°F. Pinch the remaining oat mixture into irregular 1/2-inch and 1-inch clusters for 60 to 90 seconds. Scatter those pieces from left to right so some berry filling stays visible. Then press only five or six clusters lightly with two fingertips.
Don’t flatten the whole surface or force the crumbs into a solid lid. The topping should look uneven with rolled oats exposed and glossy raspberry showing through several gaps. You’ll see larger crumbs near one corner and finer crumbs along the opposite edge. Move the pan into the oven within 3 minutes because warm butter spreads instead of crumbling.
Pack the topping tightly and steam can make it gummy. Open gaps let moisture escape while the oat clusters crisp.
Tip: Chill the reserved crumble for 8 minutes if your kitchen is above 75°F. Cooler clusters hold their shape during baking.
Step 4: Bake until golden and bubbling
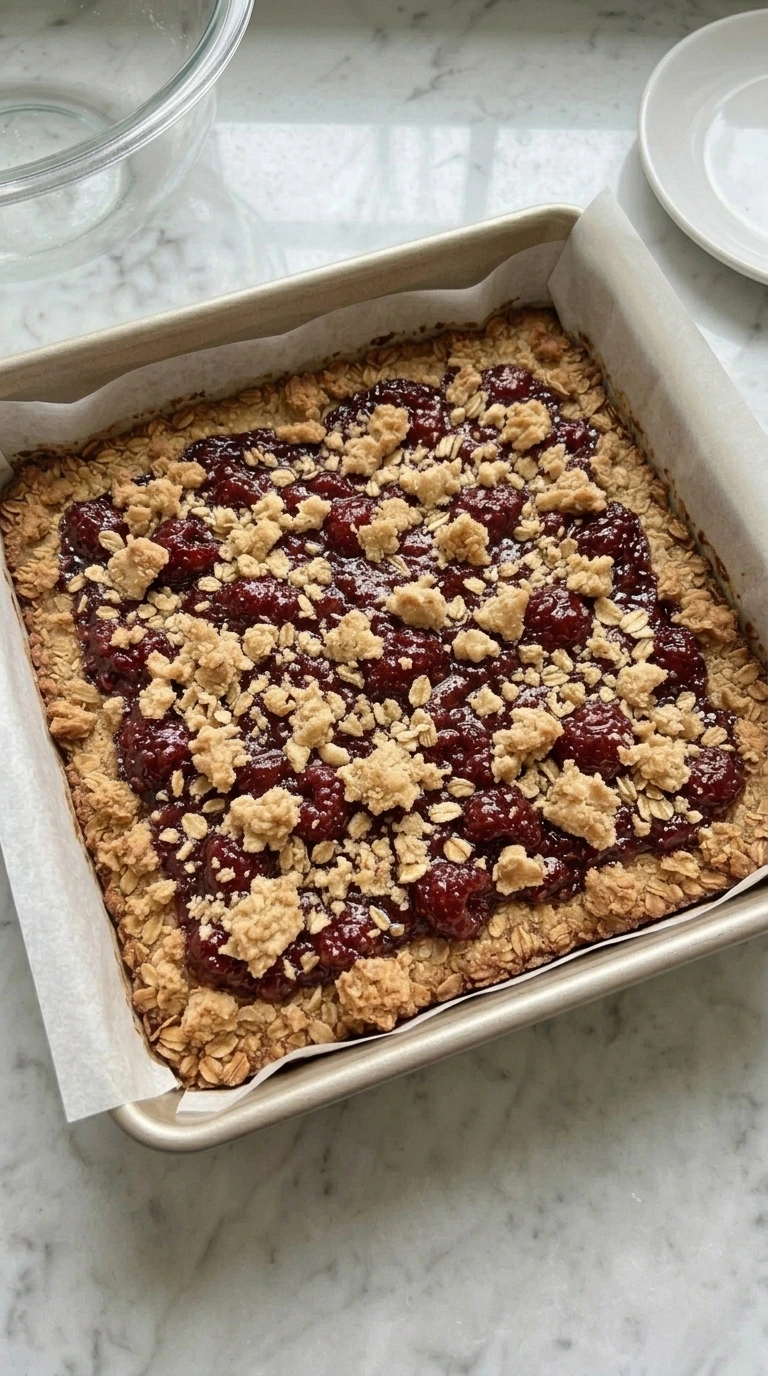
Bake the pan at 350°F for 30 to 34 minutes. Rotate it 180 degrees at minute 18 so the back edge doesn’t darken first. Don’t open the oven before minute 18 because the crumb structure still feels fragile. (I tried 375°F first, the top browned before the berry center stopped sloshing.
350°F is the fix. ) The edges should turn deep golden while the middle stays one shade lighter. You’ll see slow raspberry bubbles in three or four gaps and smell toasted oats near minute 30. Remove the pan when the center reaches 195°F.
Go past 34 minutes and the preserves can set hard after cooling. Moderate heat sets the oat base before the berry sugars scorch.
Tip: Use an oven thermometer beside the pan. A 25°F oven error can harden the jam before the center reaches 195°F.
Step 5: Cool, slice and serve
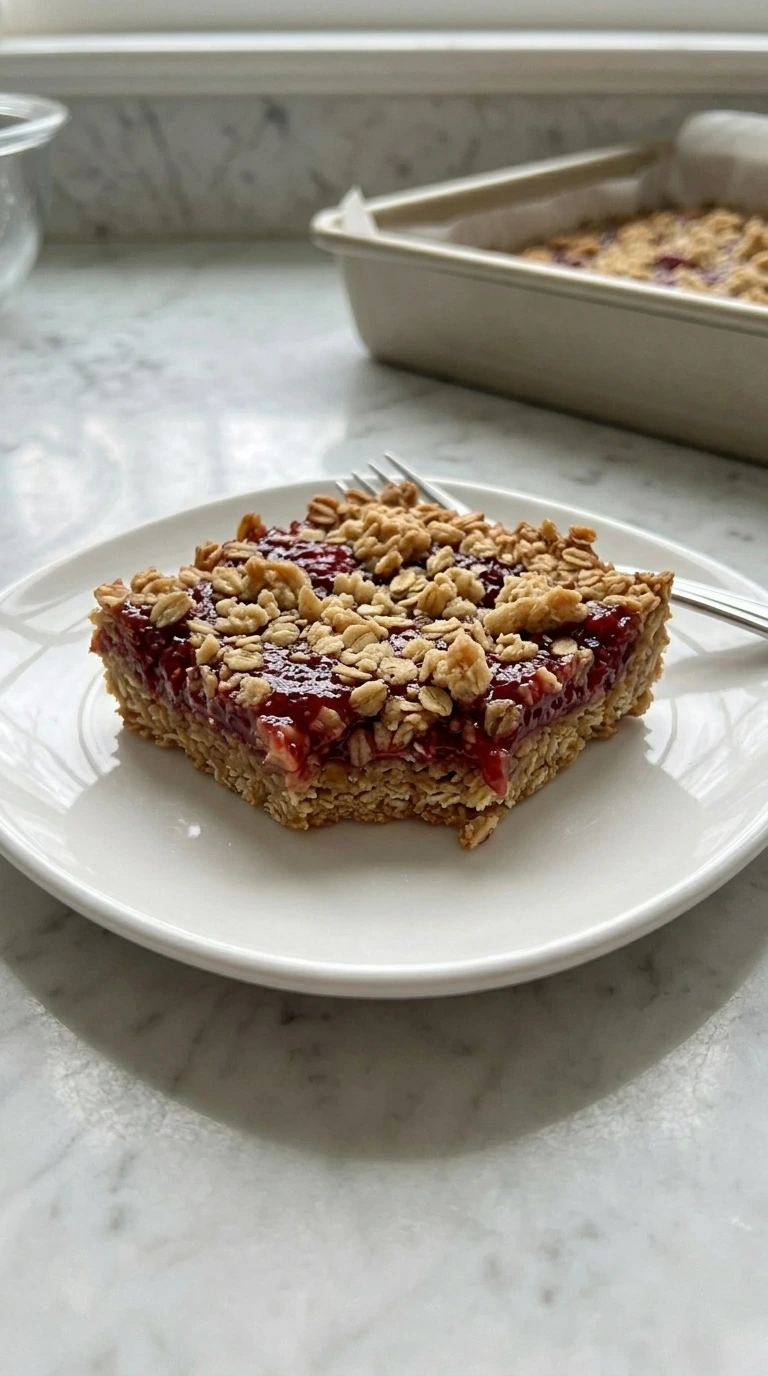
Cool the pan at about 70°F for 60 minutes. Lift the slab out and cut it into nine 3-inch squares with one firm downward motion per cut. Wipe the blade after every slice. Then place one bar on a small white plate and add three reserved raspberries beside it.
Don’t chill before slicing because the butter can become overly firm. The cut face should show a compact golden base, a glossy ruby center and an uneven oat crumble. The filling should hold its shape but remain soft when pressed. Cut before 45 minutes and berry streaks will drag through the crumbs.
Finally, serve at room temperature within 2 hours for the clearest flavor. Full cooling lets the starch set before the bars are sliced.
Tip: Trim only 1/8 inch from rough outer edges for cleaner squares while keeping the homemade shape and most of the crisp crust.
Pro Tips
- Weigh the white whole wheat flour at about 120 grams. An extra 20 grams can turn the oat base dry and sandy.
- Choose thick raspberry preserves with at least 45 percent fruit. Thin syrupy jam can leak under the base during the 30-minute bake.
- Keep butter cubes below 45°F and about 1/2 inch wide. Smaller warm pieces disappear into the flour and reduce the rough crumble.
- Leave a 2-inch parchment overhang on two sides. It supports the warm slab and prevents the center from bending during removal.
- Microwave stiff preserves for only 10 seconds before mixing. Longer heating loosens them too much and encourages a runny berry layer.
- Use a light-colored metal pan and begin checking at minute 30. Dark pans can deepen the bottom crust about 5 minutes sooner.
- Wait the full 60 minutes before cutting. The center should feel set and show no wet berry trail on the blade.
- Replace the raspberries and preserves with equal amounts of blueberries and blueberry preserves, then add 1 teaspoon lemon zest for a brighter finish.
- Scatter 1/3 cup mini semisweet chocolate chips under the crumble for a chocolate raspberry version like the stacked bars in the visual reference.
- Replace 1/2 cup rolled oats with sliced almonds and add 1/2 teaspoon almond extract for a nuttier and slightly crisper top.
- Reduce the brown sugar to 1/2 cup and use no-sugar-added preserves for a less sweet bar with a paler and softer crumble.
Storage Instructions
Store cooled bars in a shallow airtight container with parchment between layers. Keep them refrigerated for up to 5 days because the fresh raspberry filling stays softer than plain jam. For freezing, wrap each bar twice and place them in a sealed freezer bag for 2 months. Thaw one bar overnight in the refrigerator or for 45 minutes at room temperature.
Don’t stack unwrapped pieces because the filling can glue them together. Reheat a thawed bar at 300°F for 8 to 10 minutes to refresh the oat edges. For a softer bar, microwave it for 10 to 15 seconds and let it stand 1 minute. Add two fresh raspberries after warming because heated garnish collapses quickly.
Discard bars with a fermented smell, visible mold or wet filling that has separated from the crust. Those signs mean the berry layer has started spoiling.
Print
Raspberry Breakfast Bars
- Total Time: 1 hour 54 minutes
- Yield: 9 bars servings 1x
Description
These Raspberry Breakfast Bars are an easy and quick bake for brunch, meal prep or a casual party. The simple oat crust turns crisp at the edges while the center stays soft with a glossy raspberry layer that smells bright and jammy. The trick is mixing fresh berries with preserves and cornstarch, which gives the best slice without a runny filling. They’re a healthy breakfast choice for busy mornings and one of my favorite ideas for sharing at a holiday breakfast.
Ingredients
- 2 cups old-fashioned rolled oats
- 1 cup white whole wheat flour
- 3/4 cup light brown sugar
- 1/2 teaspoon baking powder
- 1 teaspoon ground cinnamon
- 1/4 teaspoon fine sea salt
- 10 tablespoons unsalted butter
- 1 large egg
- 1 teaspoon pure vanilla extract
- 1 1/2 cups fresh raspberries
- 3/4 cup seedless raspberry preserves
- 1 tablespoon fresh lemon juice
- 1 tablespoon cornstarch
Instructions
- Set the oven to 350°F and keep the cubed butter near 40°F. Stir the rolled oats, white whole wheat flour, light brown sugar, baking powder, cinnamon and sea salt for 30 seconds. Then work in the butter with quick pinching motions for 3 minutes. Fold in the egg and vanilla for another 60 to 90 seconds. The mixture should look sandy with uneven pea-size clumps and a few larger walnut-size pieces. You’ll smell cinnamon and brown sugar before the dough starts holding when squeezed. Stop within 5 minutes after adding the egg because extra mixing makes the base tough. Cold butter keeps the crumble tender instead of greasy.
- Keep the oven at 350°F. Press two thirds of the oat mixture into the lined 9-inch pan for 2 minutes using firm overlapping fingertip presses. Reserve nine whole raspberries. Then crush the remaining raspberries lightly and stir them with preserves, lemon juice and cornstarch for 45 seconds. Spread the filling over the base within 1/2 inch of every edge. The base should look compact but still show individual oat flakes. Meanwhile, the berry layer should turn thick and glossy with rough raspberry pockets and deep ruby streaks. Finish this step within 5 minutes so the butter stays cool. Push filling against the pan edge and it can bubble underneath the crust. A sealed oat border keeps the berry layer from soaking through.
- Keep the oven steady at 350°F. Pinch the remaining oat mixture into irregular 1/2-inch and 1-inch clusters for 60 to 90 seconds. Scatter those pieces from left to right so some berry filling stays visible. Then press only five or six clusters lightly with two fingertips. Don’t flatten the whole surface or force the crumbs into a solid lid. The topping should look uneven with rolled oats exposed and glossy raspberry showing through several gaps. You’ll see larger crumbs near one corner and finer crumbs along the opposite edge. Move the pan into the oven within 3 minutes because warm butter spreads instead of crumbling. Pack the topping tightly and steam can make it gummy. Open gaps let moisture escape while the oat clusters crisp.
- Bake the pan at 350°F for 30 to 34 minutes. Rotate it 180 degrees at minute 18 so the back edge doesn’t darken first. Don’t open the oven before minute 18 because the crumb structure still feels fragile. (I tried 375°F first, the top browned before the berry center stopped sloshing. 350°F is the fix.) The edges should turn deep golden while the middle stays one shade lighter. You’ll see slow raspberry bubbles in three or four gaps and smell toasted oats near minute 30. Remove the pan when the center reaches 195°F. Go past 34 minutes and the preserves can set hard after cooling. Moderate heat sets the oat base before the berry sugars scorch.
- Cool the pan at about 70°F for 60 minutes. Lift the slab out and cut it into nine 3-inch squares with one firm downward motion per cut. Wipe the blade after every slice. Then place one bar on a small white plate and add three reserved raspberries beside it. Don’t chill before slicing because the butter can become overly firm. The cut face should show a compact golden base, a glossy ruby center and an uneven oat crumble. The filling should hold its shape but remain soft when pressed. Cut before 45 minutes and berry streaks will drag through the crumbs. Finally, serve at room temperature within 2 hours for the clearest flavor. Full cooling lets the starch set before the bars are sliced.
Notes
Pro Tips:
- Weigh the white whole wheat flour at about 120 grams. An extra 20 grams can turn the oat base dry and sandy.
- Choose thick raspberry preserves with at least 45 percent fruit. Thin syrupy jam can leak under the base during the 30-minute bake.
- Keep butter cubes below 45°F and about 1/2 inch wide. Smaller warm pieces disappear into the flour and reduce the rough crumble.
- Leave a 2-inch parchment overhang on two sides. It supports the warm slab and prevents the center from bending during removal.
- Microwave stiff preserves for only 10 seconds before mixing. Longer heating loosens them too much and encourages a runny berry layer.
- Use a light-colored metal pan and begin checking at minute 30. Dark pans can deepen the bottom crust about 5 minutes sooner.
- Wait the full 60 minutes before cutting. The center should feel set and show no wet berry trail on the blade.
Storage: Store cooled bars in a shallow airtight container with parchment between layers. Keep them refrigerated for up to 5 days because the fresh raspberry filling stays softer than plain jam. For freezing, wrap each bar twice and place them in a sealed freezer bag for 2 months. Thaw one bar overnight in the refrigerator or for 45 minutes at room temperature. Don’t stack unwrapped pieces because the filling can glue them together. Reheat a thawed bar at 300°F for 8 to 10 minutes to refresh the oat edges. For a softer bar, microwave it for 10 to 15 seconds and let it stand 1 minute. Add two fresh raspberries after warming because heated garnish collapses quickly. Discard bars with a fermented smell, visible mold or wet filling that has separated from the crust. Those signs mean the berry layer has started spoiling.
- Prep Time: 20 minutes
- Cook Time: 34 minutes
- Category: Breakfast
- Cuisine: American
Nutrition
- Serving Size: 1 serving (of 9)
- Calories: 559
- Sugar: 33g
- Sodium: 122mg
- Fat: 18g
- Carbohydrates: 99g
- Fiber: 12g
- Cholesterol: 54mg
Frequently Asked Questions
Yes, bake the bars up to 2 days before serving and cool them for 60 minutes before slicing. Store them in one layer at 40°F or colder so the berry center stays firm. Before brunch, rest them at room temperature for 20 minutes to soften the oat base.
The berries probably released more juice than the cornstarch could catch. Use 1 tablespoon cornstarch for 1 1/2 cups berries and keep filling 1/2 inch from the edges. Bake until slow bubbles appear and the center reaches 195°F, then cool at least 45 minutes before cutting.
Yes, but keep the raspberries frozen until mixing so they don’t flood the filling early. Use the same 1 1/2-cup amount and add 1 extra teaspoon cornstarch. Bake at 350°F for 3 to 5 extra minutes, then cool fully because the center stays slightly softer.
Double every ingredient and use a 9 by 13-inch light-colored metal pan. Keep the layer thickness close to the original and check the center after 34 minutes. It usually needs 38 to 42 minutes at 350°F, with one 180-degree rotation at minute 22.
Serve one bar with 3/4 cup plain Greek yogurt and three fresh raspberries for a balanced breakfast. For brunch, add eggs and hot coffee to the table. Warm the bars for 8 minutes at 300°F first because gentle heat refreshes the crumble without loosening the filling.
Wrap fully cooled bars separately and freeze them for up to 2 months. Thaw overnight in the refrigerator or for 45 minutes at room temperature. Reheat at 300°F for 8 to 10 minutes, then rest 2 minutes because the raspberry center holds heat longer.
Final Thoughts
This is the kind of breakfast recipe I wish I had found years ago. It would have saved me so many rushed Monday mornings.
But now that I have it, I make it all the time because that glossy berry layer and rough oat crumble feel extra special. If you enjoyed this, check out my Egg and Cheese Breakfast Sandwich or Classic Rice Krispie Treats.
And leave a comment, I read every single one and it really makes my day.