Seriously, no joke, this is the best easy no bake cheesecake. It’s the one my mom, and before that, my grandma has made for years. It’s a classic dessert with simple, delicious ingredients. Cream cheese is mixed with sugar, vanilla, lemon juice, and fluffy whipped cream over a buttery graham cracker crust.
Perfect for holidays or an easy make ahead dessert with fresh berries on top! A classic no bake cheesecake recipe is one of my go-to easy desserts. Not only does it make for a super delicious treat, but it’s cool, creamy, and always keeps everyone happy for hours. Also, there’s no complicated methods or ingredients needed.
And make ahead prep’s a cinch. I often make a cheesecake on Sunday to enjoy for dessert that night and another slice on Monday and Tuesday. With just a few basic ingredients probably already in the fridge and pantry, you can whip up a cheesecake to serve plain or top it with fruit or even spoon on a little jam for a fancy dessert everyone loves!
Ingredients
Here’s what I use for this recipe and you can always make substitutions if you prefer.
- graham cracker crumbs: They create the sweet, sandy base that gives the cheesecake its classic crust.
- granulated sugar: This sweetens both the crust and the filling for a balanced flavor.
- unsalted butter, melted: It binds the graham cracker crumbs so the crust presses together neatly.
- cream cheese, softened: This is the rich and tangy base that gives the filling its smooth cheesecake texture.
- powdered sugar: It sweetens the filling while helping it stay silky and lump free.
- vanilla extract: Vanilla rounds out the flavor and makes the filling taste fuller and more dessert-like.
- fresh lemon juice: A little lemon brightens the filling and balances the richness of the cream cheese.
- heavy whipping cream: Whipped cream lightens the filling and makes it airy, soft, and creamy.
- fresh strawberries: They add a fresh, juicy topping that looks beautiful and pairs perfectly with the creamy filling.
Tools You’ll Need
- mixing bowl: For combining the crust and filling ingredients.
- hand mixer: Helps create a smooth filling and fluffy whipped cream.
- rubber spatula: Useful for folding and smoothing the filling.
- 9 inch pie dish or springform pan: Use whichever shape you prefer for serving.
- measuring cups and spoons: For accurate ingredient portions.
- knife: For slicing the strawberries and cutting clean cheesecake slices.
Instructions
Step 1: Mix the graham cracker crust base
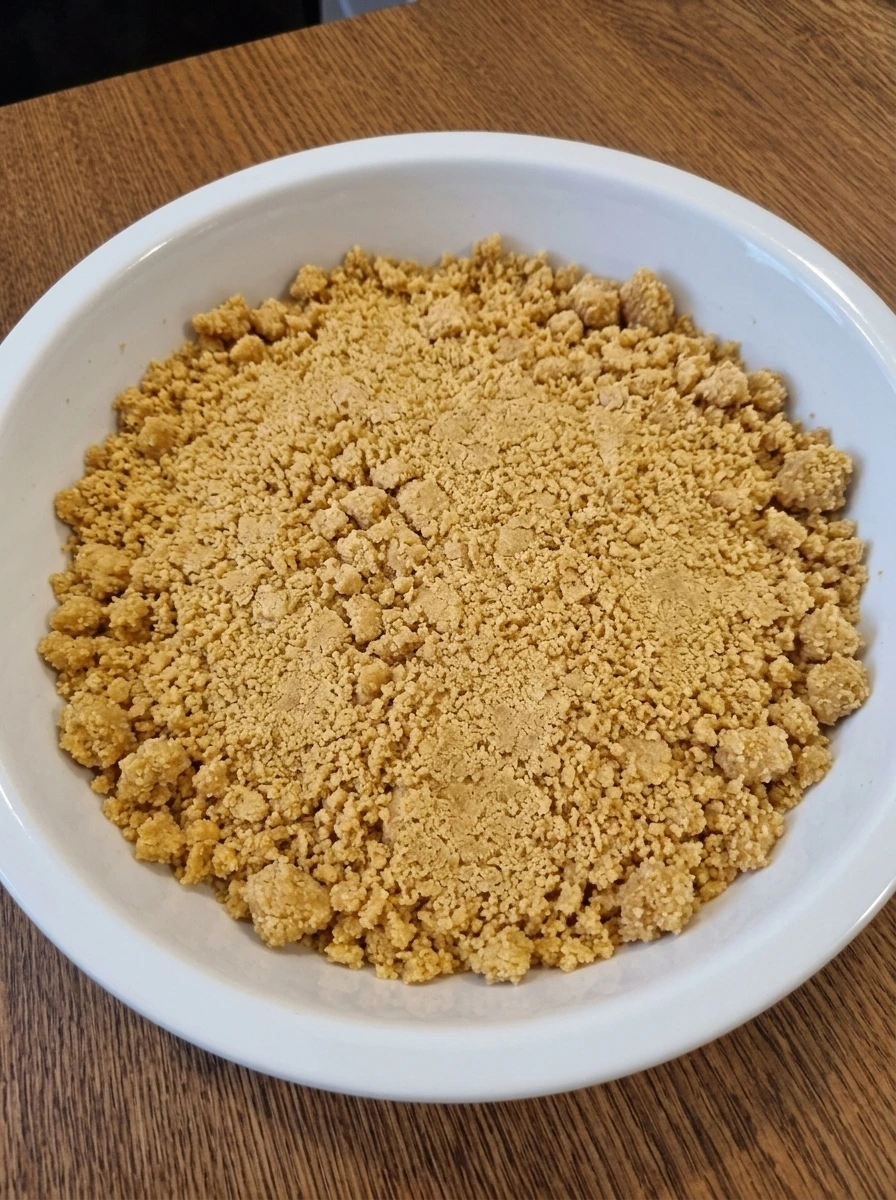
Add the graham cracker crumbs, a little granulated sugar, and the melted butter to a round white ceramic pie dish. Stir until every crumb looks evenly coated and the mixture turns from dry and sandy into a darker, moist crumb with a texture that holds together when pressed. At this stage, nothing is cooked and there are no signs of heat. The mixture should look loose but damp, with tiny buttery clusters throughout and no dry patches of crumbs left behind in the dish.
Tip: If the crumbs still look dusty, add one more small spoonful of melted butter.
Step 2: Press the crust into the dish
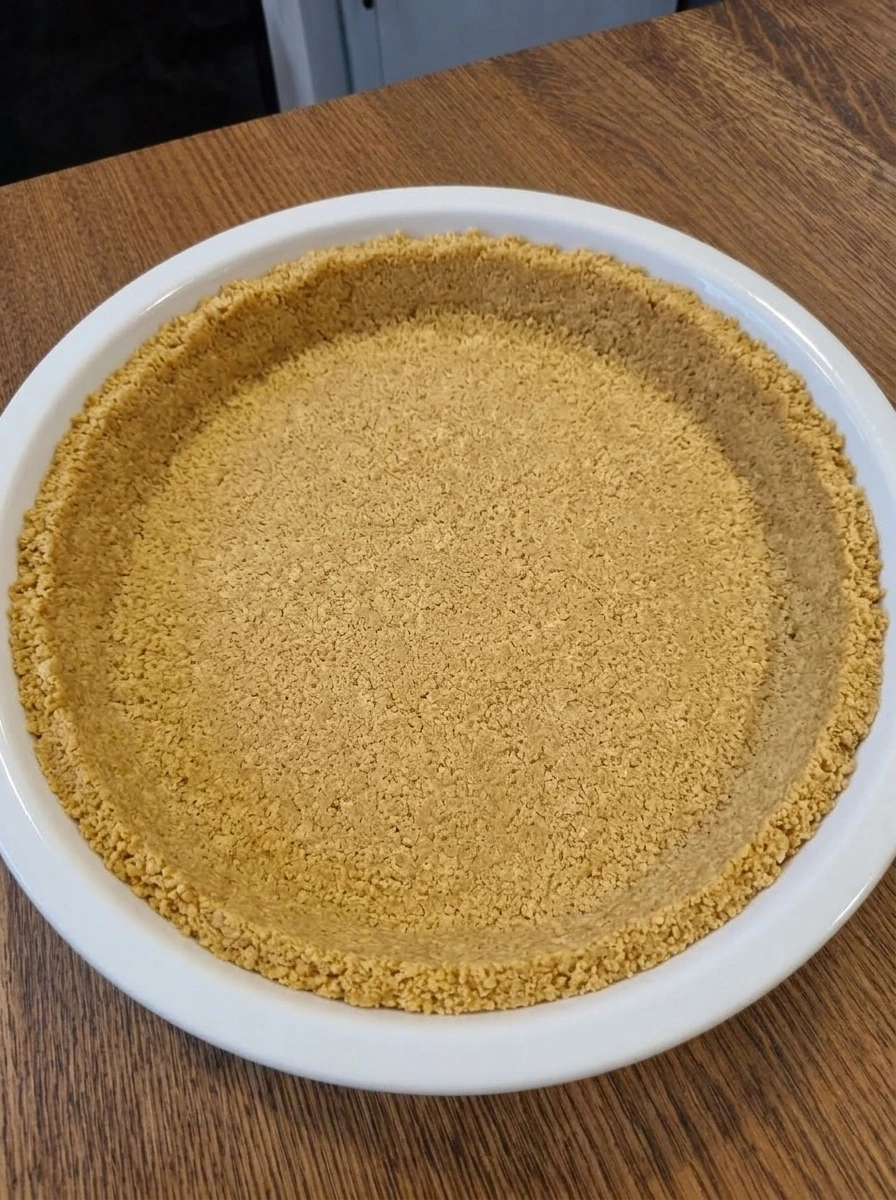
Press the buttered crumbs firmly across the bottom and slightly up the sides of the round white ceramic pie dish. The loose mixture changes into a compact crust with a flat surface, tidy edges, and a more solid appearance that holds its shape. The crust remains completely uncooked, but it should now look packed and even instead of crumbly and loose. You want a smooth layer with no deep cracks, thin spots, or piles of crumbs gathered in one area.
Tip: Use the bottom of a cup to make the crust level and firm.
Step 3: Beat the cream cheese filling base
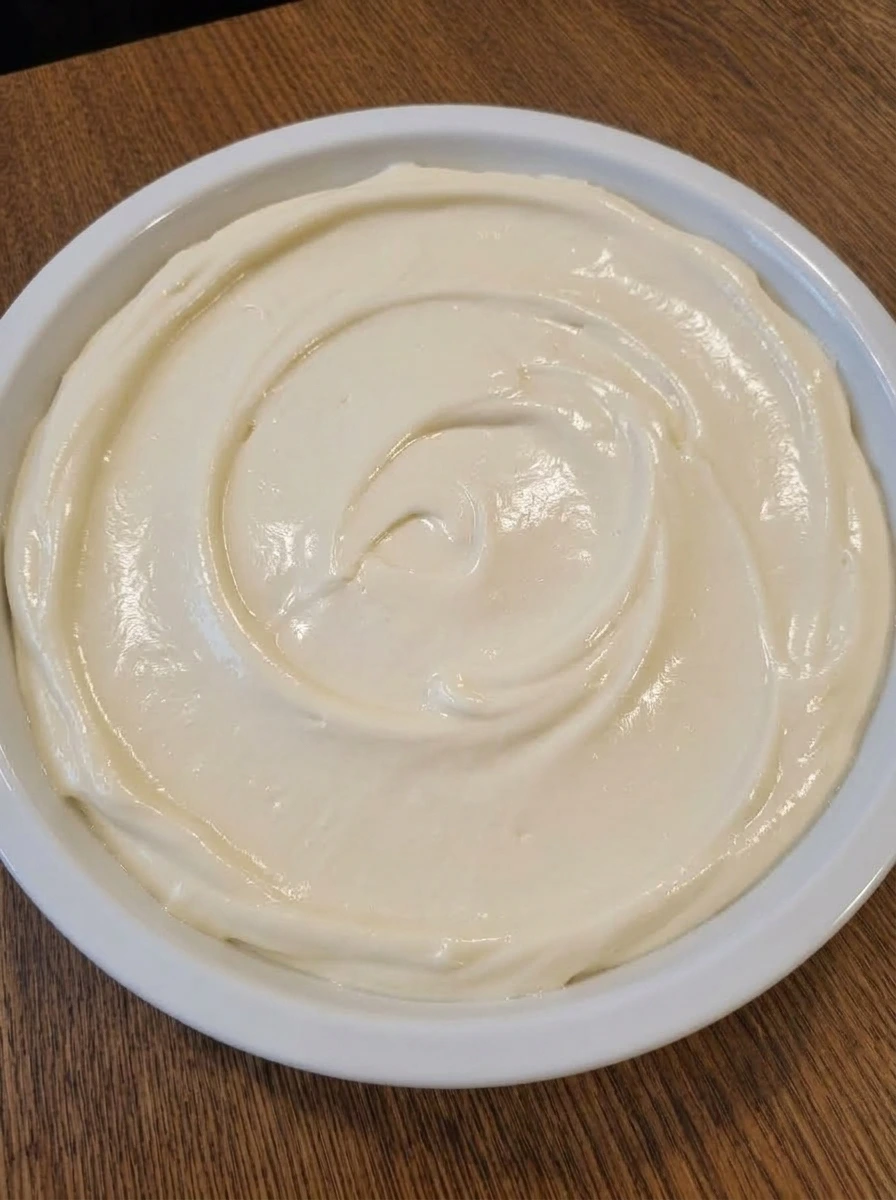
In the same round white ceramic pie dish, combine the softened cream cheese, powdered sugar, vanilla extract, and lemon juice and mix until smooth. The mixture changes from thick separate ingredients into a pale cream colored base that looks glossy, dense, and free of lumps. This stage is still fully uncooked with no signs of heat. The filling should look rich and spreadable, with a silky surface and soft swirls left behind from mixing instead of grainy streaks or little bits of cream cheese.
Tip: Softened cream cheese mixes much more smoothly than cold cream cheese.
Step 4: Whip the cream until fluffy
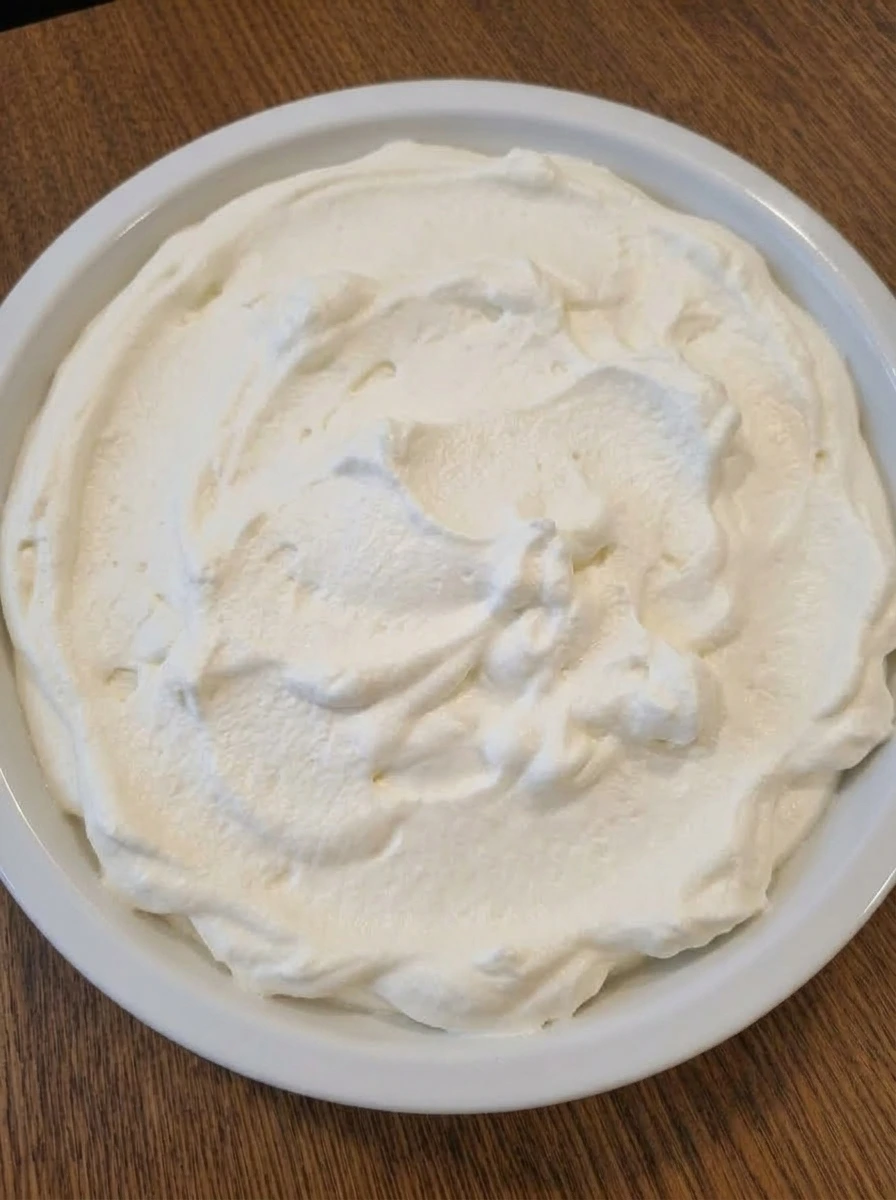
Add the heavy whipping cream and whip until it thickens and becomes fluffy. Visually, the liquid cream transforms into a brighter white mixture with soft peaks, more volume, and a lighter texture that looks airy instead of pourable. The cream remains uncooked and cool with no signs of heat. It should stand up in soft mounds and leave pillowy ridges in the round white ceramic pie dish without looking grainy, separated, or overly stiff.
Tip: Stop whipping as soon as the cream holds soft peaks for the best texture.
Step 5: Fold the filling until light and smooth
Fold the whipped cream into the cream cheese mixture until fully combined. The filling changes from a heavy dense base into a lighter, fluffier cheesecake mixture with a soft, cloudlike body and an even pale ivory color all the way through. This is still an uncooked step with no signs of heat. The finished filling should look thick enough to hold gentle swirls, but soft enough to spread easily, with no white streaks of whipped cream or dense patches of cream cheese left behind.
Tip: Fold gently so the filling stays airy and does not deflate.
Step 6: Spread the filling over the crust
Spoon the cheesecake filling over the prepared crust and spread it all the way to the edges. The dish now clearly shows two layers: a firm golden graham crust on the bottom and a thick pale filling on top with a smooth, level surface. Everything is still uncooked with no signs of heat. Once spread, the top should look even and creamy, with soft spatula marks or light swirls and no gaps where the crust peeks through the filling.
Tip: Tap the dish gently to settle the filling into an even layer.
Step 7: Chill until firm and slice the strawberries
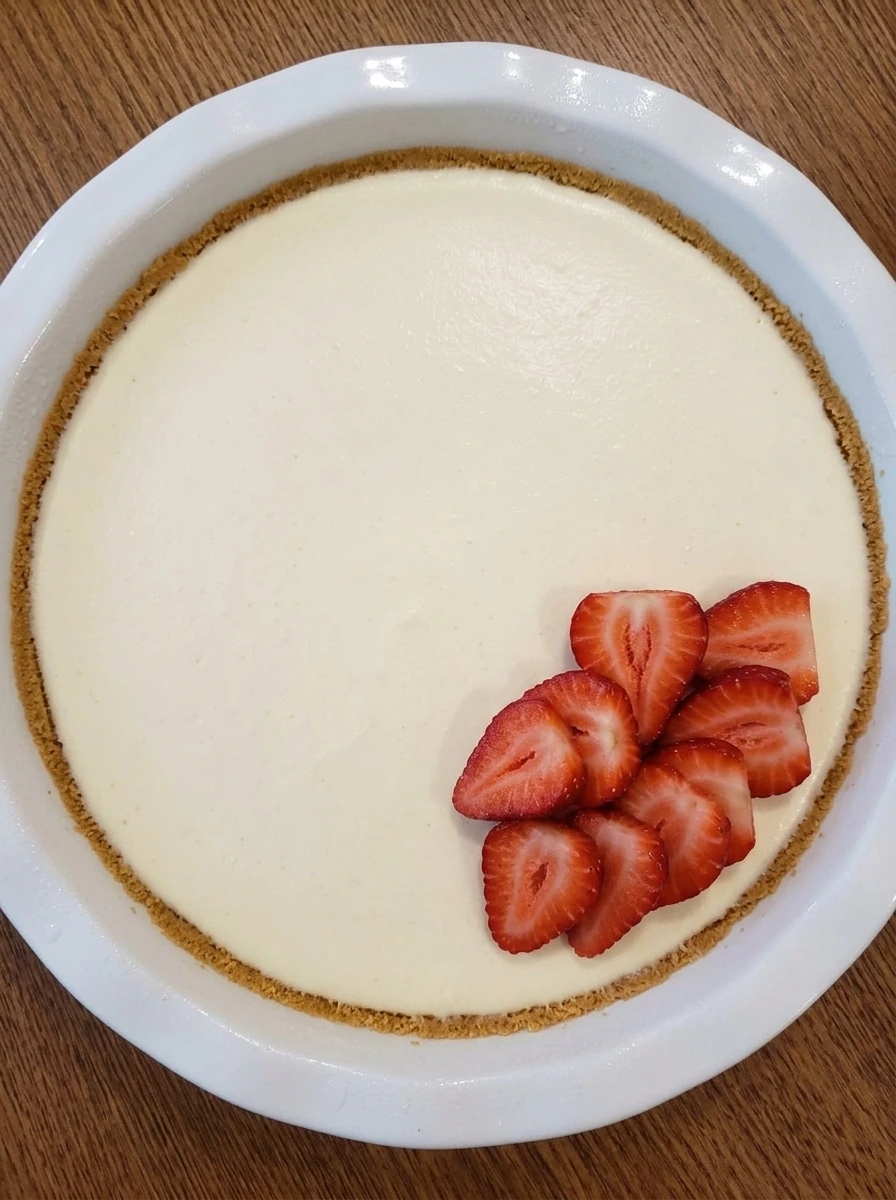
Let the assembled cheesecake rest until the filling looks firmer and cleaner around the edges. While it chills, slice the strawberries into thin pieces so they are ready to arrange on top. The cheesecake surface changes from very soft and freshly spread to a more set finish that holds its shape better. This remains a no heat stage with no signs of cooking. The filling should look cool, smooth, and stable enough for topping, while the sliced strawberries appear glossy, juicy, and bright red with pale centers.
Tip: Chill long enough that the center no longer looks loose when the dish is gently moved.
Step 8: Top, slice, and plate the cheesecake
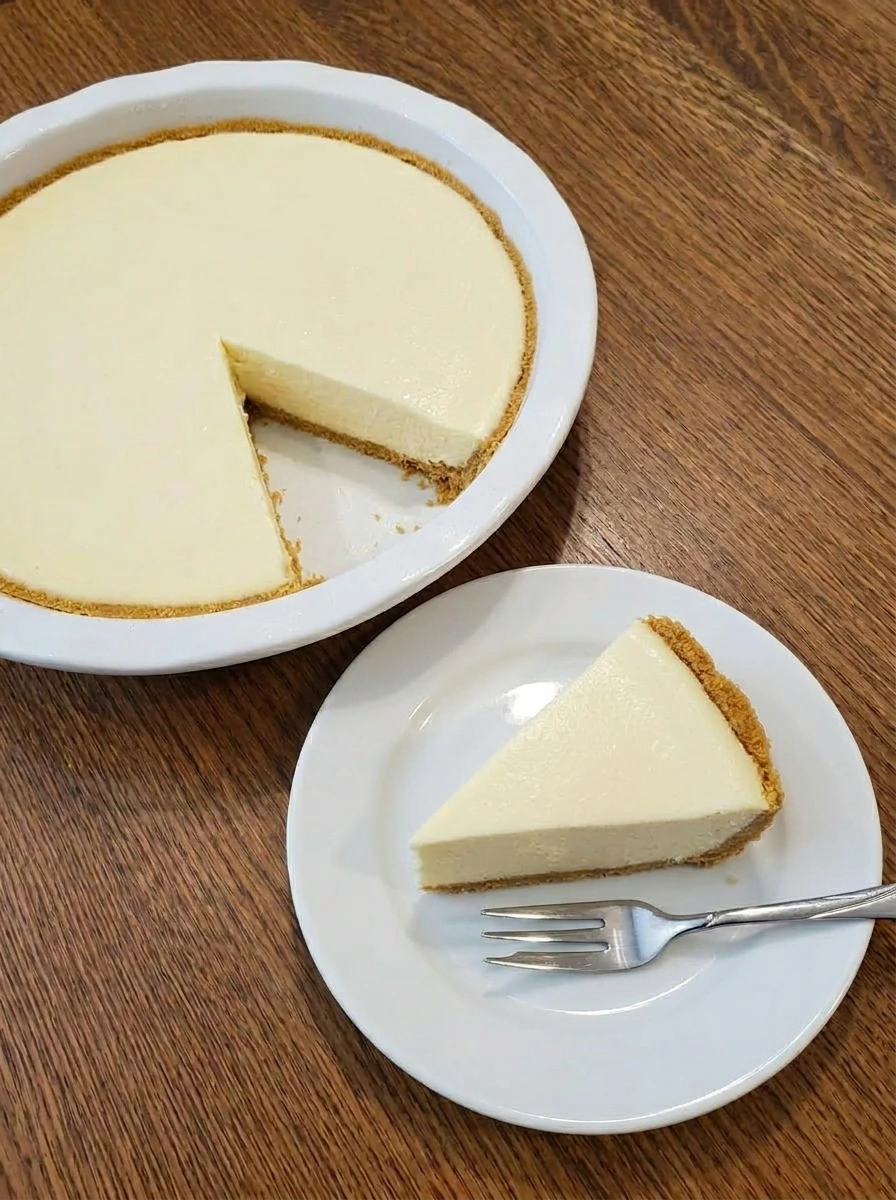
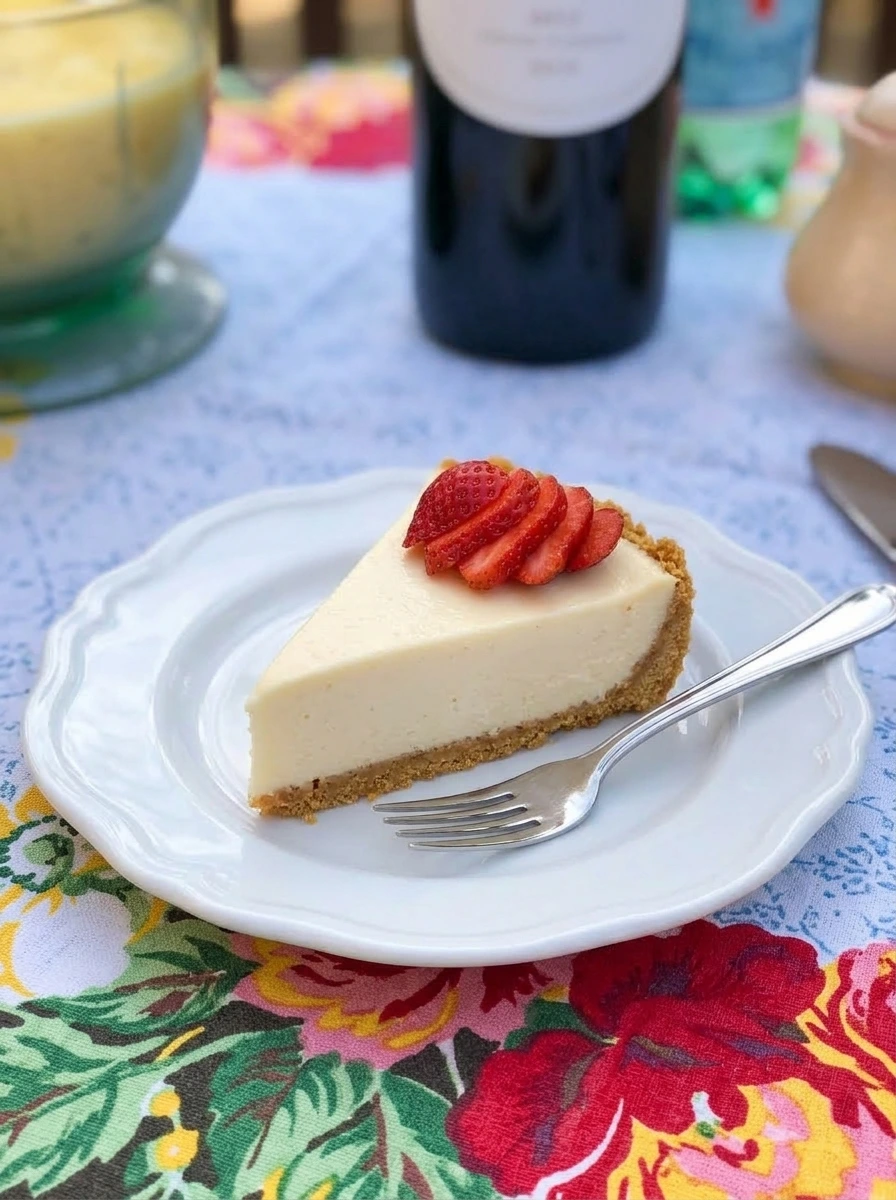
Arrange the sliced strawberries over the top of the chilled cheesecake, then cut a neat slice and plate it. The finished dessert looks creamy and fully set, with distinct layers, a tidy crust, a smooth filling, and a bright fresh fruit topping that makes the whole cheesecake look ready to serve. This final dish is fully assembled and served cold with no signs of heat. On the plate, the slice should hold its shape with clean edges, a firm crust, and a soft creamy center, while the strawberries add glossy color across the top.
Tip: Wipe the knife between cuts for the cleanest slices.
Pro Tips
- Use fully softened cream cheese so the filling turns out extra smooth.
- Whip the cream just to soft peaks so the cheesecake stays light and creamy.
- Press the crust firmly so it slices cleanly after chilling.
- Chill the cheesecake long enough before serving so every slice holds its shape.
Storage Instructions
Store the cheesecake covered in the fridge for up to 4 days, and keep the slices chilled until serving time so the filling stays firm and creamy. You can also freeze the whole cheesecake or individual slices for up to 1 month if they are wrapped well and stored in an airtight container. Thaw overnight in the fridge before serving, and since this is a cold dessert, there is no reheating needed at all.
Frequently Asked Questions
Can I make easy no bake cheesecake ahead of time?
Yes, this is a great make ahead dessert. In fact, it usually tastes even better after a good chill because the filling has more time to firm up. You can make it the day before serving and keep it covered in the fridge until you are ready to slice it.
Can I use a different topping instead of strawberries?
Absolutely, this cheesecake works well with many toppings. Blueberries, raspberries, cherry topping, lemon curd, or even a spoonful of jam all taste great. Just add the topping after the cheesecake has chilled and set so the surface stays neat.
Why is my no bake cheesecake too soft?
A soft cheesecake usually means the filling needed more chilling time or the whipped cream was not thick enough before folding. It can also happen if the cream cheese was too warm and loose when mixed. Letting it chill longer in the fridge usually helps the slices hold together much better.
Can I freeze no bake cheesecake?
Yes, no bake cheesecake freezes surprisingly well. Wrap it tightly so it stays fresh and does not absorb freezer odors. Thaw it in the fridge before serving, and add fresh fruit after thawing for the best texture and appearance.
Final Thoughts
This is the kind of recipe I wish I had found years ago. It would have saved me so many last minute dessert worries.
But now that I have it, I make it all the time and I think you will too. If you enjoyed this, check out some of my other popular recipes on the blog.
And leave a comment, I read every single one and it really makes my day.
Print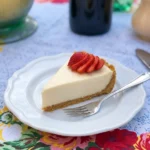
Easy No Bake Cheesecake
- Total Time: 4 hours 20 minutes
- Yield: 8 servings
Description
Looking for the best easy no bake cheesecake? This one is quick, easy, and wonderfully creamy with simple ingredients and foolproof results. Whether you are after healthy dessert ideas or a simple holiday treat, this delivers every time. Great for weeknight dinner, meal prep, brunch, potluck, and party tables. Save this easy no bake cheesecake for your next holiday, brunch, or party!
Ingredients
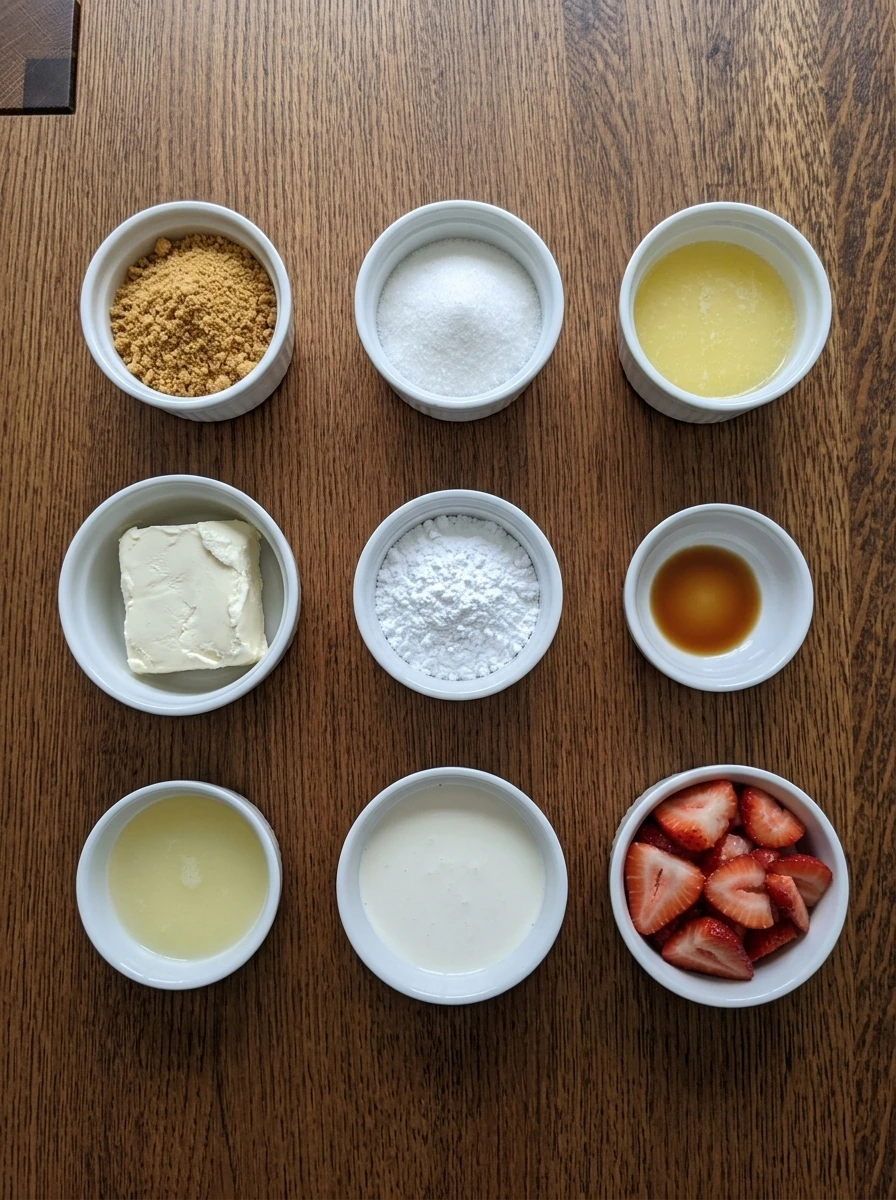
- 2 cups graham cracker crumbs
- 1/4 cup granulated sugar
- 1/2 cup unsalted butter, melted
- 16 ounces cream cheese, softened
- 3/4 cup powdered sugar
- 2 teaspoons vanilla extract
- 1 tablespoon fresh lemon juice
- 1 cup heavy whipping cream
- 1 cup, sliced fresh strawberries
Instructions
- Add the graham cracker crumbs, a little granulated sugar, and the melted butter to a round white ceramic pie dish. Stir until every crumb looks evenly coated and the mixture turns from dry and sandy into a darker, moist crumb with a texture that holds together when pressed. At this stage, nothing is cooked and there are no signs of heat. The mixture should look loose but damp, with tiny buttery clusters throughout and no dry patches of crumbs left behind in the dish.
- Press the buttered crumbs firmly across the bottom and slightly up the sides of the round white ceramic pie dish. The loose mixture changes into a compact crust with a flat surface, tidy edges, and a more solid appearance that holds its shape. The crust remains completely uncooked, but it should now look packed and even instead of crumbly and loose. You want a smooth layer with no deep cracks, thin spots, or piles of crumbs gathered in one area.
- In the same round white ceramic pie dish, combine the softened cream cheese, powdered sugar, vanilla extract, and lemon juice and mix until smooth. The mixture changes from thick separate ingredients into a pale cream colored base that looks glossy, dense, and free of lumps. This stage is still fully uncooked with no signs of heat. The filling should look rich and spreadable, with a silky surface and soft swirls left behind from mixing instead of grainy streaks or little bits of cream cheese.
- Add the heavy whipping cream and whip until it thickens and becomes fluffy. Visually, the liquid cream transforms into a brighter white mixture with soft peaks, more volume, and a lighter texture that looks airy instead of pourable. The cream remains uncooked and cool with no signs of heat. It should stand up in soft mounds and leave pillowy ridges in the round white ceramic pie dish without looking grainy, separated, or overly stiff.
- Fold the whipped cream into the cream cheese mixture until fully combined. The filling changes from a heavy dense base into a lighter, fluffier cheesecake mixture with a soft, cloudlike body and an even pale ivory color all the way through. This is still an uncooked step with no signs of heat. The finished filling should look thick enough to hold gentle swirls, but soft enough to spread easily, with no white streaks of whipped cream or dense patches of cream cheese left behind.
- Spoon the cheesecake filling over the prepared crust and spread it all the way to the edges. The dish now clearly shows two layers: a firm golden graham crust on the bottom and a thick pale filling on top with a smooth, level surface. Everything is still uncooked with no signs of heat. Once spread, the top should look even and creamy, with soft spatula marks or light swirls and no gaps where the crust peeks through the filling.
- Let the assembled cheesecake rest until the filling looks firmer and cleaner around the edges. While it chills, slice the strawberries into thin pieces so they are ready to arrange on top. The cheesecake surface changes from very soft and freshly spread to a more set finish that holds its shape better. This remains a no heat stage with no signs of cooking. The filling should look cool, smooth, and stable enough for topping, while the sliced strawberries appear glossy, juicy, and bright red with pale centers.
- Arrange the sliced strawberries over the top of the chilled cheesecake, then cut a neat slice and plate it. The finished dessert looks creamy and fully set, with distinct layers, a tidy crust, a smooth filling, and a bright fresh fruit topping that makes the whole cheesecake look ready to serve. This final dish is fully assembled and served cold with no signs of heat. On the plate, the slice should hold its shape with clean edges, a firm crust, and a soft creamy center, while the strawberries add glossy color across the top.
Notes
Pro Tips:
- Use fully softened cream cheese so the filling turns out extra smooth.
- Whip the cream just to soft peaks so the cheesecake stays light and creamy.
- Press the crust firmly so it slices cleanly after chilling.
- Chill the cheesecake long enough before serving so every slice holds its shape.
Storage: Store the cheesecake covered in the fridge for up to 4 days, and keep the slices chilled until serving time so the filling stays firm and creamy. You can also freeze the whole cheesecake or individual slices for up to 1 month if they are wrapped well and stored in an airtight container. Thaw overnight in the fridge before serving, and since this is a cold dessert, there is no reheating needed at all.
- Prep Time: 20 minutes
- Cook Time: 0 minute
- Category: Dessert
- Cuisine: American