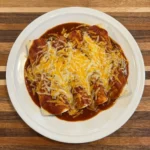
This Baked BBQ Chicken Drumsticks recipe is an easy, comforting dinner that comes together so quickly in the kitchen! With juicy chicken, a sticky flavorful BBQ coating and perfectly seasoned drumsticks.
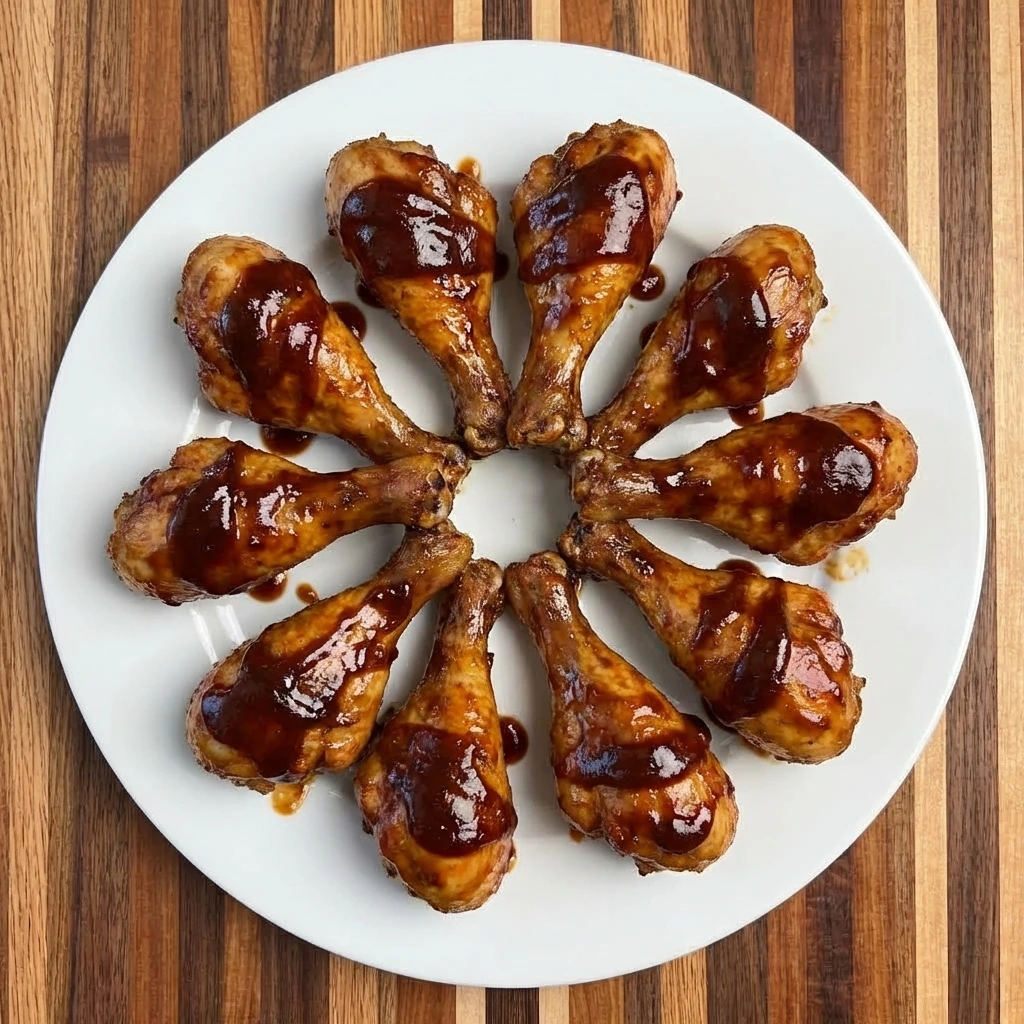
We love simple dinners because it means that easy meals like these Baked BBQ Chicken Drumsticks are back on the table. Comfort foods, especially those that are satisfying and full of bold flavor, are my favorite kinds of meals!
Ingredients
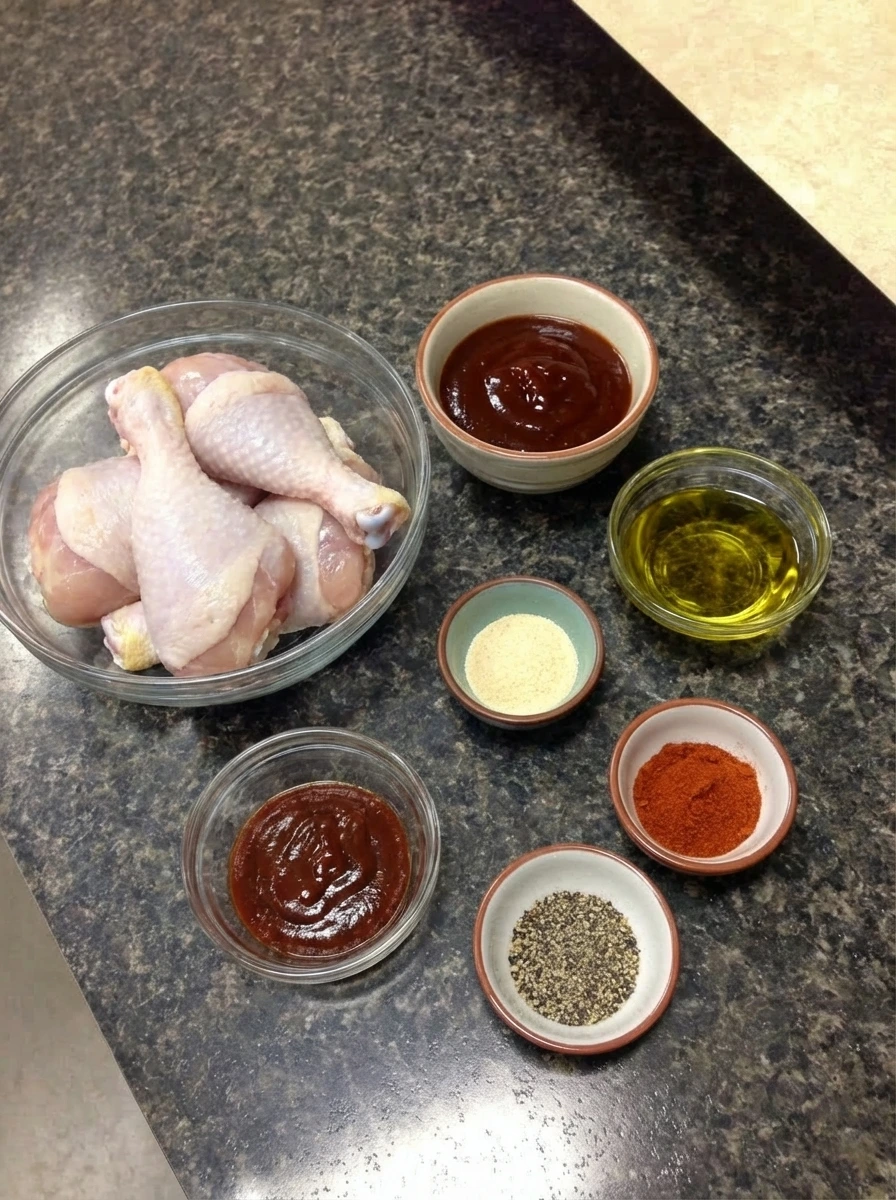
Here’s what I use for this recipe and you can always make substitutions if you prefer.
- chicken drumsticks: The main protein that becomes tender and flavorful when coated.
- BBQ sauce: Adds smoky sweetness and creates the signature sticky coating.
- olive oil: Helps the seasoning stick and keeps the chicken moist.
- garlic powder: Adds a rich savory depth to the flavor.
- paprika: Gives color and a mild smoky taste.
- salt: Enhances all the flavors in the recipe.
- black pepper: Adds a slight kick and balance.
Tools You’ll Need
- Mixing bowl (For coating and seasoning)
- Baking tray (For arranging drumsticks)
- Measuring spoons (For accurate seasoning)
Instructions
Step 1: Prepare the chicken
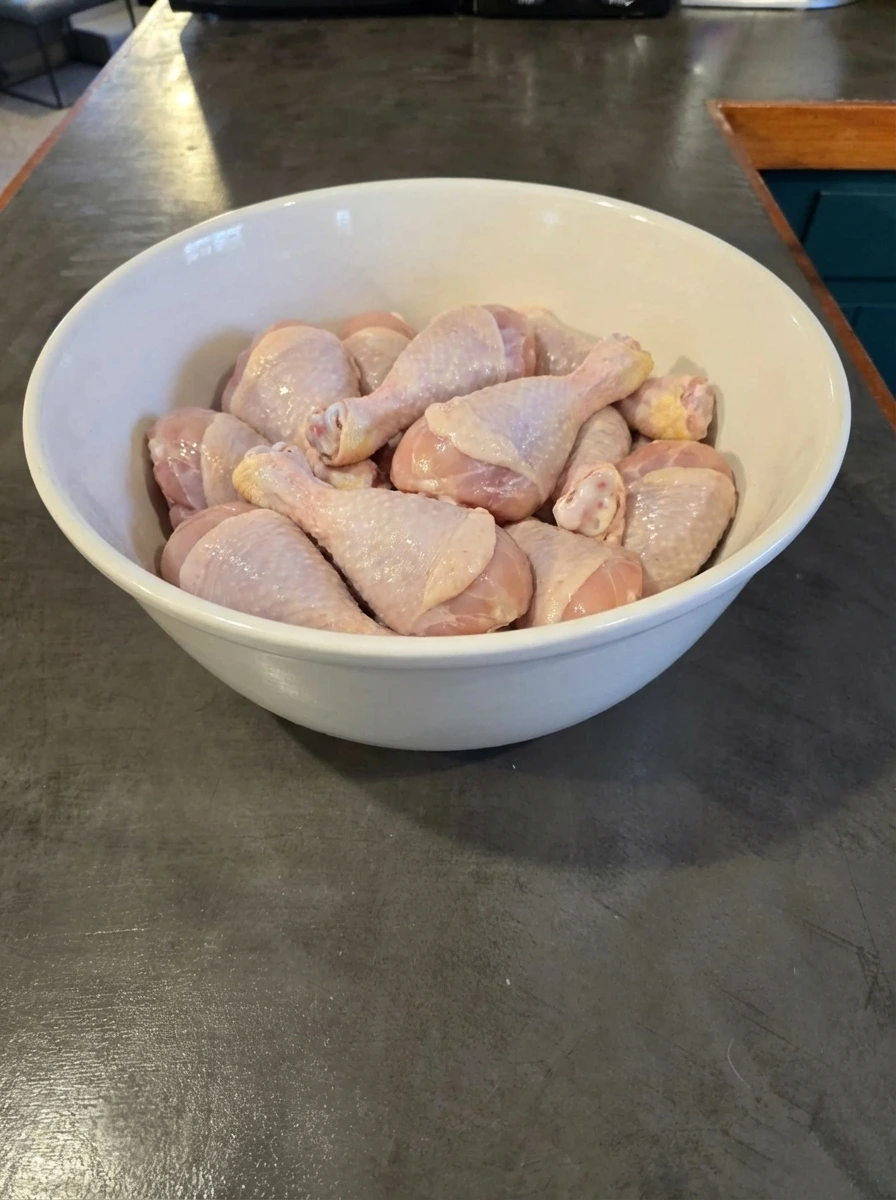
Place the chicken drumsticks into a large mixing bowl and pat them dry to remove excess moisture. This step helps the seasoning stick better and ensures an even coating. Make sure the drumsticks are evenly sized so they cook consistently later. Arrange them in the bowl so each piece is separated and easy to season.
Tip: Dry chicken helps seasoning stick better
Step 2: Season the drumsticks
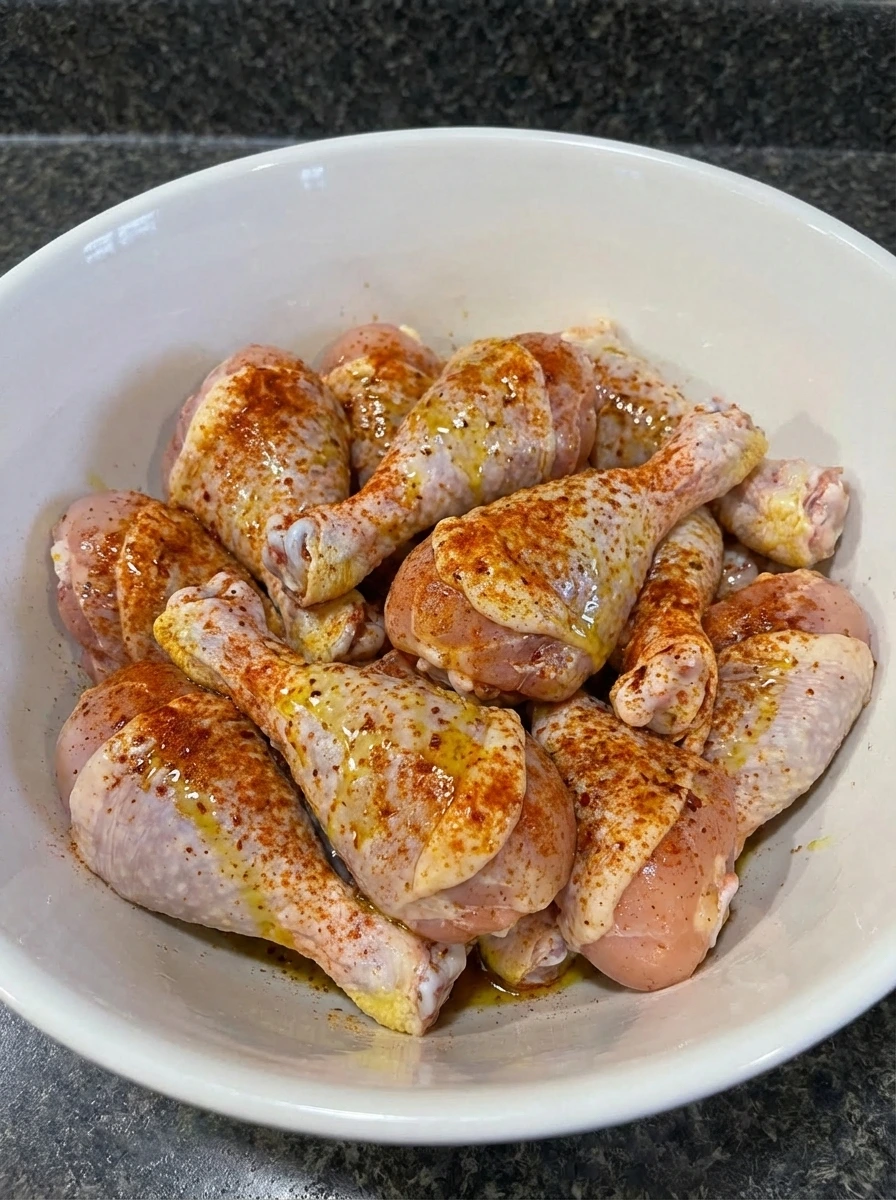
Drizzle olive oil over the chicken drumsticks in the bowl. Sprinkle garlic powder, paprika, salt, and black pepper evenly across all pieces. Use a spoon or gently turn the drumsticks to coat them completely with the seasoning mixture. Make sure every piece is evenly covered for consistent flavor.
Tip: Coat every piece evenly for best taste
Step 3: Add BBQ sauce
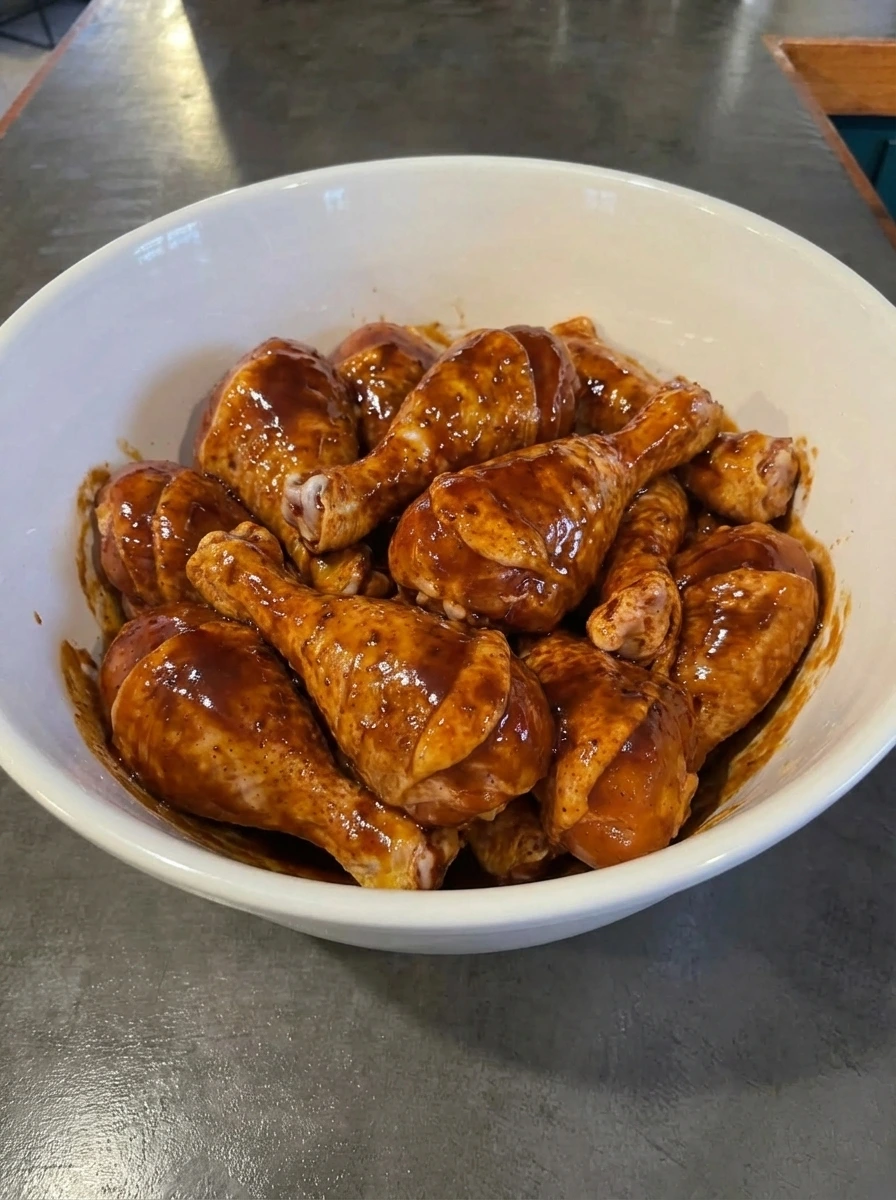
Pour the BBQ sauce over the seasoned drumsticks in the bowl. Make sure the sauce is evenly distributed across all pieces. Mix thoroughly until every drumstick is fully coated in a thick, glossy layer of sauce. The coating should be rich and evenly spread without dry spots.
Tip: Use thick BBQ sauce for better coating
Step 4: Arrange on tray
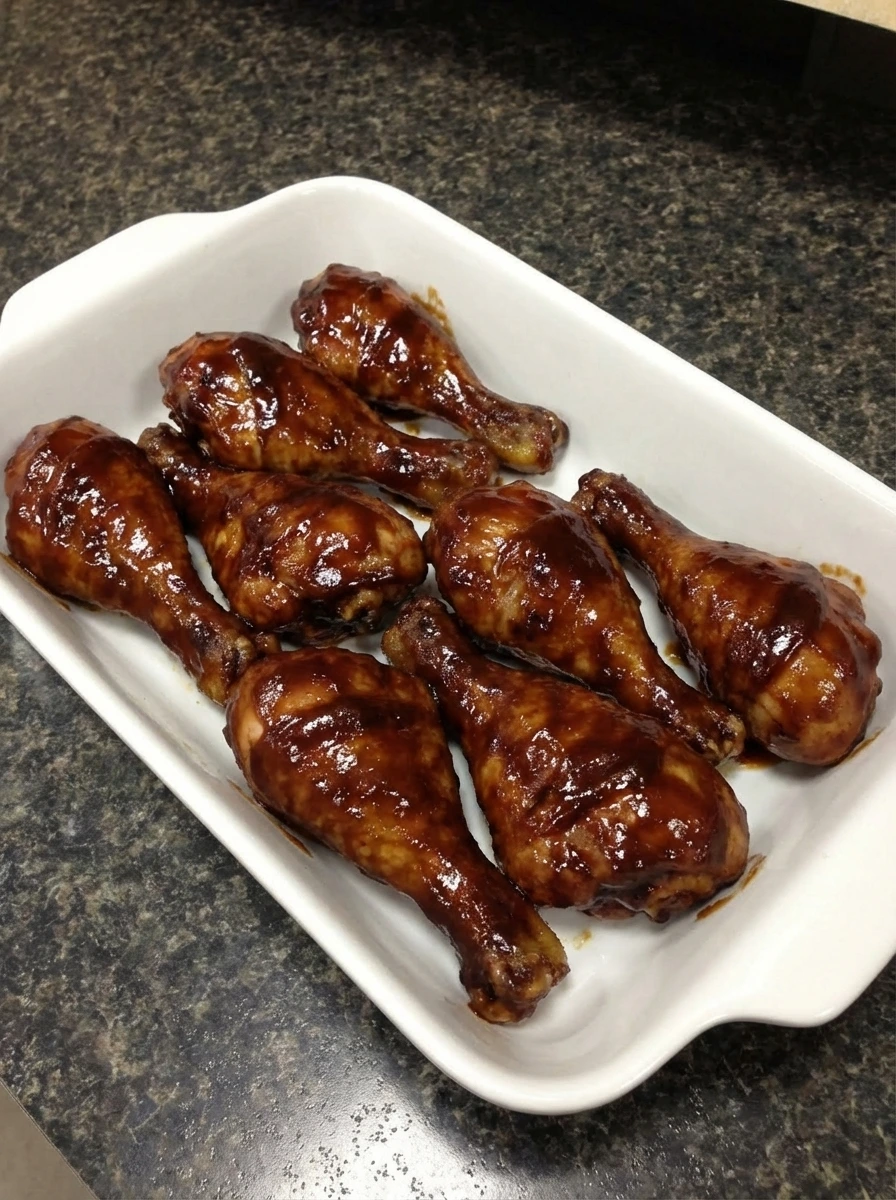
Transfer the coated drumsticks from the bowl onto a baking tray, spacing them slightly apart. This allows even coating distribution and prevents sticking. Ensure each piece is positioned neatly so the sauce stays intact on the surface. Avoid overcrowding the tray for best results later.
Tip: Leave space between pieces
Step 5: Final coating
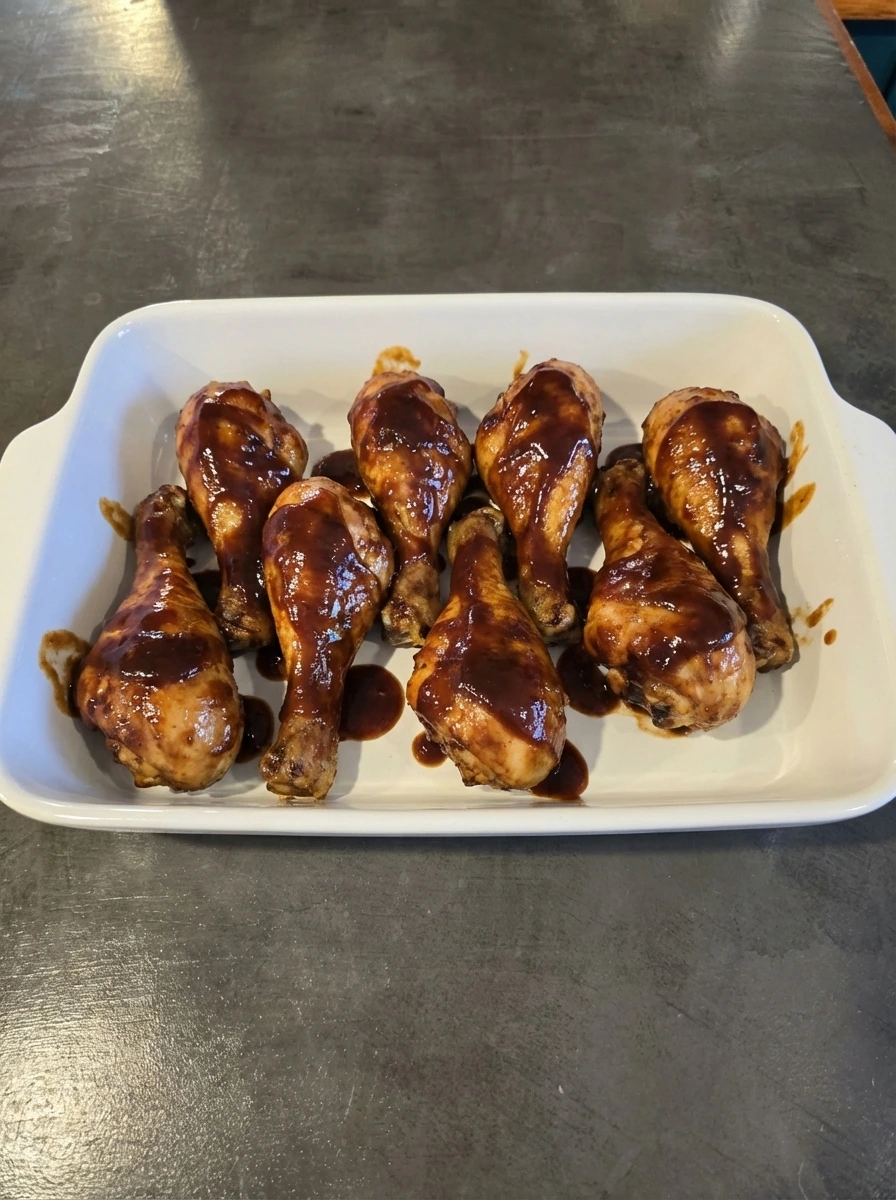
Use a spoon to add a final layer of BBQ sauce over each drumstick on the tray. This ensures a rich and glossy finish after cooking. Make sure the sauce is evenly spread and no parts of the chicken are left uncovered. This step enhances both flavor and appearance.
Tip: Extra sauce gives a glossy finish
Pro Tips
- Use room temperature chicken for better coating
- Choose a thick BBQ sauce for richer texture
- Do not overcrowd the tray for even results
- Add a second layer of sauce before cooking for extra flavor
Storage Instructions
Store leftover drumsticks in an airtight container in the refrigerator for up to 4 days. Make sure they are completely cooled before storing to maintain texture. For longer storage, freeze them for up to 2 months in a sealed container. When reheating, use an oven or air fryer to bring back the crisp coating and avoid sogginess. Avoid microwaving if possible as it can soften the texture.
Frequently Asked Questions
Can I use other chicken cuts?
Yes, you can use thighs or wings instead of drumsticks. Just make sure to adjust cooking time accordingly. The preparation method remains the same.
Can I make this ahead of time?
Yes, you can season and coat the chicken in advance. Store it in the fridge until ready to cook. This actually helps deepen the flavor.
What BBQ sauce works best?
Any BBQ sauce you like will work well. Sweet, smoky, or spicy varieties all add different flavor profiles. Choose based on your preference.
How do I make it spicier?
You can add chili powder or hot sauce to the BBQ mixture. Mix it well before coating the chicken. This gives a balanced heat without overpowering the dish.
Final Thoughts
If you try this recipe, I really hope you love it as much as my family does. It has become one of those dishes we just keep coming back to, no matter the season.
Drop a comment below and let me know how yours turned out. And if you are looking for more easy dinner ideas, make sure to bookmark this page.
I am always adding new recipes that are simple, satisfying, and perfect for busy weeknights.
Print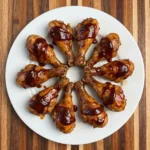
Juicy Oven-Ready Baked BBQ Chicken Drumsticks with Sticky Sauce
- Total Time: 45 minutes
- Yield: 4 servings
Description
This Baked BBQ Chicken Drumsticks recipe is an easy, comforting dinner that comes together so quickly in the kitchen! With juicy chicken, a sticky flavorful BBQ coating and perfectly seasoned drumsticks. We love simple dinners because it means that easy meals like these Baked BBQ Chicken Drumsticks are back on the table. Comfort foods, especially those that are satisfying and full of bold flavor, are my favorite kinds of meals!
Ingredients
- 8 pieces chicken drumsticks
- 1 cup BBQ sauce
- 2 tablespoons olive oil
- 1 teaspoon garlic powder
- 1 teaspoon paprika
- 1 teaspoon salt
- 1/2 teaspoon black pepper
Instructions
- Place the chicken drumsticks into a large mixing bowl and pat them dry to remove excess moisture. This step helps the seasoning stick better and ensures an even coating. Make sure the drumsticks are evenly sized so they cook consistently later. Arrange them in the bowl so each piece is separated and easy to season.
- Drizzle olive oil over the chicken drumsticks in the bowl. Sprinkle garlic powder, paprika, salt, and black pepper evenly across all pieces. Use a spoon or gently turn the drumsticks to coat them completely with the seasoning mixture. Make sure every piece is evenly covered for consistent flavor.
- Pour the BBQ sauce over the seasoned drumsticks in the bowl. Make sure the sauce is evenly distributed across all pieces. Mix thoroughly until every drumstick is fully coated in a thick, glossy layer of sauce. The coating should be rich and evenly spread without dry spots.
- Transfer the coated drumsticks from the bowl onto a baking tray, spacing them slightly apart. This allows even coating distribution and prevents sticking. Ensure each piece is positioned neatly so the sauce stays intact on the surface. Avoid overcrowding the tray for best results later.
- Use a spoon to add a final layer of BBQ sauce over each drumstick on the tray. This ensures a rich and glossy finish after cooking. Make sure the sauce is evenly spread and no parts of the chicken are left uncovered. This step enhances both flavor and appearance.
Notes
Pro Tips:
- Use room temperature chicken for better coating
- Choose a thick BBQ sauce for richer texture
- Do not overcrowd the tray for even results
- Add a second layer of sauce before cooking for extra flavor
Storage: Store leftover drumsticks in an airtight container in the refrigerator for up to 4 days. Make sure they are completely cooled before storing to maintain texture. For longer storage, freeze them for up to 2 months in a sealed container. When reheating, use an oven or air fryer to bring back the crisp coating and avoid sogginess. Avoid microwaving if possible as it can soften the texture.
- Prep Time: 15 minutes
- Cook Time: 30 minutes
- Category: Dinner
- Cuisine: American