

Dinner gets a lot better when there’s garlic and butter involved. These Garlic Butter Chicken Thighs are packed with flavor and so easy to make. It’s a budget friendly recipe that you can have on the table in about 45 minutes!
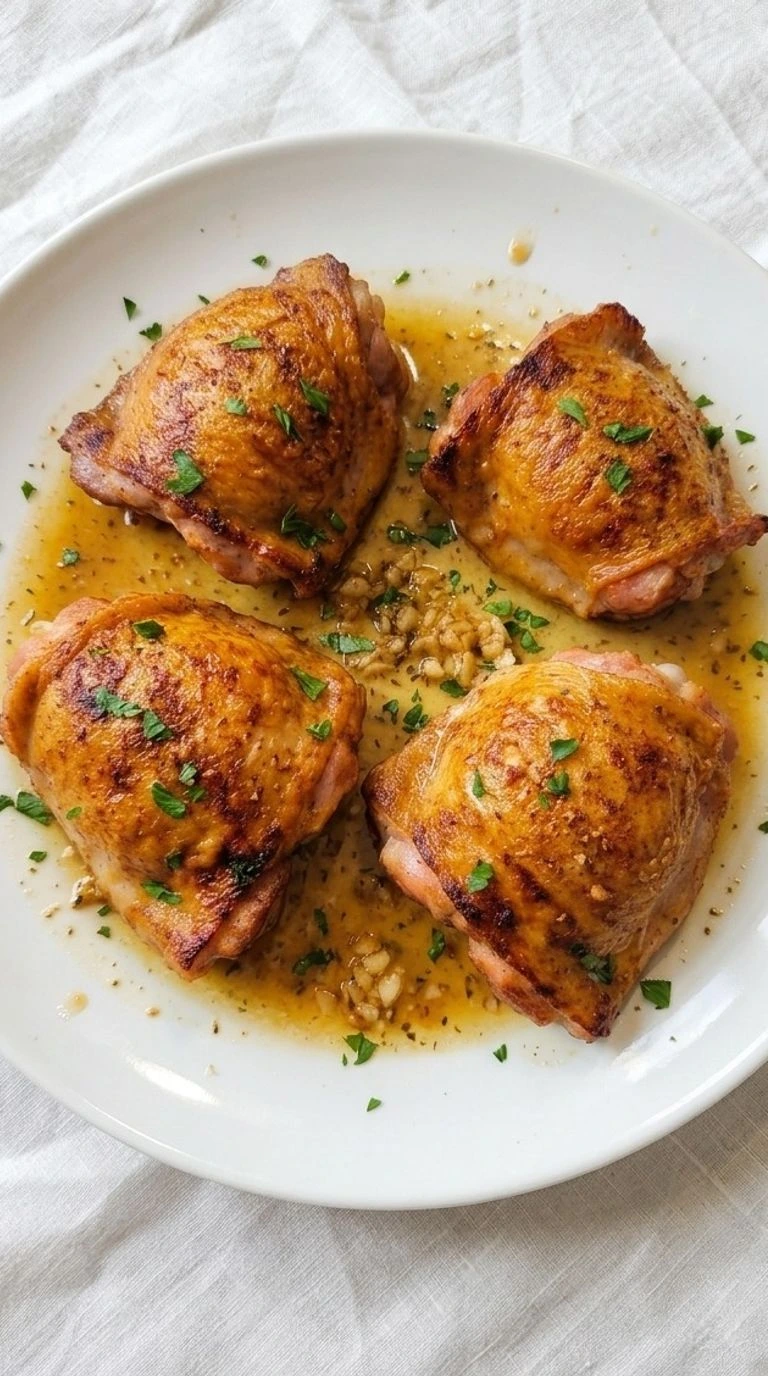
Make this buttery chicken recipe for dinner tonight. If you love juicy chicken with crispy skin and plenty of sauce then you’re going to love these easy garlic butter chicken thighs. It’s a low carb chicken dinner that’s hearty and full of flavor.
And with all that garlic butter in the pan you’ll want something to soak up every last drop. If you’re looking for more chicken recipes like this one then why not try my Creamy Garlic Butter Chicken Thighs. They have that same rich garlic flavor but with a creamy sauce that’s great over rice or mashed potatoes. Both recipes make a lovely weeknight dinner without much fuss.
Ingredients
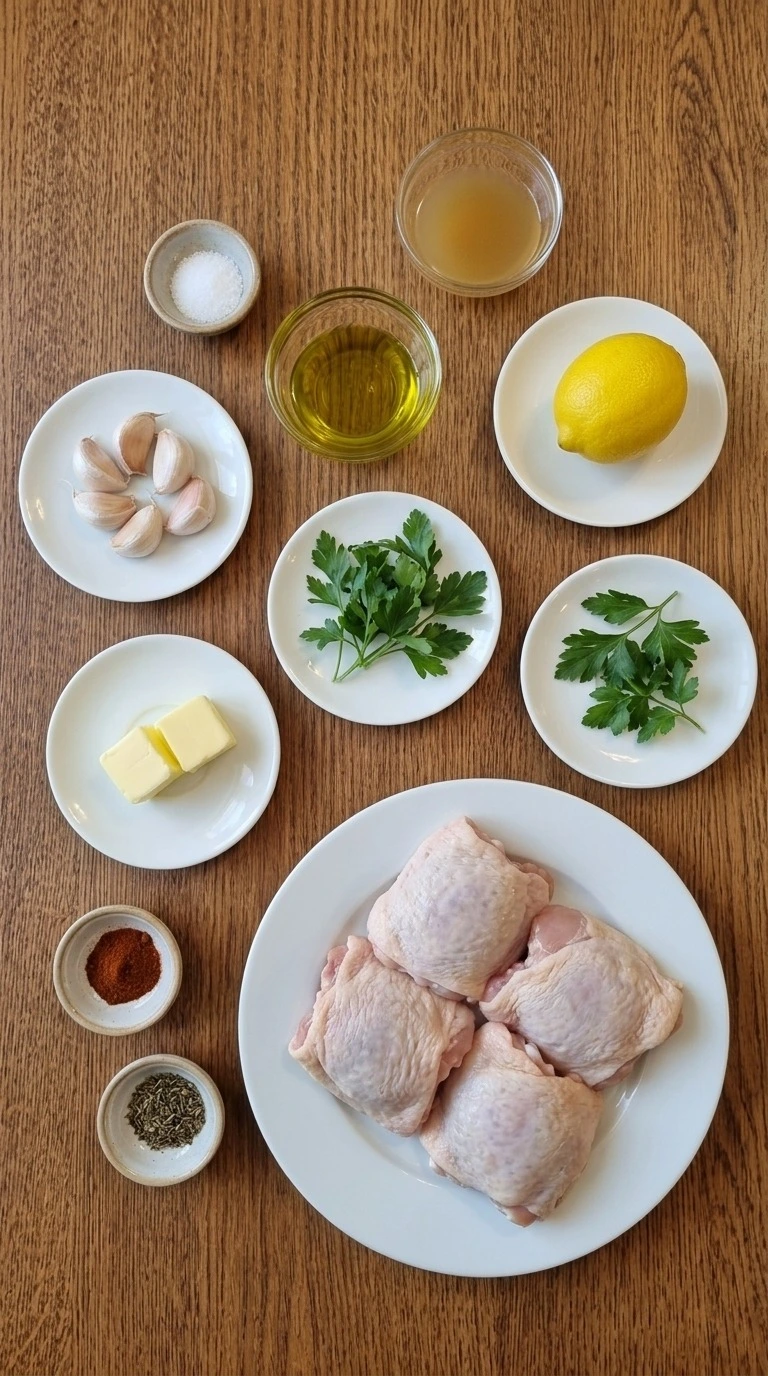
- bone-in skin-on chicken thighs: Pat dry before seasoning so the skin browns evenly and stays crisp while the bone helps the meat retain moisture.
- extra virgin olive oil: Use for searing the chicken and helping the skin form a deep golden crust.
- unsalted butter: Cut into small pieces so it melts quickly and forms the rich base of the garlic sauce.
- fresh garlic cloves: Peel and finely mince just before cooking for a sweet and fragrant garlic flavor.
- low-sodium chicken broth: Add to loosen the browned pan drippings and create a savory sauce without making the dish overly salty.
- Diamond Crystal kosher salt: Combine with the other dry seasonings to flavor both sides of the chicken before searing.
- freshly ground black pepper: Add to the spice blend for gentle warmth and a little bite.
- smoked paprika: Mix into the seasoning blend to add a warm smoky note and deepen the golden color of the skin.
- dried thyme: Stir into the garlic butter so the herb flavor spreads evenly through the sauce.
- fresh lemon juice: Squeeze from a fresh lemon and stir into the finished pan sauce to balance the richness of the butter.
- fresh flat-leaf parsley: Finely chop and scatter over the finished chicken for a fresh herbal finish and a little color.
Tools You’ll Need
- 12-inch oven-safe cast-iron skillet: A heavy 12-inch skillet builds an even crust and moves straight into the oven, while a smaller pan crowds the thighs and traps moisture.
- Kitchen tongs: Use 12-inch tongs with a firm grip to turn the chicken without tearing its skin, since short slippery tongs make flipping hot pieces difficult.
- Digital instant-read meat thermometer: A thin-probe thermometer checks the thickest part of each thigh for a safe 165°F minimum, while a slow dial model can miss the correct finish.
- Wooden spoon: A sturdy wooden spoon lifts browned bits into the broth without scraping the pan harshly, while a flimsy spoon makes deglazing harder.
- Small mixing bowl: A 1-cup mixing bowl keeps the dry seasonings together for even coating, while a wide shallow dish makes the spice blend easier to spill.
- Measuring spoons and liquid measuring cup: Standard measuring spoons and a 1-cup liquid measure keep the butter, spices and broth balanced, while rough estimates can leave the sauce too salty or thin.
- Paper towels: Use clean absorbent paper towels to dry the four thighs before searing, since wet skin steams and won’t develop the same crisp crust.
Instructions
Step 1: Season the Chicken and Sear the Skin
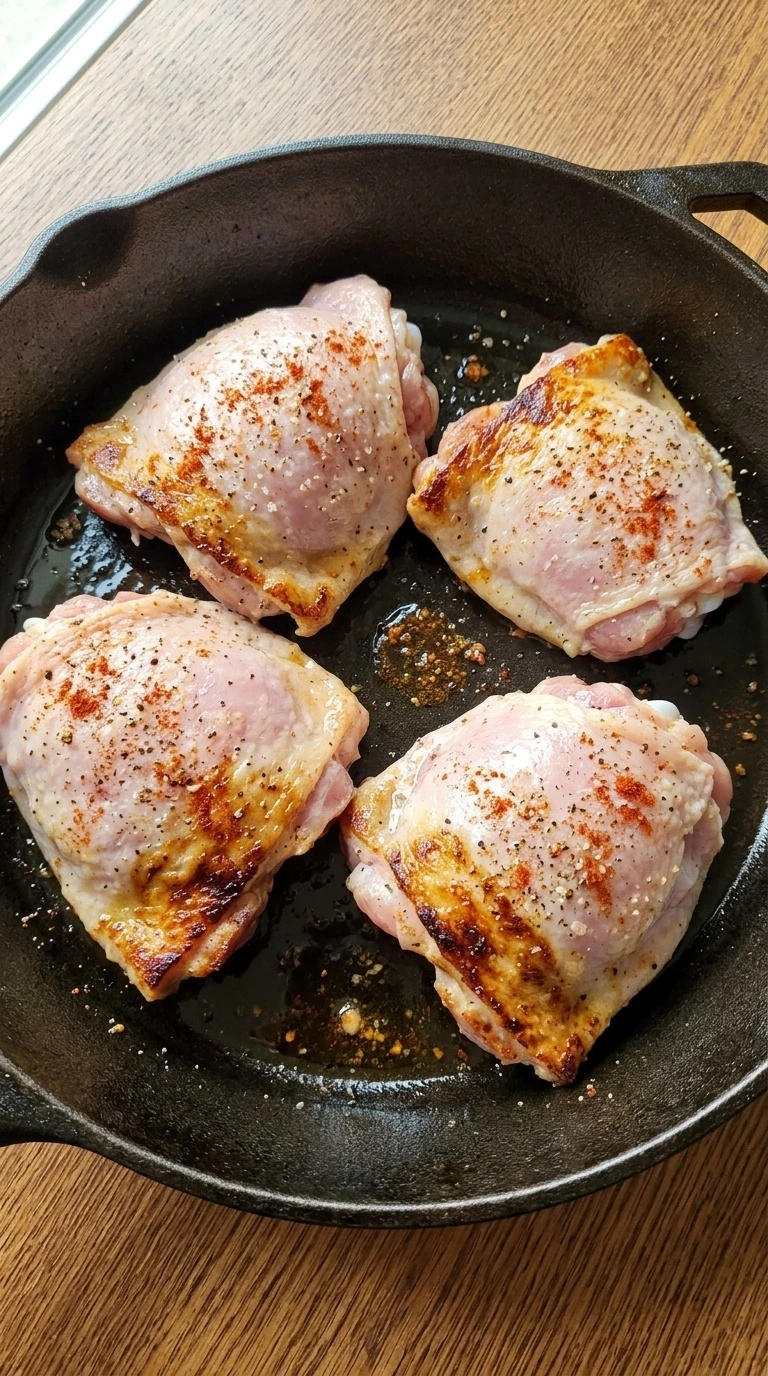
First pat all four chicken thighs dry with paper towels. Mix the kosher salt with the black pepper and smoked paprika. Then rub that blend over both sides of each thigh. Heat the extra virgin olive oil in a 12-inch oven-safe skillet over medium-high heat until the oil reaches about 400°F.
Place the thighs skin side down and press each one flat for 5 seconds. Let them sear without moving for 7 to 9 minutes. Keep a little space between the pieces so they don’t steam instead of brown. Next watch for the skin to turn deep golden brown with crisp edges.
You’ll hear a steady sizzle as the fat melts. Don’t pull the chicken up too soon or the skin may tear. This first sear builds a crust that stays crisp beneath the sauce.
Tip: Choose thighs weighing about 7 to 9 ounces each so all four pieces reach their safe internal temperature at roughly the same time.
Step 2: Flip the Chicken and Melt the Garlic Butter
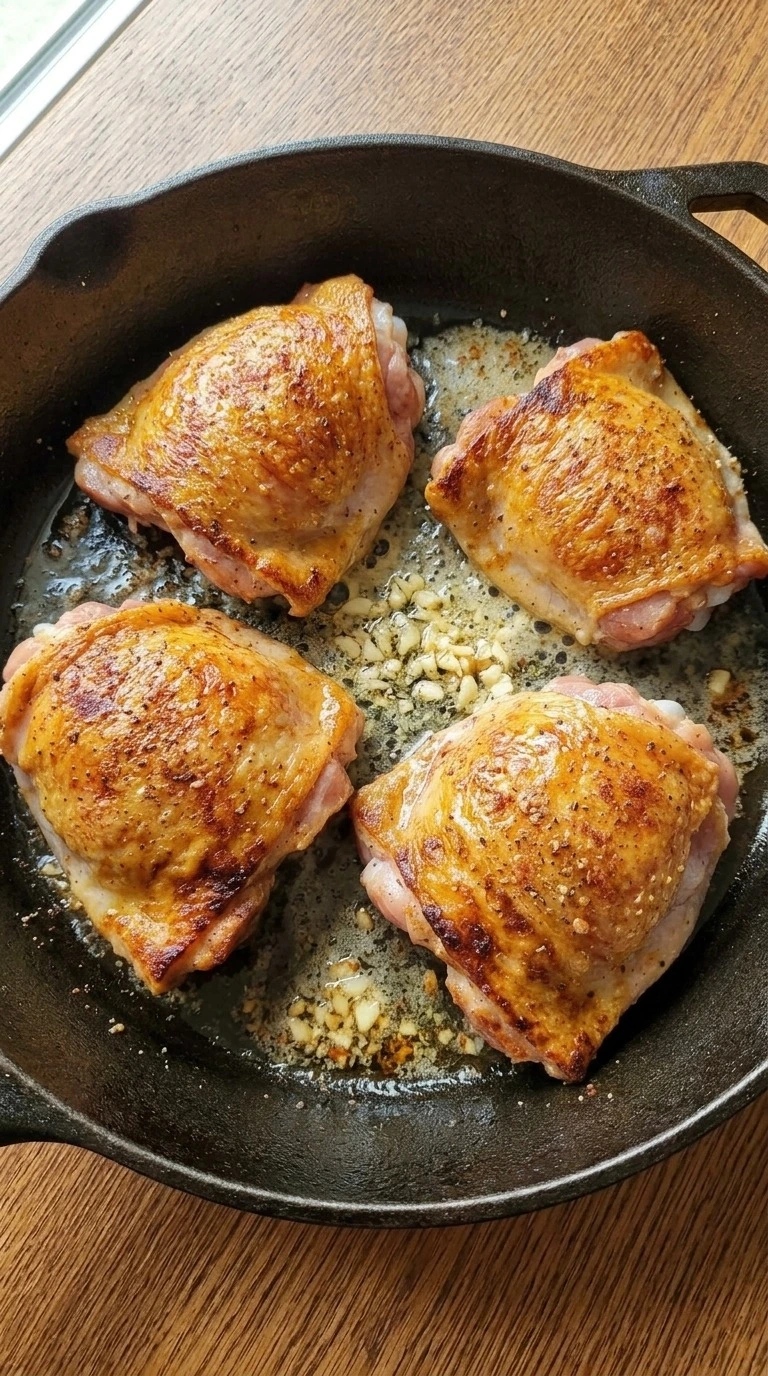
Once the skin has browned, turn each thigh with tongs so the golden side faces up. Lower the heat to medium and let the second side sear for 2 to 3 minutes. Then shift the thighs slightly toward the outer edges. Add the unsalted butter to the open center and let it melt for about 30 seconds.
Stir in the minced garlic and dried thyme. Keep the garlic moving through the butter for 45 to 60 seconds. You want it soft and fragrant without dark spots. Meanwhile the butter will foam around the chicken and the garlic will smell sweet and toasty.
The skin should stay above the sauce. Garlic left too long in hot fat turns bitter. Lower heat lets the garlic soften without burning.
Tip: Use fresh garlic cloves instead of jarred minced garlic because fresh garlic gives the butter a fuller aroma after just 60 seconds.
Step 3: Add the Broth and Finish the Chicken in the Oven
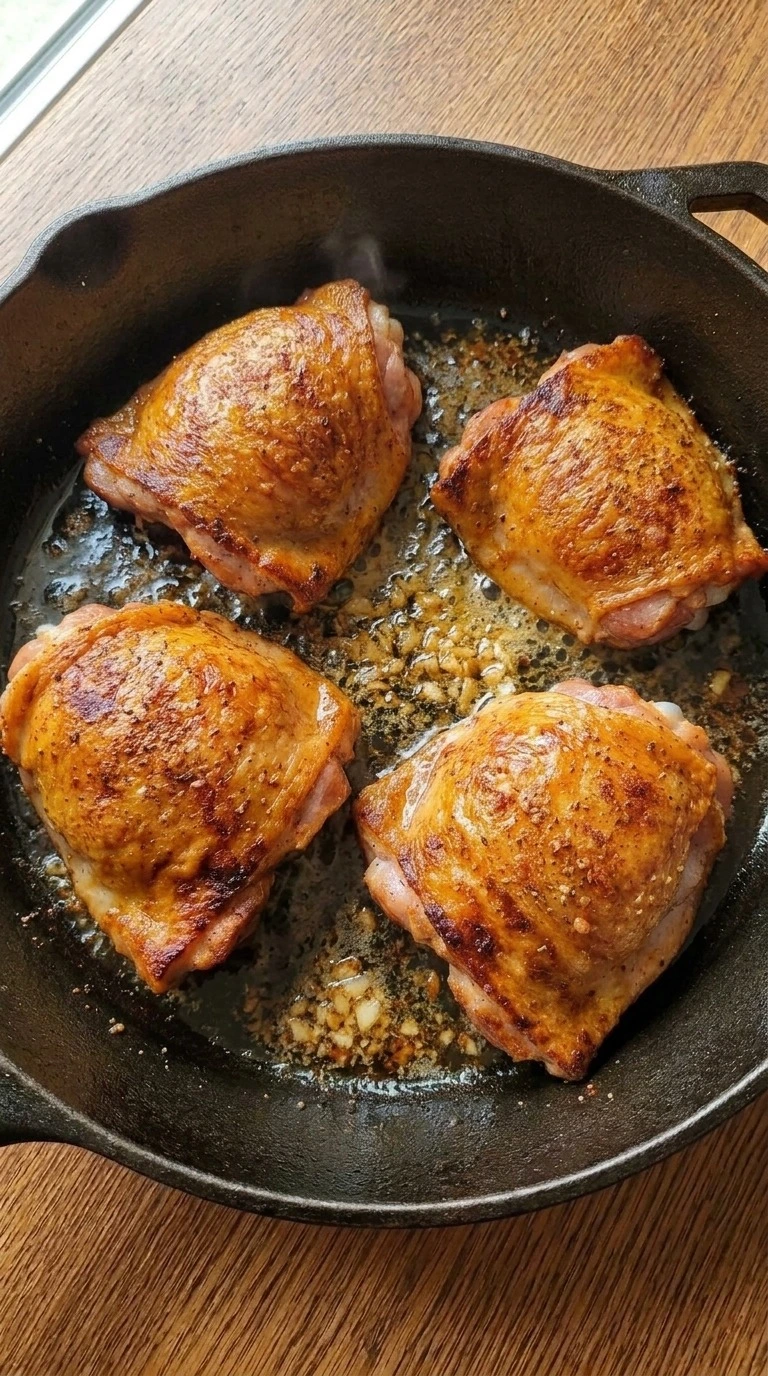
Pour the low-sodium chicken broth into the skillet around the thighs. Don’t pour it over the crispy skin. Scrape the browned bits from the pan bottom into the liquid with a wooden spoon and let it bubble for 1 minute. Then move the oven-safe skillet into a preheated 400°F oven.
Roast for 14 to 18 minutes and check the thickest part of each thigh with a meat thermometer. Keep the probe away from the bone. The chicken must reach at least 165°F before you take it out. Finally the meat should feel firm yet springy and the sauce will look darker and slightly reduced.
You’ll see small bubbles around the edges. A low oven temperature can leave the center underdone. The 400°F oven finishes the meat while keeping the skin crisp.
Tip: For softer dark meat, let the thighs reach 175°F to 185°F if you prefer, since the extra heat helps break down connective tissue.
Step 4: Finish the Sauce and Plate the Chicken
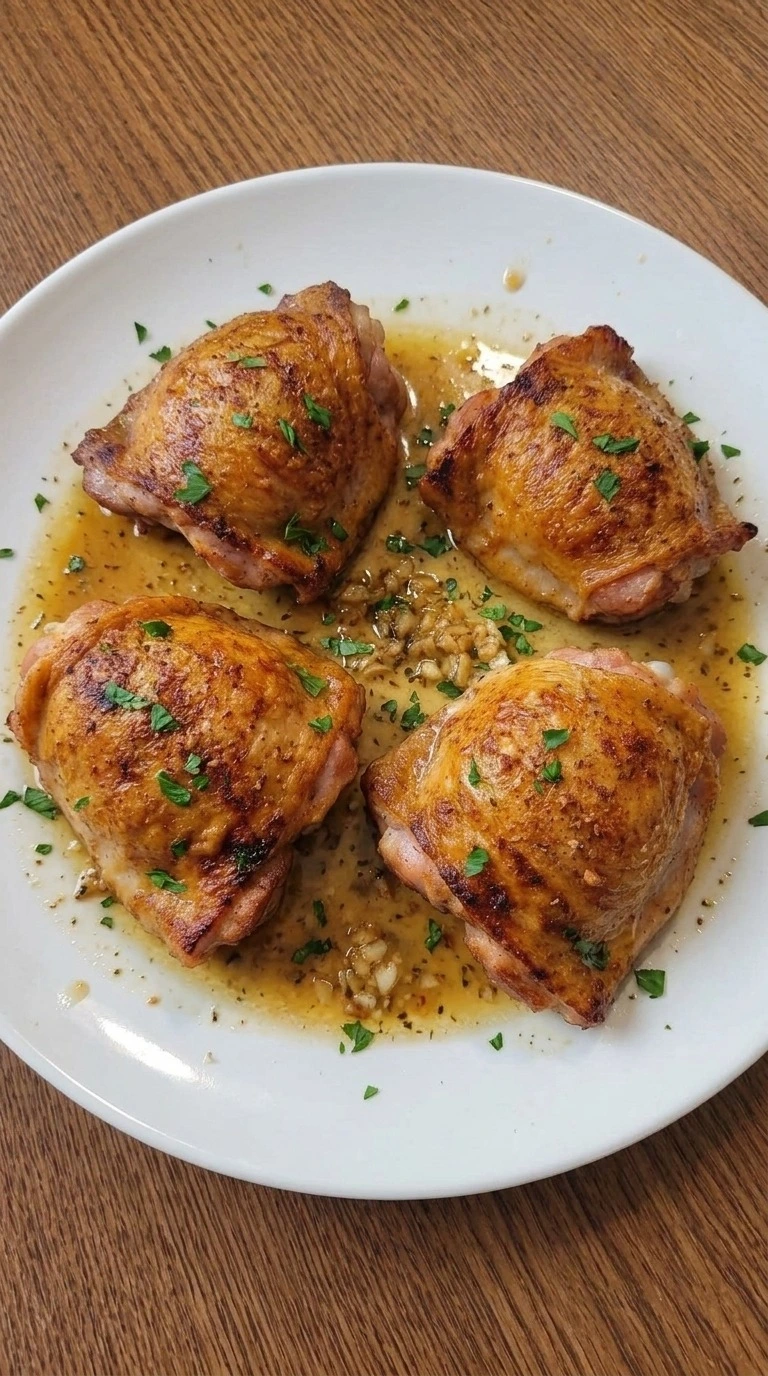
Take the skillet out of the oven and check that all four thighs have reached at least 165°F. Let them rest for 5 minutes. Meanwhile stir the fresh lemon juice into the warm garlic butter sauce and taste it. Spoon a little sauce onto a large serving plate and set the thighs on top with the crispy skin facing up.
Add a little more sauce around each piece. Then scatter the chopped fresh flat-leaf parsley over the chicken. Leave the skin partly exposed so it stays crisp. The garlic sauce should look glossy with soft golden garlic pieces throughout.
The chicken will have uneven amber edges and a rich roasted smell. (I used to cut chicken right after roasting. The juices escaped too fast. ) Resting helps the juices settle inside the meat.
Tip: For a brighter finish, add an extra teaspoon of freshly squeezed lemon juice to the sauce just before serving, then taste again.
Pro Tips
- Take the chicken out of the fridge about 10 to 15 minutes before cooking while you measure the other ingredients. Keep raw poultry away from other foods.
- Choose bone-in skin-on thighs weighing 7 to 9 ounces each. Pieces of similar size will brown more evenly and finish at nearly the same time.
- Leave at least 1/2 inch between the thighs during searing. If your skillet is smaller than 12 inches, use a second pan to avoid steaming.
- Check the skin after 7 minutes of searing. If it’s still pale, give it another minute rather than turning up the heat and burning the spices.
- Use a digital thermometer in two different thighs before serving. The thickest part must register at least 165°F without touching the bone.
- Keep the broth below the top of the chicken skin. Just 1/3 cup is enough to loosen the browned bits without soaking the crust.
- Taste the garlic butter sauce after adding 1 tablespoon of lemon juice. Add a small pinch of salt only if the sauce needs more flavor.
- For a spicy garlic butter version, add 1/4 teaspoon crushed red pepper flakes to the melted butter with the minced garlic for a gentle kick.
- For lemon herb chicken thighs, increase the fresh lemon juice to 2 tablespoons and replace the dried thyme with 1 tablespoon fresh thyme leaves for a brighter sauce.
- For a smoky paprika version, increase the smoked paprika from 1 teaspoon to 1 1/2 teaspoons and add 1/4 teaspoon ground cumin to the seasoning blend.
- For a dairy-free garlic chicken dinner, replace the 3 tablespoons of unsalted butter with dairy-free cooking butter and use certified gluten-free broth if needed.
Storage Instructions
Leftover Garlic Butter Chicken Thighs keep well in the fridge for 3 to 4 days. Let the chicken cool briefly and place it in a shallow airtight container within 2 hours of cooking. Spoon the garlic butter sauce over the pieces to help them stay moist. Keep your fridge at 40°F or below.
You can also freeze individual portions with their sauce in freezer-safe containers for up to 3 months for best quality. Thaw frozen portions overnight in the fridge before reheating. For reheating, place the thighs in a baking dish with 1 to 2 tablespoons of chicken broth. Cover loosely with foil and warm at 325°F for about 15 to 20 minutes or until the center reaches 165°F.
Remove the foil near the end to help dry the skin. If the chicken develops a sour smell or slimy texture, throw it away. Don’t taste questionable leftovers to check whether they’re safe.
Print
Garlic Butter Chicken Thighs
- Total Time: 45 minutes
- Yield: 4 servings 1x
Description
These easy Garlic Butter Chicken Thighs have crisp golden skin and tender meat with a rich garlic sauce that smells incredible as it cooks. The trick is searing the skin first and then finishing the thighs in the oven so they stay juicy. It’s one of the best quick and simple dinner ideas for a busy weeknight dinner or meal prep. Serve with rice or vegetables for a healthy, satisfying meal that uses everyday ingredients and gives you plenty of buttery pan sauce to spoon over each serving.
Ingredients
- 4 thighs, about 2 pounds bone-in skin-on chicken thighs (Pat dry before seasoning so the skin browns evenly and stays crisp while the bone helps the meat retain moisture.)
- 1 tablespoon extra virgin olive oil (Use for searing the chicken and helping the skin form a deep golden crust.)
- 3 tablespoons unsalted butter (Cut into small pieces so it melts quickly and forms the rich base of the garlic sauce.)
- 5 cloves fresh garlic cloves (Peel and finely mince just before cooking for a sweet and fragrant garlic flavor.)
- 1/3 cup low-sodium chicken broth (Add to loosen the browned pan drippings and create a savory sauce without making the dish overly salty.)
- 1 teaspoon Diamond Crystal kosher salt (Combine with the other dry seasonings to flavor both sides of the chicken before searing.)
- 1/2 teaspoon freshly ground black pepper (Add to the spice blend for gentle warmth and a little bite.)
- 1 teaspoon smoked paprika (Mix into the seasoning blend to add a warm smoky note and deepen the golden color of the skin.)
- 1 teaspoon dried thyme (Stir into the garlic butter so the herb flavor spreads evenly through the sauce.)
- 1 tablespoon fresh lemon juice (Squeeze from a fresh lemon and stir into the finished pan sauce to balance the richness of the butter.)
- 1 tablespoon fresh flat-leaf parsley (Finely chop and scatter over the finished chicken for a fresh herbal finish and a little color.)
Instructions
- First pat all four chicken thighs dry with paper towels. Mix the kosher salt with the black pepper and smoked paprika. Then rub that blend over both sides of each thigh. Heat the extra virgin olive oil in a 12-inch oven-safe skillet over medium-high heat until the oil reaches about 400°F. Place the thighs skin side down and press each one flat for 5 seconds. Let them sear without moving for 7 to 9 minutes. Keep a little space between the pieces so they don’t steam instead of brown. Next watch for the skin to turn deep golden brown with crisp edges. You’ll hear a steady sizzle as the fat melts. Don’t pull the chicken up too soon or the skin may tear. This first sear builds a crust that stays crisp beneath the sauce.
- Once the skin has browned, turn each thigh with tongs so the golden side faces up. Lower the heat to medium and let the second side sear for 2 to 3 minutes. Then shift the thighs slightly toward the outer edges. Add the unsalted butter to the open center and let it melt for about 30 seconds. Stir in the minced garlic and dried thyme. Keep the garlic moving through the butter for 45 to 60 seconds. You want it soft and fragrant without dark spots. Meanwhile the butter will foam around the chicken and the garlic will smell sweet and toasty. The skin should stay above the sauce. Garlic left too long in hot fat turns bitter. Lower heat lets the garlic soften without burning.
- Pour the low-sodium chicken broth into the skillet around the thighs. Don’t pour it over the crispy skin. Scrape the browned bits from the pan bottom into the liquid with a wooden spoon and let it bubble for 1 minute. Then move the oven-safe skillet into a preheated 400°F oven. Roast for 14 to 18 minutes and check the thickest part of each thigh with a meat thermometer. Keep the probe away from the bone. The chicken must reach at least 165°F before you take it out. Finally the meat should feel firm yet springy and the sauce will look darker and slightly reduced. You’ll see small bubbles around the edges. A low oven temperature can leave the center underdone. The 400°F oven finishes the meat while keeping the skin crisp.
- Take the skillet out of the oven and check that all four thighs have reached at least 165°F. Let them rest for 5 minutes. Meanwhile stir the fresh lemon juice into the warm garlic butter sauce and taste it. Spoon a little sauce onto a large serving plate and set the thighs on top with the crispy skin facing up. Add a little more sauce around each piece. Then scatter the chopped fresh flat-leaf parsley over the chicken. Leave the skin partly exposed so it stays crisp. The garlic sauce should look glossy with soft golden garlic pieces throughout. The chicken will have uneven amber edges and a rich roasted smell. (I used to cut chicken right after roasting. The juices escaped too fast.) Resting helps the juices settle inside the meat.
Notes
Pro Tips:
- Take the chicken out of the fridge about 10 to 15 minutes before cooking while you measure the other ingredients. Keep raw poultry away from other foods.
- Choose bone-in skin-on thighs weighing 7 to 9 ounces each. Pieces of similar size will brown more evenly and finish at nearly the same time.
- Leave at least 1/2 inch between the thighs during searing. If your skillet is smaller than 12 inches, use a second pan to avoid steaming.
- Check the skin after 7 minutes of searing. If it’s still pale, give it another minute rather than turning up the heat and burning the spices.
- Use a digital thermometer in two different thighs before serving. The thickest part must register at least 165°F without touching the bone.
- Keep the broth below the top of the chicken skin. Just 1/3 cup is enough to loosen the browned bits without soaking the crust.
- Taste the garlic butter sauce after adding 1 tablespoon of lemon juice. Add a small pinch of salt only if the sauce needs more flavor.
Storage: Leftover Garlic Butter Chicken Thighs keep well in the fridge for 3 to 4 days. Let the chicken cool briefly and place it in a shallow airtight container within 2 hours of cooking. Spoon the garlic butter sauce over the pieces to help them stay moist. Keep your fridge at 40°F or below. You can also freeze individual portions with their sauce in freezer-safe containers for up to 3 months for best quality. Thaw frozen portions overnight in the fridge before reheating. For reheating, place the thighs in a baking dish with 1 to 2 tablespoons of chicken broth. Cover loosely with foil and warm at 325°F for about 15 to 20 minutes or until the center reaches 165°F. Remove the foil near the end to help dry the skin. If the chicken develops a sour smell or slimy texture, throw it away. Don’t taste questionable leftovers to check whether they’re safe.
- Prep Time: 15 minutes
- Cook Time: 30 minutes
- Category: Dinner
- Cuisine: American
Nutrition
- Serving Size: 1 serving
Frequently Asked Questions
Yes, you can season the raw chicken up to 24 hours ahead and keep it covered in the fridge at 40°F or below. Store the minced garlic and measured sauce ingredients separately. Then sear the thighs just before dinner because cooking them fresh gives you a much crisper skin.
Store leftovers in a shallow airtight container within 2 hours of cooking and refrigerate at 40°F or below. They’ll keep for 3 to 4 days. Keep the sauce with the meat so it doesn’t dry out, and reheat each portion to 165°F before eating.
Yes, replace the 3 tablespoons of unsalted butter with 3 tablespoons of dairy-free cooking butter or 2 tablespoons of extra virgin olive oil. The olive oil version will taste lighter and won’t have the same rich sauce texture. You’ll still get plenty of garlic flavor if you keep the heat moderate.
The most common problem is moisture on the skin or too many thighs crowded into one skillet. Dry each piece well and sear skin side down for 7 to 9 minutes with steady heat. Don’t pour broth directly over the browned skin because it’ll soften the crust you’ve worked to build.
Yes, use 8 chicken thighs and double every ingredient for 8 servings. Brown the chicken in two 12-inch oven-safe skillets so the pieces have enough room. Finish both skillets at 400°F and check the thickest thighs for at least 165°F because the oven time may vary.
Try steamed jasmine rice or creamy mashed Yukon Gold potatoes because both soak up the garlic butter sauce. For vegetables, roast broccoli florets at 425°F for 18 to 22 minutes while you prepare the chicken. A fresh green salad also works well if you want something lighter beside the rich sauce.
Yes, cool the chicken promptly and freeze it with the sauce in airtight freezer-safe containers for up to 3 months for best quality. Thaw it overnight in the fridge. Then cover and reheat at 325°F until the thickest part reaches 165°F, adding 1 to 2 tablespoons of broth if the sauce looks dry.
Final Thoughts
And that’s dinner sorted. These Garlic Butter Chicken Thighs are simple enough for a Tuesday night but still good enough to share with family or friends. I’ve made this kind of skillet chicken on busy evenings because the crispy skin and garlic sauce make an ordinary dinner feel special.
If you enjoyed this garlic butter chicken thighs recipe, try my Crockpot Garlic Butter Chicken for a hands-off dinner or my Honey Mustard Baked Chicken Thighs for something different. Save this one and share your results in the comments. I’d love to hear what you served with it.
It works just as well when you are after easy garlic butter chicken thighs.