Seriously and no joke and this is the best Raspberry Pina Colada Cocktail. It’s the one my mom and before that my grandma would have loved making for years. It’s a classic style drink with simple and delicious ingredients. Juicy raspberries are blended with sweet pineapple and creamy coconut and a splash of rum for a frosty cocktail that feels like a mini vacation in a glass.
A classic Raspberry Pina Colada Cocktail is one of my go to easy treats. Not only does it make for a super delicious sip and it’s packed with bright fruit flavor and keeps me happy for hours. Also there’s no complicated methods or ingredients needed. And prep is a cinch.
I often make a batch of this cocktail mix ahead on Sunday to enjoy for a drink and a fun little treat on Monday and Tuesday. With just a few basic ingredients probably already in the fridge and pantry and freezer you can whip up a frosty cocktail or mocktail or even pour it into chilled glasses with extra raspberry swirl and toasted coconut for a fancy and fruity drink.
Ingredients
Here’s what I use for this recipe and you can always make substitutions if you prefer.
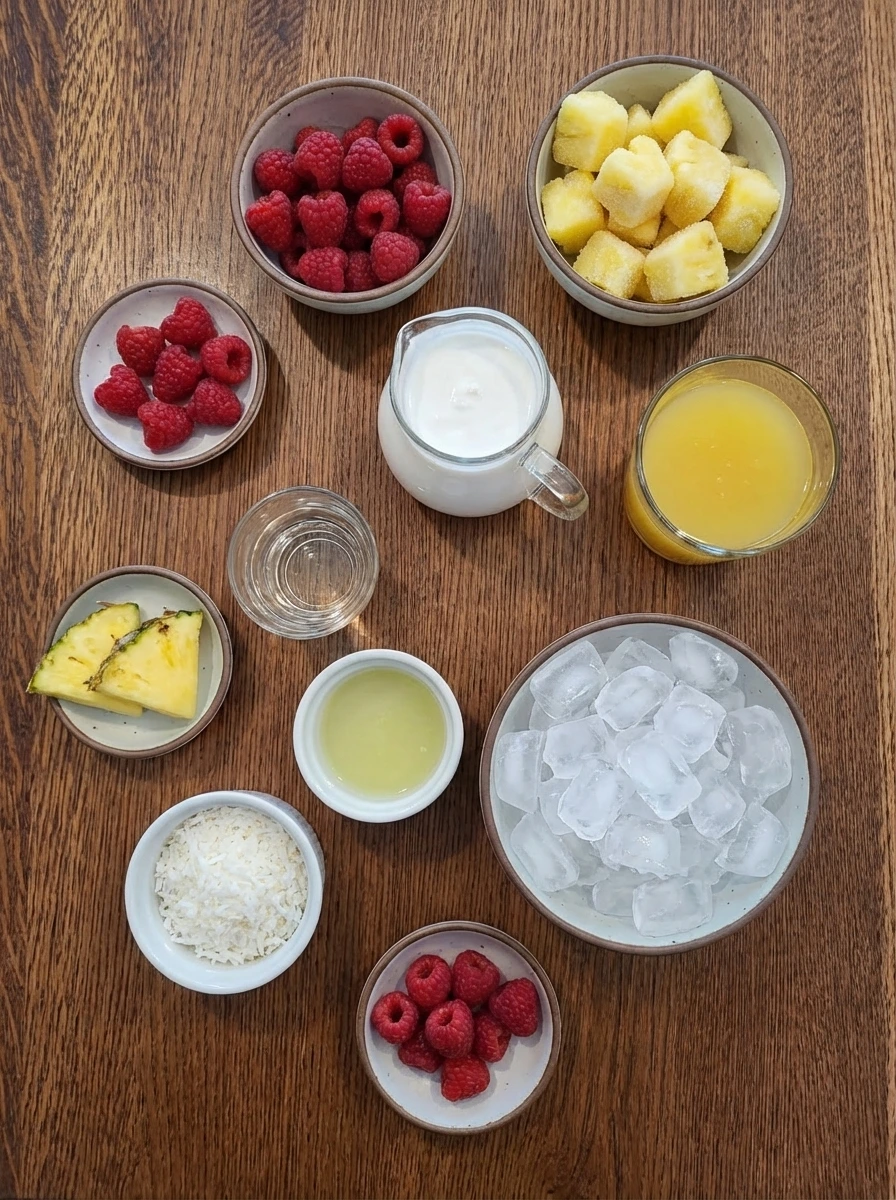
- fresh raspberries: for bright berry flavor and color
- frozen pineapple chunks: for thick tropical sweetness
- cream of coconut: for creamy coconut richness
- pineapple juice: to loosen and sweeten the blend
- white rum: for classic cocktail depth
- lime juice: for fresh acidity
- ice cubes: for a frosty thick texture
- sweetened shredded coconut: for the rim and garnish
- fresh pineapple wedges: for garnish
- extra fresh raspberries: for garnish
- raspberry syrup: for a loose swirl inside the glasses
Tools You’ll Need
- blender: for crushing the fruit and ice into a thick frozen drink
- measuring cups and spoons: for accurate liquid and garnish amounts
- serving glasses: use chilled tumblers or hurricane style glasses
Instructions
Step 1: Prep the fruit and garnishes
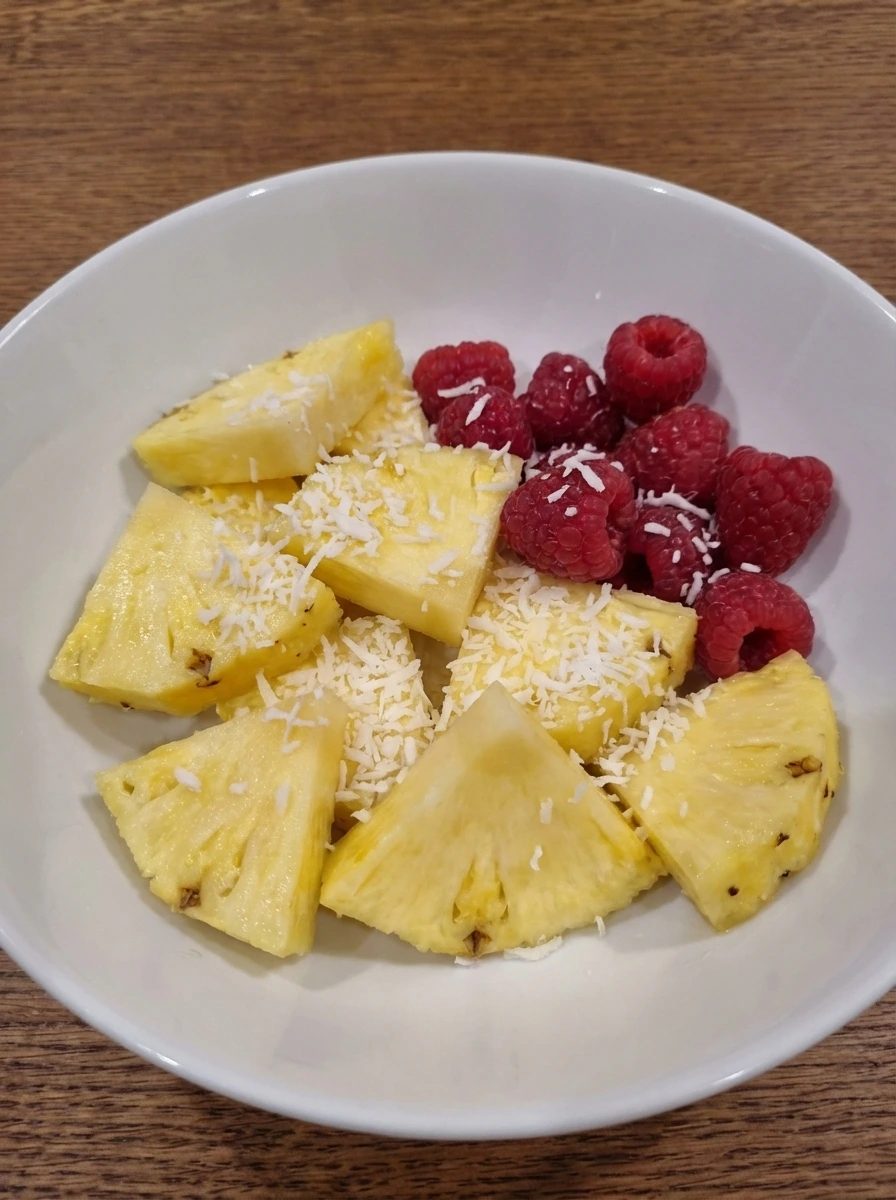
Slice the pineapple into casual wedges and pick through the raspberries so only the best berries go into the drink. Keep the sizes slightly varied so everything looks natural and homemade rather than too neat. Place the pineapple wedges and extra raspberries aside for later garnish. In a shallow layer of shredded coconut add a few loose crumbs so the texture already looks irregular and ready for a lightly toasted finish.
Tip: Leave one or two raspberries slightly softer because they blend more easily and deepen the color.
Step 2: Toast the coconut until lightly golden
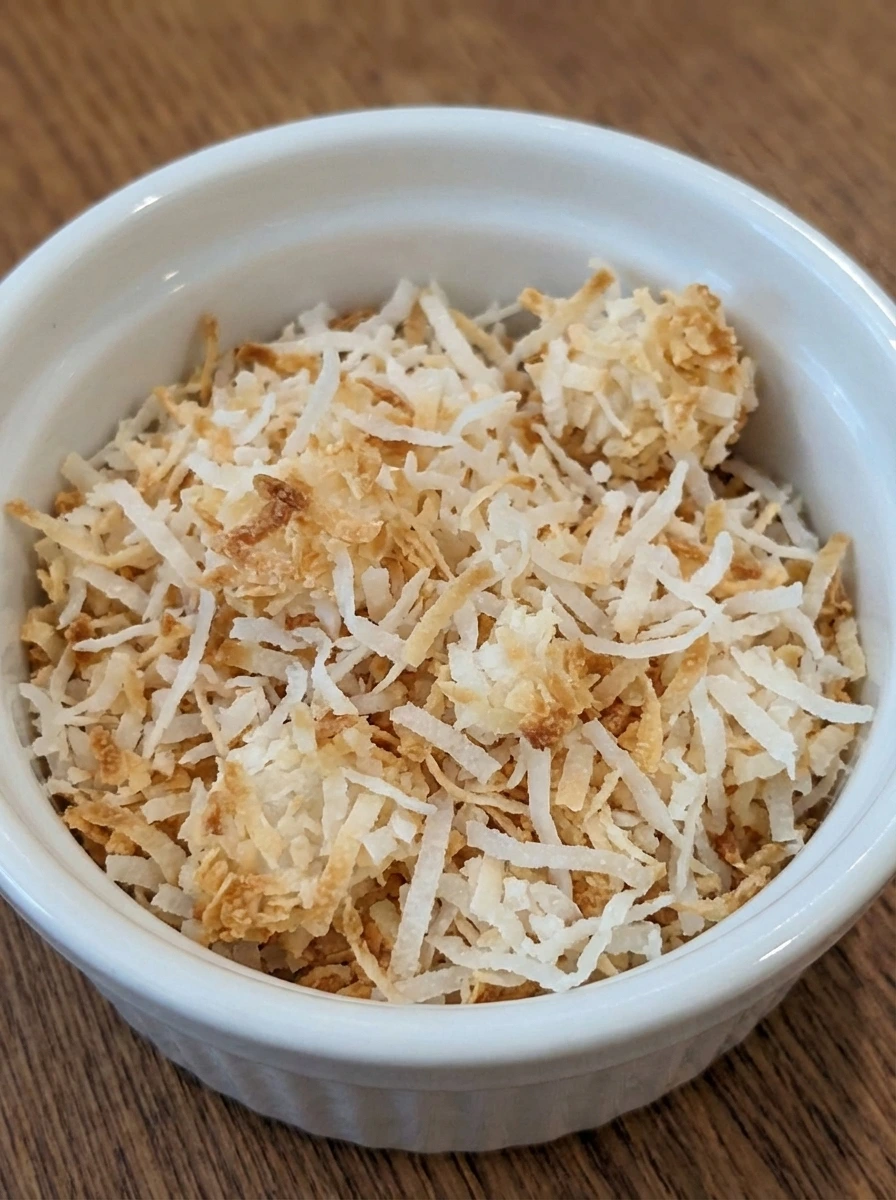
Spread the shredded coconut in a loose uneven layer so some spots are thinner and some are slightly piled. As it heats the edges dry first and a few strands turn pale gold while others stay creamy white. Stir once so the color develops naturally rather than evenly. The finished coconut should look lightly browned in scattered patches with a slightly drier texture and a sweet toasted smell.
Tip: Stop when you see mixed shades of white and pale gold because it darkens quickly after that.
Step 3: Measure and layer the base
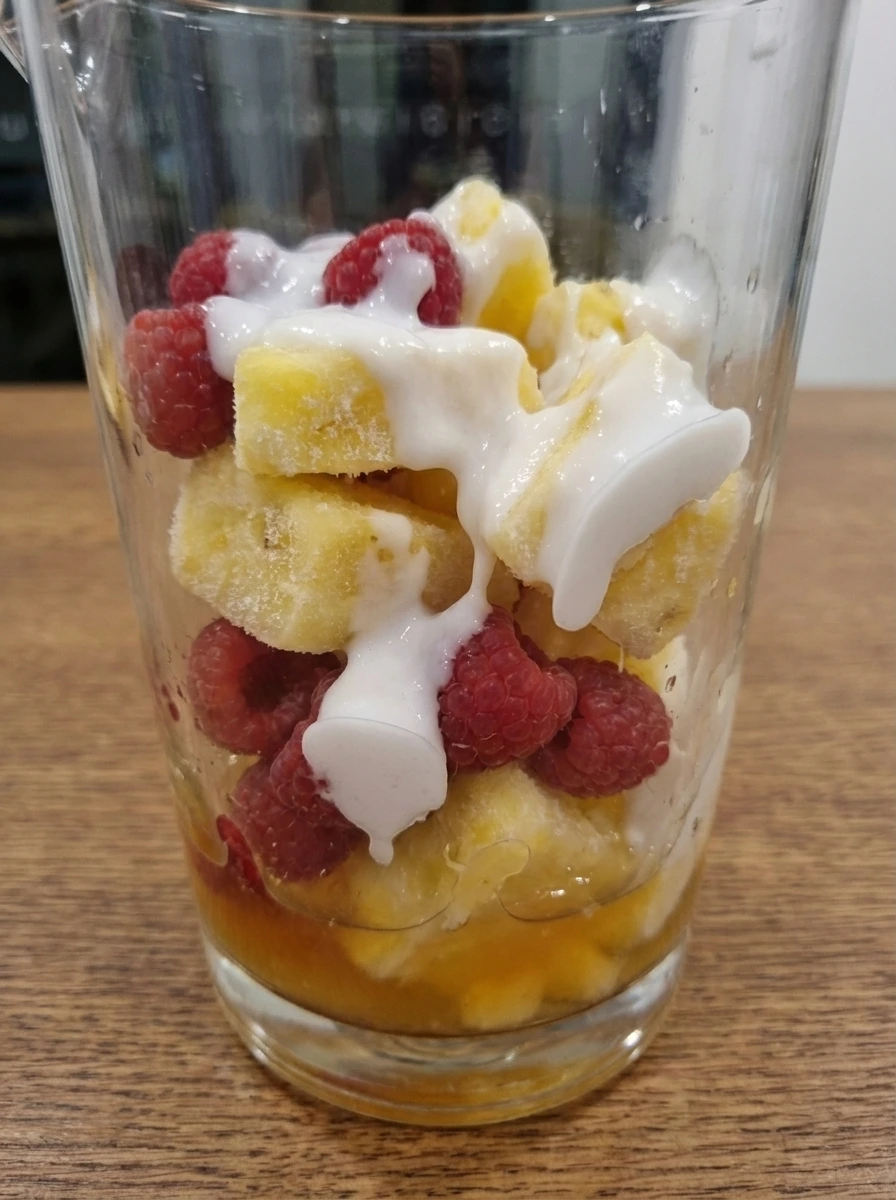
Add the raspberries then the frozen pineapple then the cream of coconut then the pineapple juice and rum and lime juice in that order so the colors stack visibly. The deep pink berries sit under the pale coconut cream while the yellow juice pools around the fruit. This stage should look loose and layered rather than mixed. The ingredients stay distinct with bright color contrast and the frozen pineapple keeps the base looking firm and chunky.
Tip: Pour the cream of coconut in a few ribbons rather than one smooth stream for better visual layering.
Step 4: Blend until thick and partially swirled
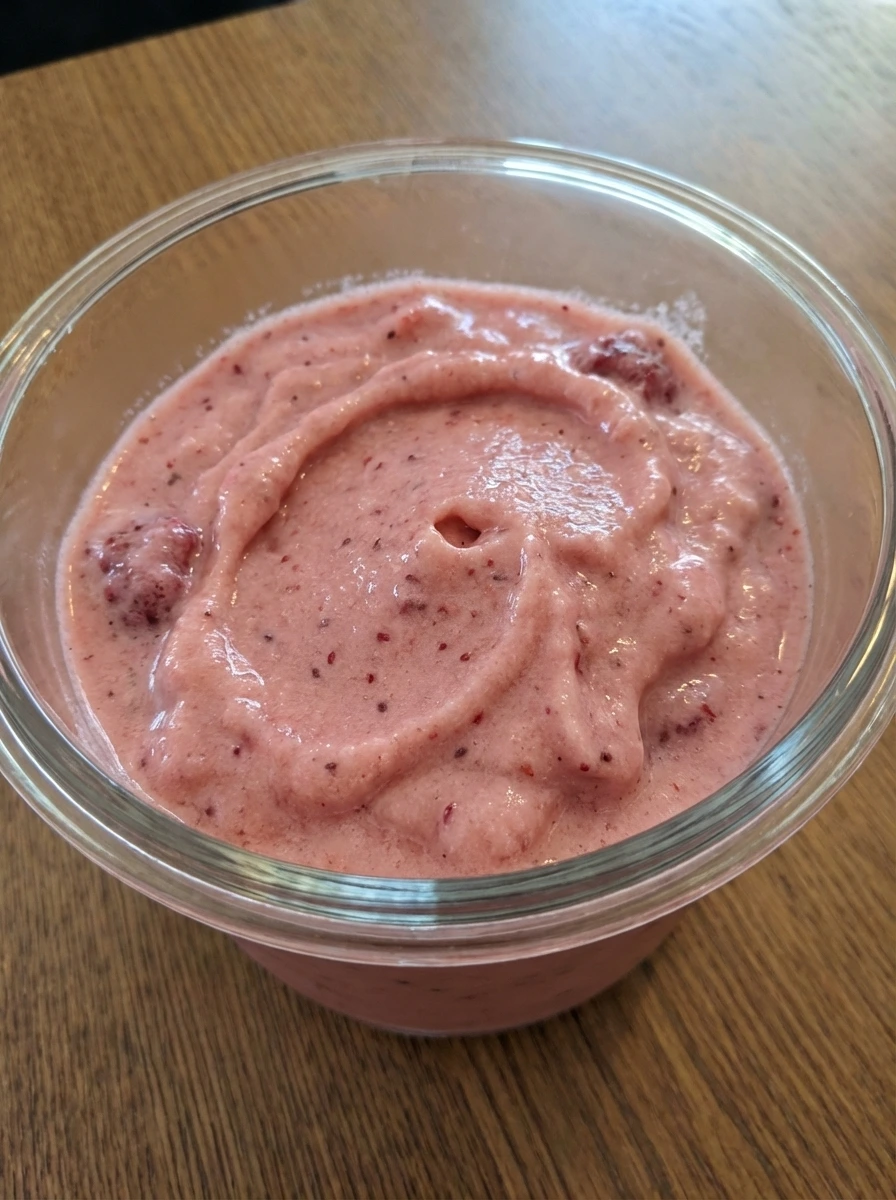
Blend the fruit and liquids until the hard pineapple softens and the raspberries break down into the coconut base. The mixture changes from separate chunks into a thick icy blend with tiny berry flecks and loose pink streaks moving through a creamy blush base. Keep a little texture in the drink so it looks real and frosty instead of perfectly smooth. The surface should look softly mounded with a few uneven air pockets and a naturally thick pour.
Tip: Blend just until the ice disappears into the drink so the texture stays full and slushy.
Step 5: Swirl the glasses and coat the rims
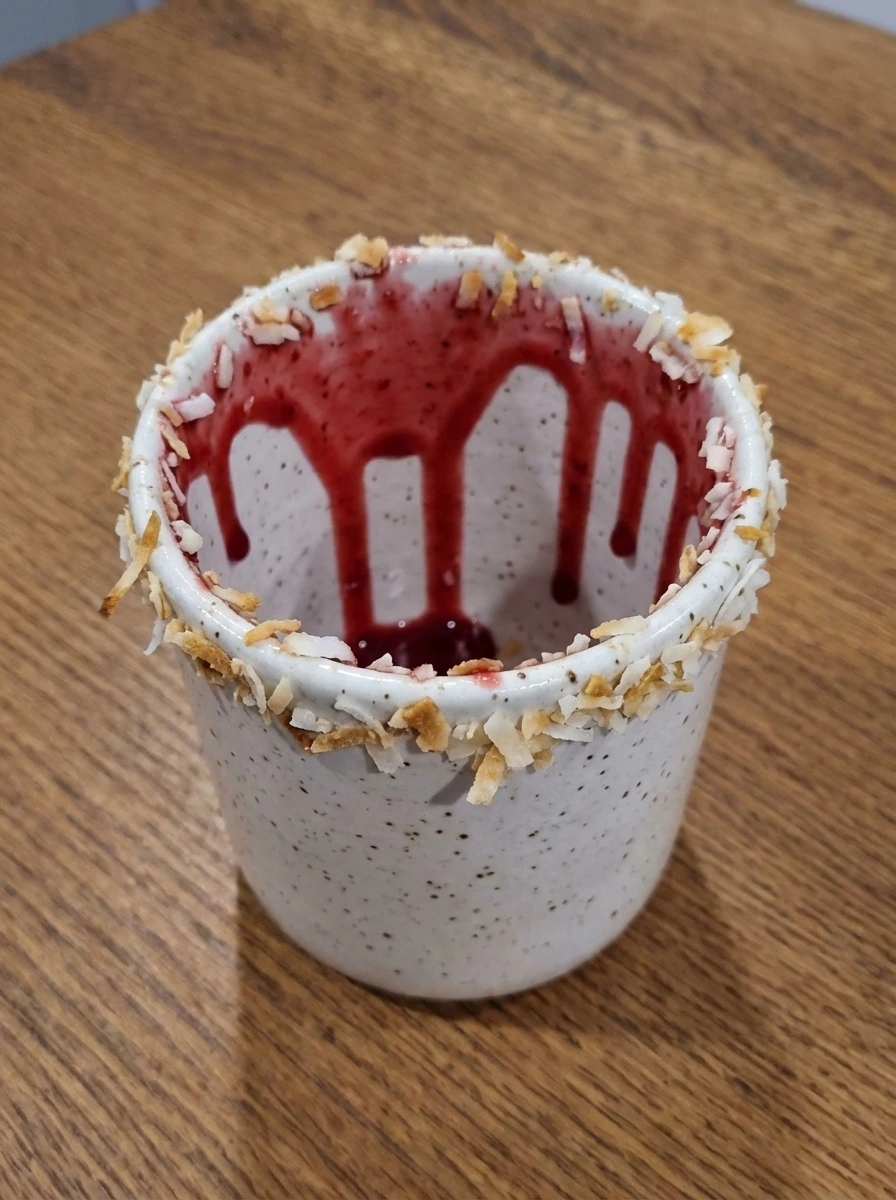
Spoon a little raspberry syrup into each glass and let it drag in uneven lines along the inside. The syrup should cling in loose drips and soft streaks rather than forming perfect patterns. Moisten the rim lightly then press it into the toasted coconut so some spots catch more flakes and some stay sparse. The finished rim should look casual with irregular coverage and visible golden bits.
Tip: A patchy coconut rim looks more natural and gives each sip a little texture.
Step 6: Pour and loosely finish the drink
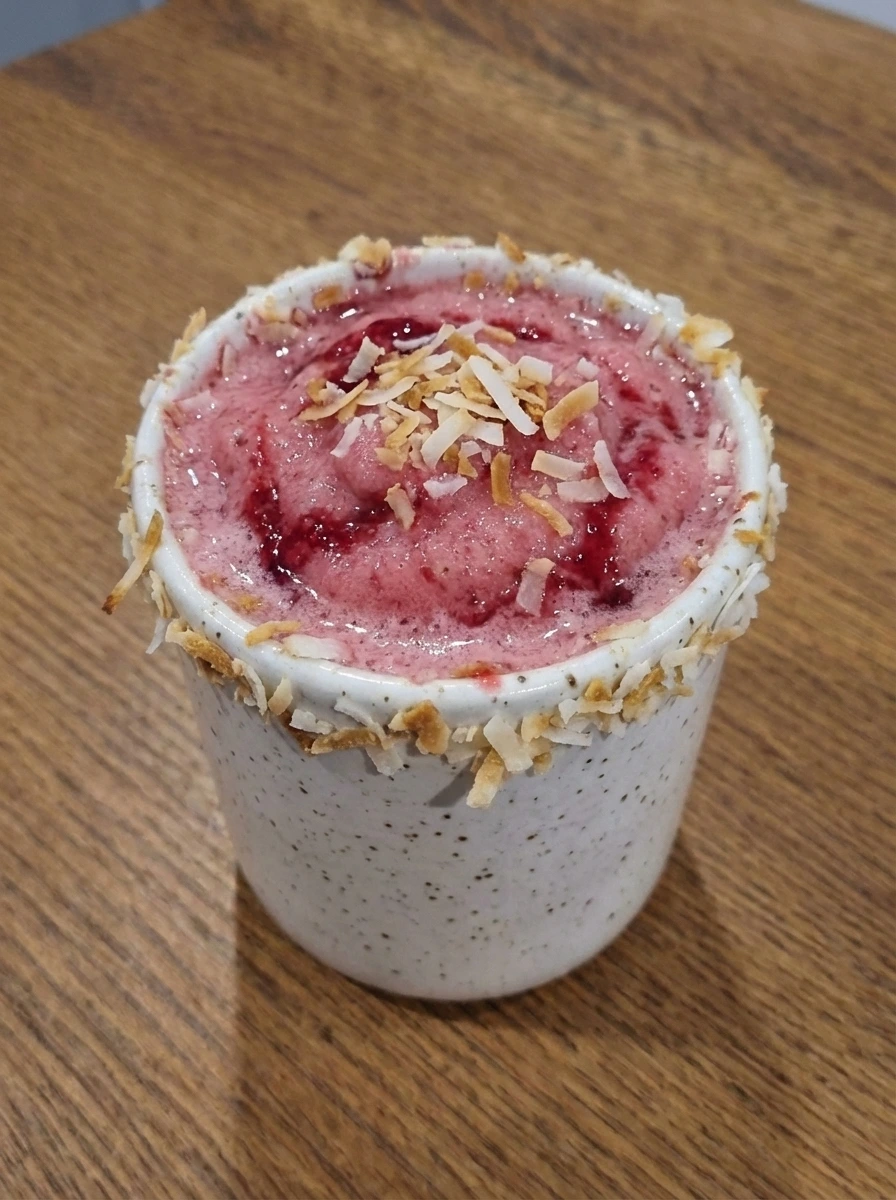
Pour the frozen cocktail into the prepared glasses and let it settle naturally. The thick mixture should mound slightly above the rim in some areas while other areas dip lower and the raspberry streaks remain visible through the sides. Scatter a little more toasted coconut over the top so it lands unevenly. A few flakes can sink slightly while others stay dry on the surface and add a lightly browned finish.
Tip: Pour slowly so the syrup streaks stay visible instead of blending fully into the drink.
Step 7: Add the fruit garnish with casual placement
Tuck a pineapple wedge into the rim at a slight angle then add two fresh raspberries near the top without trying to center them. The garnish should look lightly placed and a little imperfect with natural overlap and different spacing. This step gives the drink a finished tropical look while keeping the homemade feel. You should still see the uneven coconut rim and the textured pink surface beneath the fruit.
Tip: Avoid overfilling the top with garnish because the drink should still be the main focus.
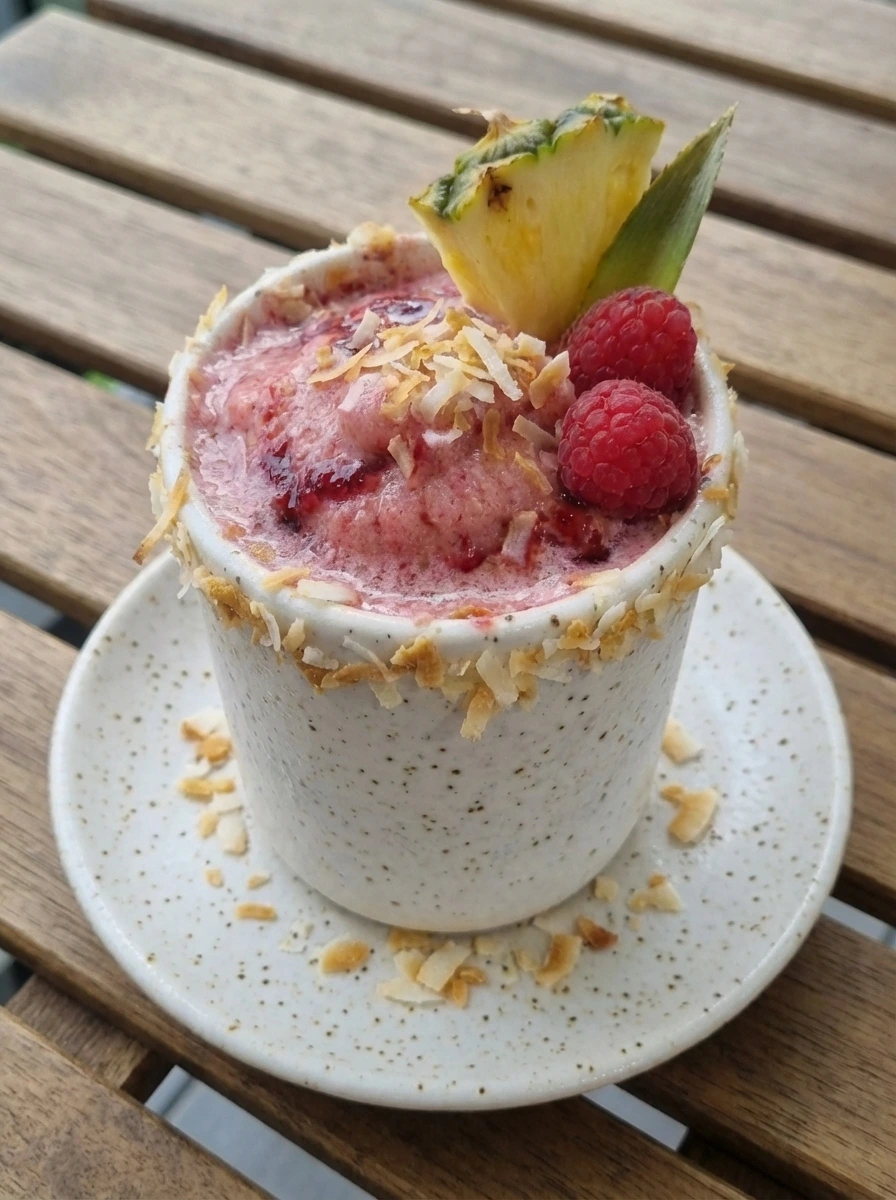
Step 8: Plate and serve the finished cocktail
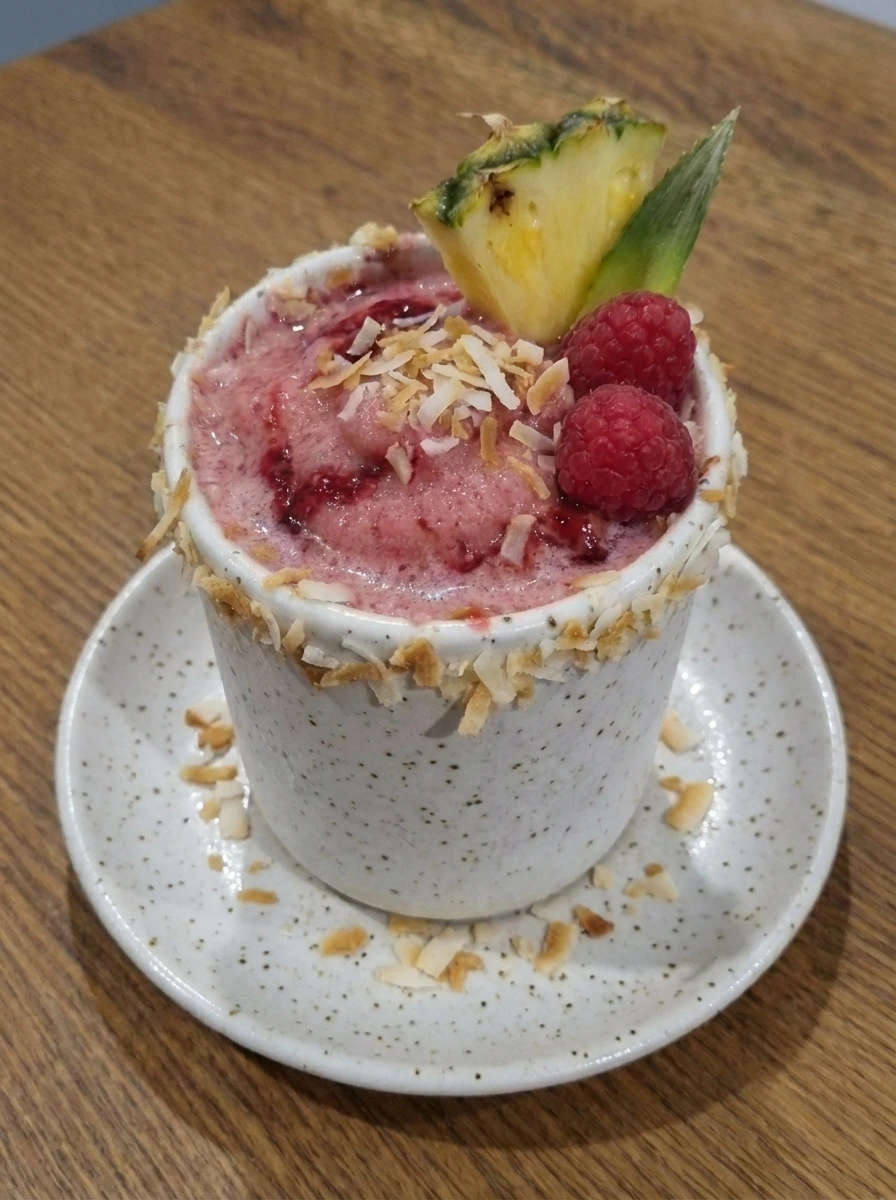
Set the finished drink on a small matching saucer or serving plate and let the top remain slightly uneven and softly piled. The toasted coconut shows light golden brown variation while the syrup streaks and berry flecks give the drink a rich homemade look. The final cocktail should look fully finished and ready to serve with creamy pink color and visible fruit texture and lightly browned coconut and natural garnish placement. Nothing should look stiff or perfectly styled and the surface should still feel cold and lush.
Tip: Serve right away while the texture is thick and frosty and the coconut stays crisp.
Pro Tips
- Use frozen pineapple instead of fresh pineapple so the cocktail stays thick without tasting watery.
- Chill the glasses first so the drink holds its frosty texture longer.
- Add the raspberry syrup in loose streaks rather than mixing it in fully for better color contrast.
- Toast the coconut just until lightly golden so it adds warmth and crunch without tasting bitter.
Storage Instructions
This cocktail is best served right after blending. If needed then freeze the blended mixture in a covered container for up to 1 day and stir after a short thaw so the texture becomes slushy again.
Frequently Asked Questions
Can I make Raspberry Pina Colada Cocktail without alcohol?
Yes and just leave out the rum and add a little extra pineapple juice or a splash of coconut water for the same creamy tropical texture.
Can I use frozen raspberries instead of fresh?
Yes and frozen raspberries work well. They make the drink even thicker and colder and may slightly deepen the color.
How do I make the cocktail sweeter?
Add a little more cream of coconut or an extra drizzle of raspberry syrup and blend again until the sweetness tastes right to you.
Can I make this ahead for a party?
Yes and blend the base ahead then freeze it. Let it soften slightly before stirring and pouring so the texture becomes creamy again.
Final Thoughts
This is the kind of recipe I wish I had found years ago. It would have saved me so many boring drink nights.
But now that I have it and I make it all the time and I think you will too. If you enjoyed this and check out some of my other popular recipes on the blog.
And leave a comment and I read every single one and it really makes my day.
Print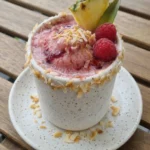
Raspberry Pina Colada Cocktail
- Total Time: 45 minutes
- Yield: 4 servings 1x
Description
This easy Raspberry Pina Colada Cocktail is packed with bright tropical flavor and it is one of my best quick and simple drink ideas for brunch or party nights. The creamy coconut and juicy raspberry blend tastes fresh and healthy while still feeling fun and festive. Make it for holiday gatherings or potluck sipping or weeknight dinner treats or meal prep freezer packs when you want a fast homemade cocktail everyone loves.
Ingredients
- 1 cup fresh raspberries
- 2 cups frozen pineapple chunks
- 3/4 cup cream of coconut
- 1 cup pineapple juice
- 1/2 cup white rum
- 2 tablespoons lime juice
- 2 cups ice cubes
- 1/4 cup sweetened shredded coconut
- 4 wedges fresh pineapple wedges
- 8 berries extra fresh raspberries
- 2 tablespoons raspberry syrup
Instructions
- Slice the pineapple into casual wedges and pick through the raspberries so only the best berries go into the drink. Keep the sizes slightly varied so everything looks natural and homemade rather than too neat. Place the pineapple wedges and extra raspberries aside for later garnish. In a shallow layer of shredded coconut add a few loose crumbs so the texture already looks irregular and ready for a lightly toasted finish.
- Spread the shredded coconut in a loose uneven layer so some spots are thinner and some are slightly piled. As it heats the edges dry first and a few strands turn pale gold while others stay creamy white. Stir once so the color develops naturally rather than evenly. The finished coconut should look lightly browned in scattered patches with a slightly drier texture and a sweet toasted smell.
- Add the raspberries then the frozen pineapple then the cream of coconut then the pineapple juice and rum and lime juice in that order so the colors stack visibly. The deep pink berries sit under the pale coconut cream while the yellow juice pools around the fruit. This stage should look loose and layered rather than mixed. The ingredients stay distinct with bright color contrast and the frozen pineapple keeps the base looking firm and chunky.
- Blend the fruit and liquids until the hard pineapple softens and the raspberries break down into the coconut base. The mixture changes from separate chunks into a thick icy blend with tiny berry flecks and loose pink streaks moving through a creamy blush base. Keep a little texture in the drink so it looks real and frosty instead of perfectly smooth. The surface should look softly mounded with a few uneven air pockets and a naturally thick pour.
- Spoon a little raspberry syrup into each glass and let it drag in uneven lines along the inside. The syrup should cling in loose drips and soft streaks rather than forming perfect patterns. Moisten the rim lightly then press it into the toasted coconut so some spots catch more flakes and some stay sparse. The finished rim should look casual with irregular coverage and visible golden bits.
- Pour the frozen cocktail into the prepared glasses and let it settle naturally. The thick mixture should mound slightly above the rim in some areas while other areas dip lower and the raspberry streaks remain visible through the sides. Scatter a little more toasted coconut over the top so it lands unevenly. A few flakes can sink slightly while others stay dry on the surface and add a lightly browned finish.
- Tuck a pineapple wedge into the rim at a slight angle then add two fresh raspberries near the top without trying to center them. The garnish should look lightly placed and a little imperfect with natural overlap and different spacing. This step gives the drink a finished tropical look while keeping the homemade feel. You should still see the uneven coconut rim and the textured pink surface beneath the fruit.
- Set the finished drink on a small matching saucer or serving plate and let the top remain slightly uneven and softly piled. The toasted coconut shows light golden brown variation while the syrup streaks and berry flecks give the drink a rich homemade look. The final cocktail should look fully finished and ready to serve with creamy pink color and visible fruit texture and lightly browned coconut and natural garnish placement. Nothing should look stiff or perfectly styled and the surface should still feel cold and lush.
Notes
Pro Tips:
- Use frozen pineapple instead of fresh pineapple so the cocktail stays thick without tasting watery.
- Chill the glasses first so the drink holds its frosty texture longer.
- Add the raspberry syrup in loose streaks rather than mixing it in fully for better color contrast.
- Toast the coconut just until lightly golden so it adds warmth and crunch without tasting bitter.
Storage: This cocktail is best served right after blending. If needed then freeze the blended mixture in a covered container for up to 1 day and stir after a short thaw so the texture becomes slushy again.
- Prep Time: 15 minutes
- Cook Time: 30 minutes
- Category: Dessert
- Cuisine: Caribbean inspired
Nutrition
- Serving Size: 1 serving