This Classic Strawberry Shortcake recipe is an easy, comforting dessert that comes together so beautifully with tender shortcakes, juicy strawberries, and soft whipped cream! With sweet berries, fluffy layers, and a fresh finish that feels special.

We love spring because it means that easy desserts like this Classic Strawberry Shortcake are back on the table. Comfort foods, especially those that are healthy and nourish our bodies, are my favorite kinds of meals!
Ingredients

Here’s what I use for this recipe and you can always make substitutions if you prefer.
- Fresh strawberries: These bring the bright, juicy sweetness that makes the filling fresh and classic.
- Granulated sugar: This sweetens both the strawberries and the shortcake dough for balanced flavor.
- All purpose flour: Flour forms the base of the shortcakes and gives them structure.
- Baking powder: This helps the shortcakes rise into soft, tender layers.
- Fine salt: Salt sharpens the flavor and keeps the shortcakes from tasting flat.
- Unsalted butter: Cold butter creates flaky, rich shortcakes with a tender crumb.
- Heavy cream: Cream moistens the dough and also whips into the soft topping.
- Vanilla extract: Vanilla adds warm sweetness to both the berries and whipped cream.
- Powdered sugar: This sweetens the whipped cream and keeps it smooth.
Tools You’ll Need
- Mixing bowls: Use separate bowls for berries, dough, and whipped cream.
- Measuring cups and spoons: Needed for accurate baking and whipping.
- Pastry cutter or fork: Helpful for working the butter into the flour.
- Whisk or hand mixer: Use for making the whipped cream.
- Knife: For hulling and slicing the strawberries and splitting the shortcakes.
Instructions
Step 1: Slice and sweeten the strawberries
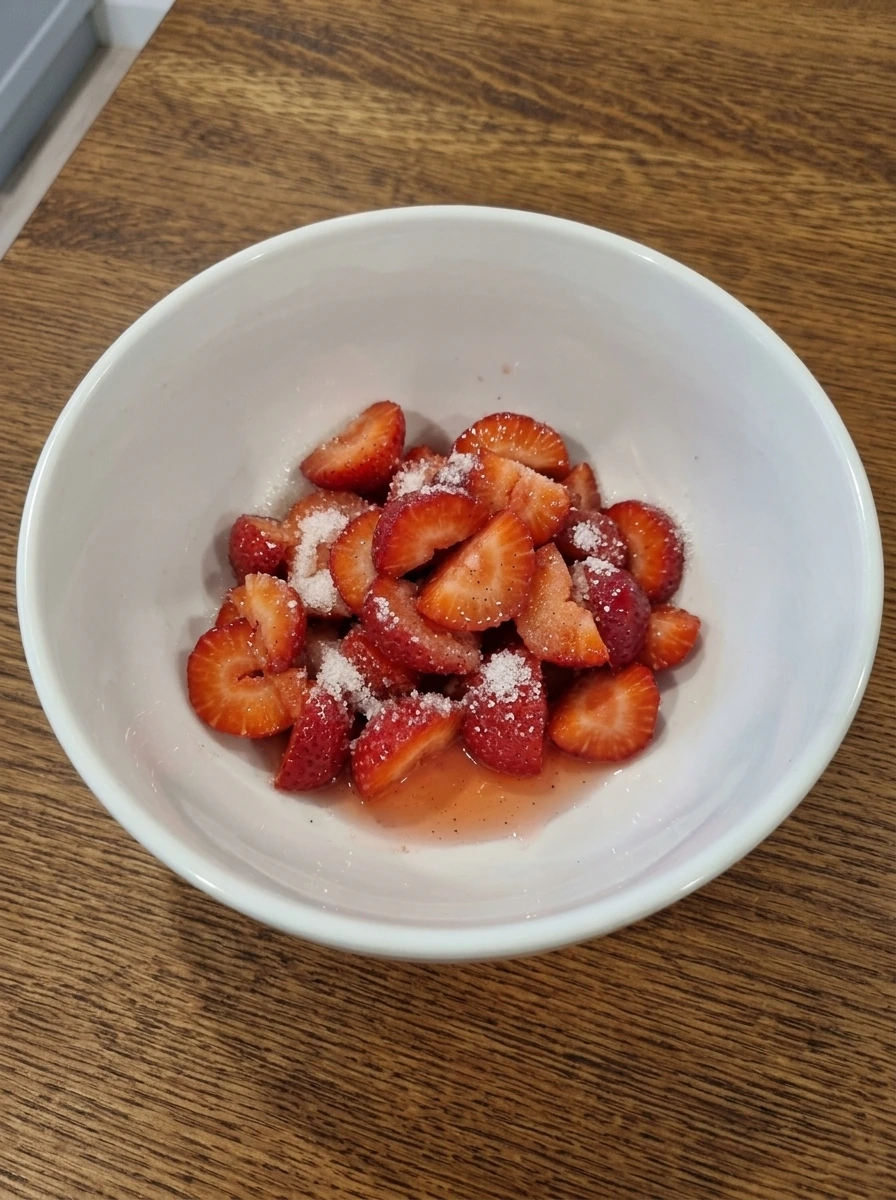
Hull the strawberries and slice them into even pieces, then place them into a white ceramic mixing bowl with part of the granulated sugar and a little vanilla. Toss until every slice looks lightly glossy and evenly coated. As the berries sit, their color deepens and a rosy syrup begins to collect at the bottom of the bowl. The fruit looks juicy, softened, and slightly shiny, but it still holds its shape.
Tip: Slice the berries evenly so they soften at the same pace.
Step 2: Measure the dry ingredients
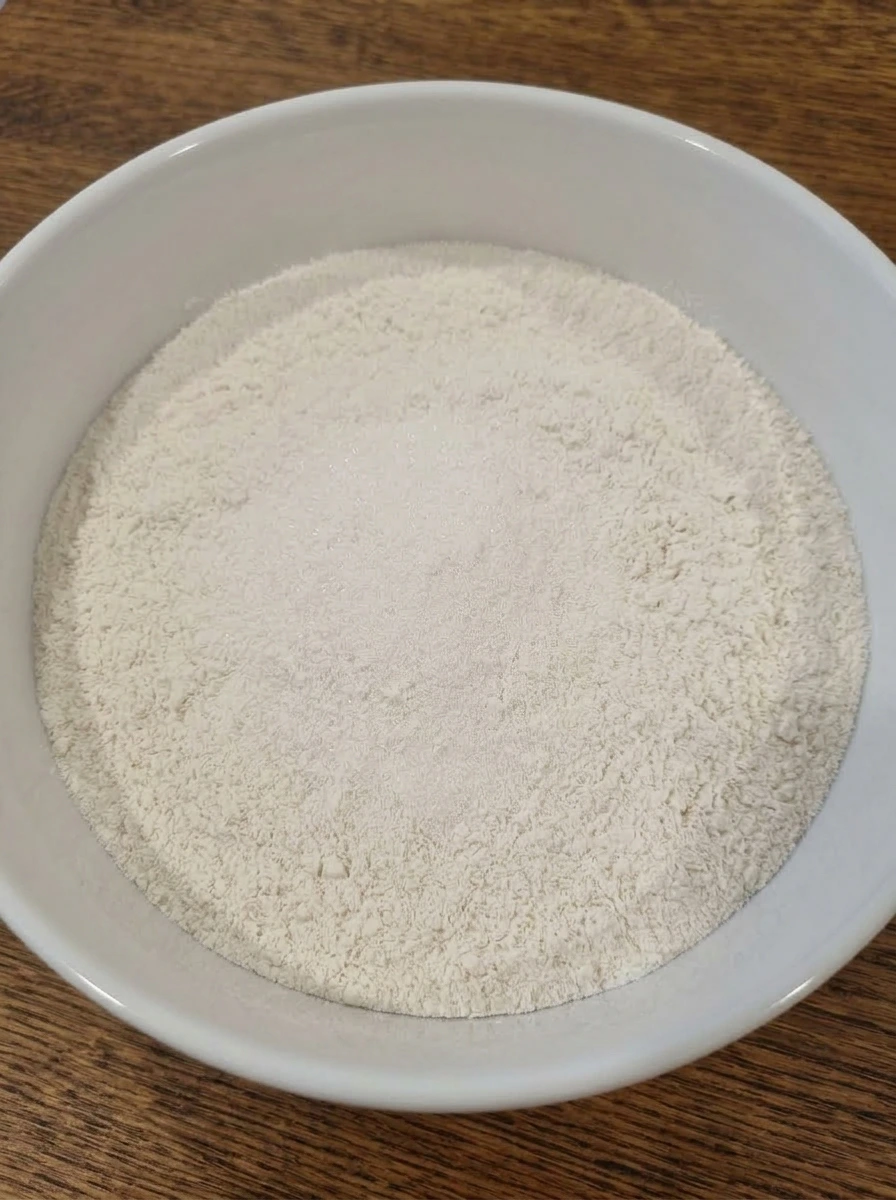
Add the flour, remaining granulated sugar, baking powder, and salt to a white ceramic mixing bowl. Stir until the powders look evenly blended with no streaks or pockets. The mixture should look pale, soft, and powdery throughout. This step gives the dough an even base before the butter is worked in.
Tip: Stir the dry ingredients well so the leavening is evenly distributed.
Step 3: Work the butter into the flour
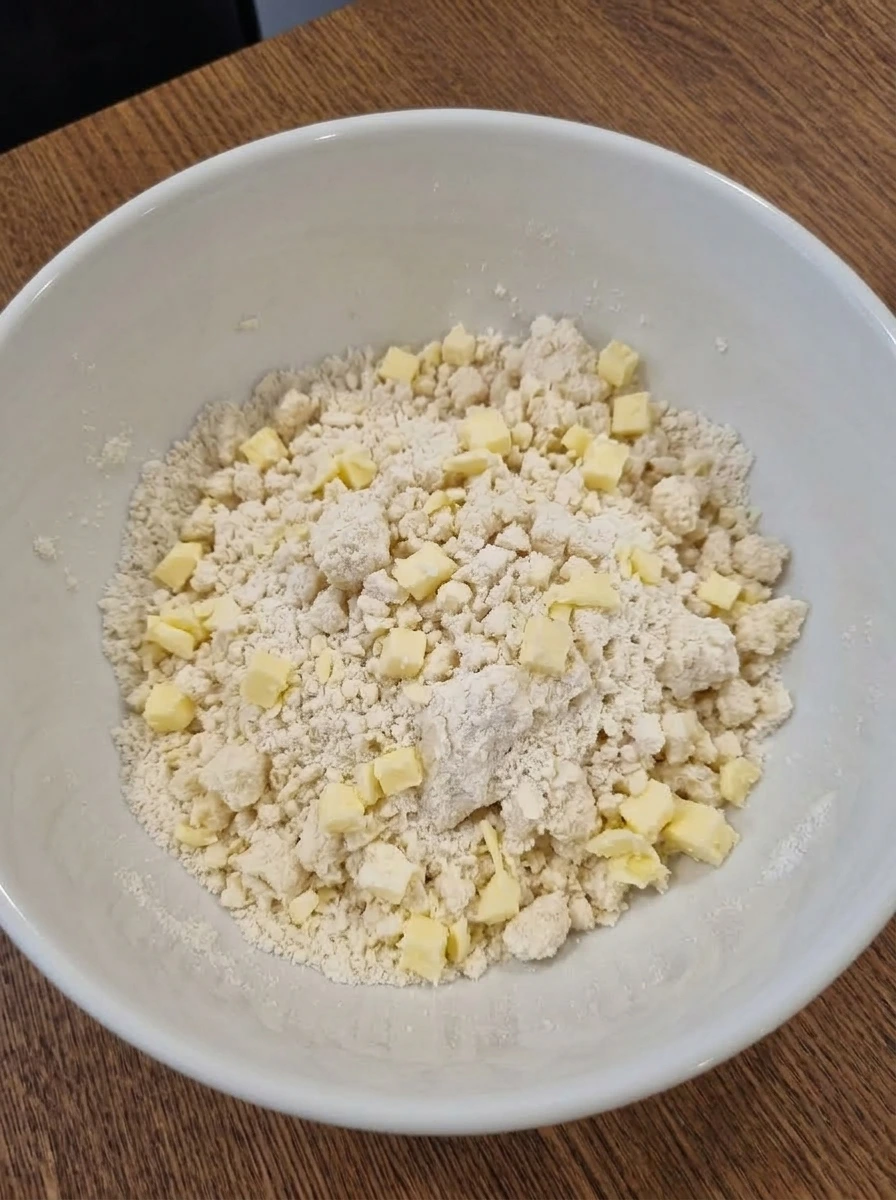
Add the cold butter cubes to the dry ingredients and work them in until the mixture looks crumbly. Some pieces should become very small, while others stay pea sized for texture. The bowl should now hold a loose, sandy mixture with visible butter pieces throughout. It looks richer and slightly clumped compared to the dry flour mixture from the previous step.
Tip: Keep the butter cold so the shortcakes stay tender and flaky.
Step 4: Mix the shortcake dough
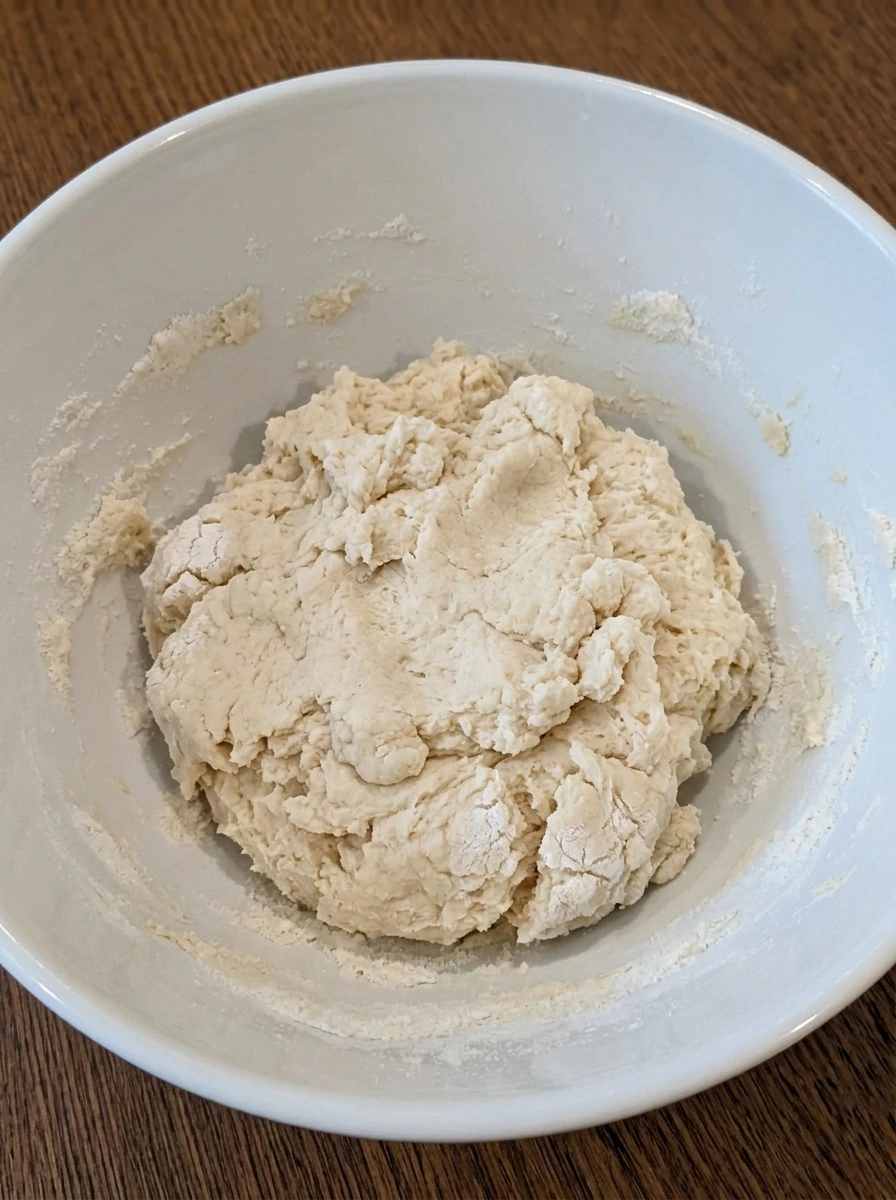
Pour in part of the heavy cream and gently mix just until a shaggy dough forms. The mixture changes from loose crumbs into soft, uneven clumps that hold together when pressed. Do not smooth it out completely. The dough should look slightly rough and thick, with a few dry edges barely visible, which helps keep the final texture light.
Tip: Stop mixing as soon as the dough holds together to avoid dense shortcakes.
Step 5: Shape the shortcakes
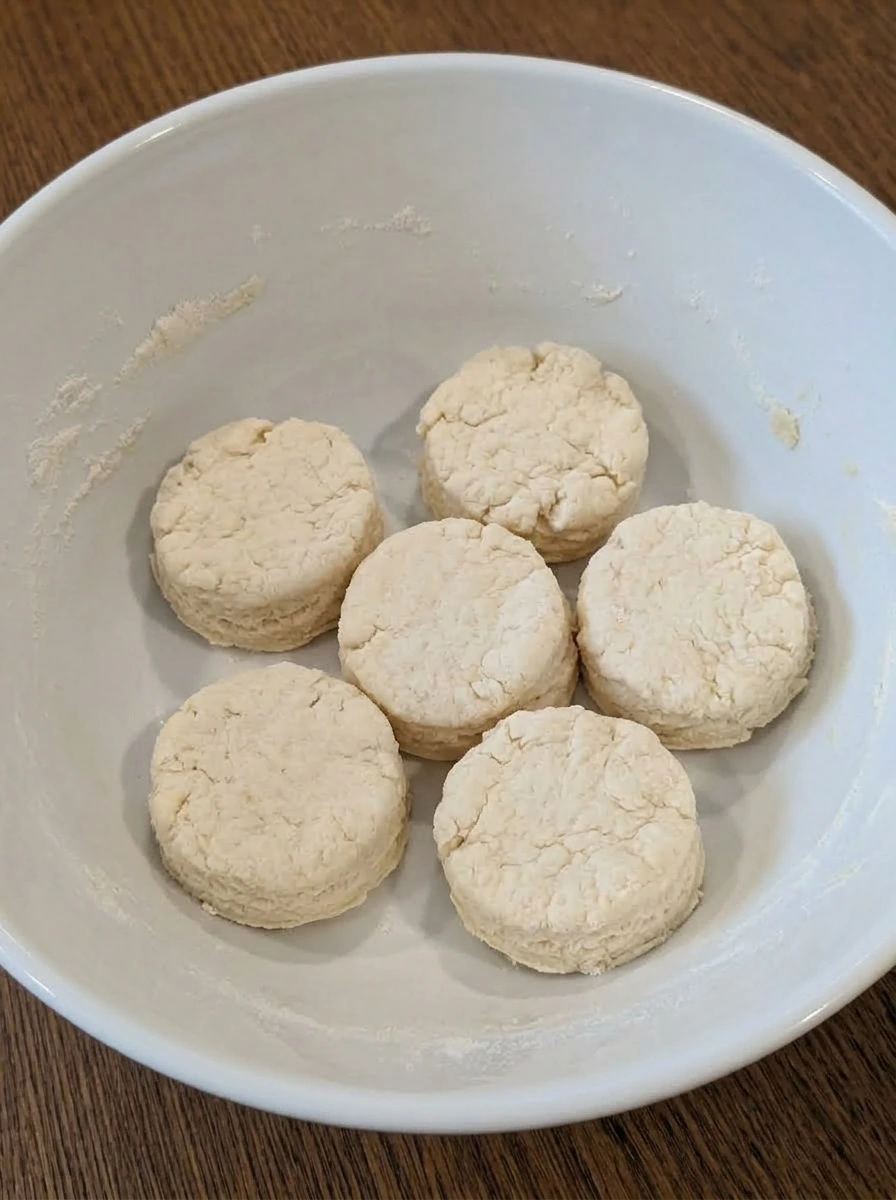
Gather the dough and shape it into a thick round, then divide it into even portions and gently form each one into a short, rustic round. Arrange the pieces with space between them so their edges stay distinct. At this stage the dough looks smooth in some spots and lightly craggy in others. The tops should be soft and pale, and the rounds should hold their shape clearly.
Tip: Handle the dough lightly so the rounds do not get compacted.
Step 6: Cool the baked shortcakes
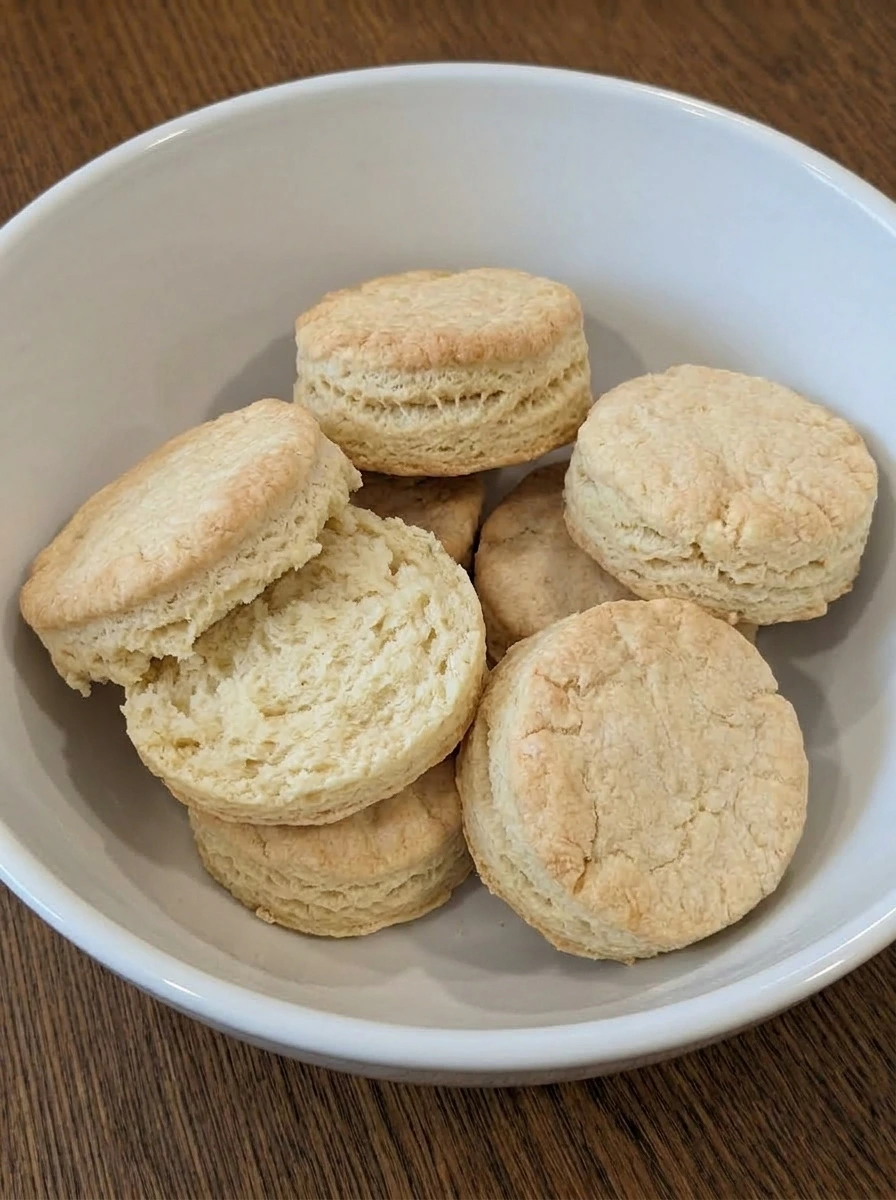
Let the shortcakes cool until they are easy to handle and their surfaces look set. The outsides should appear lightly golden and dry, while the sides keep a soft, tender look. Once cooled, split one open to check the texture. The inside should look fluffy and pale with a delicate crumb that is ready to soak up the berry juices and cream.
Tip: Cool the shortcakes before filling so the whipped cream stays full and soft.
Step 7: Whip the cream

Add the remaining heavy cream, powdered sugar, and vanilla to a white ceramic mixing bowl and whisk until thick, soft peaks form. The cream changes from fluid and glossy to full, smooth, and billowy. It should look soft enough to spoon but sturdy enough to sit in tall mounds. The surface becomes silky with visible swirls that hold their shape.
Tip: Whip only until soft peaks so the cream stays smooth and luscious.
Step 8: Assemble and plate the shortcakes
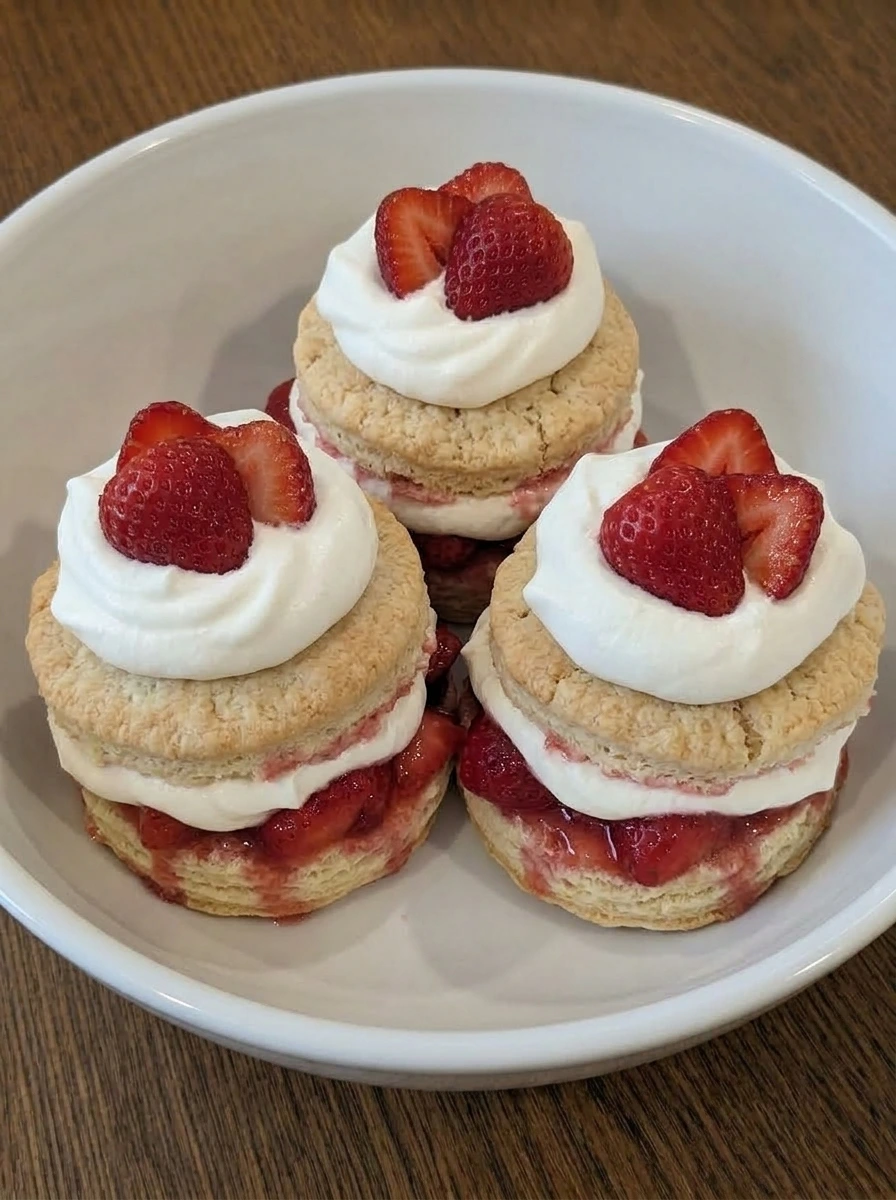
Split the cooled shortcakes and spoon some of the juicy strawberries over the bottom halves. Add generous dollops of whipped cream, then place the top halves over the filling and finish with more berries and cream. The finished dessert looks layered, soft, and abundant. Red berry juices settle into the crumb, the whipped cream sits in thick clouds, and the final shortcakes look plated and ready to serve.
Tip: Assemble just before serving so the shortcakes keep their best texture.
Pro Tips
- Let the strawberries sit long enough to build a syrupy juice before assembling.
- Keep the butter cold so the shortcakes stay tender and layered.
- Do not overmix the dough or the shortcakes can turn tough.
- Assemble the dessert right before serving for the prettiest layers and best texture.
Storage Instructions
Store the shortcakes, strawberries, and whipped cream separately in the refrigerator for the best texture. The strawberries will stay fresh for about 2 days, the whipped cream is best within 1 day, and the shortcakes can be kept in an airtight container for 2 days or frozen for up to 1 month. If frozen, thaw the shortcakes in the refrigerator and bring them to room temperature before serving. there is no need for reheating, and assembled shortcakes should not be frozen.
Frequently Asked Questions
Can I make the strawberries ahead of time?
Yes, you can slice and sweeten the strawberries a few hours ahead. They will become even juicier as they rest in the refrigerator. Just give them a gentle stir before using so the syrup is evenly distributed.
Can I use frozen strawberries?
You can, but fresh strawberries give the best texture and appearance for classic strawberry shortcake. Frozen berries release more liquid and become much softer after thawing. They still taste good, but the filling will look looser and less bright.
How do I keep the whipped cream from getting too soft?
Start with very cold heavy cream and a chilled bowl if possible. Whip it only until soft peaks form, because overwhipping can make it grainy while underwhipping can make it collapse. Keep it refrigerated until you are ready to assemble the shortcakes.
Can I assemble strawberry shortcake in advance?
It is best to wait until just before serving. Once assembled, the berry juices and whipped cream start soaking into the shortcakes quite quickly. That soft texture can be delicious, but it will not be as neat or fluffy after sitting.
Final Thoughts
If you try this recipe, I really hope you love it as much as my family does. It has become one of those desserts we just keep coming back to, no matter the season.
Drop a comment below and let me know how yours turned out. And if you are looking for more easy dessert ideas, make sure to bookmark this page.
I am always adding new recipes that are simple, satisfying, and perfect for busy weeknights.
Print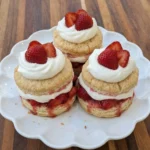
Classic Strawberry Shortcake
- Total Time: 45 minutes
- Yield: 4 servings
Description
Looking for the best Classic Strawberry Shortcake? This one is quick, easy, and simply delicious with tender shortcakes, juicy berries, and soft whipped cream. Whether you are after a healthy dessert idea or a simple holiday treat, this delivers every time. Great for brunch, party tables, potluck spreads, weeknight dinner, meal prep sweets, and spring celebrations. Save this easy Classic Strawberry Shortcake for your next holiday!
Ingredients
- 1 1/2 pounds Fresh strawberries
- 1/2 cup, divided Granulated sugar
- 2 cups All purpose flour
- 1 tablespoon Baking powder
- 1/2 teaspoon Fine salt
- 1/2 cup cold, cubed Unsalted butter
- 1 3/4 cups, divided Heavy cream
- 2 teaspoons, divided Vanilla extract
- 2 tablespoons Powdered sugar
Instructions
- Hull the strawberries and slice them into even pieces, then place them into a white ceramic mixing bowl with part of the granulated sugar and a little vanilla. Toss until every slice looks lightly glossy and evenly coated. As the berries sit, their color deepens and a rosy syrup begins to collect at the bottom of the bowl. The fruit looks juicy, softened, and slightly shiny, but it still holds its shape.
- Add the flour, remaining granulated sugar, baking powder, and salt to a white ceramic mixing bowl. Stir until the powders look evenly blended with no streaks or pockets. The mixture should look pale, soft, and powdery throughout. This step gives the dough an even base before the butter is worked in.
- Add the cold butter cubes to the dry ingredients and work them in until the mixture looks crumbly. Some pieces should become very small, while others stay pea sized for texture. The bowl should now hold a loose, sandy mixture with visible butter pieces throughout. It looks richer and slightly clumped compared to the dry flour mixture from the previous step.
- Pour in part of the heavy cream and gently mix just until a shaggy dough forms. The mixture changes from loose crumbs into soft, uneven clumps that hold together when pressed. Do not smooth it out completely. The dough should look slightly rough and thick, with a few dry edges barely visible, which helps keep the final texture light.
- Gather the dough and shape it into a thick round, then divide it into even portions and gently form each one into a short, rustic round. Arrange the pieces with space between them so their edges stay distinct. At this stage the dough looks smooth in some spots and lightly craggy in others. The tops should be soft and pale, and the rounds should hold their shape clearly.
- Let the shortcakes cool until they are easy to handle and their surfaces look set. The outsides should appear lightly golden and dry, while the sides keep a soft, tender look. Once cooled, split one open to check the texture. The inside should look fluffy and pale with a delicate crumb that is ready to soak up the berry juices and cream.
- Add the remaining heavy cream, powdered sugar, and vanilla to a white ceramic mixing bowl and whisk until thick, soft peaks form. The cream changes from fluid and glossy to full, smooth, and billowy. It should look soft enough to spoon but sturdy enough to sit in tall mounds. The surface becomes silky with visible swirls that hold their shape.
- Split the cooled shortcakes and spoon some of the juicy strawberries over the bottom halves. Add generous dollops of whipped cream, then place the top halves over the filling and finish with more berries and cream. The finished dessert looks layered, soft, and abundant. Red berry juices settle into the crumb, the whipped cream sits in thick clouds, and the final shortcakes look plated and ready to serve.
Notes
Pro Tips:
- Let the strawberries sit long enough to build a syrupy juice before assembling.
- Keep the butter cold so the shortcakes stay tender and layered.
- Do not overmix the dough or the shortcakes can turn tough.
- Assemble the dessert right before serving for the prettiest layers and best texture.
Storage: Store the shortcakes, strawberries, and whipped cream separately in the refrigerator for the best texture. The strawberries will stay fresh for about 2 days, the whipped cream is best within 1 day, and the shortcakes can be kept in an airtight container for 2 days or frozen for up to 1 month. If frozen, thaw the shortcakes in the refrigerator and bring them to room temperature before serving. there is no need for reheating, and assembled shortcakes should not be frozen.
- Prep Time: 25 minutes
- Cook Time: 20 minutes
- Category: Dessert
- Cuisine: American