When you want something different from usual chicken dinners and yet still want a meal that feels comforting these Honey Garlic Chicken Thighs offer a delicious twist. This Honey Garlic Chicken Thighs recipe is juicy and simple and packed with flavor and perfect for cozy dinners or casual gatherings.
This recipe is perfect for a weeknight dinner and meal prep and even a relaxed holiday table when you want something easy but still worth sharing. The sauce clings to the chicken in a way that makes the whole dish feel a little special without adding extra work.
If you want more chicken dinner ideas also check out baked chicken thighs and skillet chicken dinners and sticky glazed chicken recipes. This is one of those meals that fits right into a regular routine and still gets people excited when it hits the table.
Ingredients
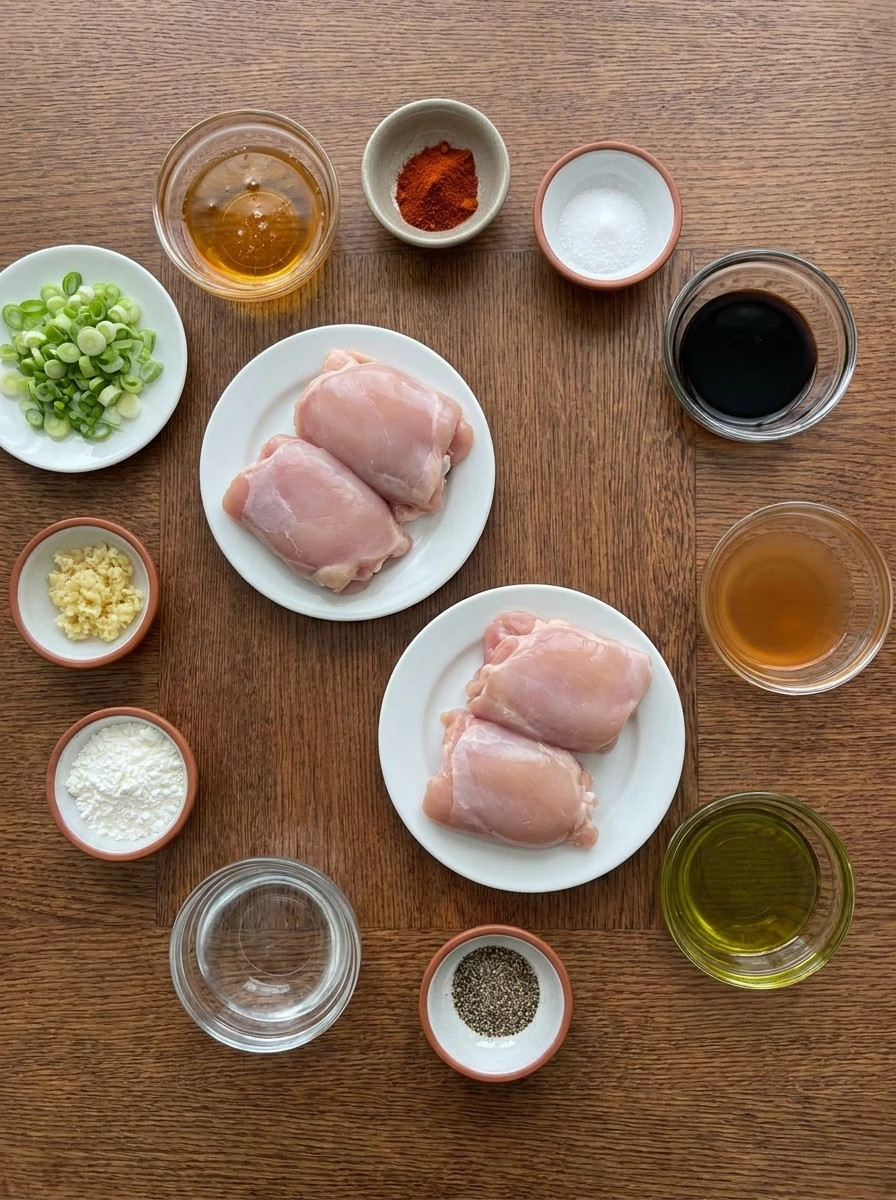
Here’s what I use for this recipe and you can always make substitutions if you prefer.
- boneless skinless chicken thighs: The main protein and it stays tender while browning nicely.
- honey: Adds sweetness and helps the glaze turn glossy.
- garlic: Brings sharp savory flavor to balance the honey.
- soy sauce: Adds saltiness and deep color to the sauce.
- apple cider vinegar: Cuts through the sweetness and brightens the glaze.
- paprika: Adds warm color and mild smoky depth.
- black pepper: Gives gentle heat and rounds out the seasoning.
- salt: Seasons the chicken throughout.
- cornstarch: Helps the sauce thicken into a glaze.
- water: Loosens the cornstarch so it blends smoothly.
- olive oil: Helps the chicken brown and keeps it from sticking.
- green onions: Adds fresh color and a mild sharp finish.
Tools You’ll Need
- mixing bowl: Used for combining the sauce and coating the chicken.
- cast iron skillet: Used for browning the chicken and reducing the glaze.
- small bowl: Used for stirring the cornstarch slurry.
- white plate: Used for serving the finished chicken.
Instructions
Step 1: Mix the honey garlic sauce
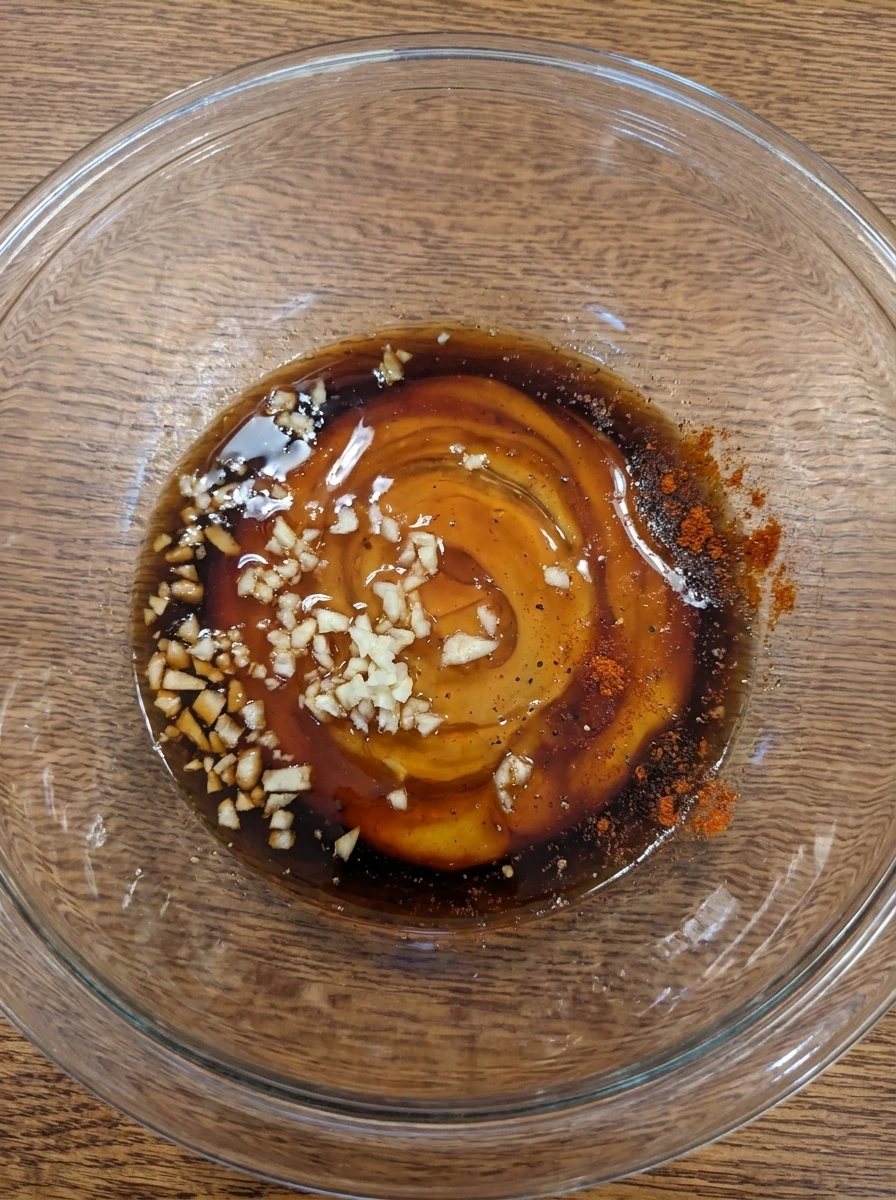
Honey and soy sauce and minced garlic and vinegar and paprika and black pepper and salt are partially swirled together and then fully blended into a loose golden brown mixture. The color deepens as the garlic spreads through the liquid and the sauce looks slightly streaky before it settles smooth.
Tip: Make sure the honey is fully blended so the sauce coats the chicken evenly.
Step 2: Coat the chicken thighs
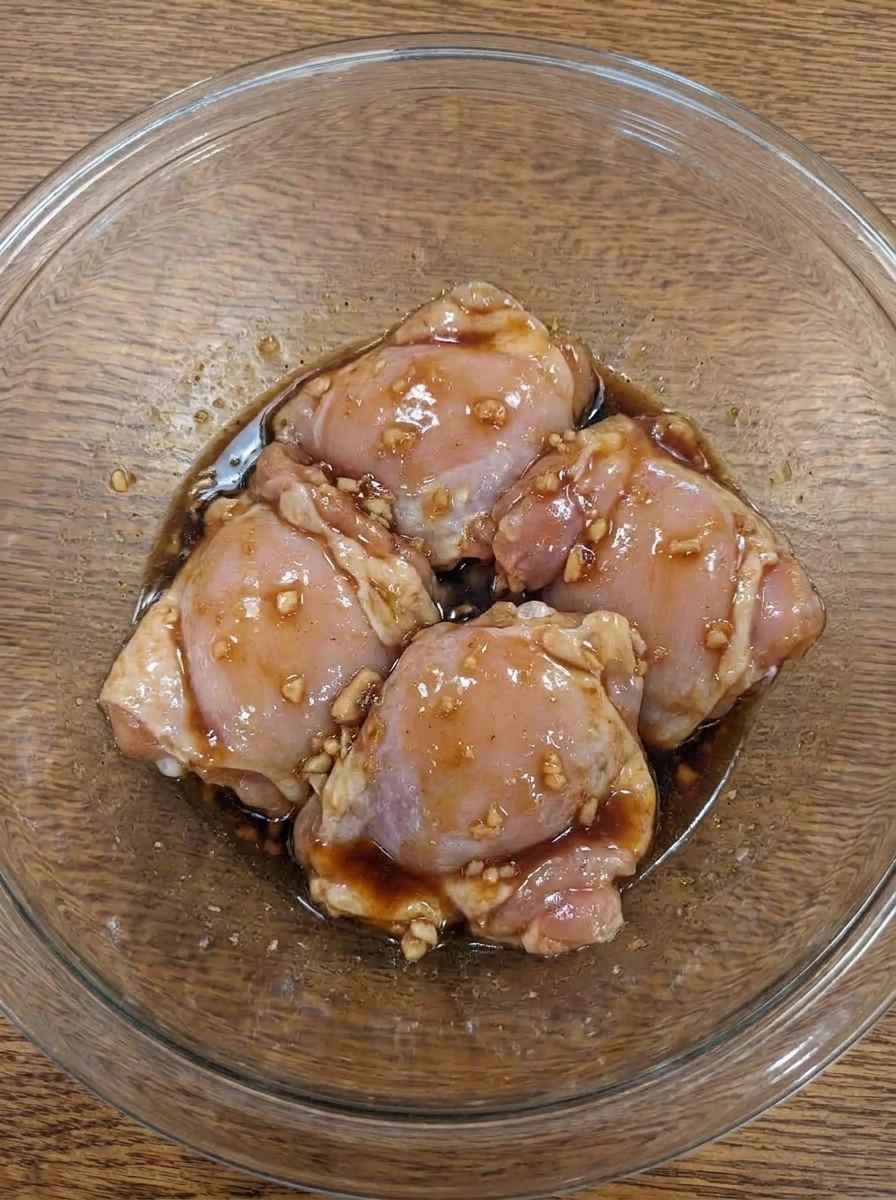
The four chicken thighs are added and turned through the sauce until their surfaces look glossy and fully coated while thicker bits of garlic cling in uneven patches. The raw pink chicken now has a darker amber sheen and the pieces overlap casually instead of sitting in a perfect pattern.
Tip: Turn each thigh well so the sauce reaches the folds and edges.
Step 3: Brown the first side
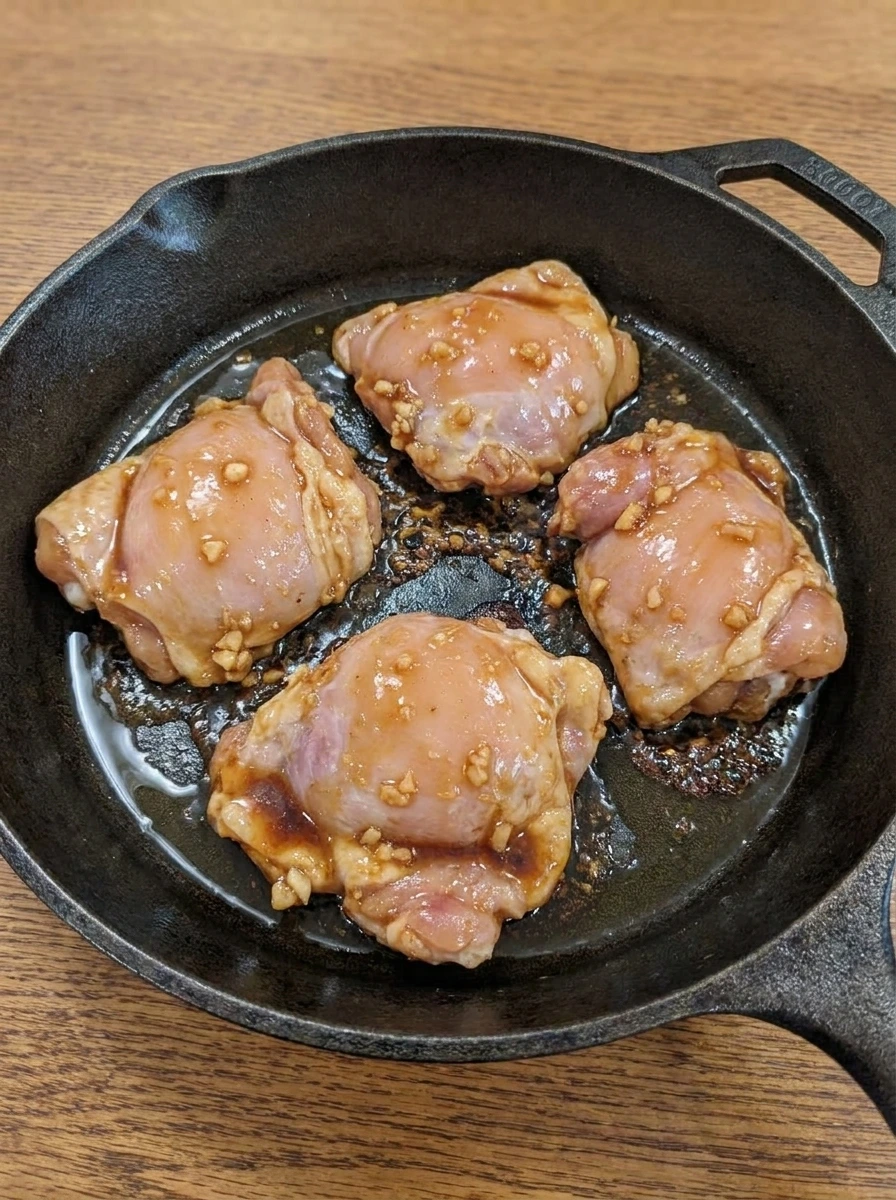
The coated thighs cook until the bottom side turns deeper and slightly caramelized while the top remains glossy and raw looking in spots. Small patches of browning appear around the edges and the sauce begins to cling more tightly instead of sliding off.
Tip: Leave the chicken alone long enough to develop color before moving it.
Step 4: Flip the chicken and thicken the glaze
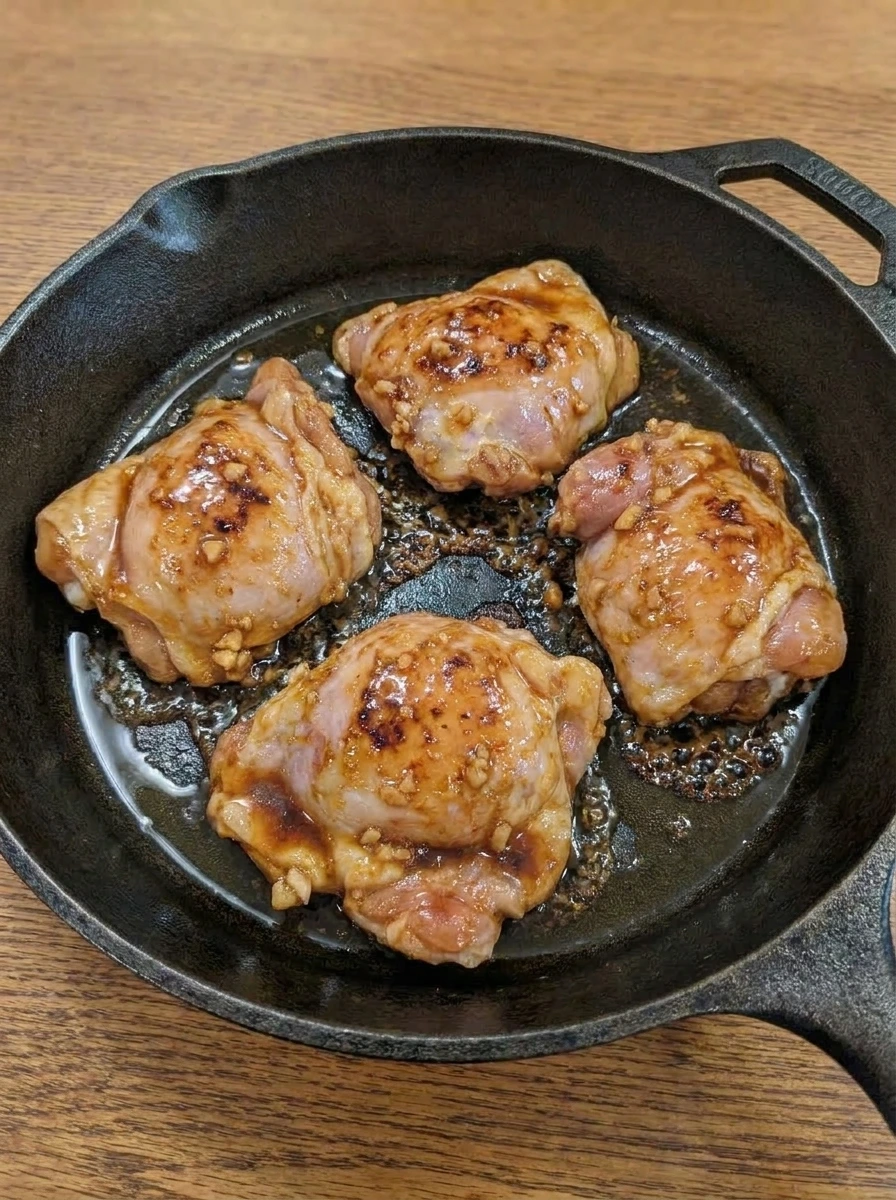
The chicken is turned so the browned undersides now face up and the sauce looks darker and more concentrated around the pieces. A cornstarch slurry is added and the glaze shifts from thin and runny to shiny and lightly thickened with uneven bubbling between the thighs.
Tip: Stir the cornstarch with water first so the glaze stays smooth.
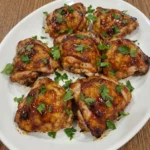
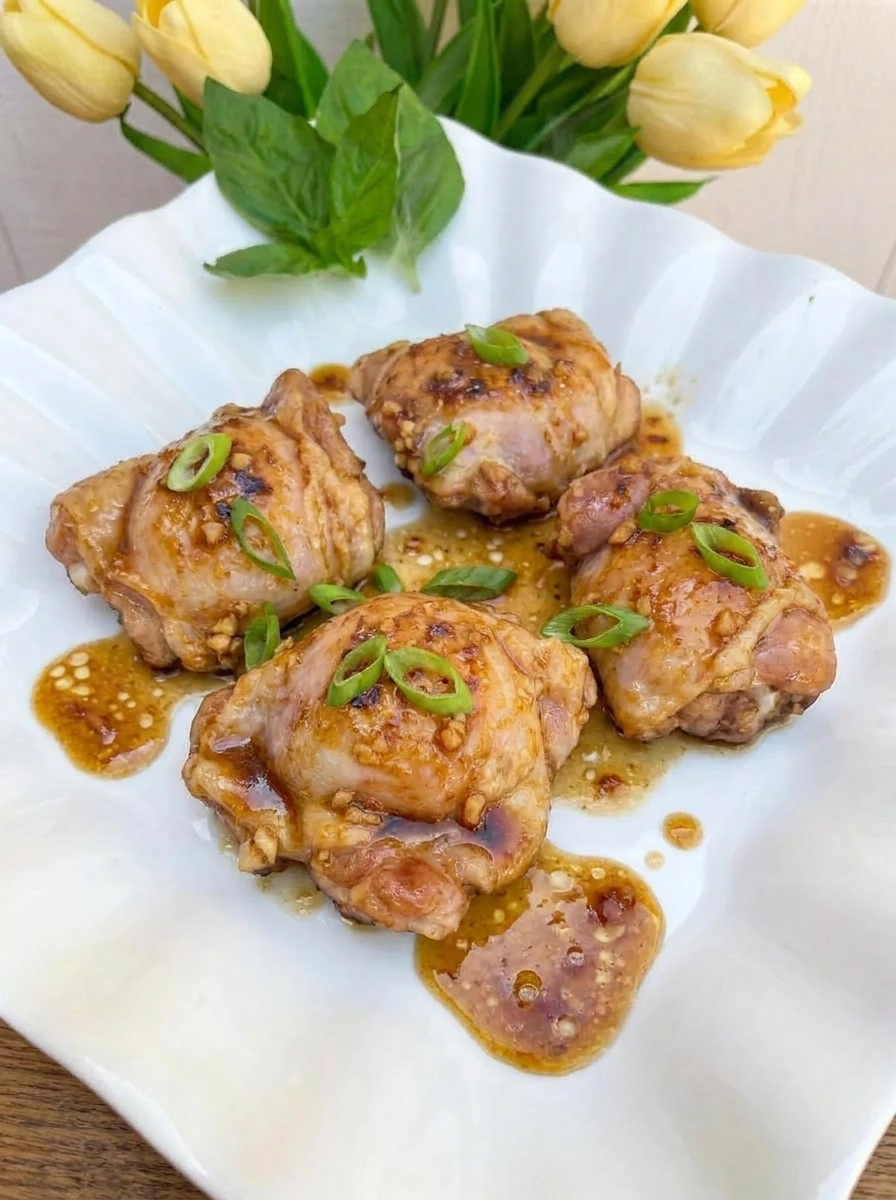
Step 5: Plate and finish with green onions
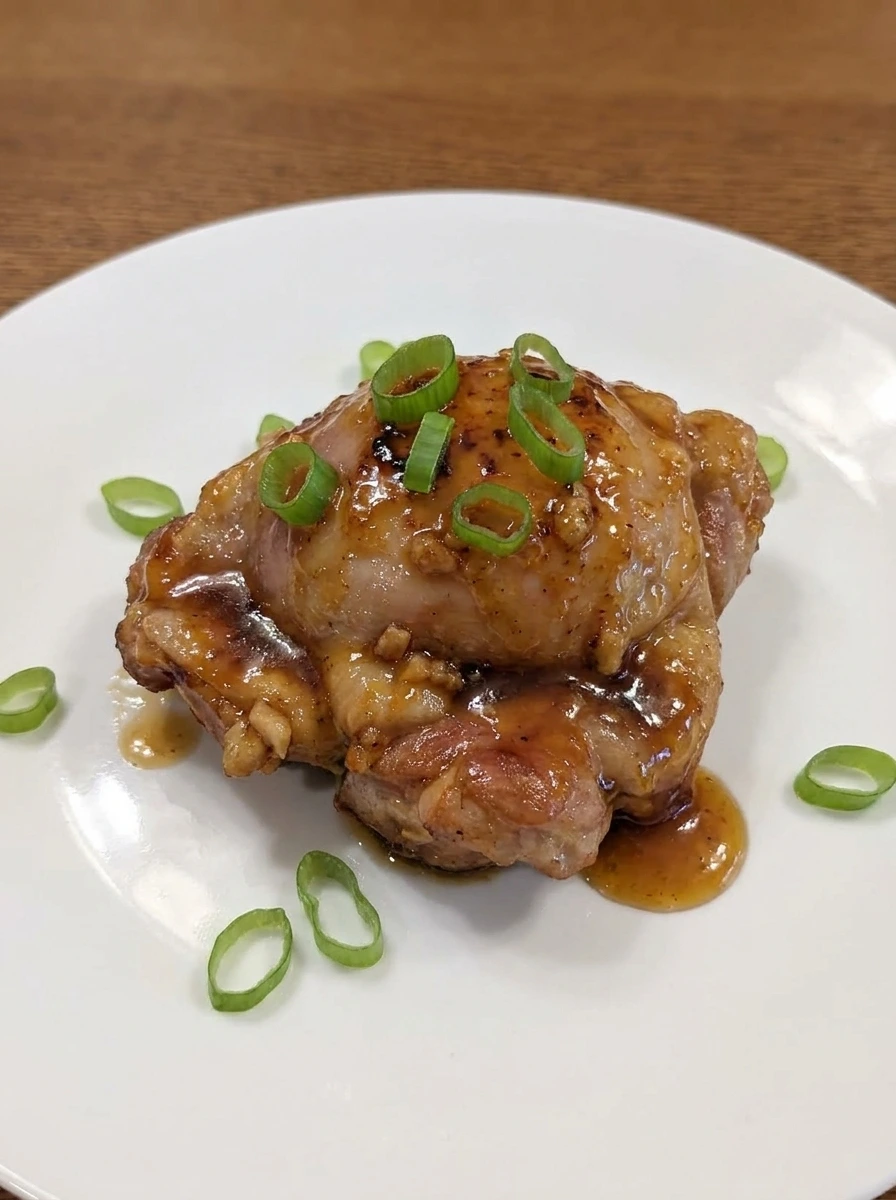
The fully cooked chicken is moved to a plate and spooned with the thick glaze so it settles in uneven lines and small pools around the thighs. Sliced green onions are scattered loosely over the top and the final dish shows browned edges and a sticky surface and a homemade look with non uniform color.
Tip: Spoon extra glaze over the top right before serving for the best shine.
Pro Tips
- Pat the chicken dry before coating so the glaze grips better.
- Keep the garlic minced small so it softens quickly in the sauce.
- Flip the thighs only once for better browning and cleaner glaze.
- Spoon the glaze over the chicken at the end for a richer finish.
Storage Instructions
Store leftovers in a sealed container in the fridge for up to four days. The glaze will thicken as it chills and then loosen again when warmed gently. Reheat the chicken with a spoonful of water to help the sauce relax and coat the meat again. This recipe also works well for meal prep because the flavor holds up nicely the next day.
Frequently Asked Questions
Yes and they will work well though they may need a little more cooking time until fully done.
Yes and the flavor gets even deeper after sitting so it is great for meal prep.
Rice and roasted vegetables and noodles all work well because they catch the extra glaze.
Yes and you can reduce the honey slightly while keeping the soy sauce and garlic the same.
Final Thoughts
So there you go. A recipe that is simple enough for a Tuesday night and yet good enough to serve at a gathering.
I have made this more times than I can count and it never disappoints. Save this one and share it with a friend and let me know in the comments if you made any fun changes.
I am always curious to see how people put their own spin on things.
Print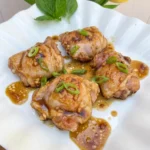
Honey Garlic Chicken Thighs
- Total Time: 45 minutes
- Yield: 4 servings 1x
Description
These Honey Garlic Chicken Thighs are the easy answer when you need quick dinner ideas that still feel special. The sauce turns glossy and rich while the chicken stays tender and juicy with the best balance of sweet and savory flavor. It is a simple and healthy option for meal prep or a busy weeknight dinner and it reheats beautifully which makes it one of the best recipes to keep on repeat at home.
Ingredients
- 4 thighs boneless skinless chicken thighs
- 1/4 cup honey
- 4 cloves minced garlic
- 3 tablespoons soy sauce
- 1 tablespoon apple cider vinegar
- 1 teaspoon paprika
- 1/2 teaspoon black pepper
- 1/2 teaspoon salt
- 1 teaspoon cornstarch
- 1 tablespoon water
- 1 tablespoon olive oil
- 2 tablespoons sliced green onions
Instructions
- Honey and soy sauce and minced garlic and vinegar and paprika and black pepper and salt are partially swirled together and then fully blended into a loose golden brown mixture. The color deepens as the garlic spreads through the liquid and the sauce looks slightly streaky before it settles smooth.
- The four chicken thighs are added and turned through the sauce until their surfaces look glossy and fully coated while thicker bits of garlic cling in uneven patches. The raw pink chicken now has a darker amber sheen and the pieces overlap casually instead of sitting in a perfect pattern.
- The coated thighs cook until the bottom side turns deeper and slightly caramelized while the top remains glossy and raw looking in spots. Small patches of browning appear around the edges and the sauce begins to cling more tightly instead of sliding off.
- The chicken is turned so the browned undersides now face up and the sauce looks darker and more concentrated around the pieces. A cornstarch slurry is added and the glaze shifts from thin and runny to shiny and lightly thickened with uneven bubbling between the thighs.
- The fully cooked chicken is moved to a plate and spooned with the thick glaze so it settles in uneven lines and small pools around the thighs. Sliced green onions are scattered loosely over the top and the final dish shows browned edges and a sticky surface and a homemade look with non uniform color.
Notes
Pro Tips:
- Pat the chicken dry before coating so the glaze grips better.
- Keep the garlic minced small so it softens quickly in the sauce.
- Flip the thighs only once for better browning and cleaner glaze.
- Spoon the glaze over the chicken at the end for a richer finish.
Storage: Store leftovers in a sealed container in the fridge for up to four days. The glaze will thicken as it chills and then loosen again when warmed gently. Reheat the chicken with a spoonful of water to help the sauce relax and coat the meat again. This recipe also works well for meal prep because the flavor holds up nicely the next day.
- Prep Time: 15 minutes
- Cook Time: 30 minutes
- Category: Dinner
- Cuisine: American
Nutrition
- Serving Size: 1 serving