This Bakery Style Blueberry Muffins recipe is packed with flavor and so easy to make. It is a budget friendly recipe that you can make with simple pantry staples! Make these soft and fluffy blueberry muffins for breakfast this week.
If you love bakery treats, you are going to love this Bakery Style Blueberry Muffins recipe. It’s a homemade muffin recipe that is tender, flavorful, and hard to resist. With juicy blueberries in every bite and those big domed tops, you’re going to want to grab one while they are still warm.
If you’re looking for other cozy breakfast recipes like my Bakery Style Blueberry Muffins, why not also try this Classic French Toast or Homemade Belgian Waffles. Both of these recipes are easy to make, making them perfect for a special breakfast or weekend brunch.
Ingredients
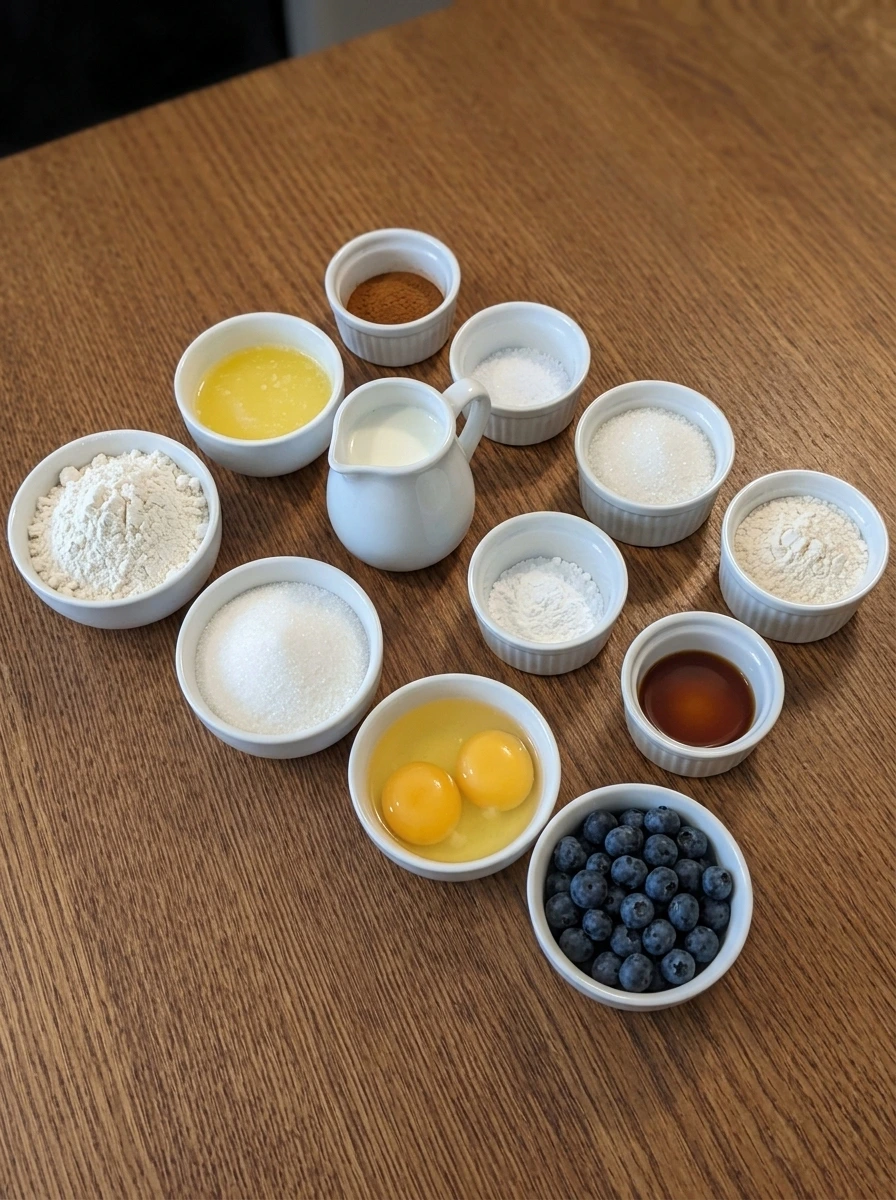
Here’s what I use for this recipe and you can always make substitutions if you prefer.
- all purpose flour: This forms the base of the muffins and gives them structure while keeping the crumb soft.
- granulated sugar: Sugar sweetens the batter and helps create a tender texture.
- baking powder: This gives the muffins their tall rise and bakery style domed tops.
- fine salt: Salt balances the sweetness and sharpens the blueberry flavor.
- ground cinnamon: A small amount adds warmth and depth without overpowering the berries.
- large eggs: Eggs bind the batter and help the muffins bake up rich and tender.
- whole milk: Milk adds moisture and helps create a soft, fluffy crumb.
- unsalted butter, melted and cooled: Butter adds richness and gives the muffins a classic bakery flavor.
- vanilla extract: Vanilla rounds out the sweetness and enhances the fruit flavor.
- fresh blueberries: Blueberries bring juicy bursts of flavor and color throughout the muffins.
- all purpose flour for coating berries: A light coating helps keep the blueberries evenly distributed in the batter.
- coarse sugar: This creates a sparkly sweet finish on top of the muffins.
Tools You’ll Need
- large mixing bowls: Use one for dry ingredients and one for wet ingredients.
- whisk: Helpful for evenly blending dry and wet mixtures.
- rubber spatula: Best for gently folding in the blueberries.
- muffin pan: A 12 cup pan works well for standard size muffins.
- paper liners: They help with easy release and neat serving.
- ice cream scoop or spoon: Useful for portioning the batter evenly.
Instructions
Step 1: Measure the dry ingredients
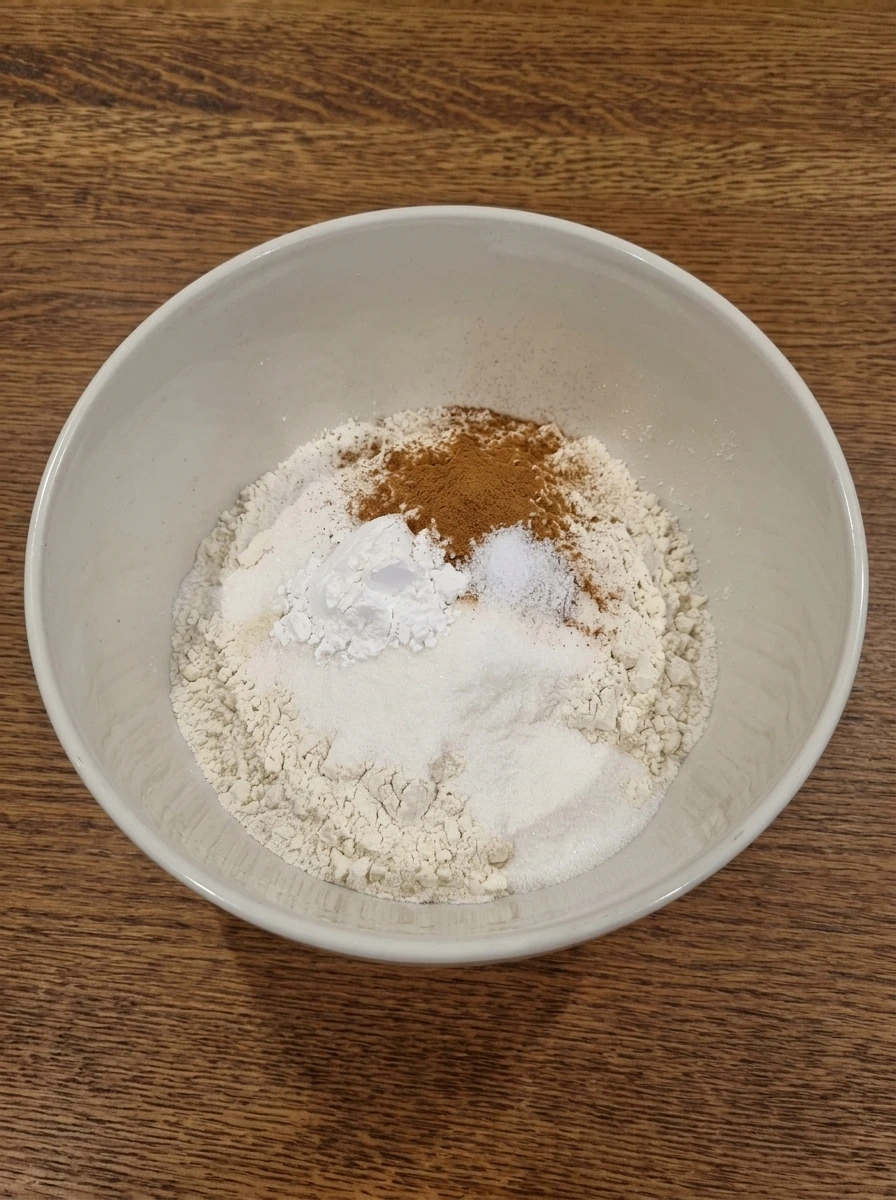
Add the flour, granulated sugar, baking powder, salt, and cinnamon to a large white ceramic mixing bowl. At this stage, the ingredients are still clearly separate in color and texture, with the white flour forming the base and the sugar and leavening lightly scattered across the top. Once everything is added to the bowl, the mixture looks powdery, pale, and completely dry. This is the starting point for the batter, and keeping the ingredients evenly measured here helps the muffins rise evenly and bake up with that classic bakery shape later on.
Tip: Level the flour with a knife so the batter stays light instead of dense.
Step 2: Whisk the dry mixture
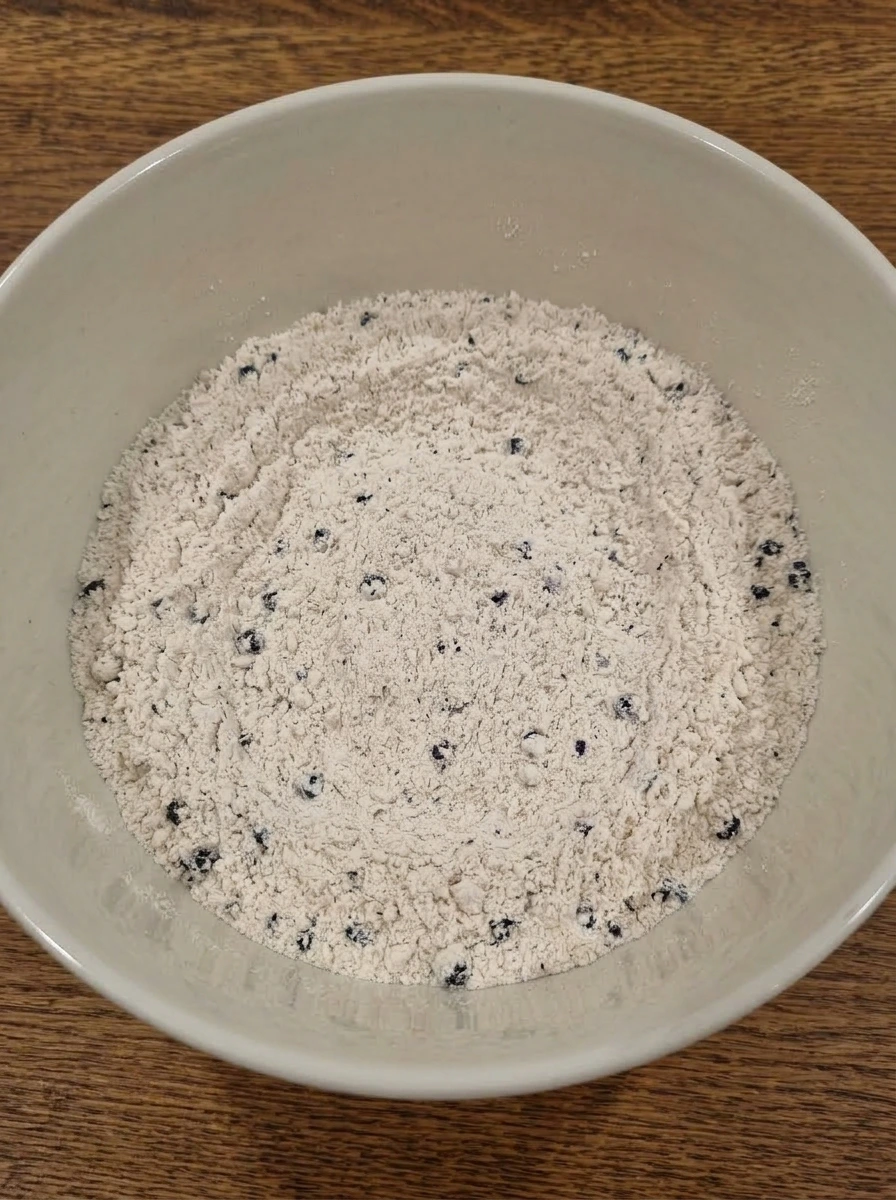
Whisk the dry ingredients together until the color looks even and the cinnamon is fully blended throughout the flour. The texture should look airy and loose, with no visible clumps of baking powder or pockets of sugar. After whisking, the mixture becomes uniform and soft looking, with a fine, fluffy appearance across the whole bowl. This simple step helps distribute the leavening and seasoning so every muffin has an even crumb and balanced flavor.
Tip: Whisk into the corners of the bowl so no baking powder gets left behind.
Step 3: Combine the wet ingredients
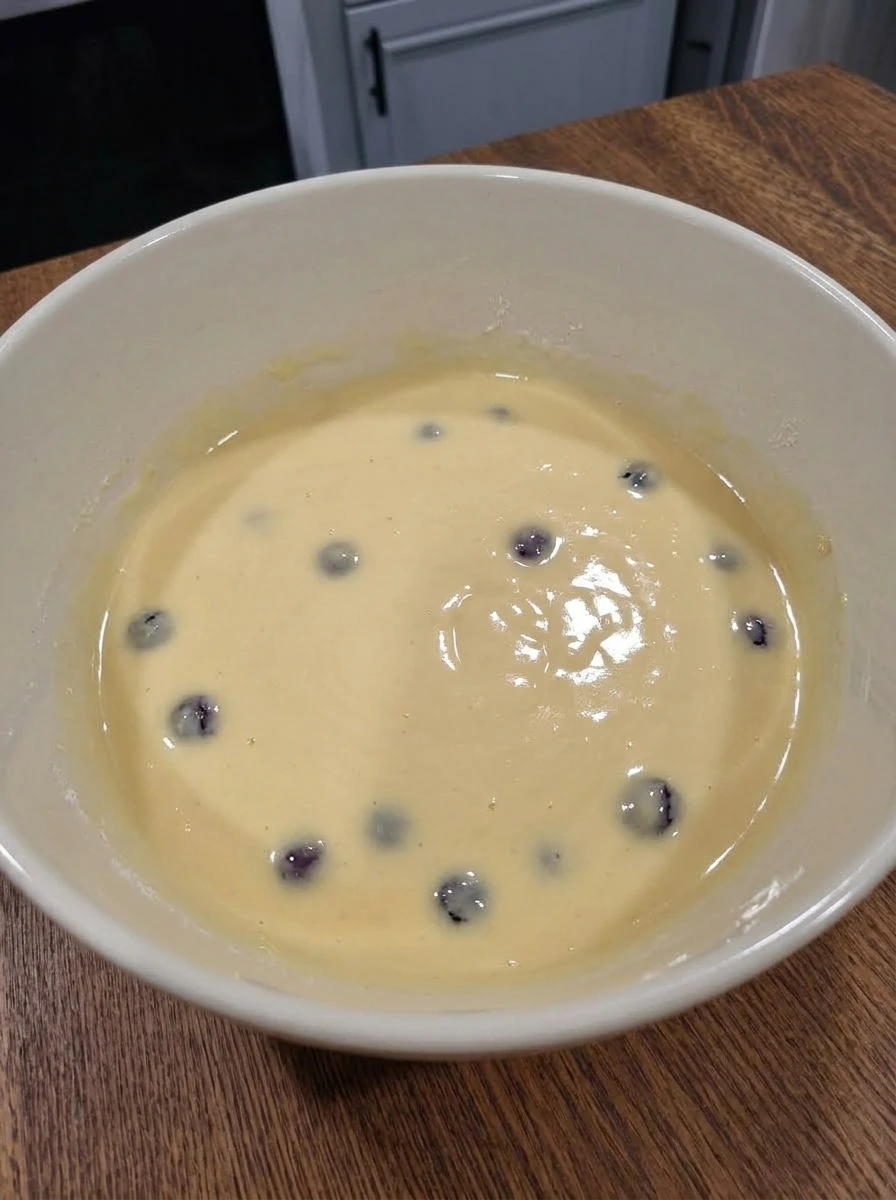
In a second large white ceramic mixing bowl, add the eggs, milk, melted butter, and vanilla extract. At first, the eggs and milk look streaky against the butter, with golden and creamy swirls visible across the bowl. Whisk until the mixture turns smooth, glossy, and pale yellow. The liquid should look fully blended and silky, with no separate streaks of egg or butter left floating on the surface.
Tip: Let the melted butter cool slightly so it blends smoothly into the wet mixture.
Step 4: Coat the blueberries
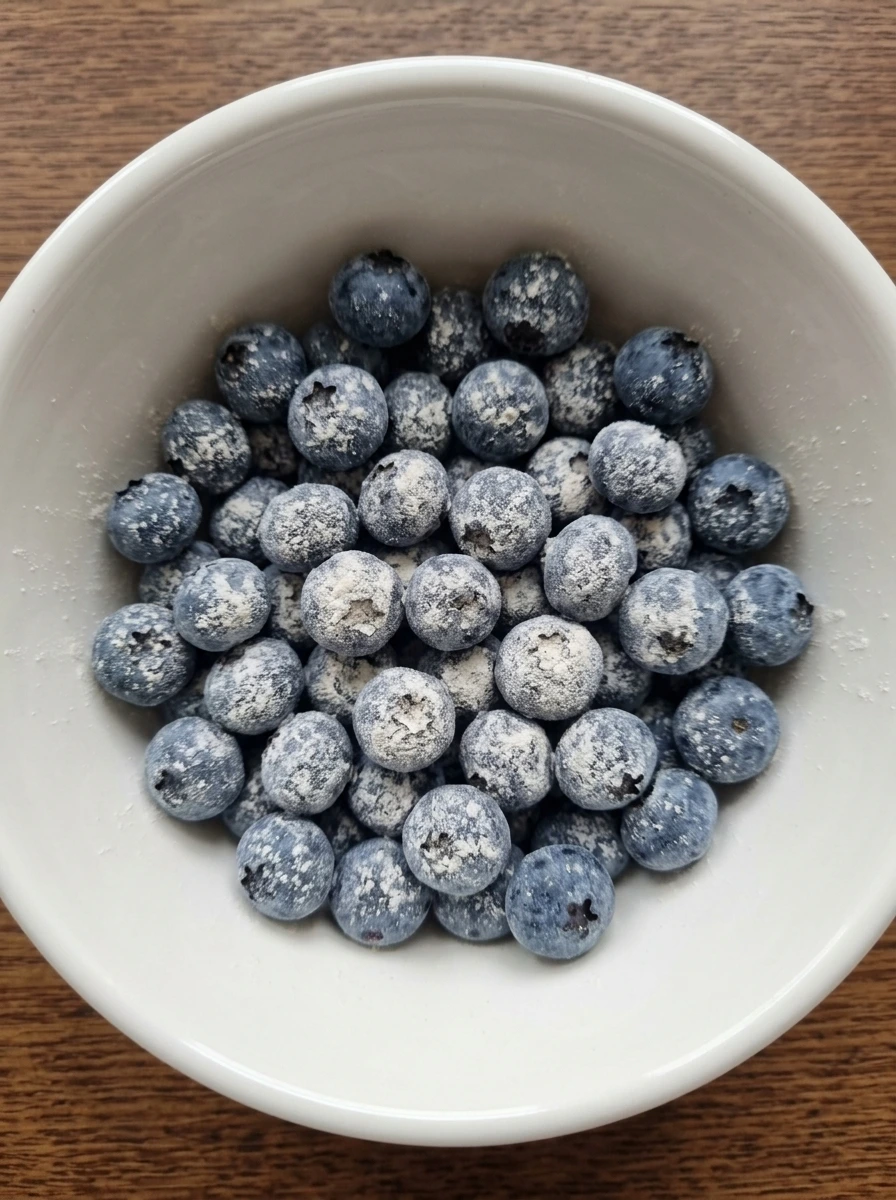
Place the fresh blueberries in a small white ceramic bowl and sprinkle them with the extra tablespoon of flour. Gently toss until the berries have a light dusty coating and their deep blue skins still show through. After coating, the berries look slightly matte rather than shiny, and the flour clings lightly to the surface. This helps keep them suspended in the batter so they stay more evenly spread through the muffins.
Tip: Toss gently so the berries stay whole and do not release too much juice.
Step 5: Mix the batter
Pour the wet mixture into the bowl of dry ingredients and stir just until the flour is absorbed. The batter should look thick, creamy, and slightly lumpy, which is exactly what you want for tender muffins. Once combined, the mixture changes from dry and powdery to a scoopable batter with a soft pale color. There should be no dry streaks left, but the surface should still look rustic rather than perfectly smooth, which helps keep the crumb light.
Tip: Stop mixing as soon as the flour disappears to avoid tough muffins.
Step 6: Fold in the blueberries
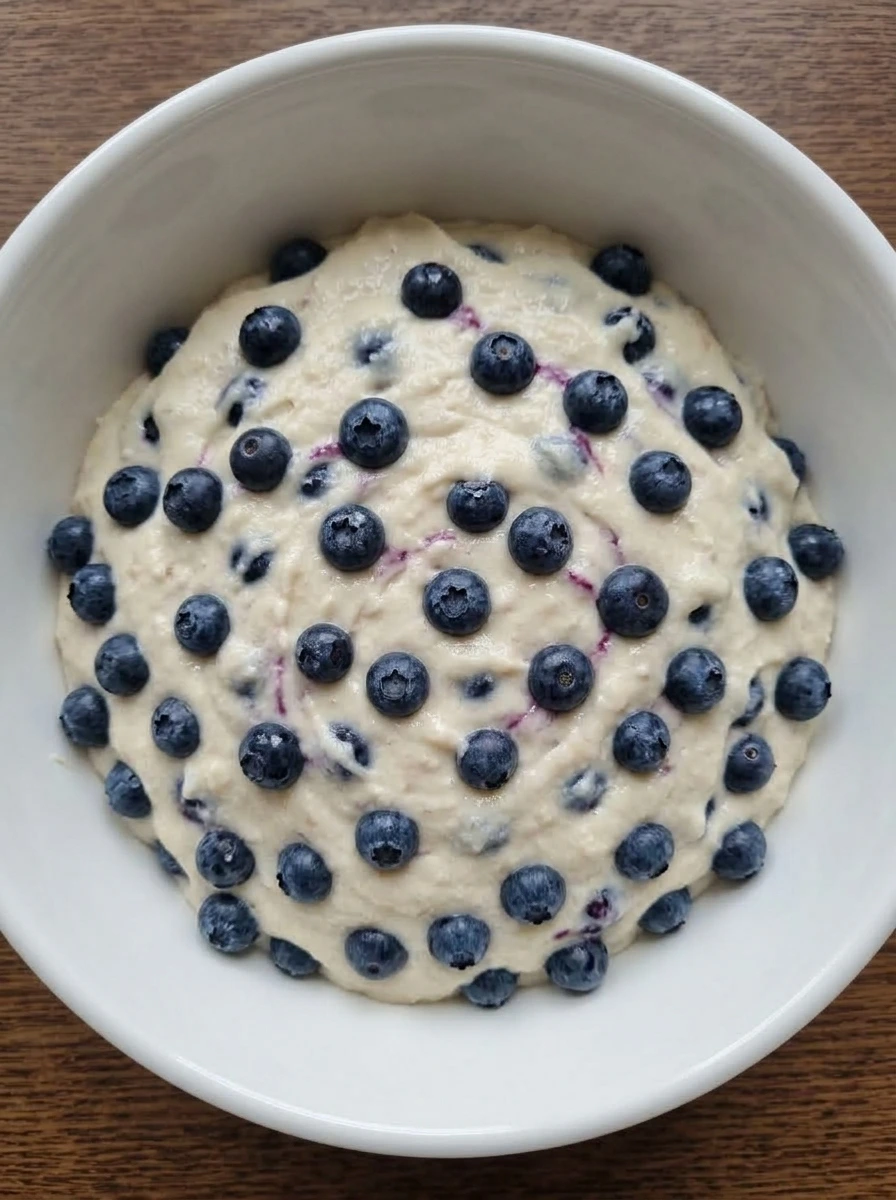
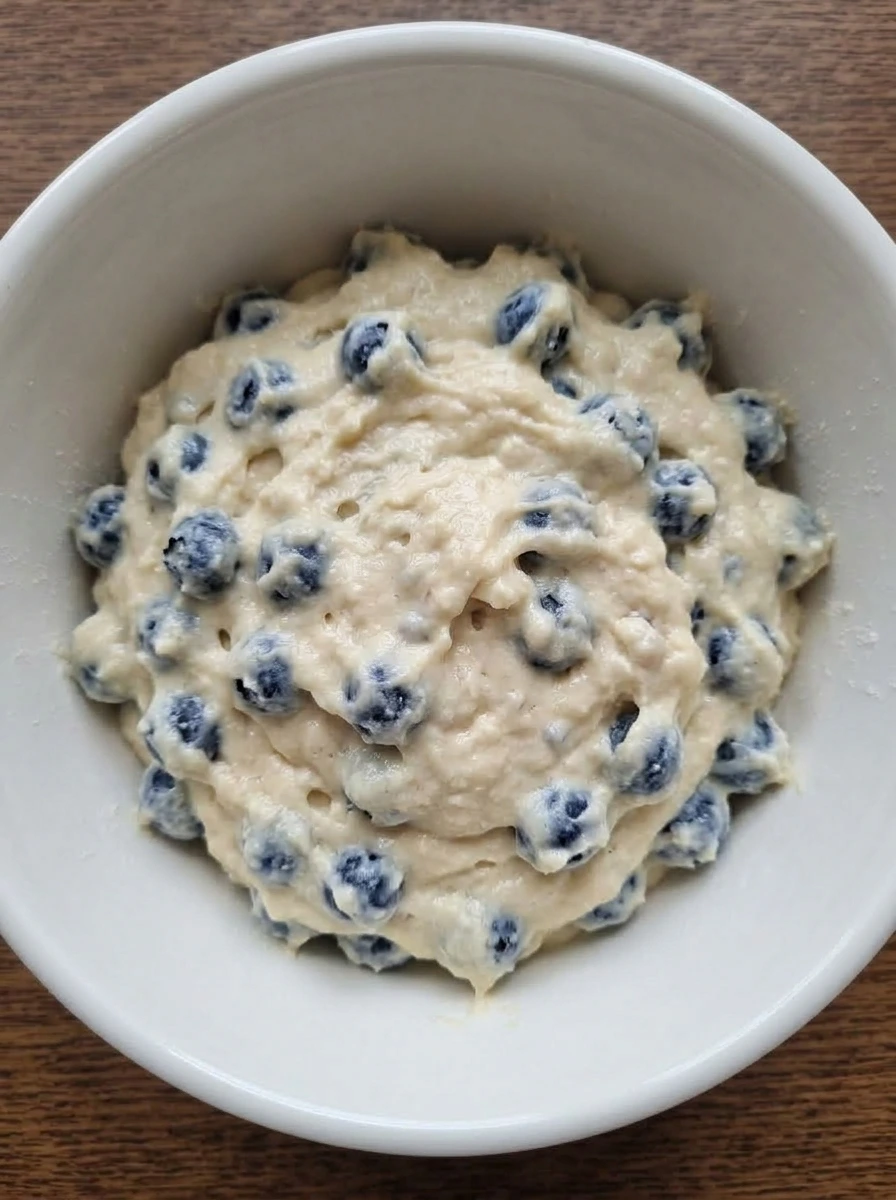
Add the coated blueberries to the batter and gently fold them through until they are evenly distributed. The batter becomes streaked with pops of deep blue and purple, and a few berries sit just below the surface. At this point, the batter should still look thick and soft, but now studded all over with fruit. The berries add visible texture and color, giving you a good preview of how full and juicy the finished muffins will look.
Tip: Use a folding motion so the berries stay intact and the batter stays fluffy.
Step 7: Portion the batter into the muffin pan
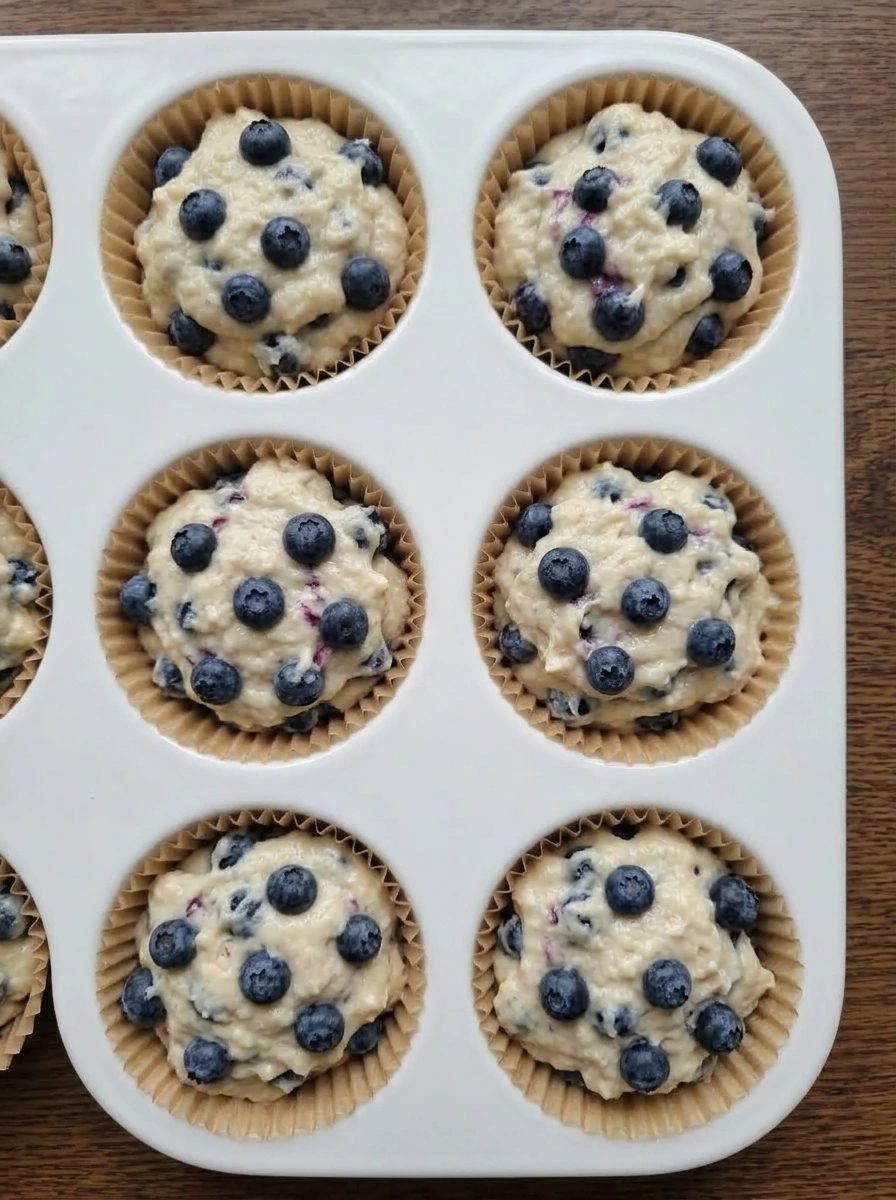
Spoon the blueberry batter into a white ceramic muffin pan lined with paper liners, filling each cup nearly to the top for tall muffin crowns. The batter should sit high in each liner with visible berries near the surface. Once portioned, the pan looks evenly filled and the batter holds its shape well. The tops are rough and textured rather than flat, which is perfect for creating those big bakery style peaks.
Tip: Use an ice cream scoop for even portions and more consistent muffin tops.
Step 8: Add the sugar topping
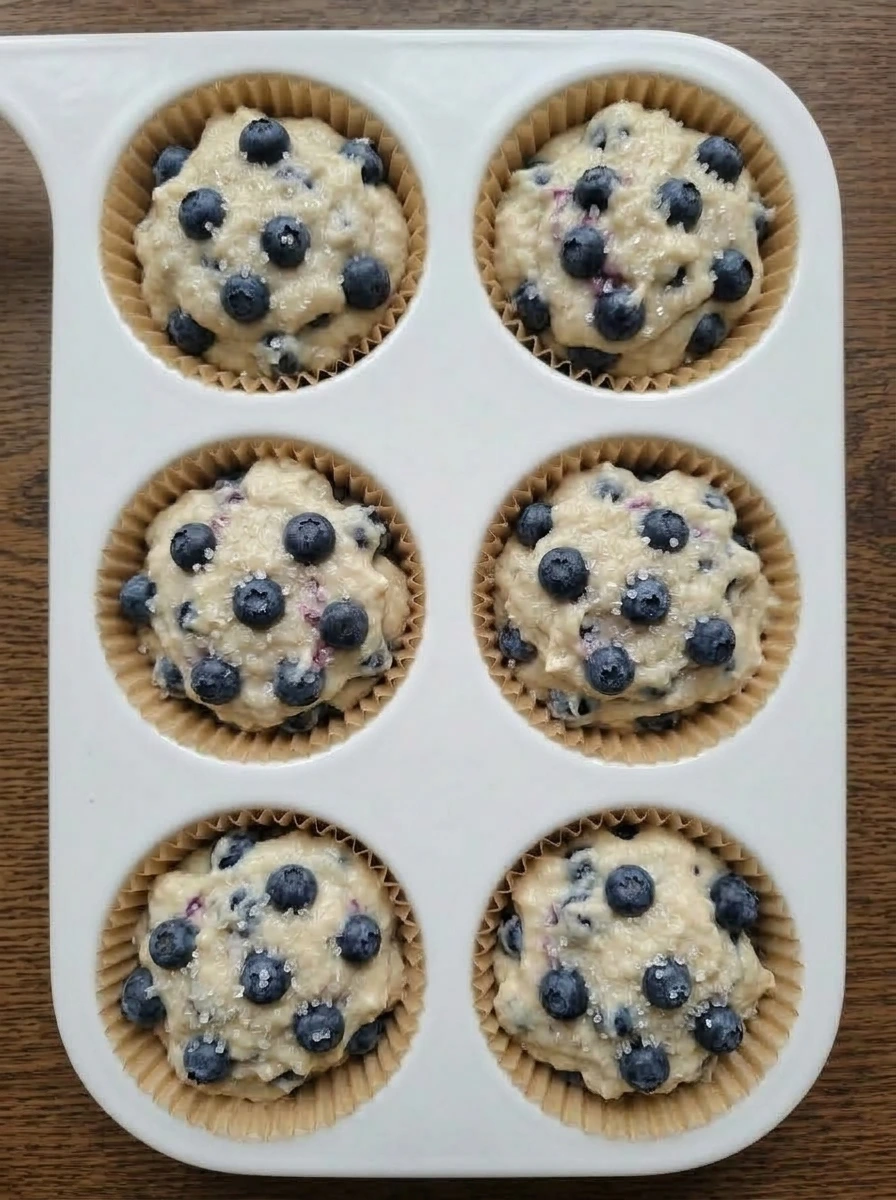
Sprinkle coarse sugar over each mound of batter so the tops are lightly but evenly covered. The crystals stand out clearly against the pale batter and nestle around the visible berries. After topping, each muffin portion looks more finished and bakery inspired. The sugar layer gives the surface extra texture and sets the stage for that crisp, sparkly finish on the completed muffins.
Tip: Sprinkle the sugar evenly so every muffin gets a lightly crisp top.
Step 9: Let the filled pan rest
Set the filled muffin pan aside briefly so the batter can settle and hydrate. During this short rest, the batter looks slightly more relaxed in the liners, while still holding its high rounded shape. The tops remain textured and thick, with berries and coarse sugar still visible. This resting step gives the ingredients a moment to come together and helps create a fuller, more even muffin structure.
Tip: A short rest helps the flour hydrate and gives the batter a more stable lift.
Step 10: Cool the finished muffins
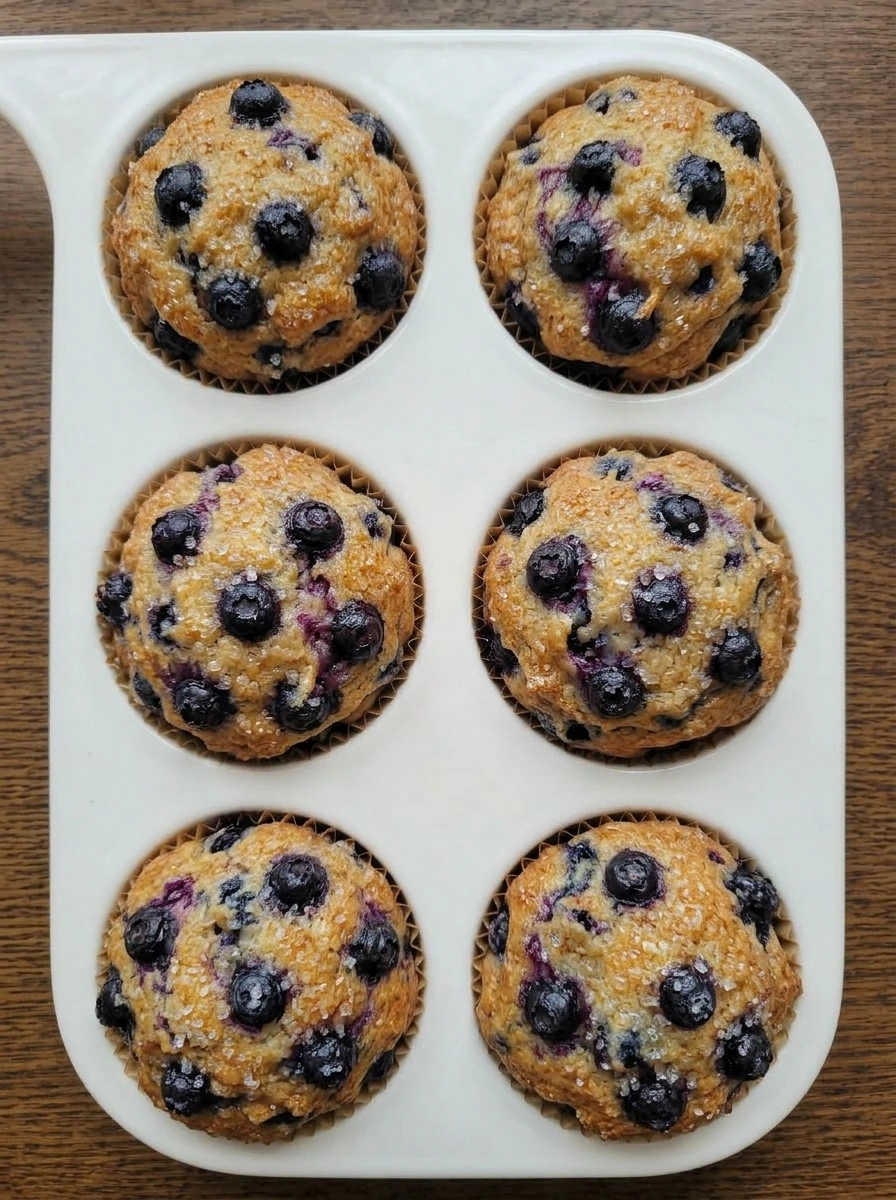
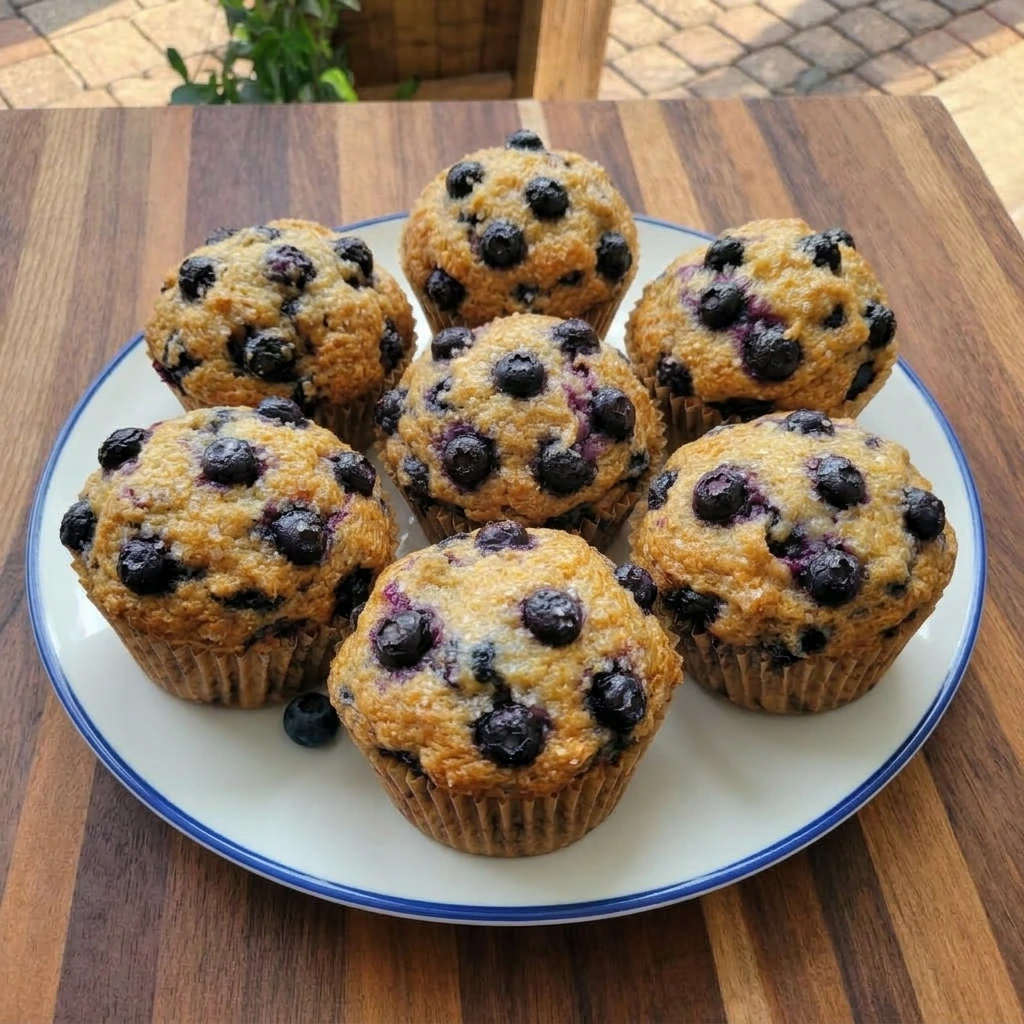
The muffins are now fully finished, with tall rounded tops, a golden surface, and deep blue berry spots peeking through the crust. The paper liners hold their shape around each muffin, and the tops look set, lightly crackled, and dusted with a sparkly sugar finish. As they cool, the muffins keep their height and the crumb looks tender where a berry has burst near the surface. This is the stage where they look unmistakably bakery style, with a rich color and a soft, domed appearance.
Tip: Let the muffins cool a bit before removing them so the tops stay intact.
Step 11: Plate and serve the muffins
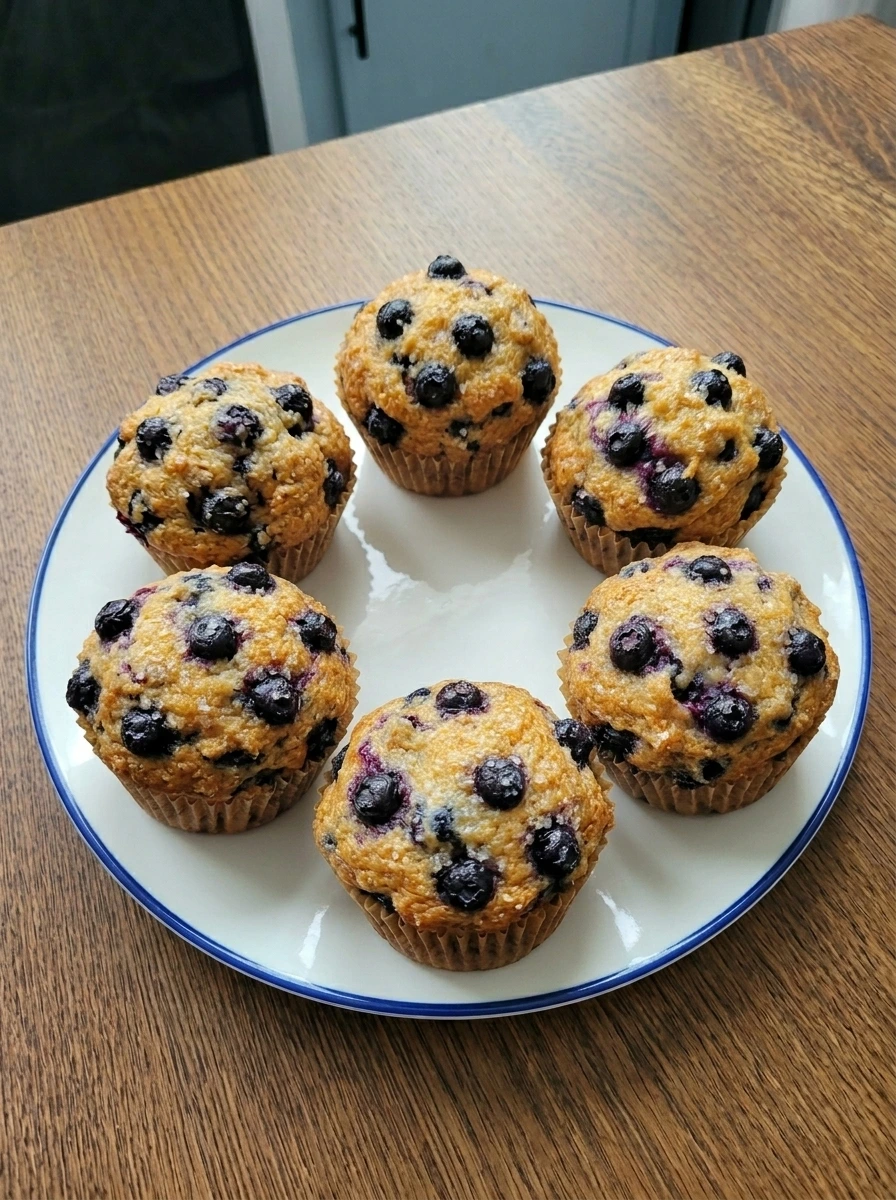
Arrange the finished blueberry muffins on a white ceramic dessert plate with a thin blue rim. The tops should look high and golden, with juicy blueberry pockets visible across the surface and a delicate sparkle from the coarse sugar. On the plate, the muffins look ready to serve and easy to grab, with their paper liners still in place and their rounded tops standing tall. This final presentation shows the full payoff of the recipe, from thick batter to beautiful bakery style muffins.
Tip: Serve them slightly warm or at room temperature for the best texture.
Pro Tips
- Coat the blueberries lightly in flour so they stay suspended in the batter.
- Do not overmix the batter or the muffins can turn dense instead of tender.
- Fill the liners high for taller muffin tops that look more like bakery muffins.
- Finish with coarse sugar for a crisp top and a pretty sparkle.
Storage Instructions
Store the muffins in an airtight container at room temperature for up to 2 days, or in the fridge for up to 5 days if you want a little extra freshness. Make sure they are fully cooled before storing so condensation does not soften the tops too much. For longer storage, freeze the muffins in a freezer safe container or bag for up to 2 months. To serve again, let them thaw at room temperature or warm briefly until the crumb is soft and the tops are pleasantly tender.
Frequently Asked Questions
Can I use frozen blueberries instead of fresh?
Yes, frozen blueberries work well in this recipe. Add them straight from the freezer so they stay firm and do not bleed too much color into the batter. Fold them in gently and expect a few more purple streaks in the finished muffins.
How do I get tall bakery style muffin tops?
The biggest help is using a thick batter and filling the muffin cups almost to the top. A short batter rest also helps the flour hydrate and supports a fuller rise. Topping the batter with coarse sugar gives the tops that classic bakery look once the muffins are finished.
Why should I avoid overmixing the batter?
Overmixing develops the flour too much and can make the muffins heavy or chewy. A properly mixed batter should still look a little lumpy rather than silky smooth. Stir just until the flour disappears so the crumb stays soft and tender.
Can I make these muffins ahead of time?
Yes, these muffins are great for making ahead. Once cooled, they stay soft and flavorful for several days, so they work well for breakfast prep or brunch planning. You can also freeze them and thaw individual muffins whenever you want one.
Final Thoughts
If you try this recipe, I really hope you love it as much as my family does. It has become one of those bakes we just keep coming back to, no matter the season.
Drop a comment below and let me know how yours turned out. And if you are looking for more easy breakfast ideas, make sure to bookmark this page.
I am always adding new recipes that are simple, satisfying, and perfect for busy mornings.
Print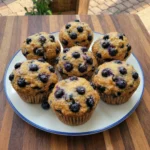
Bakery Style Blueberry Muffins
- Total Time: 45 minutes
- Yield: 4 servings
Description
Looking for the best Bakery Style Blueberry Muffins? This one is quick, easy, and wonderfully tender with juicy berries and tall sugared tops. Whether you are after a healthy breakfast idea or a simple brunch treat, this delivers every time. Great for weeknight dinner planning, meal prep, holiday mornings, potluck tables, brunch spreads, and any party. Save this easy muffin recipe for your next occasion!
Ingredients
- 2 1/2 cups all purpose flour
- 1 cup granulated sugar
- 2 1/2 teaspoons baking powder
- 1/2 teaspoon fine salt
- 1/4 teaspoon ground cinnamon
- 2 large eggs
- 1 cup whole milk
- 1/2 cup unsalted butter, melted and cooled
- 2 teaspoons vanilla extract
- 1 1/2 cups fresh blueberries
- 1 tablespoon all purpose flour for coating berries
- 2 tablespoons coarse sugar
Instructions
- Add the flour, granulated sugar, baking powder, salt, and cinnamon to a large white ceramic mixing bowl. At this stage, the ingredients are still clearly separate in color and texture, with the white flour forming the base and the sugar and leavening lightly scattered across the top. Once everything is added to the bowl, the mixture looks powdery, pale, and completely dry. This is the starting point for the batter, and keeping the ingredients evenly measured here helps the muffins rise evenly and bake up with that classic bakery shape later on.
- Whisk the dry ingredients together until the color looks even and the cinnamon is fully blended throughout the flour. The texture should look airy and loose, with no visible clumps of baking powder or pockets of sugar. After whisking, the mixture becomes uniform and soft looking, with a fine, fluffy appearance across the whole bowl. This simple step helps distribute the leavening and seasoning so every muffin has an even crumb and balanced flavor.
- In a second large white ceramic mixing bowl, add the eggs, milk, melted butter, and vanilla extract. At first, the eggs and milk look streaky against the butter, with golden and creamy swirls visible across the bowl. Whisk until the mixture turns smooth, glossy, and pale yellow. The liquid should look fully blended and silky, with no separate streaks of egg or butter left floating on the surface.
- Place the fresh blueberries in a small white ceramic bowl and sprinkle them with the extra tablespoon of flour. Gently toss until the berries have a light dusty coating and their deep blue skins still show through. After coating, the berries look slightly matte rather than shiny, and the flour clings lightly to the surface. This helps keep them suspended in the batter so they stay more evenly spread through the muffins.
- Pour the wet mixture into the bowl of dry ingredients and stir just until the flour is absorbed. The batter should look thick, creamy, and slightly lumpy, which is exactly what you want for tender muffins. Once combined, the mixture changes from dry and powdery to a scoopable batter with a soft pale color. There should be no dry streaks left, but the surface should still look rustic rather than perfectly smooth, which helps keep the crumb light.
- Add the coated blueberries to the batter and gently fold them through until they are evenly distributed. The batter becomes streaked with pops of deep blue and purple, and a few berries sit just below the surface. At this point, the batter should still look thick and soft, but now studded all over with fruit. The berries add visible texture and color, giving you a good preview of how full and juicy the finished muffins will look.
- Spoon the blueberry batter into a white ceramic muffin pan lined with paper liners, filling each cup nearly to the top for tall muffin crowns. The batter should sit high in each liner with visible berries near the surface. Once portioned, the pan looks evenly filled and the batter holds its shape well. The tops are rough and textured rather than flat, which is perfect for creating those big bakery style peaks.
- Sprinkle coarse sugar over each mound of batter so the tops are lightly but evenly covered. The crystals stand out clearly against the pale batter and nestle around the visible berries. After topping, each muffin portion looks more finished and bakery inspired. The sugar layer gives the surface extra texture and sets the stage for that crisp, sparkly finish on the completed muffins.
- Set the filled muffin pan aside briefly so the batter can settle and hydrate. During this short rest, the batter looks slightly more relaxed in the liners, while still holding its high rounded shape. The tops remain textured and thick, with berries and coarse sugar still visible. This resting step gives the ingredients a moment to come together and helps create a fuller, more even muffin structure.
- The muffins are now fully finished, with tall rounded tops, a golden surface, and deep blue berry spots peeking through the crust. The paper liners hold their shape around each muffin, and the tops look set, lightly crackled, and dusted with a sparkly sugar finish. As they cool, the muffins keep their height and the crumb looks tender where a berry has burst near the surface. This is the stage where they look unmistakably bakery style, with a rich color and a soft, domed appearance.
- Arrange the finished blueberry muffins on a white ceramic dessert plate with a thin blue rim. The tops should look high and golden, with juicy blueberry pockets visible across the surface and a delicate sparkle from the coarse sugar. On the plate, the muffins look ready to serve and easy to grab, with their paper liners still in place and their rounded tops standing tall. This final presentation shows the full payoff of the recipe, from thick batter to beautiful bakery style muffins.
Notes
Pro Tips:
- Coat the blueberries lightly in flour so they stay suspended in the batter.
- Do not overmix the batter or the muffins can turn dense instead of tender.
- Fill the liners high for taller muffin tops that look more like bakery muffins.
- Finish with coarse sugar for a crisp top and a pretty sparkle.
Storage: Store the muffins in an airtight container at room temperature for up to 2 days, or in the fridge for up to 5 days if you want a little extra freshness. Make sure they are fully cooled before storing so condensation does not soften the tops too much. For longer storage, freeze the muffins in a freezer safe container or bag for up to 2 months. To serve again, let them thaw at room temperature or warm briefly until the crumb is soft and the tops are pleasantly tender.
- Prep Time: 15 minutes
- Cook Time: 30 minutes
- Category: Breakfast
- Cuisine: American