If you’ve ever had Baked Falafel with Tahini Sauce for dinner at a favorite Middle Eastern spot then you know that this dish stands out with its warm herbs and rich nutty flavor. In this article we have the Baked Falafel with Tahini Sauce recipe for you to try in the comfort of your own home with this easy step by step guide.
This classic dish has tender chickpeas and fresh herbs baked into crisp falafel with a creamy tahini sauce that’s both savory and bright. This recipe is great for special occasions or a weeknight meal and this recipe is sure to impress your family and friends.
Ingredients
Here’s what I use for this recipe and you can always make substitutions if you prefer.
- Chickpeas: The hearty base that gives the falafel body and a creamy center.
- Yellow onion: Adds savory sweetness and moisture to the mixture.
- Garlic cloves: Brings sharp depth and classic falafel flavor.
- Fresh parsley: Adds grassy freshness and vibrant green color.
- Fresh cilantro: Rounds out the herb flavor with a citrusy note.
- Ground cumin: Adds warm earthy flavor throughout the falafel.
- Ground coriander: Gives the mixture a light citrusy spice.
- Salt: Balances the flavors and sharpens the herbs.
- Black pepper: Adds mild heat and savory bite.
- Baking powder: Helps the falafel bake up lighter inside.
- All purpose flour: Binds the mixture so the falafel hold their shape.
- Olive oil: Helps the exterior brown and crisp in the oven.
- Tahini: Creates the creamy nutty base for the sauce.
- Lemon juice: Brightens the sauce and balances the richness.
- Water: Loosens the tahini into a smooth pourable sauce.
- Maple syrup: Softens the bitterness of tahini with gentle sweetness.
- Paprika: Adds subtle warmth and color to the sauce.
- Extra parsley: Finishes the plated dish with fresh color.
Tools You’ll Need
- Mixing bowl: Used to combine the falafel mixture and whisk the tahini sauce.
- Sheet pan: Holds the shaped falafel while they bake and brown.
- Parchment paper: Helps prevent sticking and keeps cleanup simple.
- White plate: Used for the final serving and sauce drizzle.
Instructions
Step 1: Blend the chickpeas and herbs

The drained chickpeas and chopped onion and garlic and parsley and cilantro come together with cumin and coriander and salt and black pepper and baking powder and flour into a coarse green mixture. Instead of a smooth paste the texture stays slightly chunky and the herbs streak through the chickpeas so the color looks mottled and natural. As the ingredients combine the pale chickpeas darken with green flecks and the mixture starts to hold together in loose clumps. You should still see tiny uneven bits of onion and herbs throughout because that rough texture helps the baked falafel look homemade.
Tip: Stop mixing once the mixture holds when pressed so the falafel stay light instead of dense.
Step 2: Shape the falafel portions
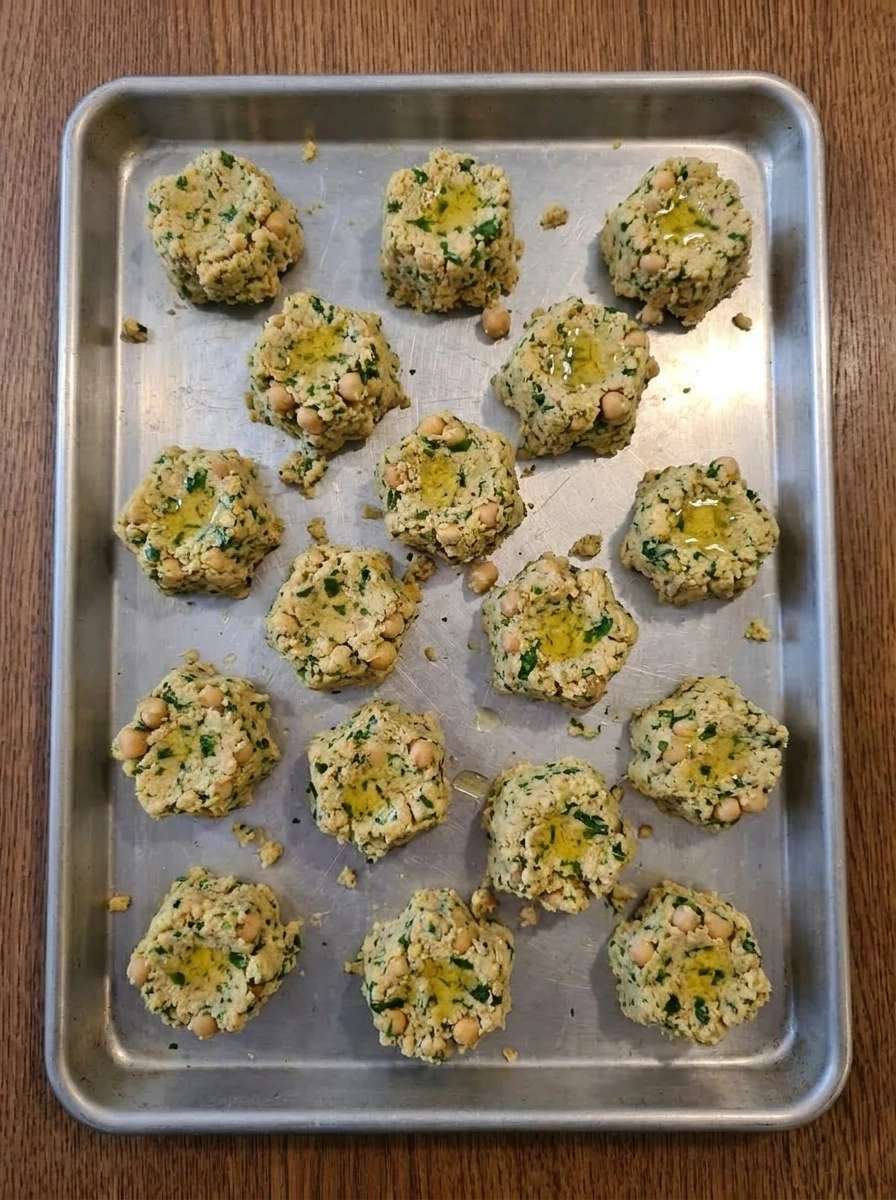
The coarse mixture is divided and pressed into 16 small falafel pieces with rough edges and irregular tops. Some pieces look slightly flatter while others are a little rounder and that uneven shaping gives the batch a realistic homemade feel. Once formed the mixture changes from loose clumps into structured portions with clear spacing between them. The green flecks stay visible on the surface and a few crumbs cling to the sides which makes the texture look natural rather than polished.
Tip: Dampen your hands lightly so the mixture presses together without sticking too much.
Step 3: Bake until the first side turns dry and pale golden
As the falafel bake the surfaces lose their wet look and the edges begin to set. The bright green tones soften into a deeper muted green while patches of light golden brown appear on the bottoms and around the thinner ridges. This is the first real cooking change because the pieces look firmer and slightly puffed rather than soft and pressed. The tops stay matte and textured with tiny cracks while the bottoms begin to color.
Tip: Brush the tops lightly with olive oil before baking for better color and a crisper crust.
Step 4: Flip and finish baking until deeply golden
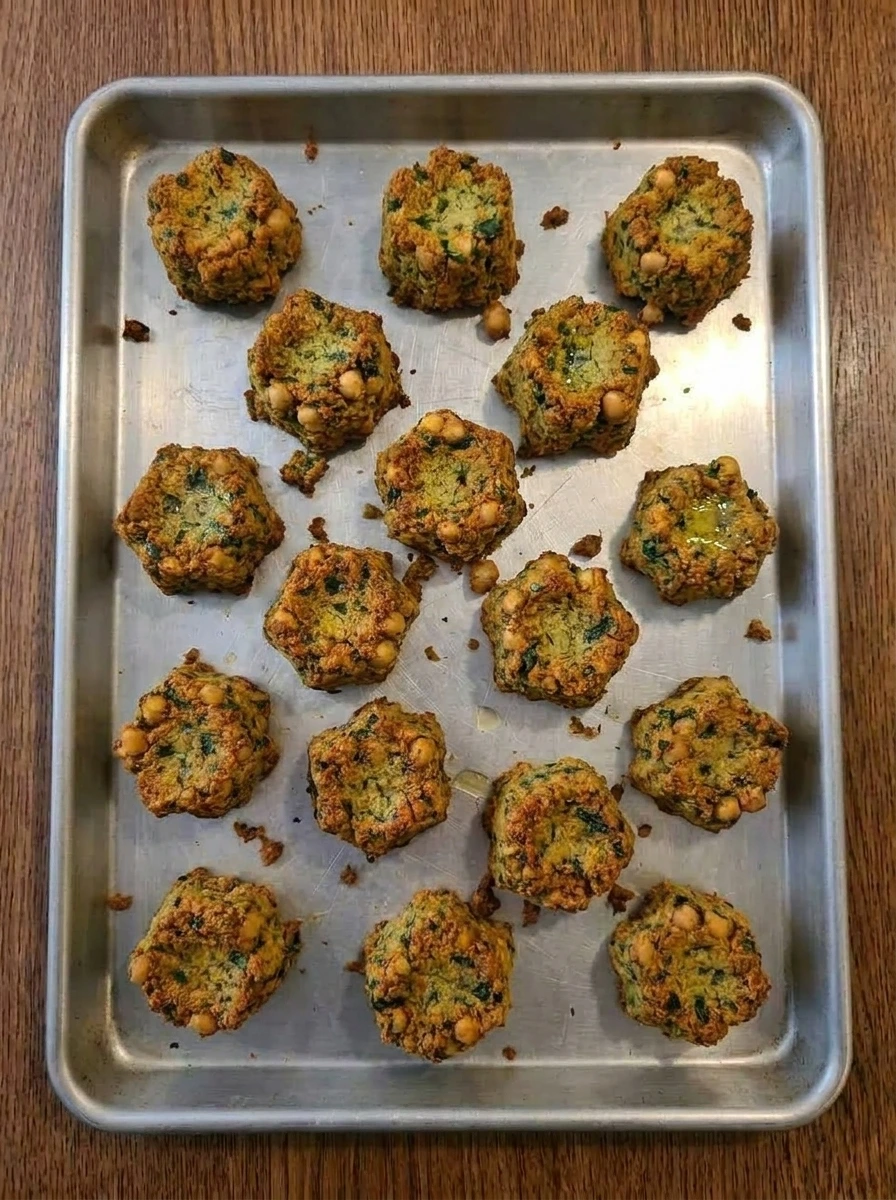
After turning the falafel the second side bakes into a darker crust and the color becomes more uneven in the best way. Some ridges turn a deep golden brown while thicker spots stay slightly greener and the contrast makes the batch look hearty and real. The pieces also shift across the pan as they are turned so the layout looks looser than before. By the end the falafel are firm with crisp looking edges and rough tops and the surfaces show non uniform browning instead of an even finish.
Tip: Bake just until the outside is crisp and browned so the centers stay tender.
Step 5: Whisk the tahini sauce and plate the falafel
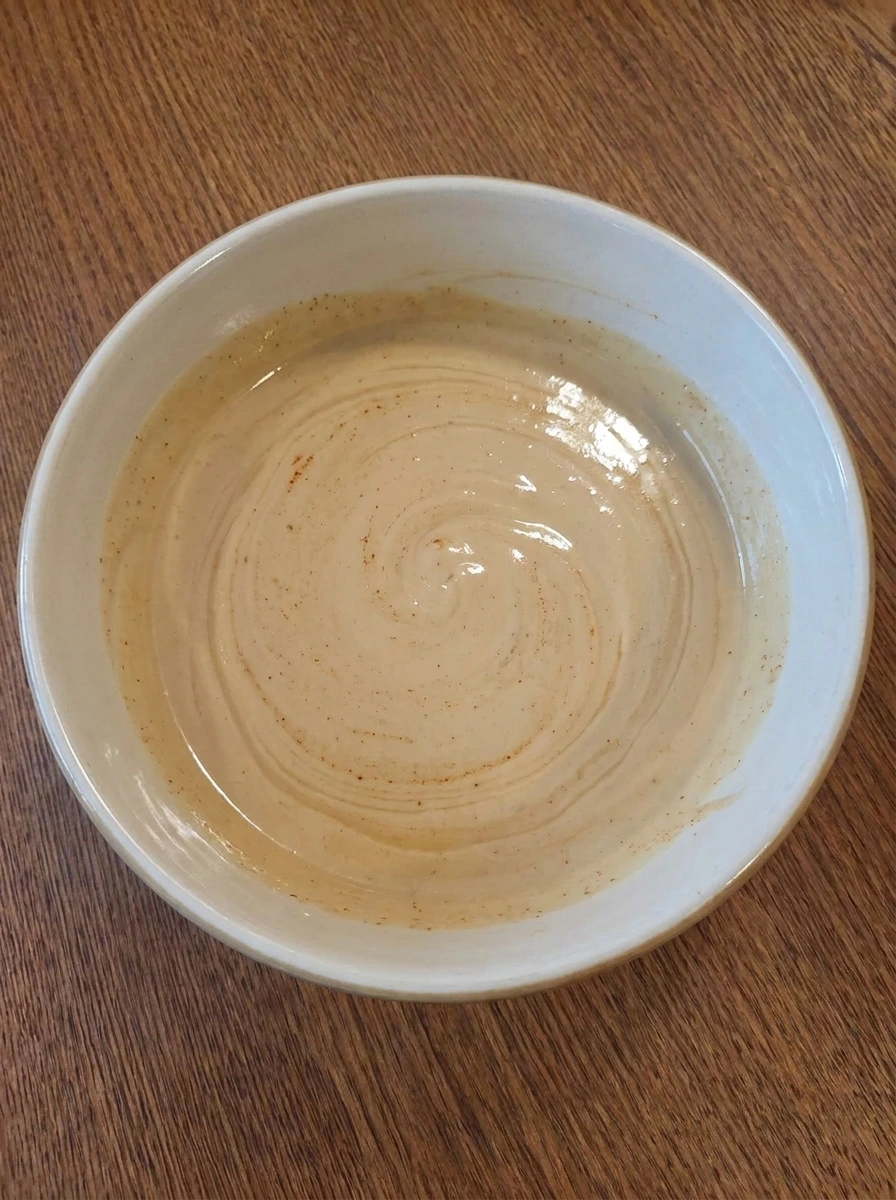
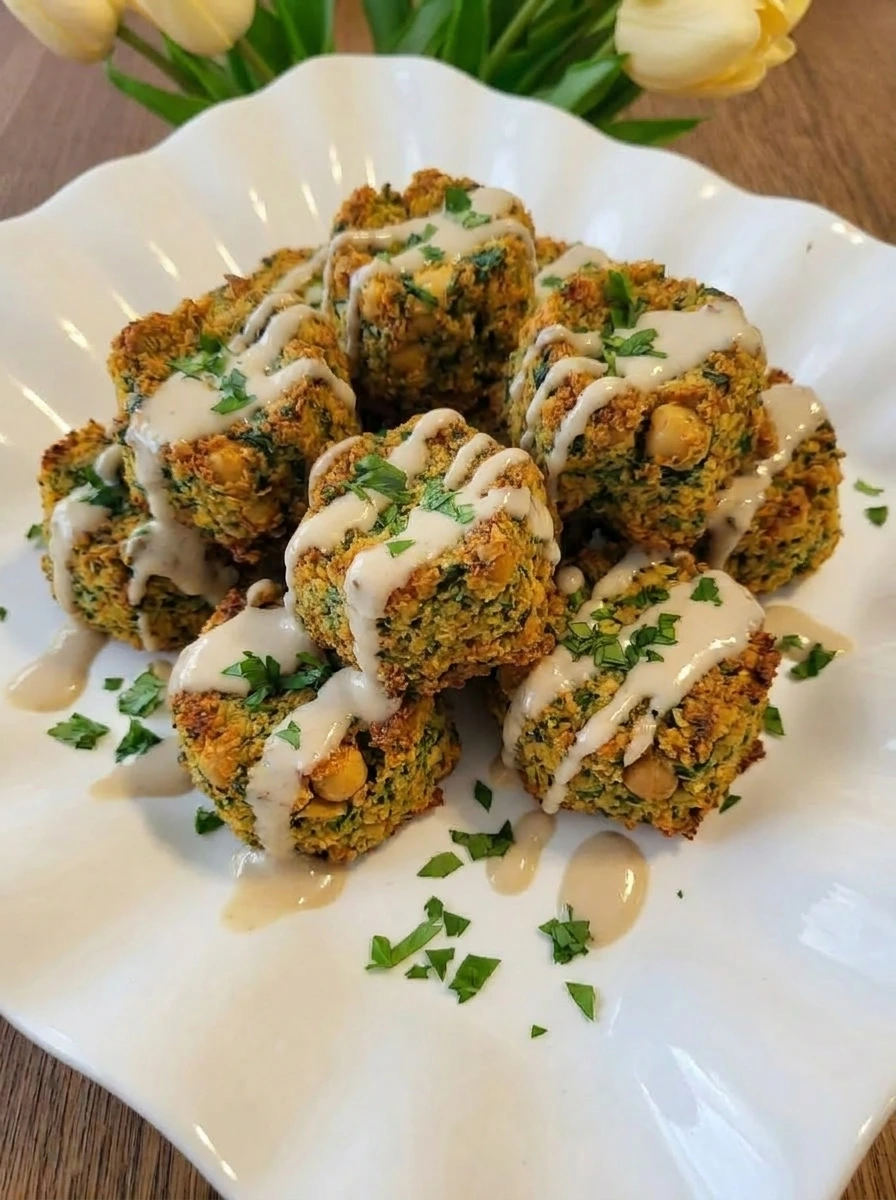
Tahini and lemon juice and water and maple syrup and paprika blend into a pale creamy sauce that starts thick and then loosens into a smooth drizzle. The color shifts from beige to a lighter creamy tan and the texture changes from tight and pasty to glossy and flowing. When the sauce is poured over the baked falafel the final dish comes together with contrast between the crisp browned pieces and the soft creamy ribbons. Chopped parsley lands unevenly over the top and a few drops of sauce pool on the plate which makes the serving look relaxed and homemade.
Tip: Add the water a little at a time so the sauce turns silky without getting too thin.
Step 6: Serve one portion with tahini sauce
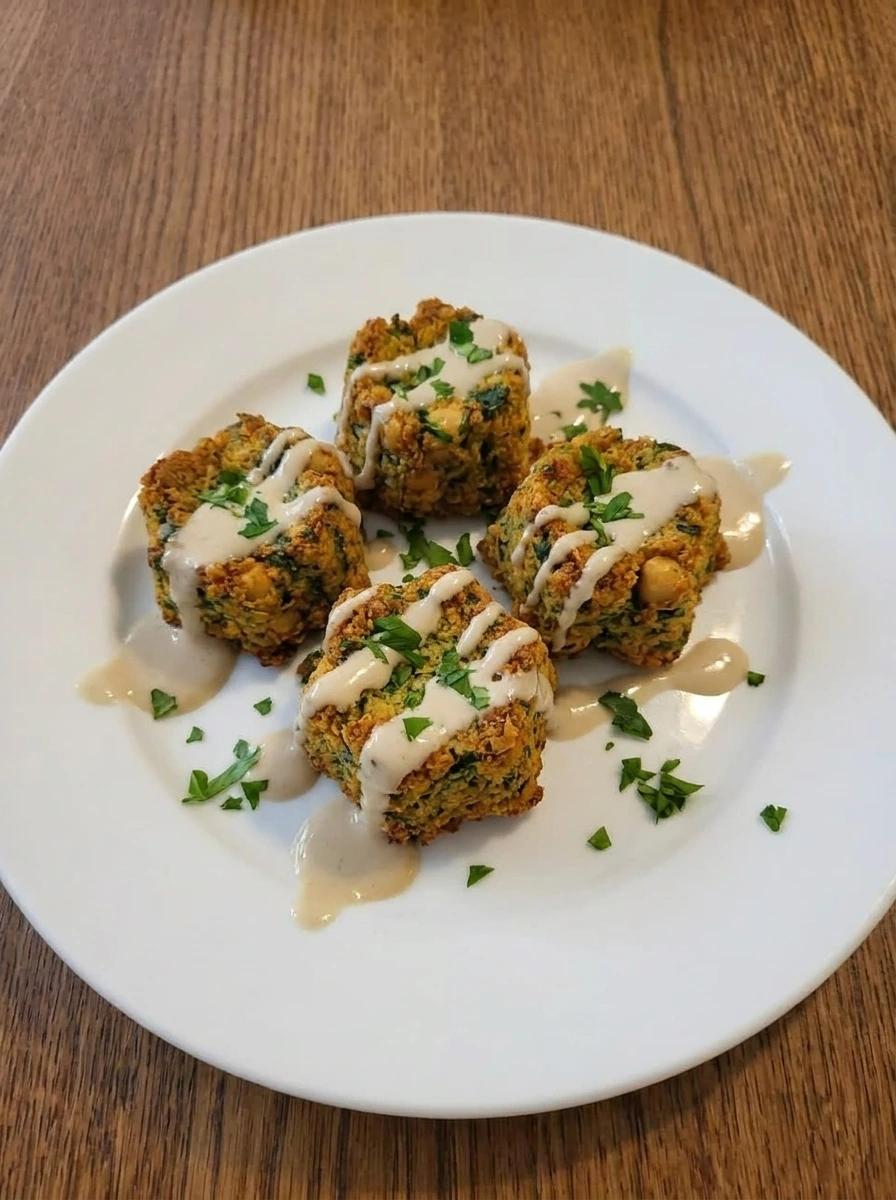
Single portion of four falafel with rough handmade edges and non uniform golden brown crust and creamy sauce in relaxed ribbons and fresh green parsley for contrast.
Pro Tips
- Drain the chickpeas well so the mixture holds together and bakes crisp at the edges.
- Keep the falafel pieces slightly uneven so the ridges brown beautifully in the oven.
- Brush lightly with olive oil before baking to help the outside turn golden.
- Let the falafel rest for a few minutes after baking so the crust sets before plating.
Storage Instructions
Store leftover falafel in a covered container in the refrigerator for up to 4 days. Keep the tahini sauce in a separate container so the crust stays firmer and the sauce keeps its creamy texture. Reheat the falafel until warmed through and lightly crisp again and stir the tahini sauce with a splash of water if it thickens in the fridge.
Frequently Asked Questions
Yes you can shape the falafel ahead and keep them chilled before baking or bake them fully and reheat them later for meal prep.
The chickpeas may still have too much moisture so drain them well and add a little more flour only if needed to help the mixture hold.
Yes baked falafel freeze well and can be reheated from cold or thawed first until hot and crisp again.
They pair well with pita and salad and pickled vegetables and rice bowls for a full meal.
Final Thoughts
This is the kind of recipe I wish I had found years ago. It would have saved me so many stressful dinner nights.
But now that I have it I make it all the time and I think you will too. If you enjoyed this then check out some of my other popular recipes on the blog.
And leave a comment and I read every single one and it really makes my day.
Print
Baked Falafel with Tahini Sauce
- Total Time: 45 minutes
- Yield: 4 servings 1x
Description
These Baked Falafel with Tahini Sauce ideas bring an easy and quick and simple way to make the best healthy dinner at home. Chickpeas and herbs bake into crisp falafel with tender centers while a creamy tahini sauce adds rich flavor. This recipe is great for weeknight dinner and meal prep and potluck spreads when you want a filling meatless option that feels fresh and satisfying without much fuss or tricky steps at all.
Ingredients
- 2 cans 15 ounces each drained and rinsed Chickpeas
- 1 small roughly chopped Yellow onion
- 3 Garlic cloves
- 1 cup packed Fresh parsley
- 1/2 cup packed Fresh cilantro
- 2 teaspoons Ground cumin
- 1 teaspoon Ground coriander
- 1 teaspoon Salt
- 1/2 teaspoon Black pepper
- 1 teaspoon Baking powder
- 3 tablespoons All purpose flour
- 2 tablespoons plus more for brushing Olive oil
- 1/2 cup Tahini
- 3 tablespoons Lemon juice
- 4 to 6 tablespoons Water
- 1 teaspoon Maple syrup
- 1/4 teaspoon Paprika
- 2 tablespoons chopped Extra parsley
Instructions
- The drained chickpeas and chopped onion and garlic and parsley and cilantro come together with cumin and coriander and salt and black pepper and baking powder and flour into a coarse green mixture. Instead of a smooth paste the texture stays slightly chunky and the herbs streak through the chickpeas so the color looks mottled and natural. As the ingredients combine the pale chickpeas darken with green flecks and the mixture starts to hold together in loose clumps. You should still see tiny uneven bits of onion and herbs throughout because that rough texture helps the baked falafel look homemade.
- The coarse mixture is divided and pressed into 16 small falafel pieces with rough edges and irregular tops. Some pieces look slightly flatter while others are a little rounder and that uneven shaping gives the batch a realistic homemade feel. Once formed the mixture changes from loose clumps into structured portions with clear spacing between them. The green flecks stay visible on the surface and a few crumbs cling to the sides which makes the texture look natural rather than polished.
- As the falafel bake the surfaces lose their wet look and the edges begin to set. The bright green tones soften into a deeper muted green while patches of light golden brown appear on the bottoms and around the thinner ridges. This is the first real cooking change because the pieces look firmer and slightly puffed rather than soft and pressed. The tops stay matte and textured with tiny cracks while the bottoms begin to color.
- After turning the falafel the second side bakes into a darker crust and the color becomes more uneven in the best way. Some ridges turn a deep golden brown while thicker spots stay slightly greener and the contrast makes the batch look hearty and real. The pieces also shift across the pan as they are turned so the layout looks looser than before. By the end the falafel are firm with crisp looking edges and rough tops and the surfaces show non uniform browning instead of an even finish.
- Tahini and lemon juice and water and maple syrup and paprika blend into a pale creamy sauce that starts thick and then loosens into a smooth drizzle. The color shifts from beige to a lighter creamy tan and the texture changes from tight and pasty to glossy and flowing. When the sauce is poured over the baked falafel the final dish comes together with contrast between the crisp browned pieces and the soft creamy ribbons. Chopped parsley lands unevenly over the top and a few drops of sauce pool on the plate which makes the serving look relaxed and homemade.
- Single portion of four falafel with rough handmade edges and non uniform golden brown crust and creamy sauce in relaxed ribbons and fresh green parsley for contrast.
Notes
Pro Tips:
- Drain the chickpeas well so the mixture holds together and bakes crisp at the edges.
- Keep the falafel pieces slightly uneven so the ridges brown beautifully in the oven.
- Brush lightly with olive oil before baking to help the outside turn golden.
- Let the falafel rest for a few minutes after baking so the crust sets before plating.
Storage: Store leftover falafel in a covered container in the refrigerator for up to 4 days. Keep the tahini sauce in a separate container so the crust stays firmer and the sauce keeps its creamy texture. Reheat the falafel until warmed through and lightly crisp again and stir the tahini sauce with a splash of water if it thickens in the fridge.
- Prep Time: 15 minutes
- Cook Time: 30 minutes
- Category: Dinner
- Cuisine: Middle Eastern
Nutrition
- Serving Size: 1 serving