This Soft Chocolate Chip Cookies recipe is packed with flavor and so easy to make. It is a budget friendly recipe that you can make with simple pantry staples! Make these soft and chewy cookies for dessert tonight.

If you love classic cookie recipes, you are going to love this Soft Chocolate Chip Cookies recipe. It’s a cozy homemade treat that is sweet, buttery, and completely irresistible. With melty chocolate in every bite, you’re going to want to reach for just one more.
If you’re looking for other easy sweet recipes like my soft chocolate chip cookies, why not also try this fudgy brownie recipe or a simple peanut butter cookie recipe. Both of these are easy to make, making them perfect for a quick homemade treat.
Ingredients
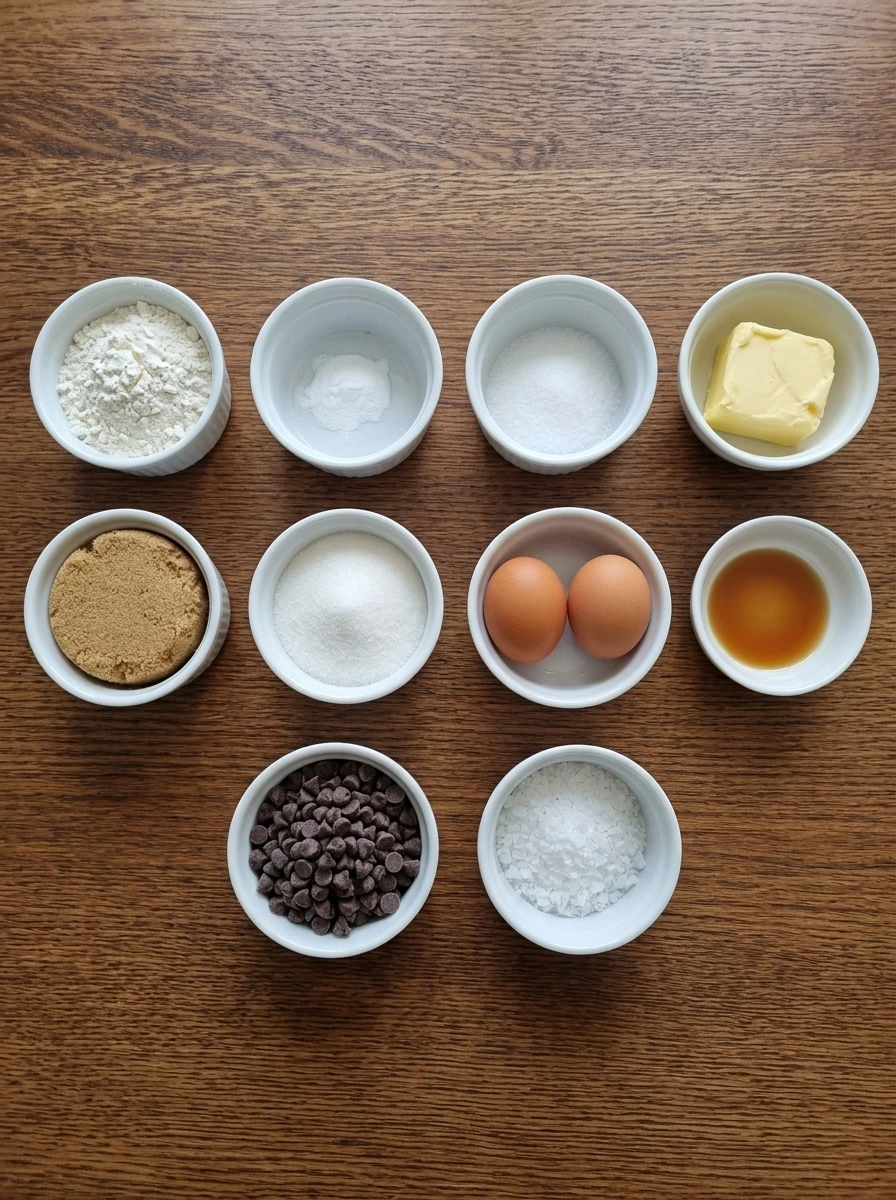
Here’s what I use for this recipe and you can always make substitutions if you prefer.
- all purpose flour: Flour gives the cookies structure while still keeping the crumb soft and tender.
- baking soda: Baking soda helps the cookies rise gently and keeps the texture light.
- fine salt: Salt balances the sweetness and brings out the chocolate flavor.
- unsalted butter, softened: Butter adds rich flavor and creates a soft, moist cookie dough.
- light brown sugar: Brown sugar adds moisture and helps create a chewy, soft center.
- granulated sugar: Granulated sugar sweetens the dough and helps the edges set nicely.
- large eggs: Eggs bind the dough together and add richness.
- vanilla extract: Vanilla rounds out the flavor and makes the cookies taste warm and classic.
- semi sweet chocolate chips: Chocolate chips bring bursts of rich chocolate throughout every cookie.
- flaky sea salt: A light sprinkle on top adds contrast and makes the cookies taste extra special.
Tools You’ll Need
- mixing bowls: Use one large bowl and one medium bowl for easy mixing.
- whisk: For blending the dry ingredients evenly.
- hand mixer or stand mixer: Helps cream the butter and sugars until fluffy.
- rubber spatula: Useful for folding in the chocolate chips.
- cookie scoop: Makes evenly sized cookies.
- baking dish or baking tray: For arranging the cookie dough portions.
Instructions
Step 1: Measure the dry ingredients
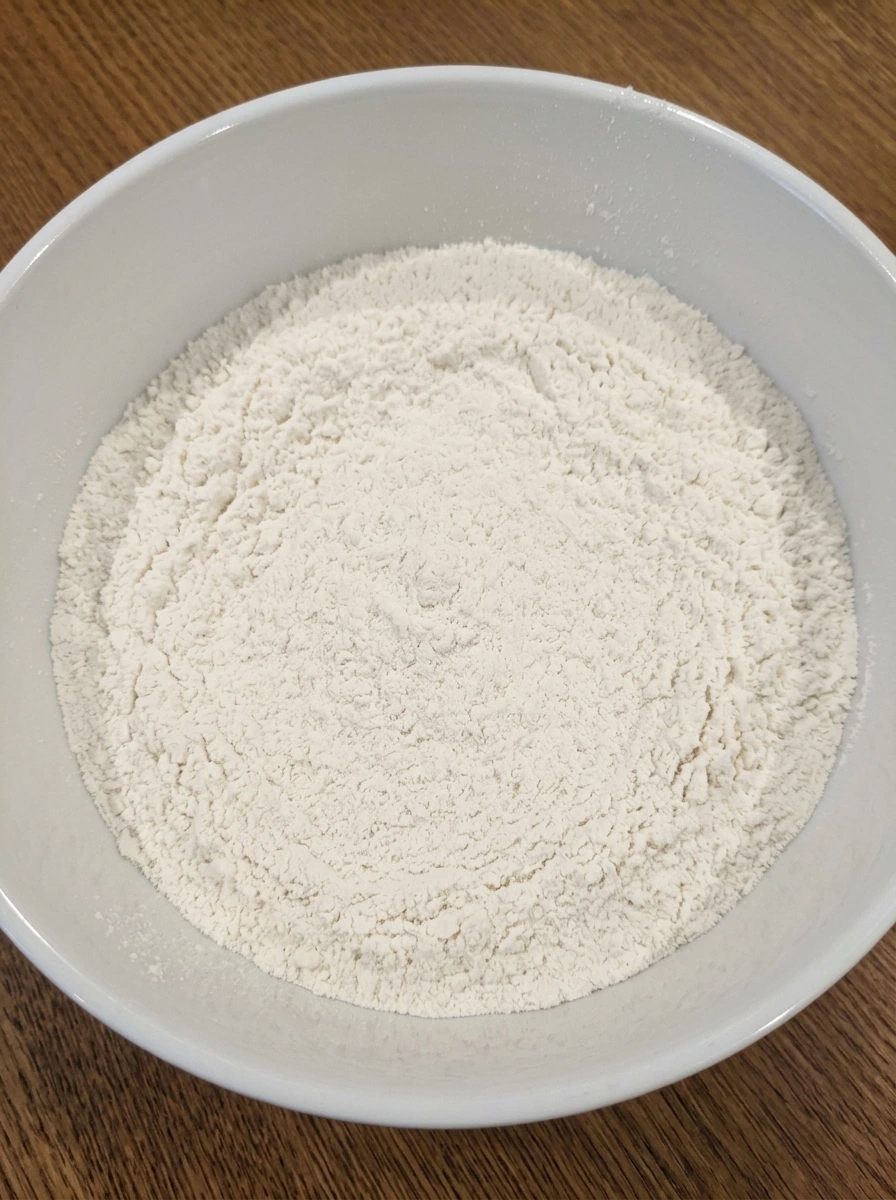
Add the flour, baking soda, and fine salt to a white ceramic mixing bowl. The dry ingredients sit in soft layered mounds, with the powdery flour surrounding the smaller portions of baking soda and salt. After a quick whisk, the mixture looks evenly blended and pale white with a smooth, airy texture. There are no streaks or pockets, and everything remains completely uncooked with no signs of heat.
Tip: Whisk well so the baking soda and salt are evenly distributed before you add the wet ingredients.
Step 2: Cream the butter and sugars
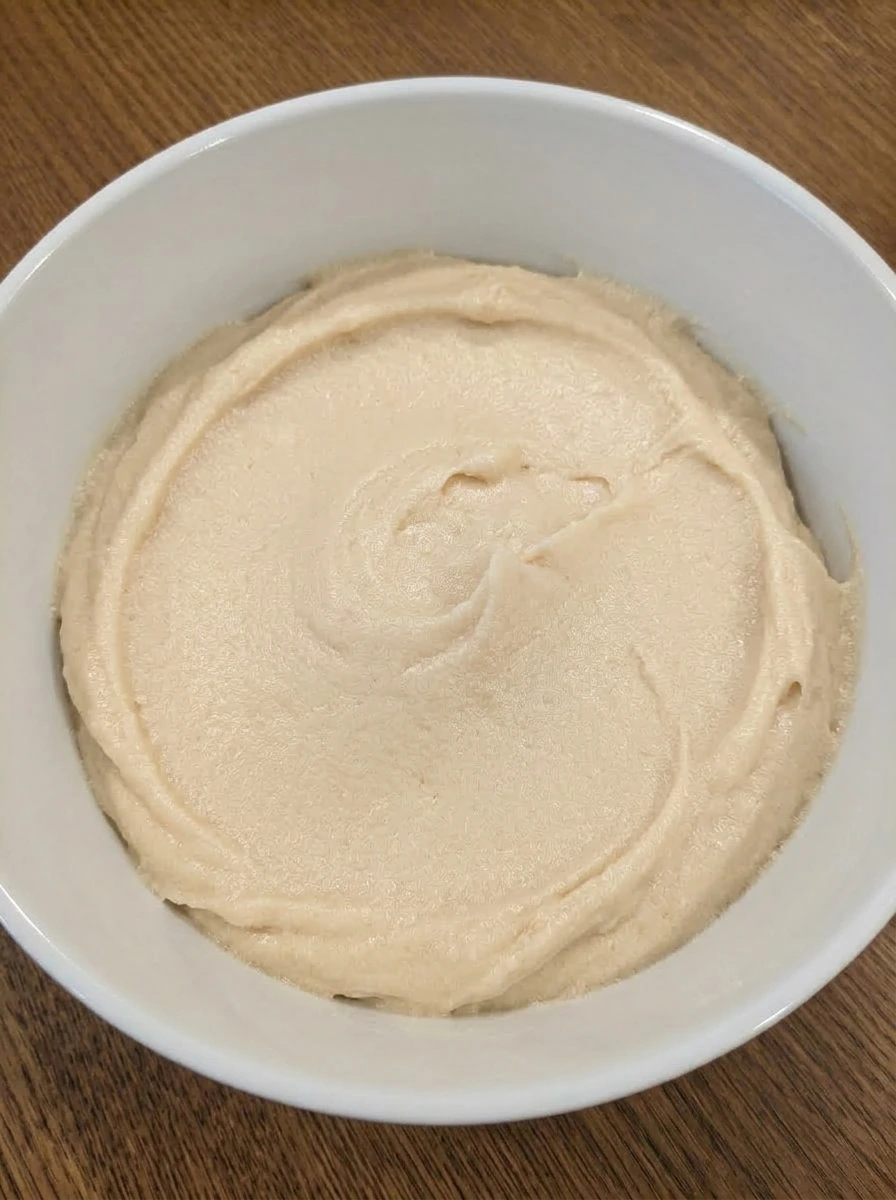
Place the softened butter, brown sugar, and granulated sugar into a white ceramic mixing bowl. At first, the butter looks thick and smooth while the sugars sit visibly separate, with the brown sugar darker and slightly damp looking beside the white sugar. Once mixed, the texture changes into a pale tan, fluffy mixture that looks creamy and light. The surface becomes soft and spreadable, and the sugars are no longer distinct, leaving a whipped base that is still completely uncooked.
Tip: Use very soft butter so the mixture turns light and creamy instead of dense.
Step 3: Mix in the eggs and vanilla
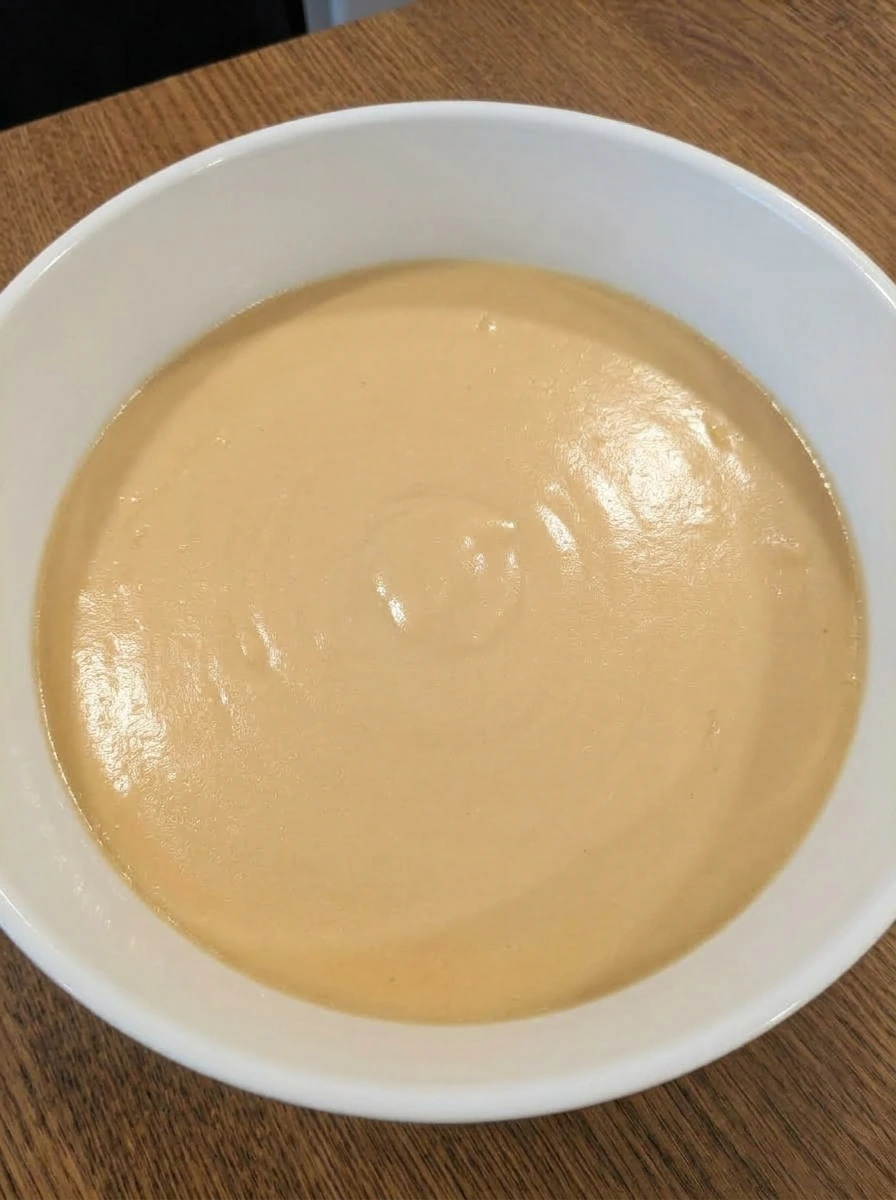
Add the eggs and vanilla extract to the creamed butter and sugar mixture. Before mixing, the yolks and vanilla are clearly visible on top, creating glossy yellow streaks over the pale tan base. After mixing, the dough base becomes smoother, silkier, and slightly glossier. The color turns a bit warmer and more uniform, with a thick creamy consistency that still looks fully raw and uncooked.
Tip: Mix just until smooth so the dough stays soft and does not become overly dense.
Step 4: Combine the wet and dry mixtures
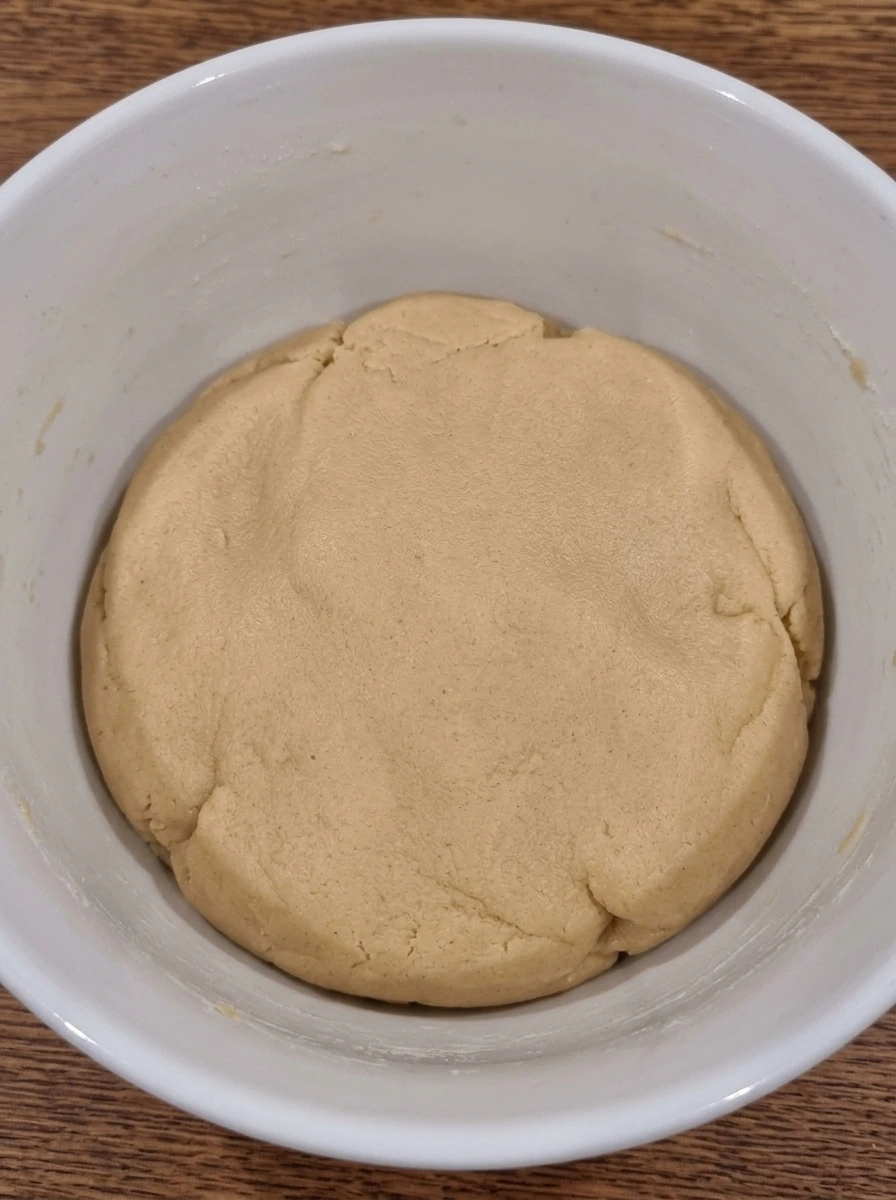
Gradually add the dry ingredient mixture into the bowl with the wet base. At first, the flour mixture sits in pale layers over the glossy dough, creating a contrast between the powdery top and the creamy mixture underneath. Once combined, the mixture thickens into a soft cookie dough with a light golden beige color. The dough looks dense, smooth, and scoopable, with no dry flour visible and no signs of heat or cooking.
Tip: Stop mixing as soon as the flour disappears to keep the cookies tender.
Step 5: Fold in the chocolate chips
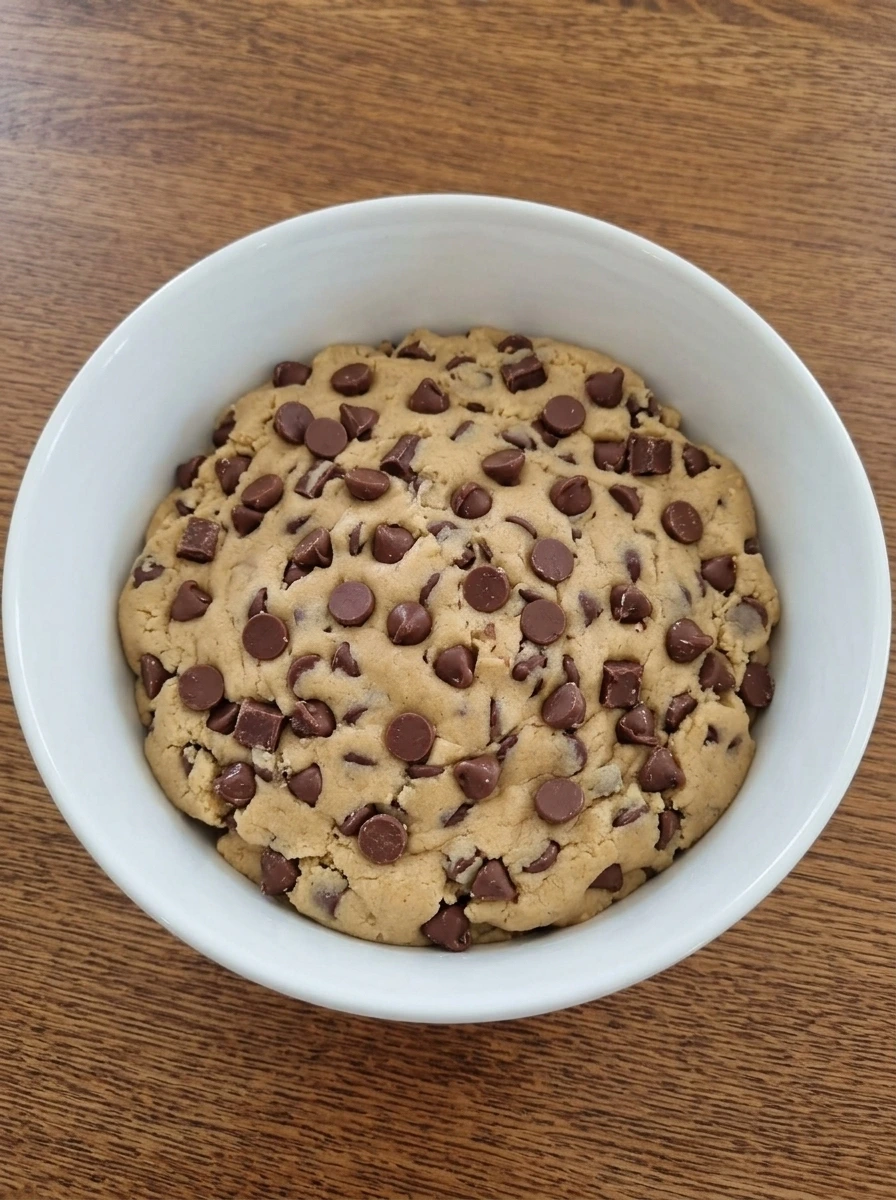
Add the semi sweet chocolate chips to the dough and fold them through gently. At the start, the chips sit in a loose pile over the dough, creating a dark contrast against the pale cookie base. After folding, the dough is evenly studded with chocolate chips throughout. The mixture remains thick and uncooked, and the chocolate pieces are clearly visible from edge to edge, promising plenty of chocolate in every cookie.
Tip: Reserve a small handful of chocolate chips to press on top later for a prettier finish.
Step 6: Shape the cookie dough portions
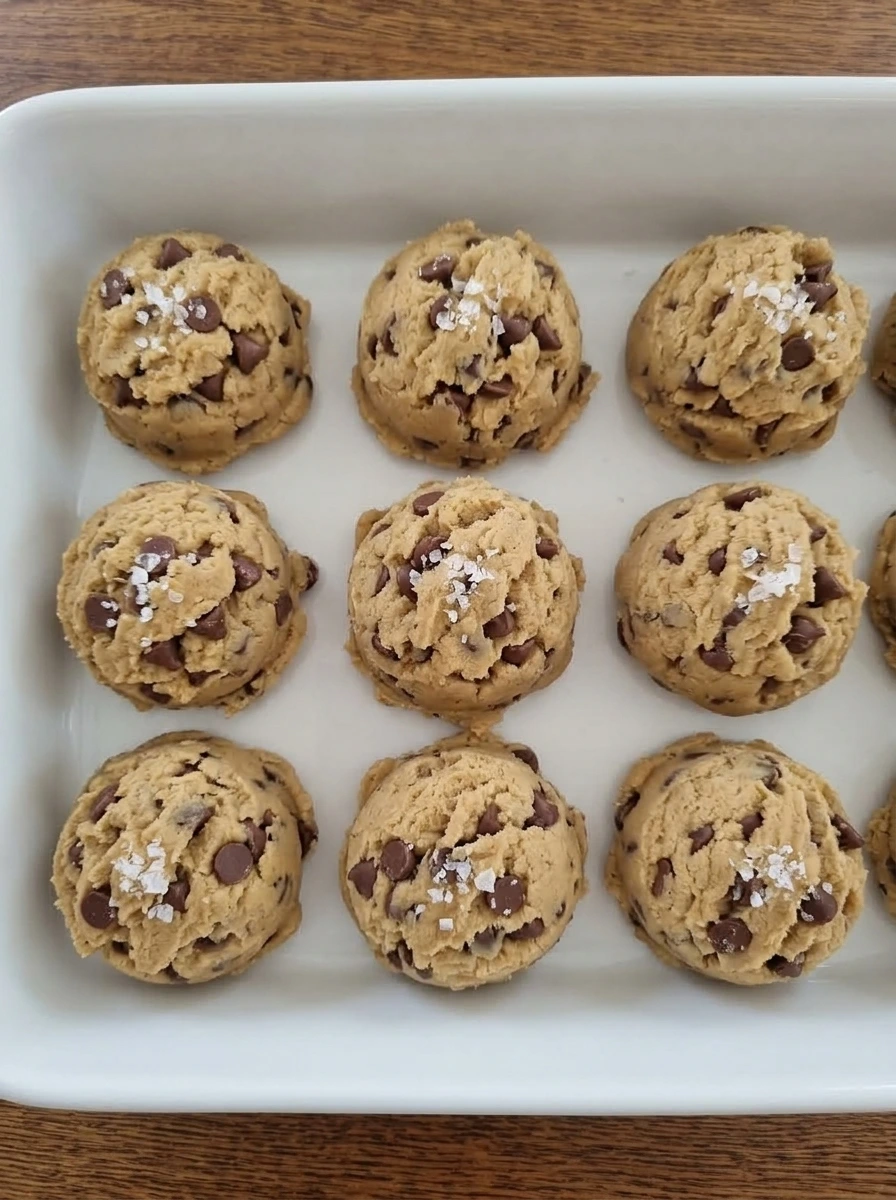
Scoop the dough into even portions and arrange them with space between each piece. Each portion looks rounded and thick, with rough tops and visible chocolate chips peeking through the surface. A few extra chocolate chips can be pressed onto the tops, and a tiny pinch of flaky sea salt can be added if using. The dough portions remain fully raw and uncooked, sitting neatly arranged and ready for the next stage.
Tip: Use a cookie scoop for evenly sized cookies that finish at the same time.
Step 7: Rest the shaped dough
Let the shaped dough rest so the portions hold their shape and the surface firms slightly. Visually, the dough mounds look a little more settled, with smoother edges and a more defined rounded shape. The chocolate chips remain visible on top and throughout each mound, and everything still looks completely raw with no signs of heat. This brief resting stage helps the dough look more structured and ready for the final transformation.
Tip: A short chill helps the cookies stay thicker and softer in the center.
Step 8: Plate the finished cookies
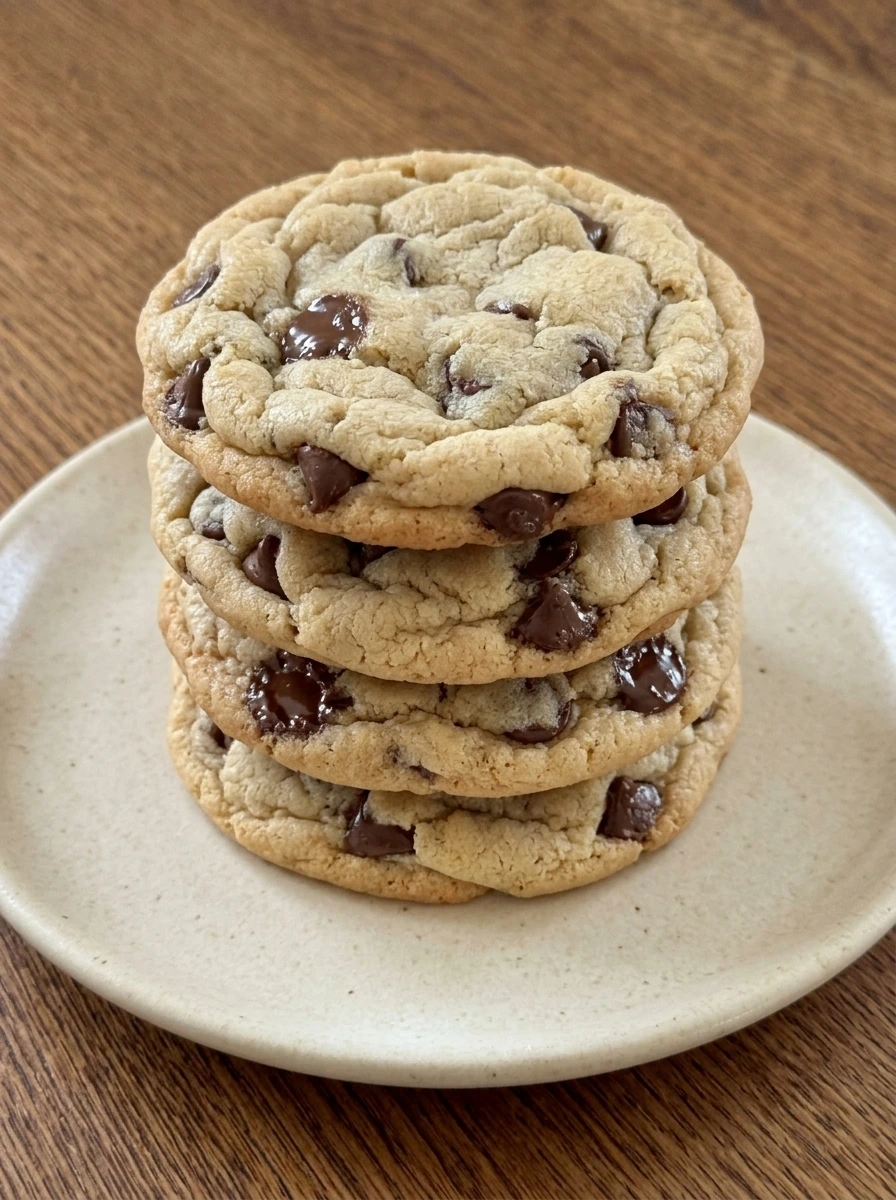
The dough portions are now finished as soft chocolate chip cookies with lightly golden brown tops and tender centers. The cookies look gently puffed with soft crinkled surfaces, and the chocolate chips appear glossy and slightly melted across the tops. Arrange the finished cookies on a serving plate and let the stacked layers show off their soft texture and rich chocolate pockets. The final dish looks warm, inviting, and ready to serve, with each cookie appearing thick, soft, and full of chocolate.
Tip: Let the cookies cool slightly before plating so they stay soft but hold together beautifully.
Pro Tips
- Use softened butter, not melted butter, for the best soft texture.
- Chill the shaped dough briefly if your kitchen is warm.
- Press a few extra chocolate chips on top before finishing for bakery style cookies.
- Do not overmix once the flour is added or the cookies can become tough.
Storage Instructions
Store the cookies in an airtight container at room temperature for up to 4 days for the best texture and flavor. If you want to keep them longer, refrigerate them for up to 1 week, though they are best after coming back to room temperature. For longer storage, freeze the baked cookies or unbaked dough portions for up to 3 months in a freezer safe container. To enjoy again, let the cookies thaw and warm them briefly until soft, or bake the frozen dough portions straight from frozen with a few extra minutes added.
Frequently Asked Questions
Why do chocolate chip cookies turn out hard instead of soft?
Chocolate chip cookies often turn out hard when too much flour is added or the dough is overmixed. Using brown sugar, softened butter, and the right amount of flour helps keep the centers soft. Slightly underbaking them also helps preserve that tender texture after they cool.
Can I chill the dough before baking?
Yes, chilling the dough is a great way to improve the texture and flavor. It helps the cookies hold their shape better and can make them a little thicker. Even a short chill can make a noticeable difference in how soft the centers stay.
Can I use milk chocolate or dark chocolate instead of semi sweet chips?
Yes, you can swap in milk chocolate, dark chocolate, or even chopped chocolate. Each option changes the sweetness level a bit, but the cookies will still be delicious. Just keep the total amount of chocolate about the same for the best dough balance.
How do I keep cookies soft after they cool?
Store the cookies in an airtight container as soon as they are completely cool. This helps lock in moisture and keeps the texture tender for longer. You can also add a small piece of bread to the container to help maintain softness.
Final Thoughts
If you try this recipe, I really hope you love it as much as my family does. It has become one of those treats we just keep coming back to, no matter the season.
Drop a comment below and let me know how yours turned out. And if you are looking for more easy dessert ideas, make sure to bookmark this page.
I am always adding new recipes that are simple, satisfying, and perfect for sharing any day of the week.
Print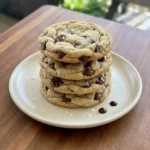
Soft Chocolate Chip Cookies
- Total Time: 45 minutes
- Yield: 4 servings 1x
Description
Looking for the best Soft Chocolate Chip Cookies? This one is quick, easy, and perfectly soft every time. Whether you are after a healthy dessert idea or a simple sweet treat, this delivers every time. Great for weeknight dinner, meal prep, holiday baking, potluck sharing, brunch tables, or any party. Save this easy cookie recipe for your next special occasion or everyday craving!
Ingredients
- 2 1/4 cups all purpose flour
- 1 teaspoon baking soda
- 1 teaspoon fine salt
- 1 cup unsalted butter, softened
- 3/4 cup packed light brown sugar
- 3/4 cup granulated sugar
- 2 large eggs
- 2 teaspoons vanilla extract
- 2 cups semi sweet chocolate chips
- 1/2 teaspoon optional flaky sea salt
Instructions
- Add the flour, baking soda, and fine salt to a white ceramic mixing bowl. The dry ingredients sit in soft layered mounds, with the powdery flour surrounding the smaller portions of baking soda and salt. After a quick whisk, the mixture looks evenly blended and pale white with a smooth, airy texture. There are no streaks or pockets, and everything remains completely uncooked with no signs of heat.
- Place the softened butter, brown sugar, and granulated sugar into a white ceramic mixing bowl. At first, the butter looks thick and smooth while the sugars sit visibly separate, with the brown sugar darker and slightly damp looking beside the white sugar. Once mixed, the texture changes into a pale tan, fluffy mixture that looks creamy and light. The surface becomes soft and spreadable, and the sugars are no longer distinct, leaving a whipped base that is still completely uncooked.
- Add the eggs and vanilla extract to the creamed butter and sugar mixture. Before mixing, the yolks and vanilla are clearly visible on top, creating glossy yellow streaks over the pale tan base. After mixing, the dough base becomes smoother, silkier, and slightly glossier. The color turns a bit warmer and more uniform, with a thick creamy consistency that still looks fully raw and uncooked.
- Gradually add the dry ingredient mixture into the bowl with the wet base. At first, the flour mixture sits in pale layers over the glossy dough, creating a contrast between the powdery top and the creamy mixture underneath. Once combined, the mixture thickens into a soft cookie dough with a light golden beige color. The dough looks dense, smooth, and scoopable, with no dry flour visible and no signs of heat or cooking.
- Add the semi sweet chocolate chips to the dough and fold them through gently. At the start, the chips sit in a loose pile over the dough, creating a dark contrast against the pale cookie base. After folding, the dough is evenly studded with chocolate chips throughout. The mixture remains thick and uncooked, and the chocolate pieces are clearly visible from edge to edge, promising plenty of chocolate in every cookie.
- Scoop the dough into even portions and arrange them with space between each piece. Each portion looks rounded and thick, with rough tops and visible chocolate chips peeking through the surface. A few extra chocolate chips can be pressed onto the tops, and a tiny pinch of flaky sea salt can be added if using. The dough portions remain fully raw and uncooked, sitting neatly arranged and ready for the next stage.
- Let the shaped dough rest so the portions hold their shape and the surface firms slightly. Visually, the dough mounds look a little more settled, with smoother edges and a more defined rounded shape. The chocolate chips remain visible on top and throughout each mound, and everything still looks completely raw with no signs of heat. This brief resting stage helps the dough look more structured and ready for the final transformation.
- The dough portions are now finished as soft chocolate chip cookies with lightly golden brown tops and tender centers. The cookies look gently puffed with soft crinkled surfaces, and the chocolate chips appear glossy and slightly melted across the tops. Arrange the finished cookies on a serving plate and let the stacked layers show off their soft texture and rich chocolate pockets. The final dish looks warm, inviting, and ready to serve, with each cookie appearing thick, soft, and full of chocolate.
Notes
Pro Tips:
- Use softened butter, not melted butter, for the best soft texture.
- Chill the shaped dough briefly if your kitchen is warm.
- Press a few extra chocolate chips on top before finishing for bakery style cookies.
- Do not overmix once the flour is added or the cookies can become tough.
Storage: Store the cookies in an airtight container at room temperature for up to 4 days for the best texture and flavor. If you want to keep them longer, refrigerate them for up to 1 week, though they are best after coming back to room temperature. For longer storage, freeze the baked cookies or unbaked dough portions for up to 3 months in a freezer safe container. To enjoy again, let the cookies thaw and warm them briefly until soft, or bake the frozen dough portions straight from frozen with a few extra minutes added.
- Prep Time: 15 minutes
- Cook Time: 30 minutes
- Category: Dessert
- Cuisine: American
Nutrition
- Serving Size: 1 serving