

Cold evenings call for a dish that feels familiar and warm, and this Chicken Pot Pie Casserole brings that classic comfort to the table with tender chicken, soft vegetables and a golden biscuit topping. It is the kind of meal that makes everyone gather around for seconds. This chicken pot pie recipe keeps the creamy filling rich without making the crust heavy.
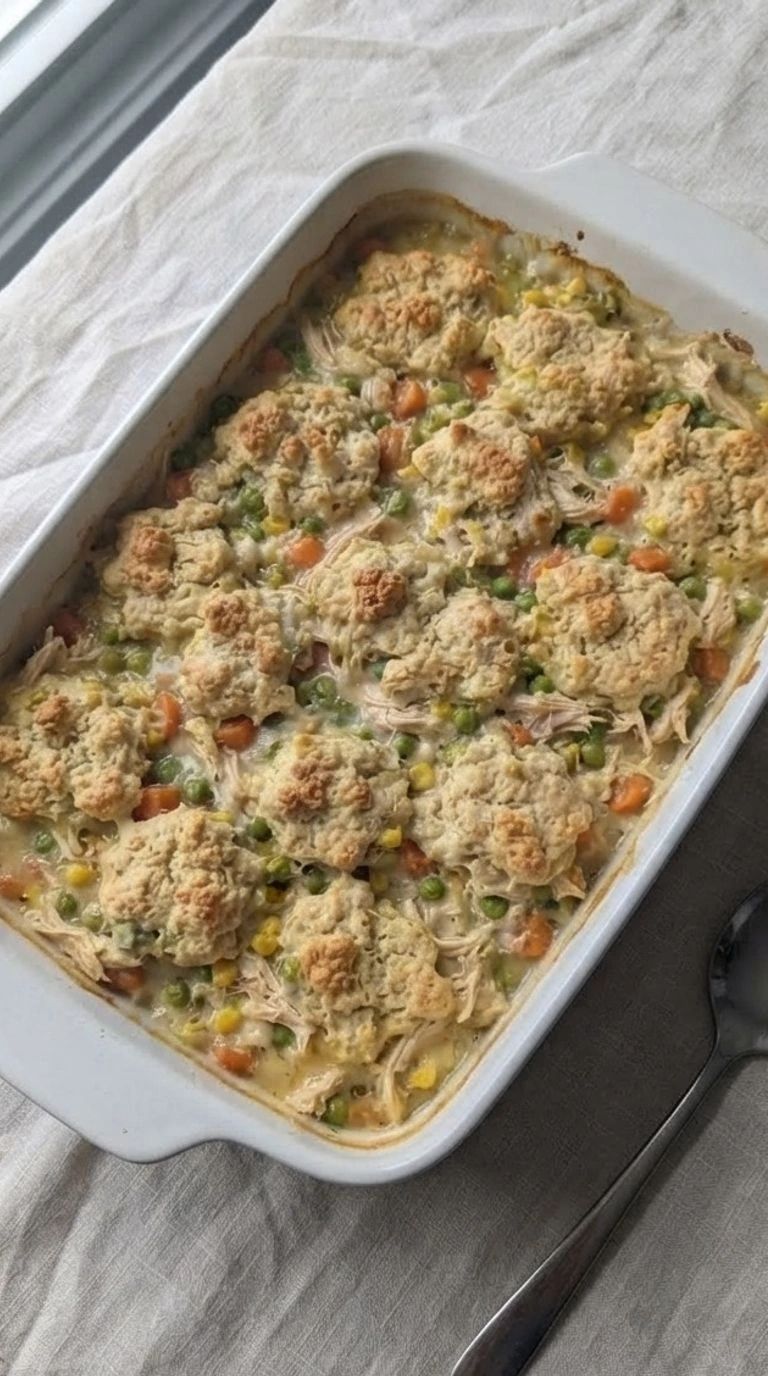
We love simple family dinners because recipes like this Chicken Pot Pie Casserole are easy to bring back whenever everyone needs something filling. If you enjoy slow cooked comfort meals too, try our Crockpot Chicken Pot Pie for another version with the same familiar flavors. Comfort foods that use real ingredients and create happy memories are my favorite kinds of meals.
This chicken pot pie casserole with biscuits gives you that homemade taste while keeping the steps clear and practical for any home cook.
Ingredients
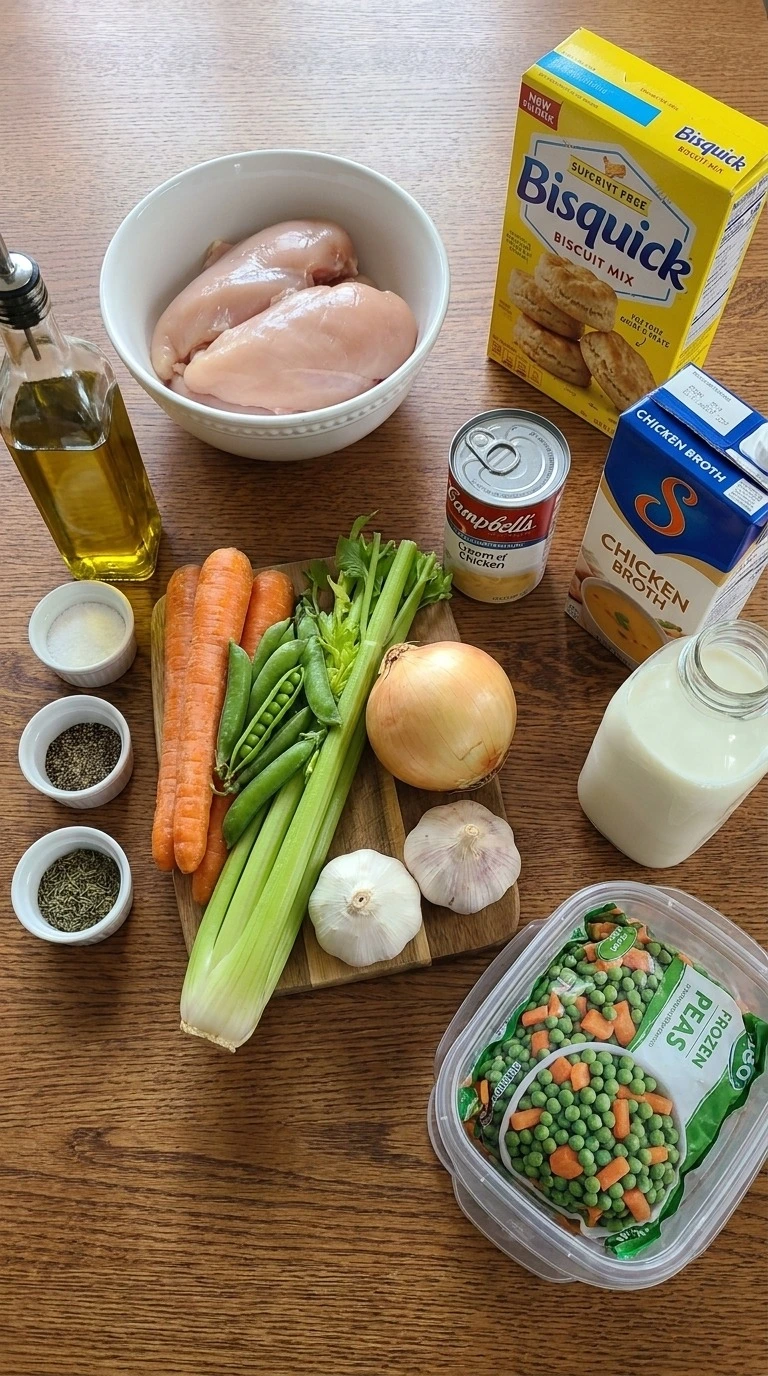
- boneless chicken breast: Cooked until 165°F and shredded into bite-size pieces for a tender filling.
- olive oil: Used to help cook the chicken and add a light savory flavor.
- salt: Adds basic seasoning throughout the chicken mixture.
- black pepper: Adds mild warmth to balance the creamy sauce.
- dried thyme: Provides a classic herb flavor for the filling.
- carrots: Diced and added for sweetness and color.
- peas: Adds small bursts of green texture.
- celery stalk: Diced to bring fresh savory notes.
- yellow onion: Diced to build the aromatic base.
- garlic: Minced for a deeper savory flavor.
- cream of chicken soup: Creates the creamy sauce base.
- chicken broth: Thins the sauce while adding chicken flavor.
- whole milk: Makes the filling smooth and rich.
- frozen peas and carrots: Adds vegetables without extra preparation time.
- Bisquick biscuit mix: Forms the fluffy biscuit topping layer.
Tools You’ll Need
- 9×13 ceramic baking dish: This size gives the filling room to bubble and the biscuit top space to rise while a smaller dish can overflow.
- Large mixing bowl: A roomy bowl helps combine the filling without crushing vegetables and should hold at least 4 quarts.
- Rubber spatula: A flexible spatula folds the biscuit mixture gently and a stiff spoon can overwork the dough.
Instructions
Step 1: Cook and shred the chicken with vegetables
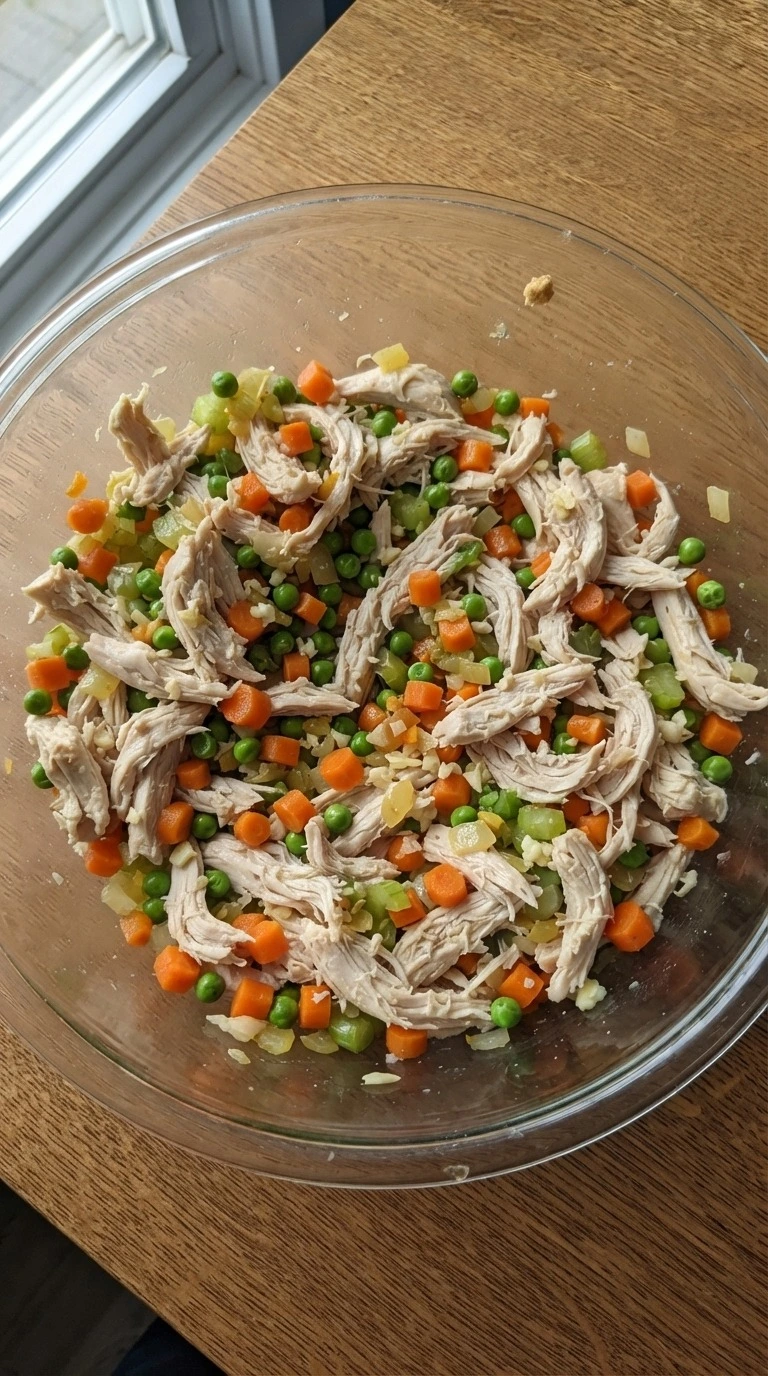
Season 2 pounds boneless chicken breast with salt pepper and thyme, then cook it with 1 tablespoon olive oil over medium-high heat until the pan reaches about 400°F and the chicken reaches 165°F inside, about 6 to 8 minutes per side. Shred the meat with two forks using a pulling motion, then fold in diced carrots, peas, celery, yellow onion and garlic. (I rushed this once and the meat dried out.
Slow shredding gave the best texture. ) You’ll see opaque chicken fibers, bright vegetables and hear a light sizzle as moisture leaves the pan. The smell turns savory.
Don’t skip this. Miss the timing and the chicken loses its moisture. Cook at 165°F because safe heat keeps the protein tender.
Tip: Cut the chicken into even pieces before cooking so each section reaches 165°F at nearly the same time.
Step 2: Build the creamy biscuit casserole filling
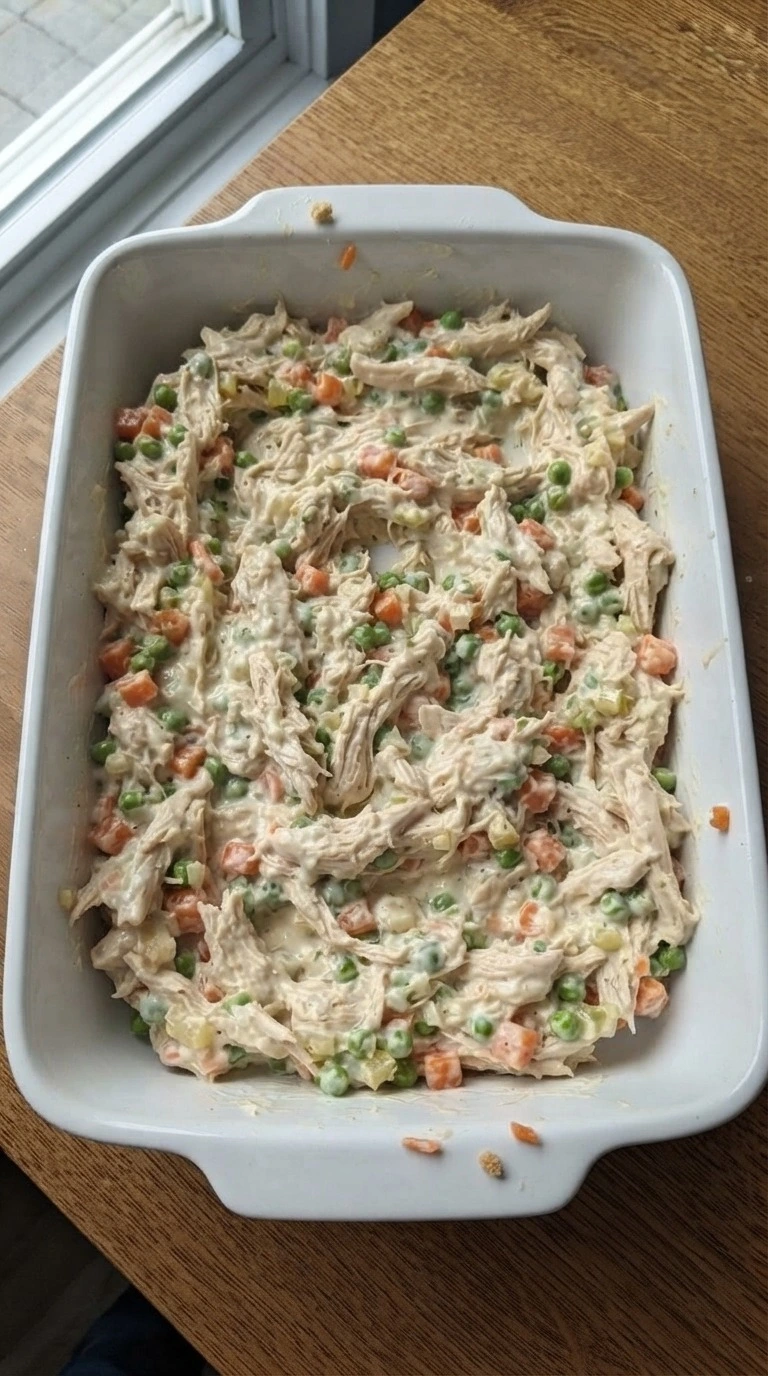
Combine the shredded chicken mixture with 1 can cream of chicken soup, 1 cup chicken broth, 1/2 cup whole milk and 2 cups frozen peas and carrots in a large mixing bowl. Stir with a rubber spatula using slow folding motions for 2 to 3 minutes until the sauce coats everything evenly.
Add the mixture to a 9×13 ceramic baking dish and spread it with gentle strokes. The filling should look thick and creamy with vegetables spaced throughout.
You’ll smell the herbs and see a smooth sauce layer. This step prevents a watery base because the sauce binds before baking.
Tip: Let the frozen vegetables sit for 5 minutes before mixing so excess ice does not thin the sauce.
Step 3: Add the biscuit topping layer
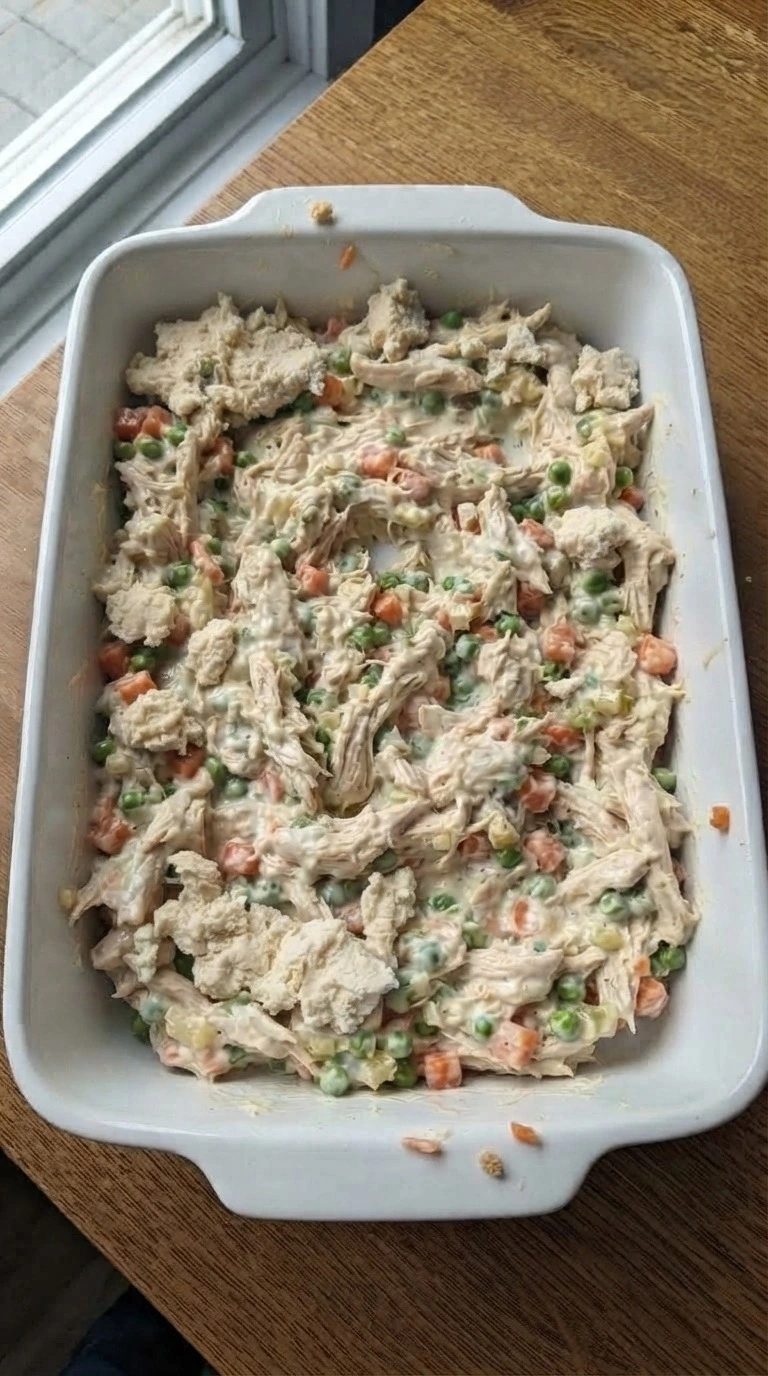
Mix 2 cups Bisquick biscuit mix with 2/3 cup whole milk until just combined, then spoon the batter over the filling in uneven portions. Use a spatula to gently spread the topping while leaving small gaps for steam during the bake.
Work quickly within 3 to 5 minutes because overmixing changes the biscuit texture. The topping should show rough peaks and valleys with creamy filling peeking through.
You’ll notice a soft dough feel and fresh baked biscuit smell after shaping. Gentle mixing keeps air pockets inside the biscuit layer.
Tip: Leave small spaces between biscuit portions so steam can escape and the topping cooks through evenly.
Step 4: Bake until the casserole turns golden
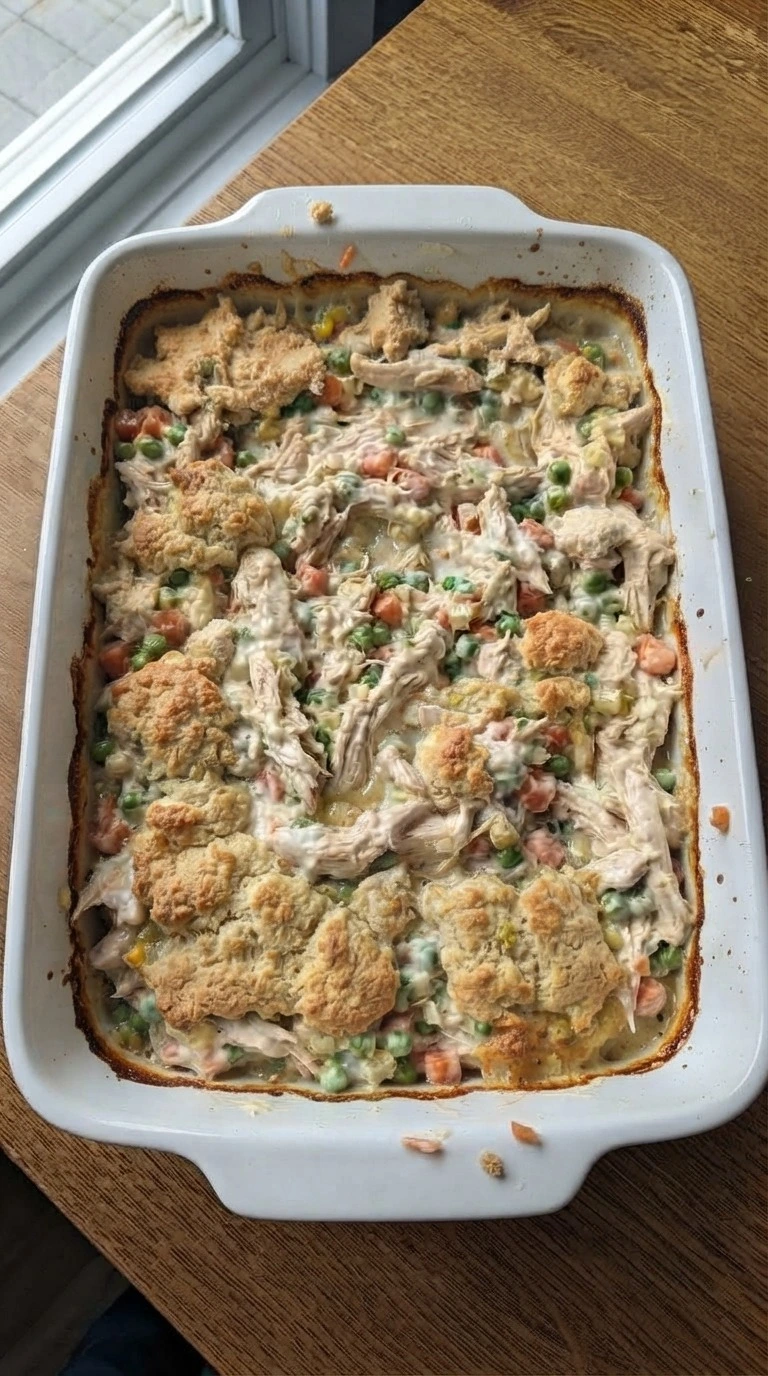
Bake the assembled casserole at 375°F for 25 to 30 minutes until the biscuit topping turns golden and the filling bubbles around the edges. Rotate the dish halfway through using careful turning motion so the top colors evenly. (My first batch went into a 400°F oven and the biscuits set too fast.
375°F fixed it. ) You’ll see deep golden biscuit tops, creamy filling bubbling below and a buttery baked smell. The edges firm up.
Bake at 375°F because steady heat lets the center set before the crust overcooks.
Tip: Rest the baked casserole for 10 minutes before serving so the creamy center holds its shape.
Step 5: Rest and serve a casserole portion
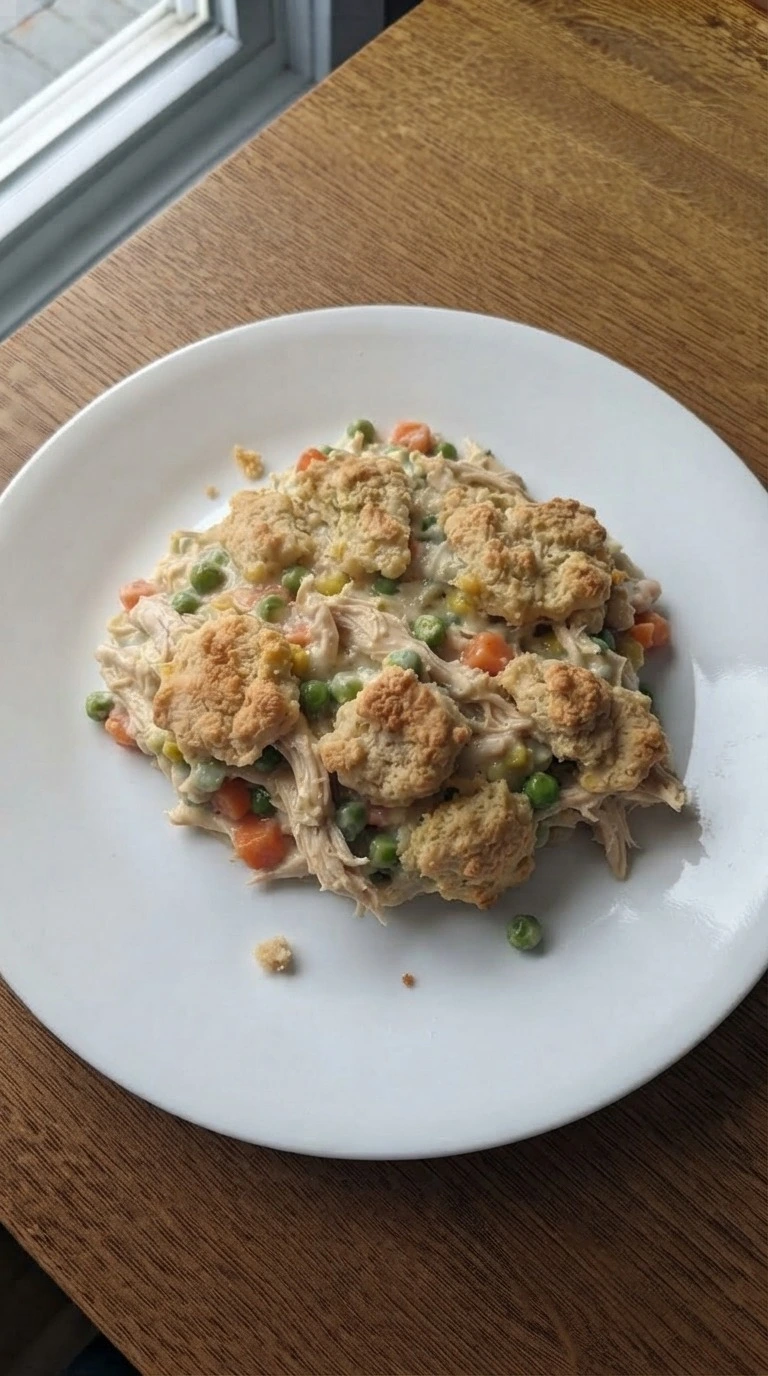
Rest the casserole for 10 minutes after baking at 375°F, then scoop one portion onto a white plate with biscuit topping and creamy filling together. Use a gentle lift and place motion so the layers stay visible while serving.
The topping should hold its flaky shape while the filling stays thick. The serving shows golden biscuit pieces, tender chicken and a creamy center.
You’ll smell buttery herbs right away. Rest 10 minutes after baking because the sauce structure holds each serving.
Tip: Serve portions with a spoon instead of cutting hard so the biscuit pieces stay intact.
Pro Tips
- Use freshly shredded chicken instead of large chunks and let it cool for 5 minutes before mixing because warm meat keeps the creamy base thicker.
- Choose frozen peas and carrots without added sauce, then check the bag size around 2 cups so extra ice doesn’t thin the casserole.
- Bake in a 9×13 ceramic dish because the wider surface gives the biscuit topping room to rise and turn golden at 375°F.
- Mix the biscuit topping for only 2 to 3 minutes because overworked dough becomes dense instead of soft and airy.
- Rest the casserole for exactly 10 minutes after baking so each serving holds its shape instead of spreading across the plate.
- Add a pinch of extra dried thyme before baking if you want a stronger herb note without changing the creamy texture.
- Keep the oven at 375°F because higher heat can brown the biscuits before the filling reaches the right thickness.
- Add 1 cup shredded sharp cheddar and 1/2 teaspoon smoked paprika for a richer version with a deeper savory taste.
- Replace the peas and carrots with 2 cups mixed frozen vegetables for a colorful variation that works well during busy weeks.
- Use 1 cup sliced mushrooms with the filling for an earthy twist that adds more texture without changing the method.
- Make a lighter version with extra vegetables and reduced-fat milk, knowing the sauce will be slightly thinner.
Storage Instructions
Keep leftover Chicken Pot Pie Casserole in a sealed glass container in the fridge for up to 4 days. Freeze the baked casserole for up to 2 months by wrapping portions tightly with foil and placing them in freezer bags.
Reheat at 350°F for 15 to 20 minutes and add 1 tablespoon chicken broth if the filling seems thick. Discard it if you notice sour smells, unusual texture or mold growth.
Print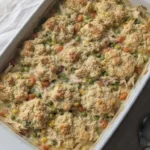
Chicken Pot Pie Casserole
- Total Time: 45 minutes
- Yield: 4 servings 1x
Description
This easy Chicken Pot Pie Casserole is one of the best quick and simple dinner ideas for busy nights, meal prep or a holiday potluck. The healthy mix of tender chicken, vegetables and a golden biscuit layer fills the kitchen with a buttery smell and gives each serving a creamy texture. The trick is baking the biscuit topping at the right heat so the center sets while the top turns golden. It is a comforting choice for a weeknight dinner or party.
Ingredients
- 2 pounds boneless chicken breast (Cooked until 165°F and shredded into bite-size pieces for a tender filling.)
- 1 tablespoon olive oil (Used to help cook the chicken and add a light savory flavor.)
- 1 teaspoon salt (Adds basic seasoning throughout the chicken mixture.)
- 1/2 teaspoon black pepper (Adds mild warmth to balance the creamy sauce.)
- 1 teaspoon dried thyme (Provides a classic herb flavor for the filling.)
- 1 cup carrots (Diced and added for sweetness and color.)
- 1 cup peas (Adds small bursts of green texture.)
- 1 cup celery stalk (Diced to bring fresh savory notes.)
- 1 medium yellow onion (Diced to build the aromatic base.)
- 2 cloves garlic (Minced for a deeper savory flavor.)
- 1 can cream of chicken soup (Creates the creamy sauce base.)
- 1 cup chicken broth (Thins the sauce while adding chicken flavor.)
- 1/2 cup whole milk (Makes the filling smooth and rich.)
- 2 cups frozen peas and carrots (Adds vegetables without extra preparation time.)
- 2 cups Bisquick biscuit mix (Forms the fluffy biscuit topping layer.)
Instructions
- Season 2 pounds boneless chicken breast with salt pepper and thyme, then cook it with 1 tablespoon olive oil over medium-high heat until the pan reaches about 400°F and the chicken reaches 165°F inside, about 6 to 8 minutes per side. Shred the meat with two forks using a pulling motion, then fold in diced carrots, peas, celery, yellow onion and garlic. (I rushed this once and the meat dried out. Slow shredding gave the best texture.) You’ll see opaque chicken fibers, bright vegetables and hear a light sizzle as moisture leaves the pan. The smell turns savory. Don’t skip this. Miss the timing and the chicken loses its moisture. Cook at 165°F because safe heat keeps the protein tender.
- Combine the shredded chicken mixture with 1 can cream of chicken soup, 1 cup chicken broth, 1/2 cup whole milk and 2 cups frozen peas and carrots in a large mixing bowl. Stir with a rubber spatula using slow folding motions for 2 to 3 minutes until the sauce coats everything evenly. Add the mixture to a 9×13 ceramic baking dish and spread it with gentle strokes. The filling should look thick and creamy with vegetables spaced throughout. You’ll smell the herbs and see a smooth sauce layer. This step prevents a watery base because the sauce binds before baking.
- Mix 2 cups Bisquick biscuit mix with 2/3 cup whole milk until just combined, then spoon the batter over the filling in uneven portions. Use a spatula to gently spread the topping while leaving small gaps for steam during the bake. Work quickly within 3 to 5 minutes because overmixing changes the biscuit texture. The topping should show rough peaks and valleys with creamy filling peeking through. You’ll notice a soft dough feel and fresh baked biscuit smell after shaping. Gentle mixing keeps air pockets inside the biscuit layer.
- Bake the assembled casserole at 375°F for 25 to 30 minutes until the biscuit topping turns golden and the filling bubbles around the edges. Rotate the dish halfway through using careful turning motion so the top colors evenly. (My first batch went into a 400°F oven and the biscuits set too fast. 375°F fixed it.) You’ll see deep golden biscuit tops, creamy filling bubbling below and a buttery baked smell. The edges firm up. Bake at 375°F because steady heat lets the center set before the crust overcooks.
- Rest the casserole for 10 minutes after baking at 375°F, then scoop one portion onto a white plate with biscuit topping and creamy filling together. Use a gentle lift and place motion so the layers stay visible while serving. The topping should hold its flaky shape while the filling stays thick. The serving shows golden biscuit pieces, tender chicken and a creamy center. You’ll smell buttery herbs right away. Rest 10 minutes after baking because the sauce structure holds each serving.
Notes
Pro Tips:
- Use freshly shredded chicken instead of large chunks and let it cool for 5 minutes before mixing because warm meat keeps the creamy base thicker.
- Choose frozen peas and carrots without added sauce, then check the bag size around 2 cups so extra ice doesn’t thin the casserole.
- Bake in a 9×13 ceramic dish because the wider surface gives the biscuit topping room to rise and turn golden at 375°F.
- Mix the biscuit topping for only 2 to 3 minutes because overworked dough becomes dense instead of soft and airy.
- Rest the casserole for exactly 10 minutes after baking so each serving holds its shape instead of spreading across the plate.
- Add a pinch of extra dried thyme before baking if you want a stronger herb note without changing the creamy texture.
- Keep the oven at 375°F because higher heat can brown the biscuits before the filling reaches the right thickness.
Storage: Keep leftover Chicken Pot Pie Casserole in a sealed glass container in the fridge for up to 4 days. Freeze the baked casserole for up to 2 months by wrapping portions tightly with foil and placing them in freezer bags. Reheat at 350°F for 15 to 20 minutes and add 1 tablespoon chicken broth if the filling seems thick. Discard it if you notice sour smells, unusual texture or mold growth.
- Prep Time: 15 minutes
- Cook Time: 30 minutes
- Category: Dinner
- Cuisine: American
Nutrition
- Serving Size: 1 serving
Frequently Asked Questions
Yes, assemble the filling and biscuit topping up to 24 hours ahead and keep it covered in the refrigerator. Let it sit for 20 minutes before baking at 375°F so the cold dish warms evenly and the topping cooks through.
Store leftovers in an airtight container for up to 4 days at 40°F or below. Reheat individual portions at 350°F for 15 to 20 minutes until the center is warm and the biscuit stays firm.
You can freeze the filling for up to 3 months, but add fresh biscuit topping after thawing for the best texture. Thaw overnight in the fridge and bake at 375°F for about 30 minutes.
A watery filling usually happens when vegetables release extra moisture or the sauce was not thick enough before baking. Cook the filling mixture for 5 extra minutes before adding biscuits so excess liquid can reduce.
Yes, prepare two separate 9×13 baking dishes instead of one oversized pan. Bake both at 375°F and rotate them halfway through the 25 to 30 minute cooking time for even browning.
Serve it with a crisp green salad or roasted vegetables to balance the creamy filling. For a gathering, prepare portions about 10 minutes after baking so the layers stay neat.
Final Thoughts
After making this dish many times, I keep coming back to Chicken Pot Pie Casserole because it feels simple enough for a Tuesday night but special enough to share. This chicken pot pie recipe with biscuits brings together creamy filling and a golden top that everyone enjoys.
Save this one for later, share it with a friend, and tell me how you changed your chicken pot pie casserole. You can also try our Friendsgiving Casserole by Joanna Gaines or another comfort meal from the collection.
Come back to it whenever you need bisquick chicken pot pie, chicken pot pie casserole with biscuits and easy chicken pot pie casserole.