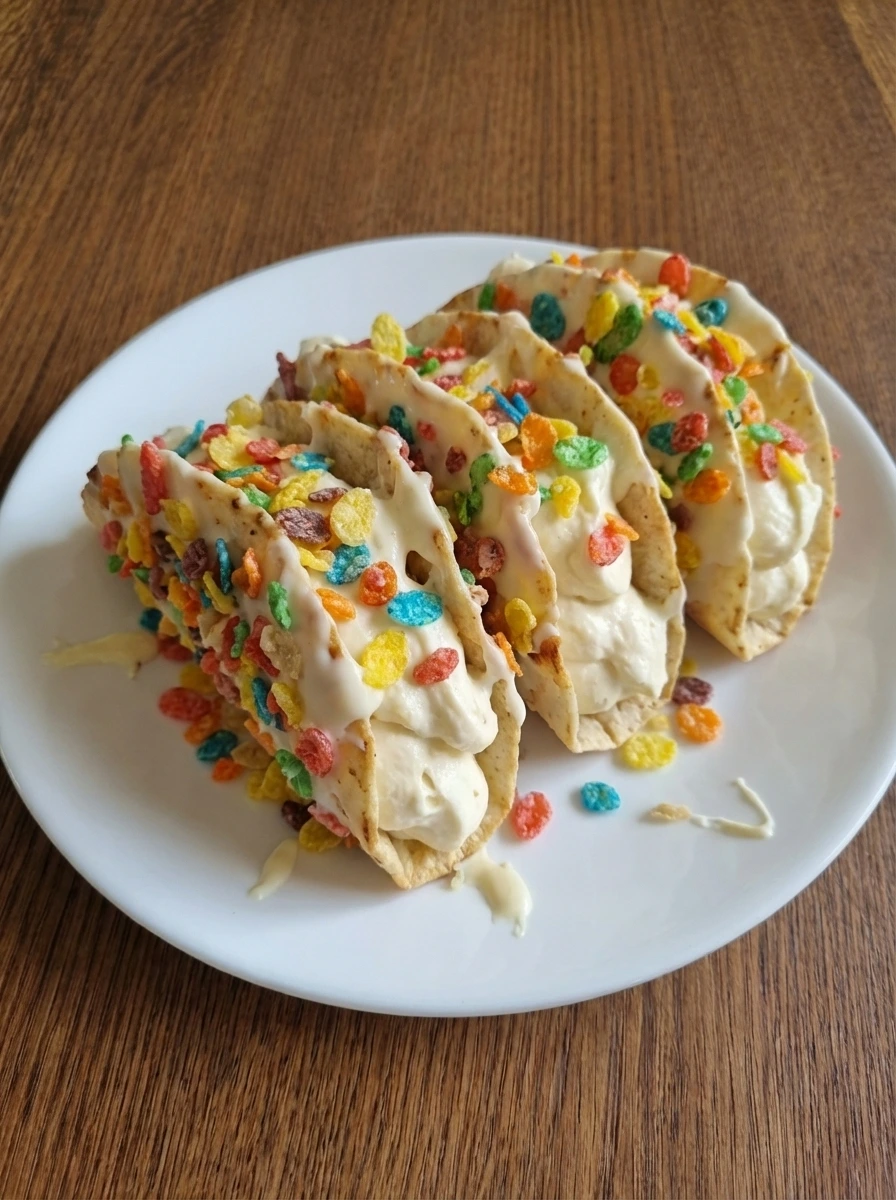
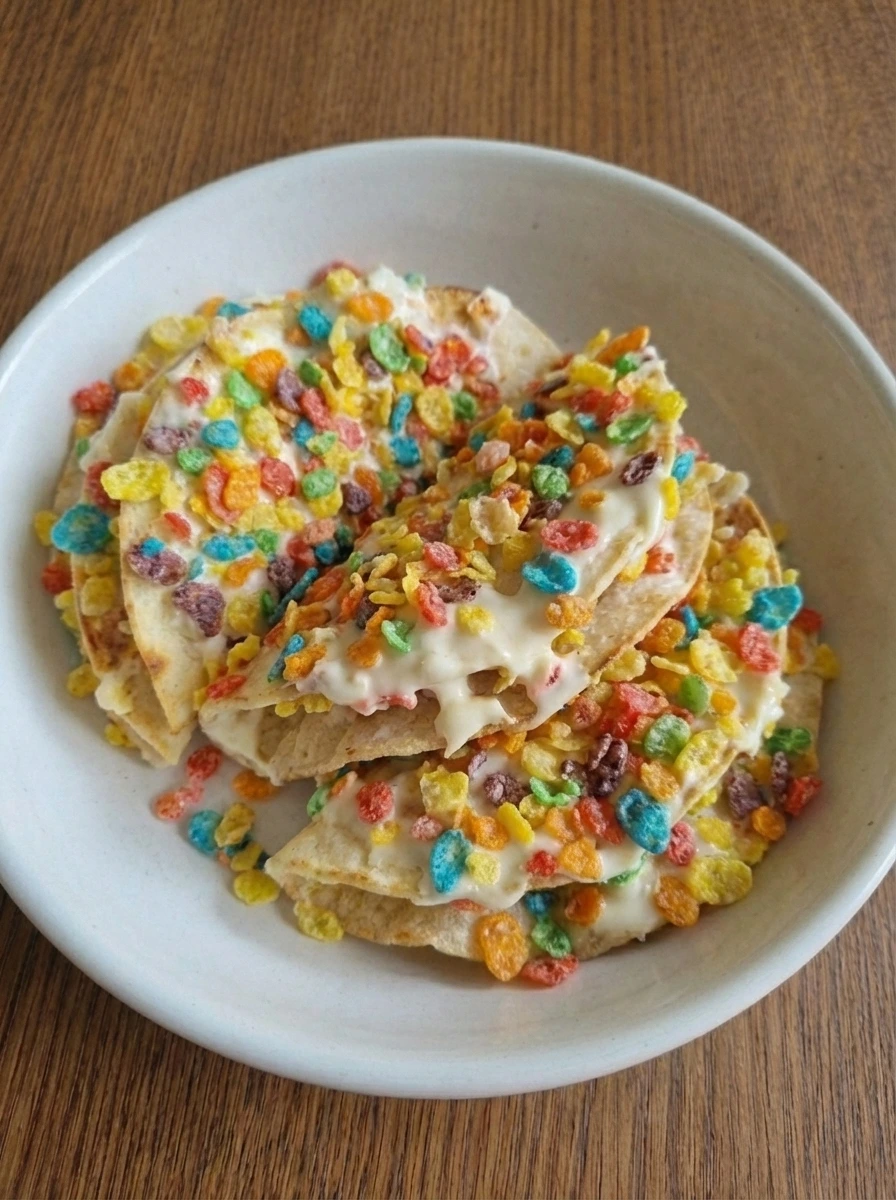
Seriously and no joke and this is the best Fruity Pebbles Cheesecake Tacos recipe. It is the one I keep coming back to whenever I want something colorful and fun. It is a classic style dessert with simple and delicious ingredients. Crispy taco shells are coated with Fruity Pebbles and then filled with a creamy cheesecake mixture for the sweetest crunch in every bite.
A classic dessert like Fruity Pebbles Cheesecake Tacos is one of my go to easy treats. Not only does it make for a super delicious bite and but it also feels playful and satisfying. Also and there are no complicated methods or ingredients needed. And making them ahead is a cinch.
I often make a batch for a weekend snack and then save a few for the next day. With just a few basic ingredients probably already in the fridge and pantry and you can whip up a dessert that feels extra special. Serve the tacos on a plate for a party and or tuck them onto a brunch spread and or bring them to a holiday table when you want something bright and cheerful.
Ingredients
Here’s what I use for this recipe and you can always make substitutions if you prefer.
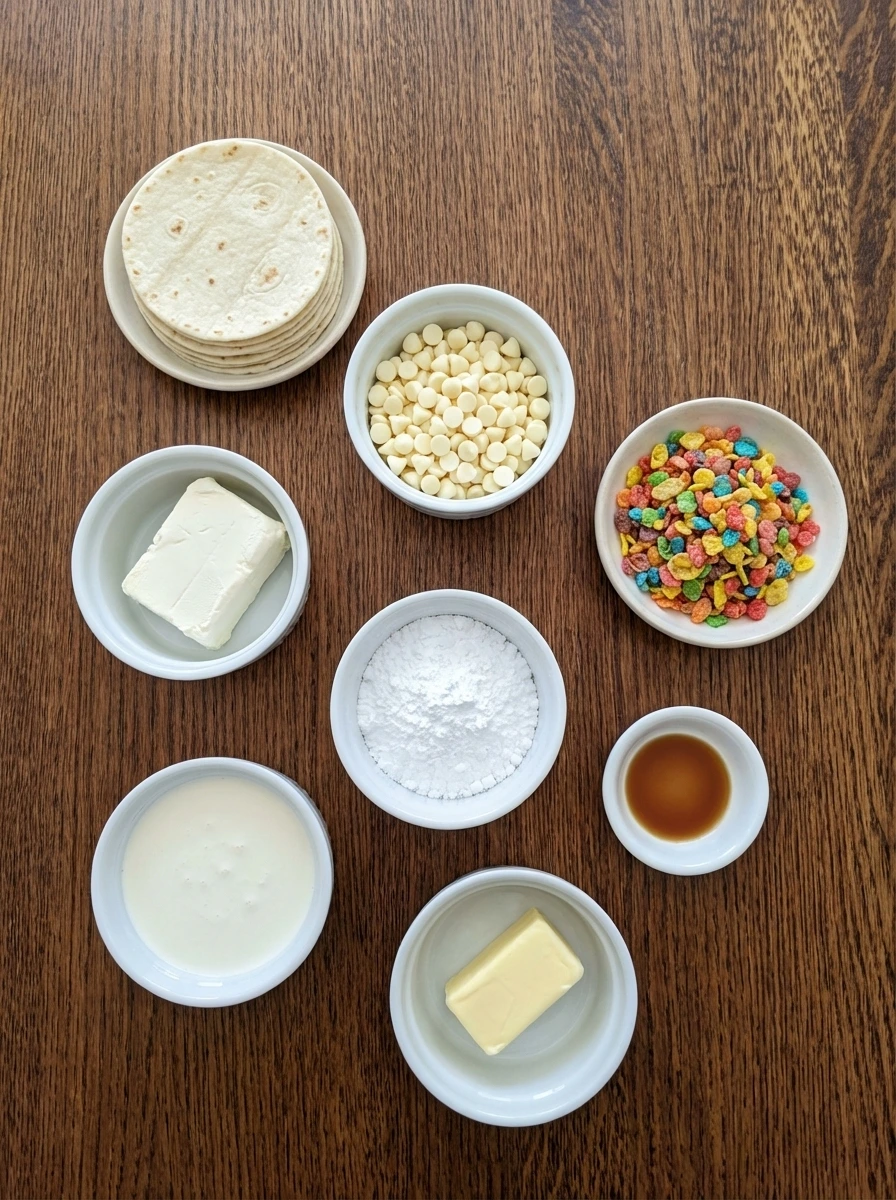
- mini taco tortillas: small shells that crisp and hold the filling
- white chocolate chips: sweet coating that helps cereal cling to the shells
- Fruity Pebbles cereal.: colorful crunch for coating and topping
- cream cheese: rich base for the cheesecake filling
- powdered sugar: sweetens the filling smoothly
- vanilla extract: adds warm dessert flavor
- heavy whipping cream: lightens the filling and adds body
- butter: helps the tortillas toast and crisp
Tools You’ll Need
- mixing bowl: for blending and folding the filling
- baking sheet: for crisping the tortillas into shells
- spoon or piping bag: for adding the filling neatly but naturally
Instructions
Step 1: Toast the tortillas into taco shells
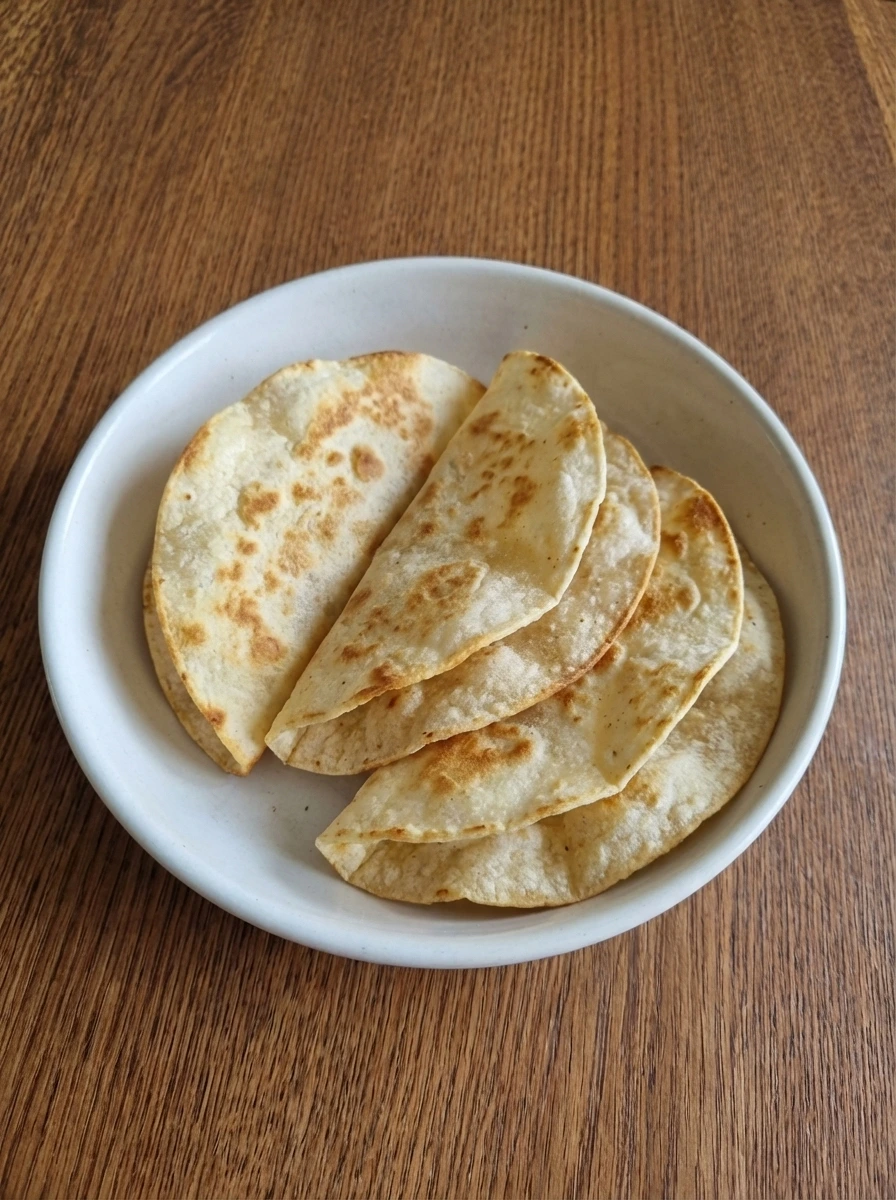
Brush the tortillas with melted butter and then fold them into taco shapes as they bake until the surfaces turn lightly golden and the edges look drier and firmer. The flat rounds become crisp shells with slight bubbling and uneven curves and each one looks a little different from the next.
Tip: Let the shells cool fully so they stay crisp before coating them.
Step 2: Coat the shells with white chocolate and cereal
Melt the white chocolate and then spread it over the outer sides of the cooled shells before pressing on Fruity Pebbles so the bright pieces stick in a loose and uneven layer. The shells now look colorful and textured with little gaps and clumps where the cereal overlaps and the coating sets in irregular patches.
Tip: Work while the chocolate is still soft so the cereal sticks well.
Step 3: Whip the cheesecake filling
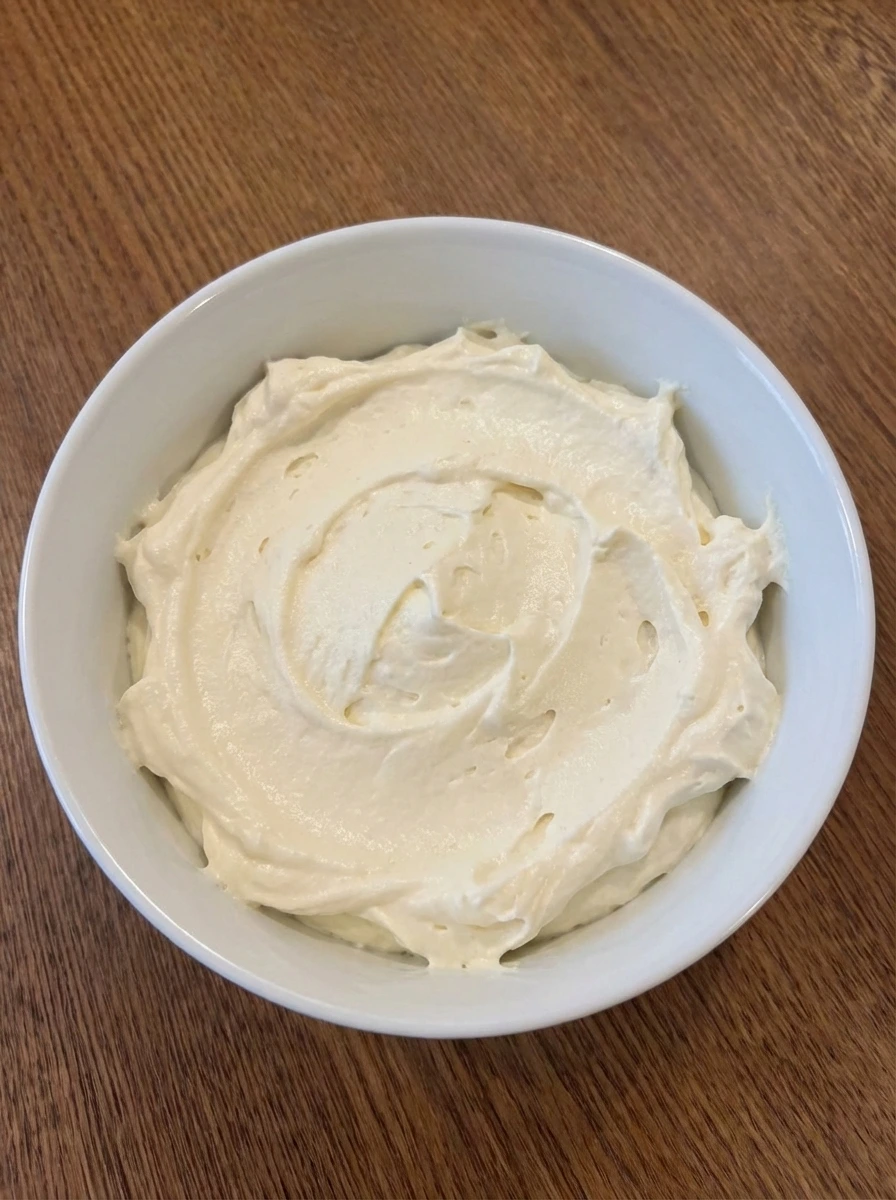
Beat the cream cheese with powdered sugar and vanilla until smooth and then fold in the whipped cream until the mixture turns fluffy and pale. The dense ingredients change into a soft filling that holds gentle swirls and looks airy rather than heavy.
Tip: Stop mixing once the filling looks thick and smooth so it stays light.
Step 4: Fill the cereal coated shells
Spoon or pipe the cheesecake mixture into each shell so the filling settles into the center and rises above the edges in loose ridges. The empty shells become structured desserts with thick creamy centers and natural spacing and slight overflow in a few spots.
Tip: Fill close to serving time if you want the shells to stay extra crisp.
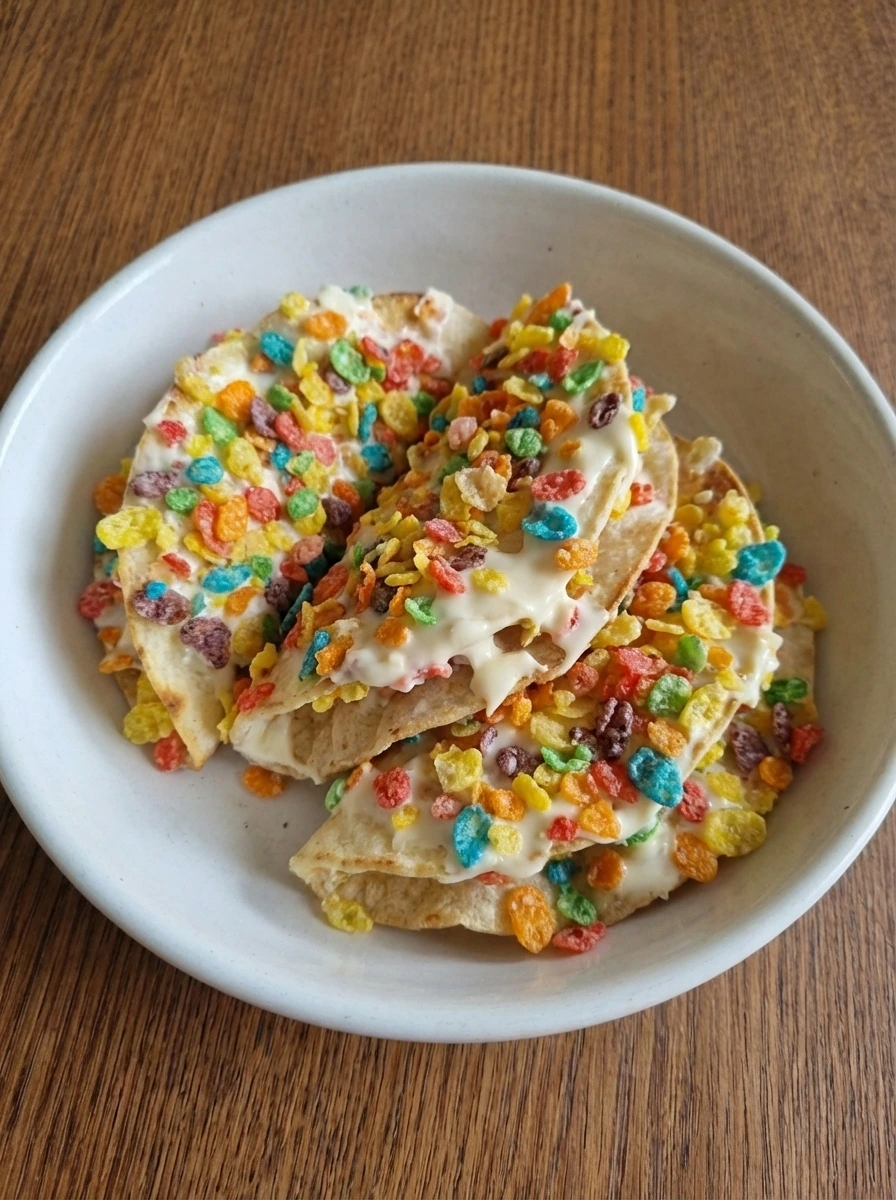
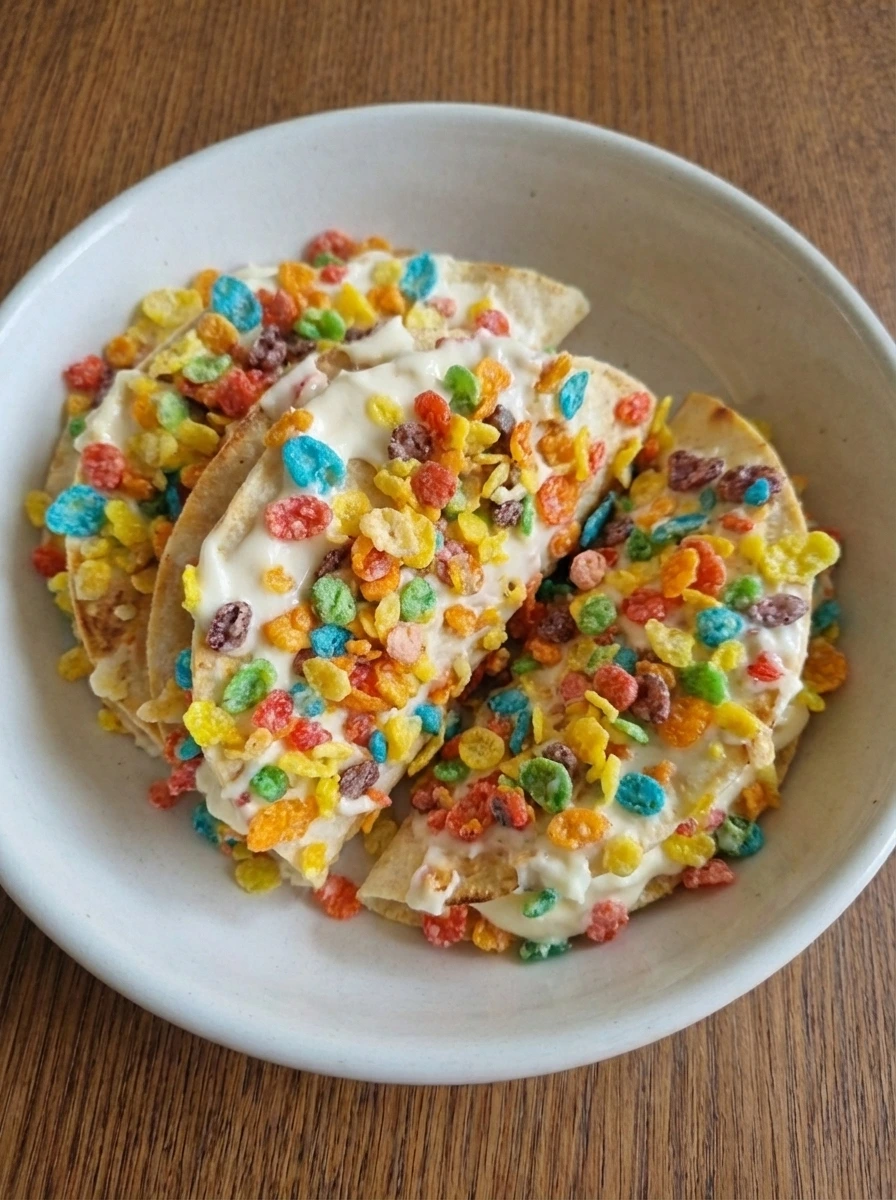
Step 5: Scatter more cereal over the filling
Sprinkle extra Fruity Pebbles over the creamy tops so the bright cereal sinks slightly into the soft filling while some pieces stay perched on top. The smooth surface gains crunch and stronger color contrast and the tacos look more layered and lively.
Tip: Add the topping just before serving for the best crunch.
Step 6: Chill and plate the finished tacos
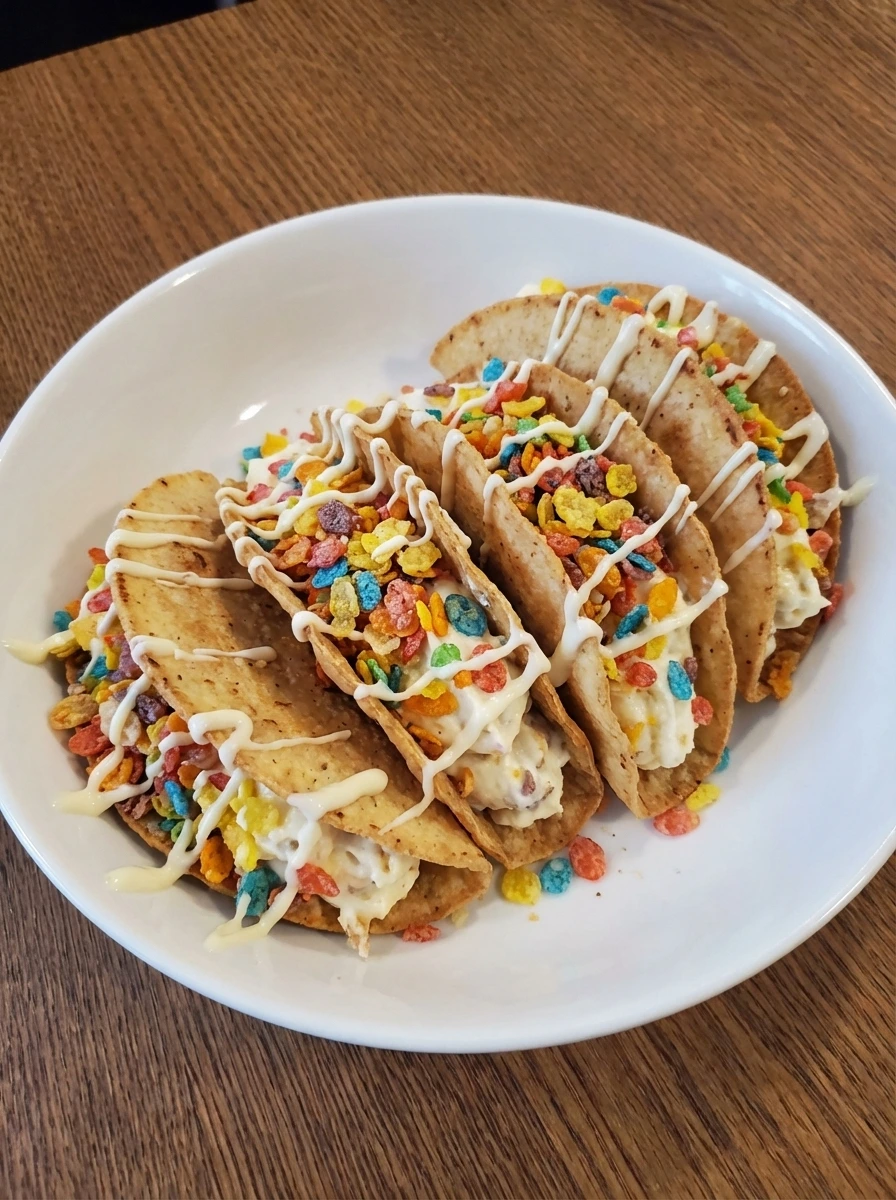
Let the assembled tacos chill until the filling firms slightly and the white chocolate feels set while the shells stay crisp around the edges. On the plate the tacos look fully finished with creamy centers and visible melting traces and cereal crunch and slight browning on the shells and plenty of homemade imperfections in the coating and filling.
Tip: A short chill helps the filling hold its shape without softening the shells too much.
Pro Tips
- Cool the shells completely before coating so the chocolate sets instead of sliding.
- Use full fat cream cheese for the richest texture and the best hold.
- Do not overfill the tacos or the shells can soften too quickly.
- Save a little extra cereal for the last minute so the topping stays crisp.
Storage Instructions
Store the cheesecake filling in a covered container in the fridge for up to 3 days. Keep the coated shells separate at room temperature in a closed container so they stay crisp. Once assembled and the tacos are best eaten the same day. Leftovers can be chilled and enjoyed later and but the shells will soften as they sit.
Frequently Asked Questions
Can I make Fruity Pebbles Cheesecake Tacos ahead of time?
Yes and you can crisp the shells and make the filling ahead. For the best texture assemble them shortly before serving so the shells stay crunchy.
Can I use store bought taco shells?
You can and but small homemade toasted tortillas give a fresher texture and a lighter bite that works especially well with the sweet filling.
How do I keep the shells from getting soggy?
Let the coating set fully and then add the filling close to serving time. A short chill helps the filling firm without soaking the shells too much.
Can I change the cereal?
Absolutely and other colorful crisp cereals work too. Fruity Pebbles gives the brightest look and the classic sweet fruity crunch for this dessert.
Final Thoughts
This is the kind of recipe I wish I had found years ago. It would have saved me so many last minute dessert moments.
But now that I have it and I make it all the time and I think you will too. If you enjoyed this and check out some of my other popular recipes on the blog.
And leave a comment and I read every single one and it really makes my day.
Print
Fruity Pebbles Cheesecake Tacos
- Total Time: 45 minutes
- Yield: 4 servings 1x
Description
Fruity Pebbles Cheesecake Tacos are the easy dessert you need when fun ideas call for something quick simple and totally craveable. Crisp cereal coated shells hold a creamy cheesecake filling for the best sweet bite with a healthy homemade feel. They are great for weeknight dinner treats meal prep holiday trays potluck tables brunch spreads and any party where bright color and big flavor make everyone smile.
Ingredients
- 8 mini taco tortillas.
- 1 cup white chocolate chips.
- 2 cups Fruity Pebbles cereal.
- 8 ounces cream cheese.
- 1/2 cup powdered sugar.
- 1 teaspoon vanilla extract.
- 3/4 cup heavy whipping cream.
- 2 tablespoons butter.
Instructions
- Brush the tortillas with melted butter and then fold them into taco shapes as they bake until the surfaces turn lightly golden and the edges look drier and firmer. The flat rounds become crisp shells with slight bubbling and uneven curves and each one looks a little different from the next.
- Melt the white chocolate and then spread it over the outer sides of the cooled shells before pressing on Fruity Pebbles so the bright pieces stick in a loose and uneven layer. The shells now look colorful and textured with little gaps and clumps where the cereal overlaps and the coating sets in irregular patches.
- Beat the cream cheese with powdered sugar and vanilla until smooth and then fold in the whipped cream until the mixture turns fluffy and pale. The dense ingredients change into a soft filling that holds gentle swirls and looks airy rather than heavy.
- Spoon or pipe the cheesecake mixture into each shell so the filling settles into the center and rises above the edges in loose ridges. The empty shells become structured desserts with thick creamy centers and natural spacing and slight overflow in a few spots.
- Sprinkle extra Fruity Pebbles over the creamy tops so the bright cereal sinks slightly into the soft filling while some pieces stay perched on top. The smooth surface gains crunch and stronger color contrast and the tacos look more layered and lively.
- Let the assembled tacos chill until the filling firms slightly and the white chocolate feels set while the shells stay crisp around the edges. On the plate the tacos look fully finished with creamy centers and visible melting traces and cereal crunch and slight browning on the shells and plenty of homemade imperfections in the coating and filling.
Notes
Pro Tips:
- Cool the shells completely before coating so the chocolate sets instead of sliding.
- Use full fat cream cheese for the richest texture and the best hold.
- Do not overfill the tacos or the shells can soften too quickly.
- Save a little extra cereal for the last minute so the topping stays crisp.
Storage: Store the cheesecake filling in a covered container in the fridge for up to 3 days. Keep the coated shells separate at room temperature in a closed container so they stay crisp. Once assembled and the tacos are best eaten the same day. Leftovers can be chilled and enjoyed later and but the shells will soften as they sit.
- Prep Time: 15 minutes
- Cook Time: 30 minutes
- Category: Dessert
- Cuisine: American
Nutrition
- Serving Size: 1 serving