When you want something different from everyday biscuits, these Peach Butter Swim Biscuits offer a delicious twist. This peach biscuit recipe is soft, simple, and packed with buttery peach flavor, perfect for cozy breakfasts or weekend brunch gatherings.
This recipe is perfect for spring brunch, summer breakfast, a holiday morning, or as a sweet side for dinner. If you want more biscuit ideas, also check out classic butter swim biscuits, peach cobbler biscuits, or homemade buttermilk biscuits.
What makes these special is the way the biscuit dough is spread into butter and finished with peach preserves for a tender, rich texture. They feel a little comforting and a little special, which is exactly the kind of recipe I love to keep on repeat.
Ingredients
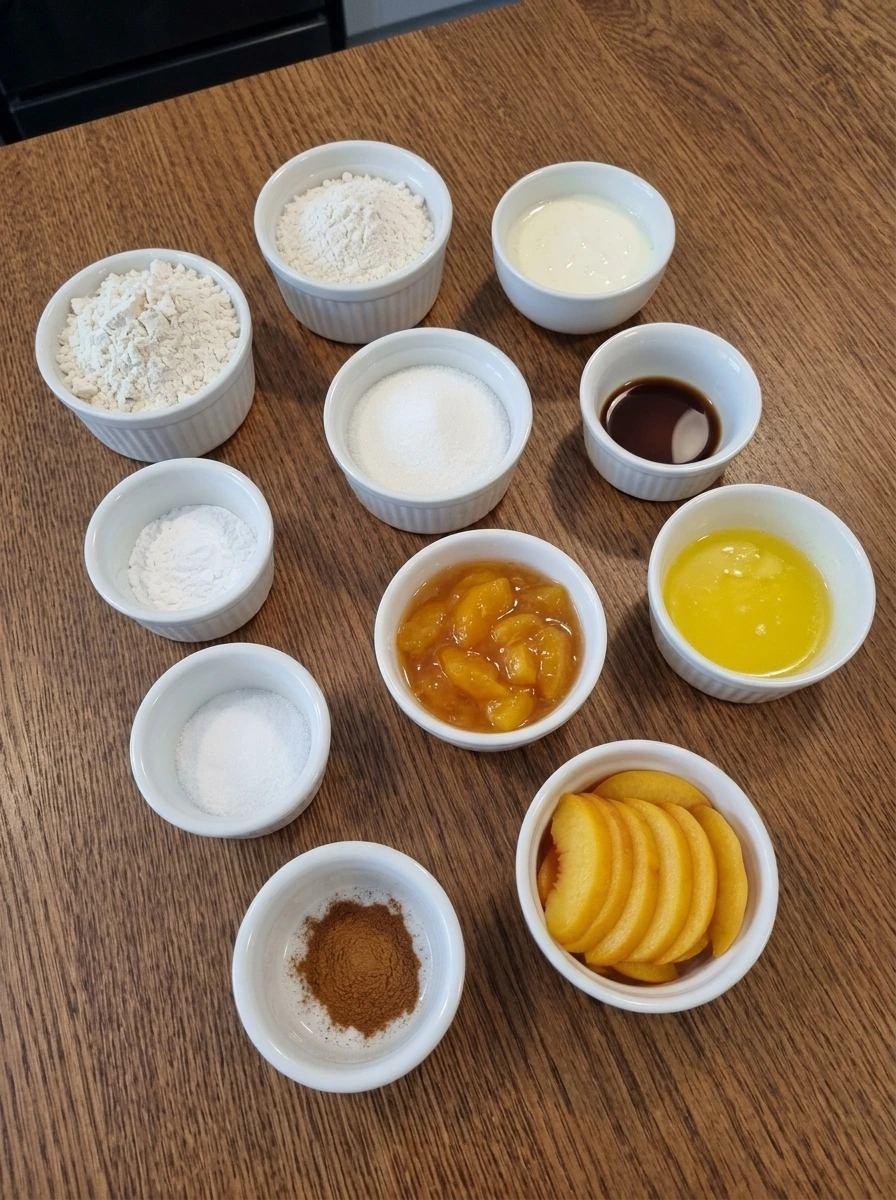
Here’s what I use for this recipe and you can always make substitutions if you prefer.
- all purpose flour: This forms the base of the biscuit dough and gives the biscuits their soft, sturdy structure.
- granulated sugar: This adds a light sweetness that balances the buttery dough and peach topping.
- baking powder: This helps the biscuits rise and keeps the crumb fluffy and tender.
- salt: This sharpens the flavor and keeps the sweet elements from tasting flat.
- ground cinnamon: This adds a warm note that pairs naturally with the peach flavor.
- buttermilk: This gives the dough moisture and creates a soft, tangy biscuit texture.
- vanilla extract: This rounds out the peach flavor with a gentle sweet aroma.
- unsalted butter, melted: This creates the rich butter base that the biscuit dough rests in.
- peach preserves: This brings concentrated peach flavor and glossy swirls across the top.
- fresh peach, thinly sliced: These slices add a fresh fruit look and a little extra peach texture.
Tools You’ll Need
- white ceramic baking dish: Use an 8×8 inch dish for even biscuit thickness.
- mixing whisk: For blending the dry ingredients evenly.
- mixing spoon or spatula: For combining the dough without overworking it.
- measuring cups and spoons: Needed for accurate baking measurements.
- knife: For scoring the dough and slicing the peach.
Instructions
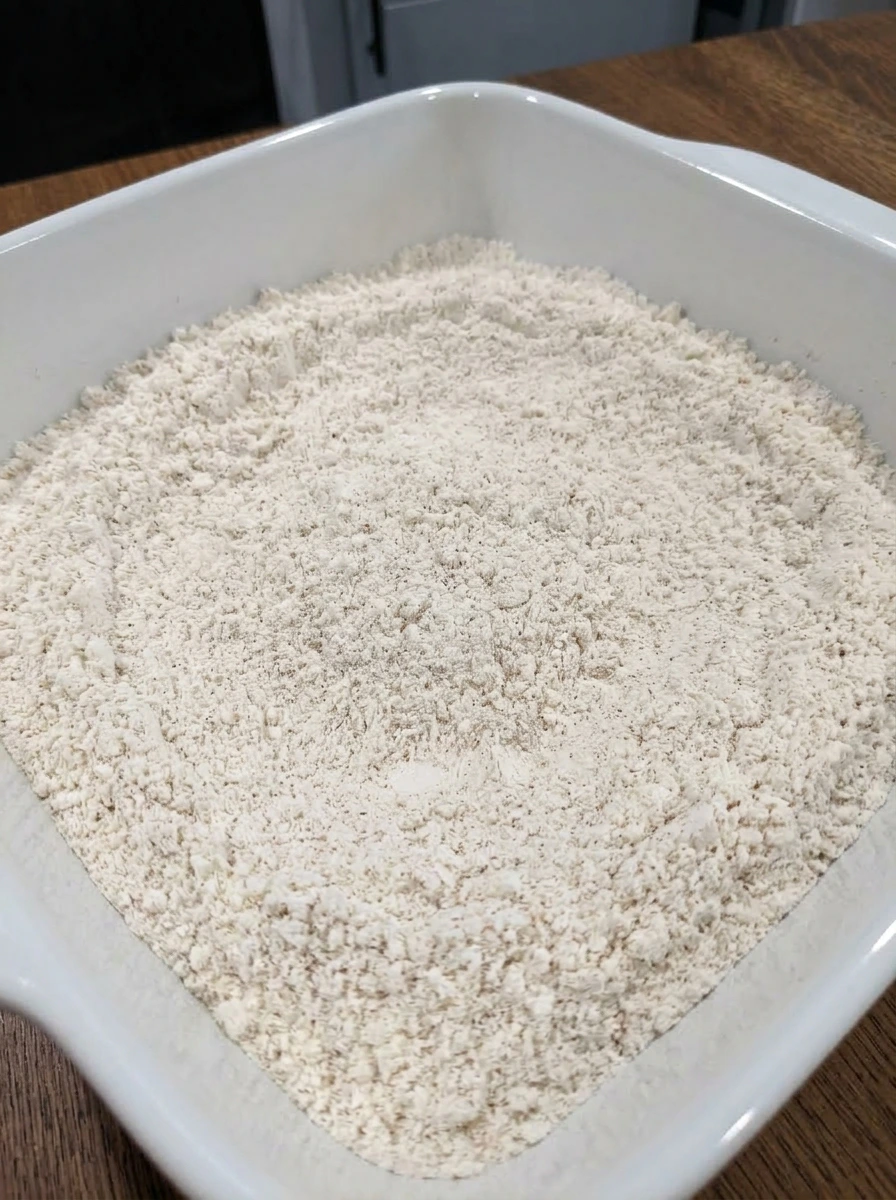
Step 1: Measure the dry ingredients

Add the flour, sugar, baking powder, salt, and cinnamon into a white ceramic baking dish sized for mixing. At this stage the ingredients are still separate in places, with the white flour taking up most of the dish and the finer ingredients sitting in small piles across the surface. Once everything is added, the top looks powdery and dry with soft tan specks of cinnamon scattered throughout. Nothing is wet yet, and the mixture should still look completely raw and unmixed.
Tip: Level the flour before measuring so the dough stays soft instead of heavy.
Step 2: Whisk the dry mixture together
Whisk the dry ingredients until the cinnamon and leavening are evenly distributed through the flour. The mixture changes from separate piles into one uniform pale cream mixture with tiny warm brown flecks throughout. The surface should look loose, soft, and evenly blended from edge to edge. It is still fully raw and dry, but it now looks ready to take in the liquid ingredients evenly.
Tip: Whisk into the corners so the baking powder and salt do not stay trapped at the edges.
Step 3: Add the buttermilk and vanilla
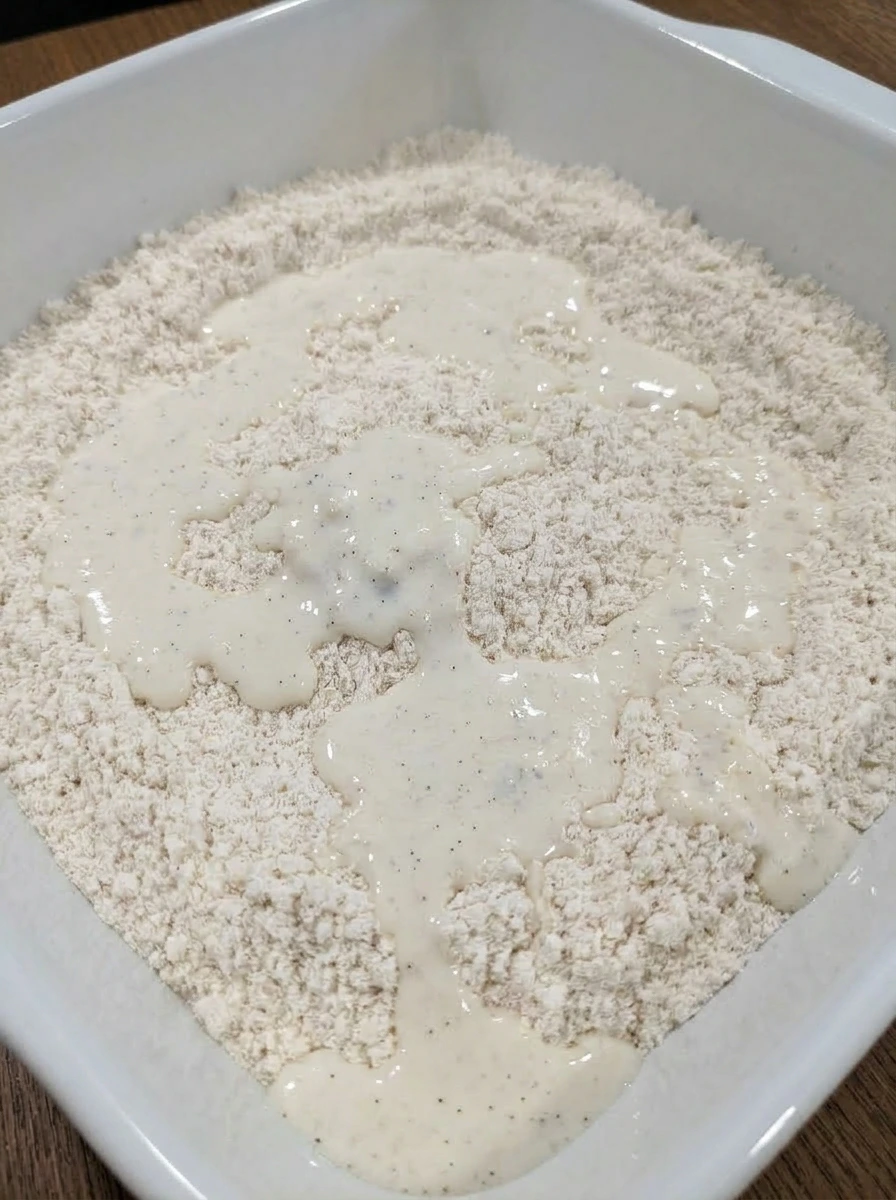
Pour the buttermilk and vanilla over the dry ingredients in the same dish. The liquid pools around the flour first, creating creamy white patches and damp streaks that begin to soak into the mixture. Visually, the dish now shows a clear contrast between the dry flour blend and the wet dairy mixture. Everything is still uncooked, but the ingredients are set up for the dough to come together in the next stage.
Tip: Pour the liquid slowly so you can see where the dry pockets are before mixing.
Step 4: Mix into a thick biscuit dough
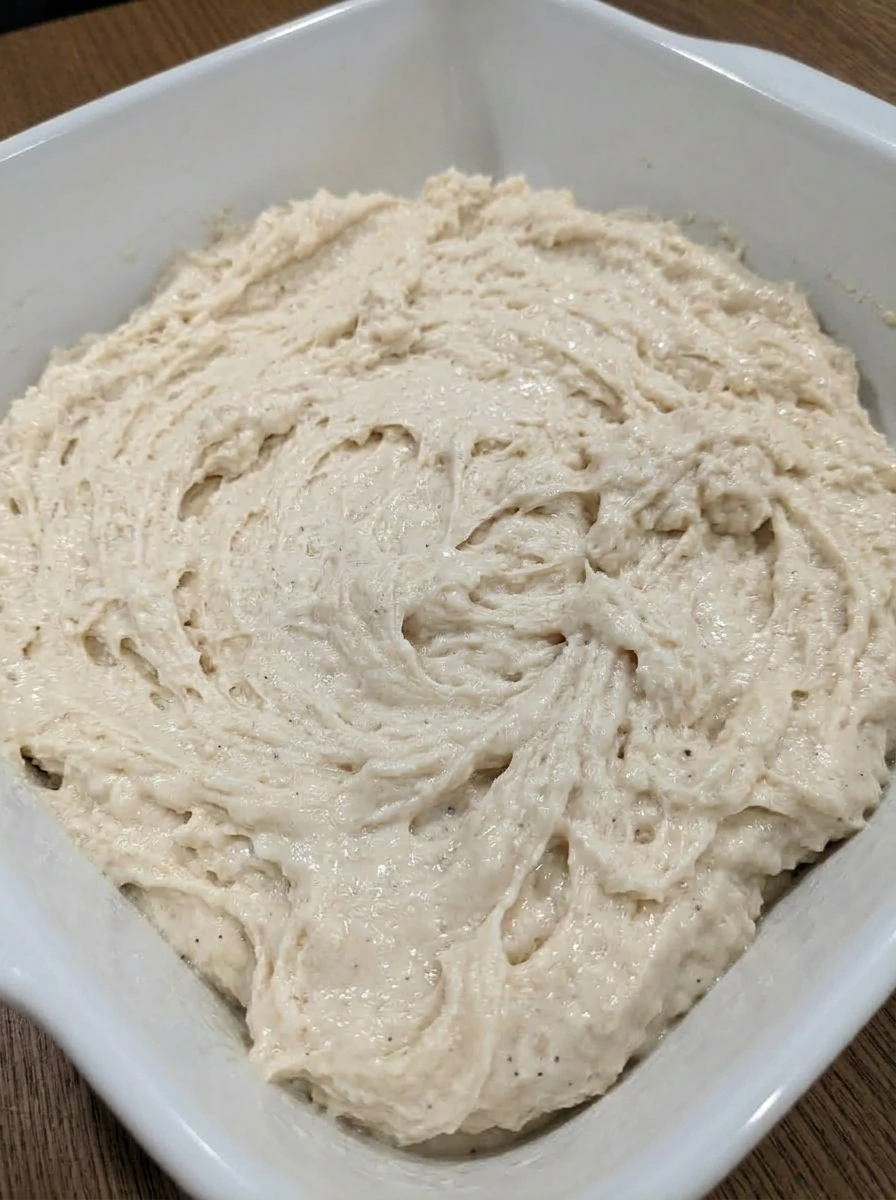
Stir the wet and dry ingredients together until no large dry patches remain. The mixture changes into a thick, shaggy dough that looks sticky, soft, and slightly lumpy rather than smooth. You should be able to see the dough holding its shape in the dish while still looking moist. The color becomes a pale creamy beige, and the texture looks hearty and spoonable with no signs of heat or cooking.
Tip: Stop mixing as soon as the flour disappears so the biscuits stay tender.
Step 5: Spread melted butter in the dish
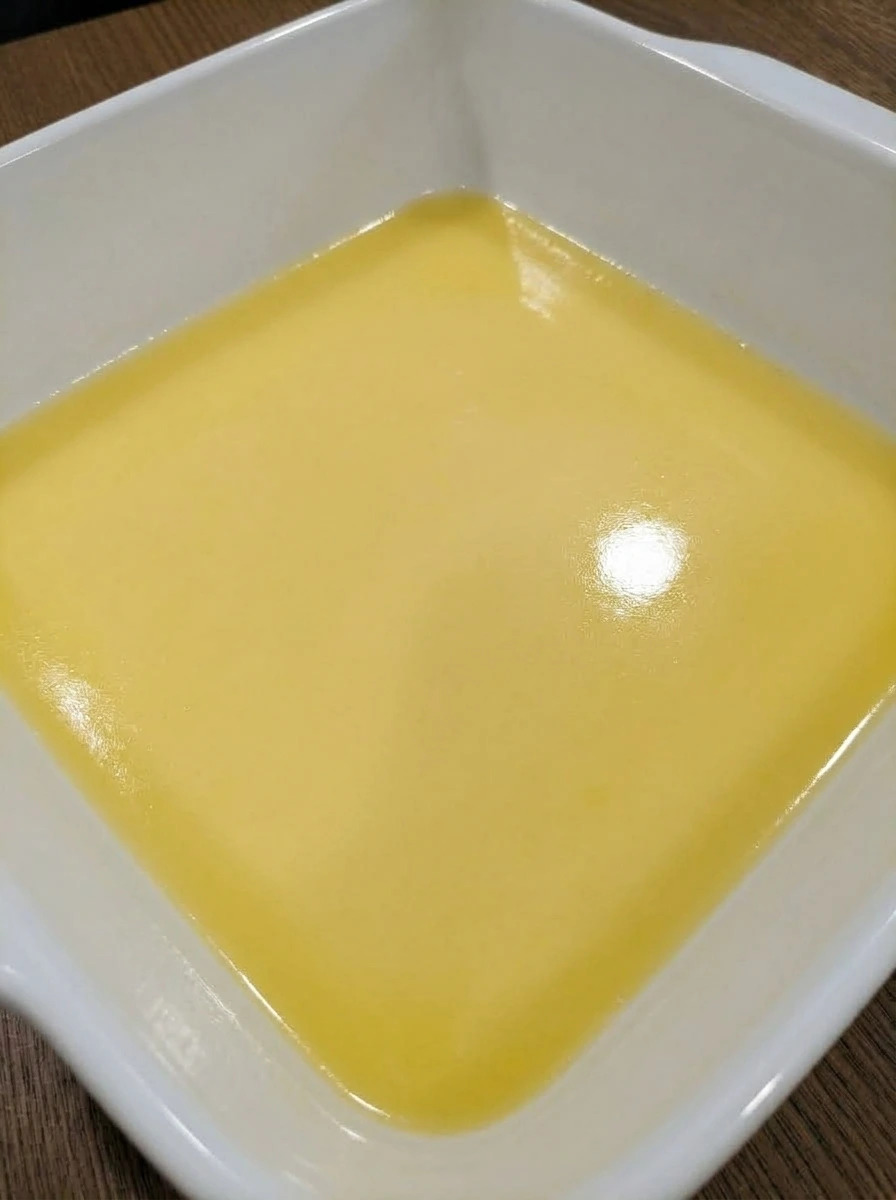
Transfer the dough out briefly if needed, then pour the melted butter into a clean white ceramic baking dish, coating the bottom completely. The butter forms a glossy yellow layer that gathers lightly at the edges. This stage should look rich and shiny, with the dish clearly lined in liquid butter. It is still uncooked, but this butter layer is what gives butter swim biscuits their signature rich finish and crisp looking edges later on.
Tip: Make sure the butter reaches the corners so every biscuit piece gets that rich edge.
Step 6: Arrange the dough over the butter
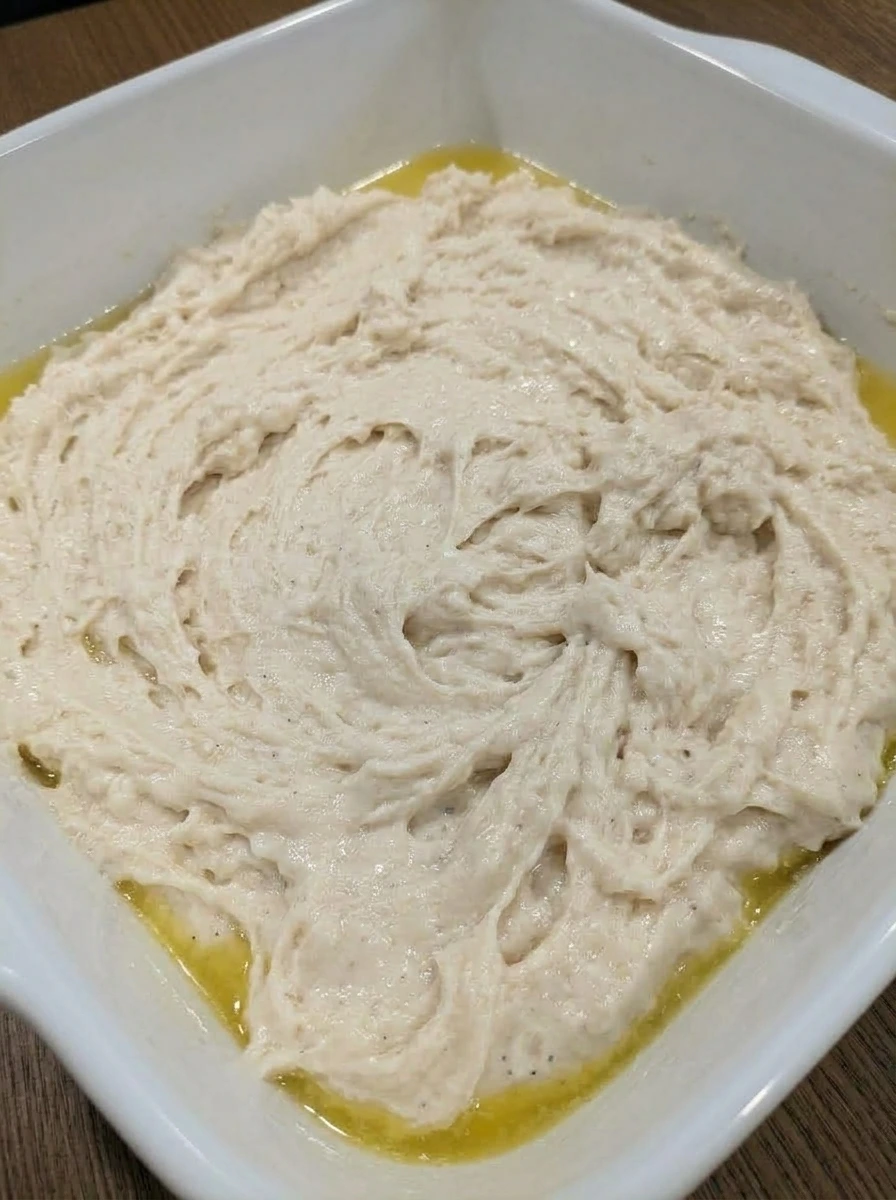
Spoon the biscuit dough into the buttered dish and gently spread it into an even layer. As it settles, butter becomes visible around the perimeter, while the dough surface looks thick, pale, and softly textured. The dough should now fill the dish from corner to corner in one solid layer. It remains raw and soft, but the arrangement makes the recipe look more like a true pan of biscuits rather than a mixing bowl of dough.
Tip: Use a light touch when spreading so the dough stays airy.
Step 7: Score the dough into portions
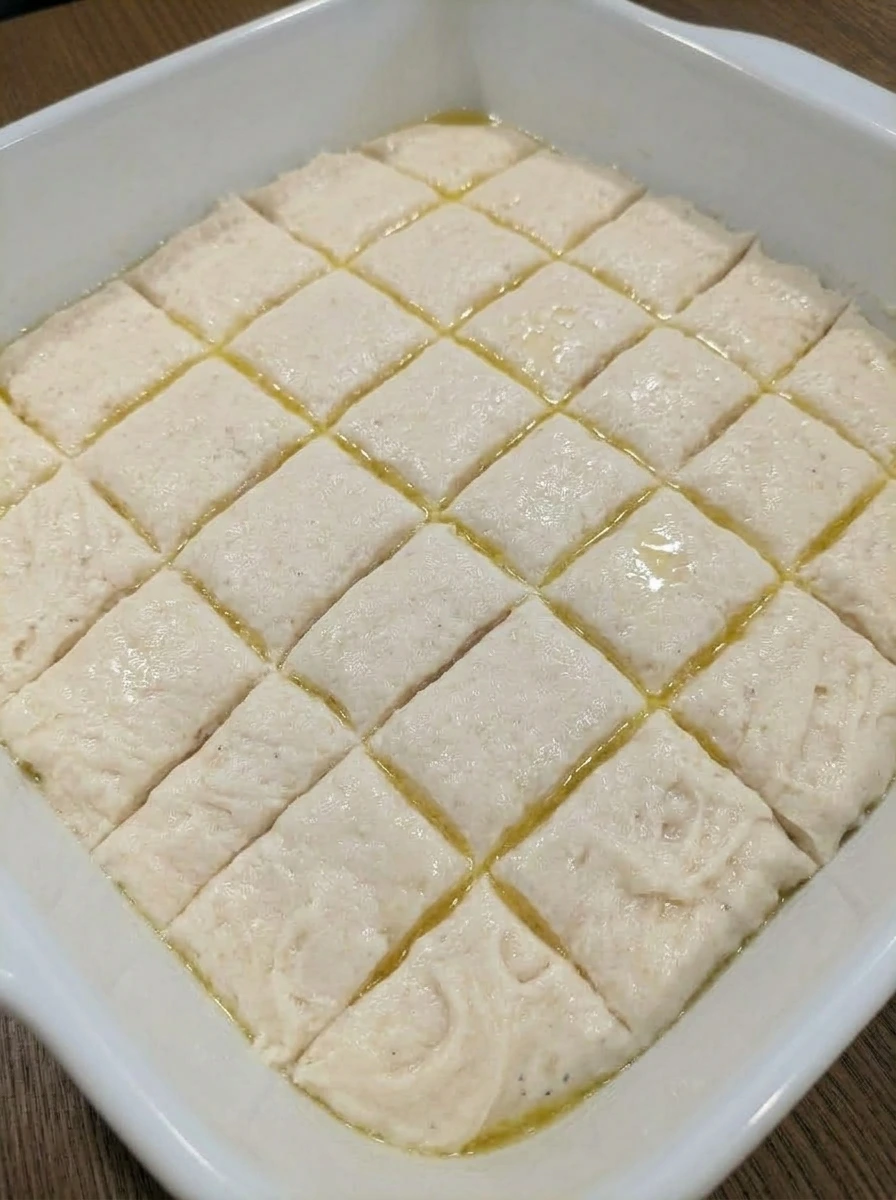
Use a knife to cut shallow lines through the dough, marking it into even squares. The surface changes visually from a smooth layer into a neatly sectioned grid, which helps with portioning later. The cuts should be visible but not messy, and a little butter may rise into the lines. Everything is still raw, but now the dough clearly looks organized and ready for the peach topping.
Tip: Make the cuts before adding the preserves so the portions stay easy to see.
Step 8: Add the peach preserves
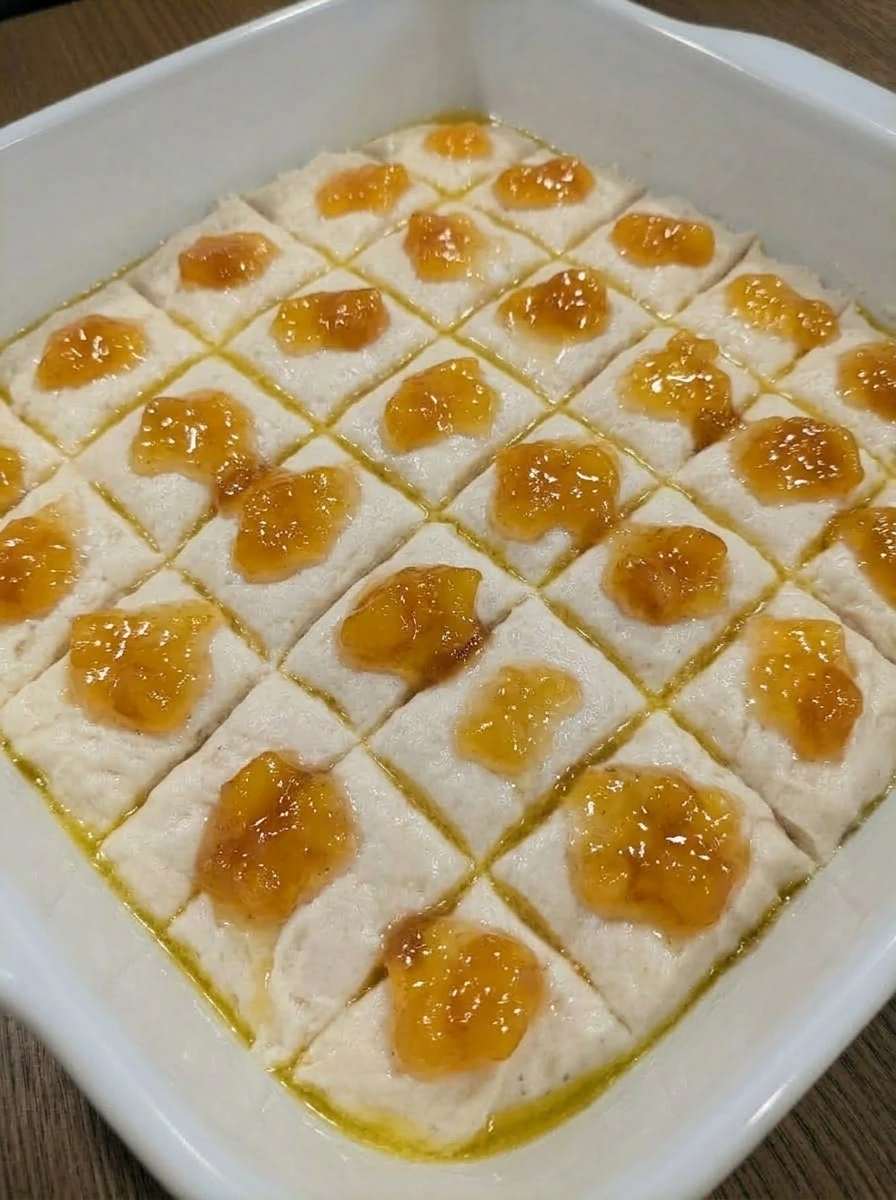
Spoon the peach preserves across the scored dough in small dollops. The bright peach topping creates glossy orange gold patches that sit on top of the pale dough and make the dish look immediately more . Because the preserves are thicker than the dough, they stay visible on the surface instead of sinking in completely. At this stage the biscuits are still uncooked, but the peach flavor is now clearly built into the top layer.
Tip: Warm the preserves just enough to loosen them if they are too thick to spoon.
Step 9: Swirl the peach topping lightly
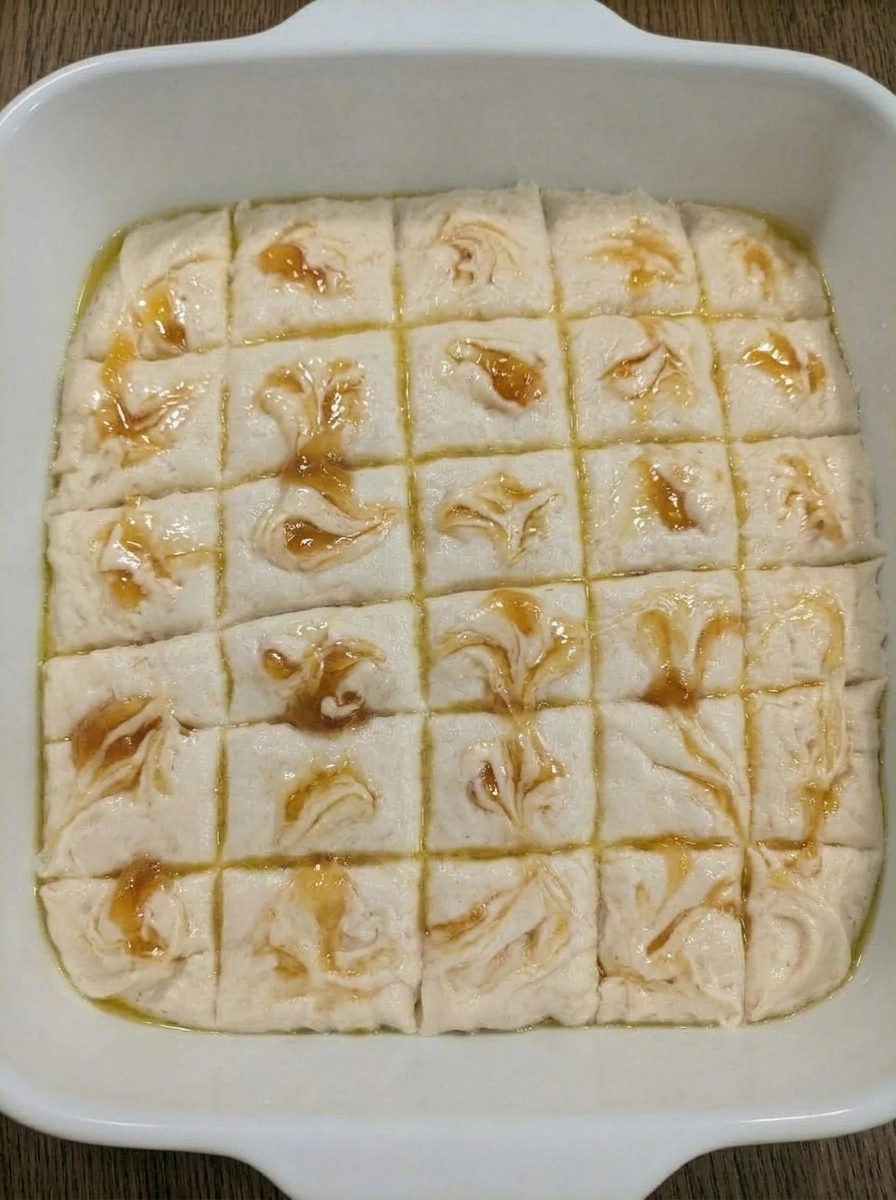
Drag a knife through the preserves in a few gentle passes to create loose peach swirls across the top. The surface now shows ribbons of orange gold running through the pale dough without fully blending in. Visually, this is the stage where the biscuits start to get their signature marbled look. The dough is still raw and soft, and the peach topping stays glossy with defined streaks and pockets.
Tip: Do not over swirl or the peach layer will disappear into the dough.
Step 10: Arrange the fresh peach slices on top
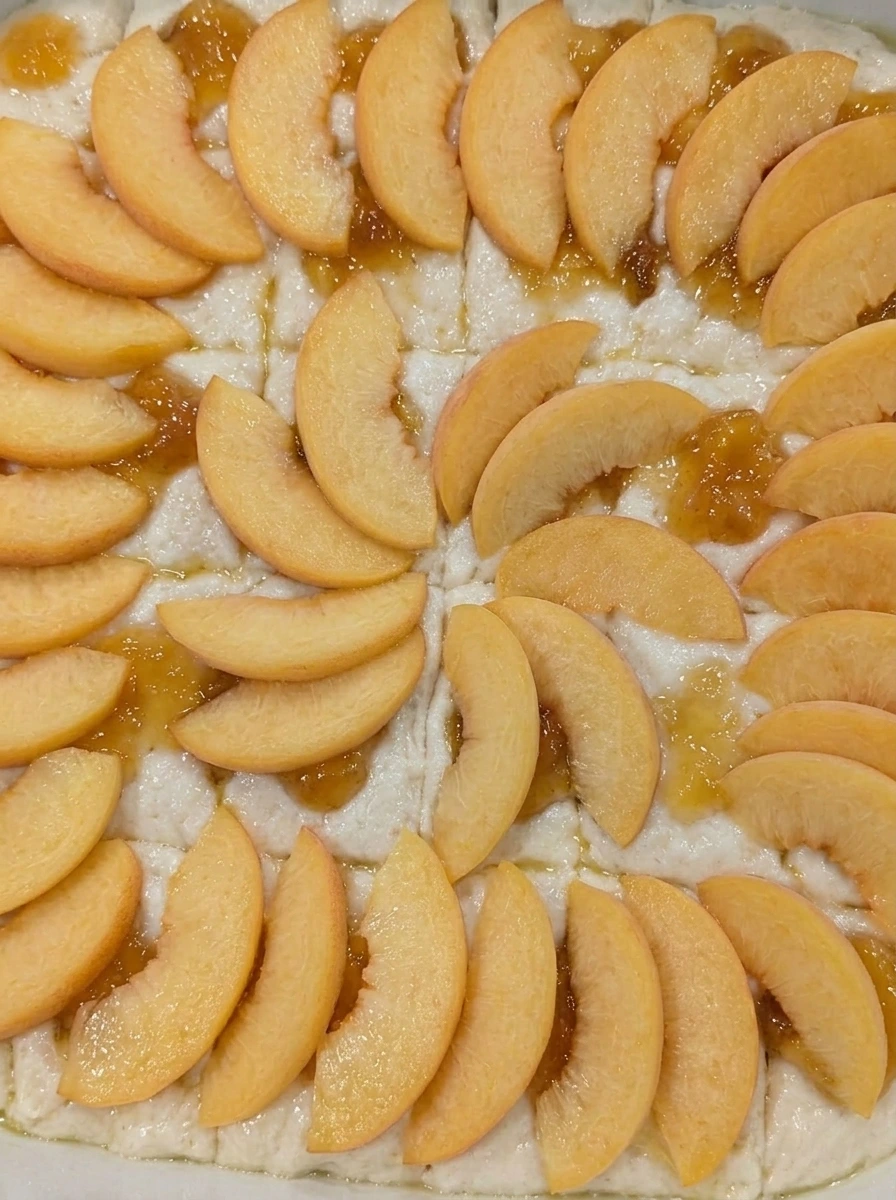
Lay the thin peach slices over the swirled surface, spacing them so each section gets a bit of fruit. The top becomes more dimensional, with soft curved slices adding a fresh peach color and shape over the glossy preserves. At this point the whole dish looks complete and ready for the final bake stage, even though the mixture is still visibly uncooked. You should see pale dough, glossy peach streaks, and tender fresh slices all clearly layered in the dish.
Tip: Keep the slices thin so they settle into the top neatly without weighing down the dough.
Step 11: Rest and let the surface settle
Let the assembled dish rest briefly so the dough relaxes and the butter settles around the edges. During this time the top looks slightly smoother, and the peach swirls and slices settle more naturally into place. This is still an uncooked stage, but it helps the dough look more even and cohesive before baking. The butter remains visible at the edges, while the surface looks moist and ready for the oven.
Tip: A short rest helps the flour fully hydrate for a softer biscuit texture.
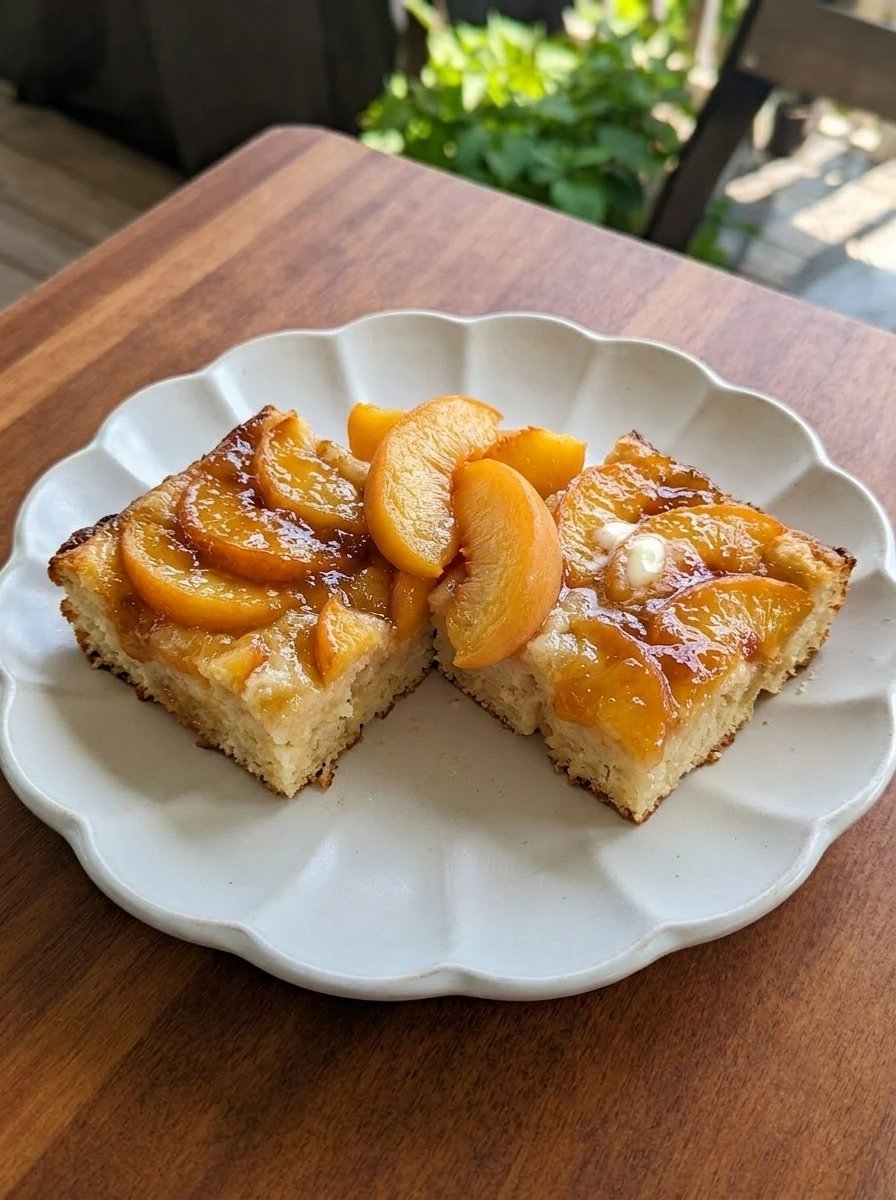
Step 12: Serve the finished Peach Butter Swim Biscuits
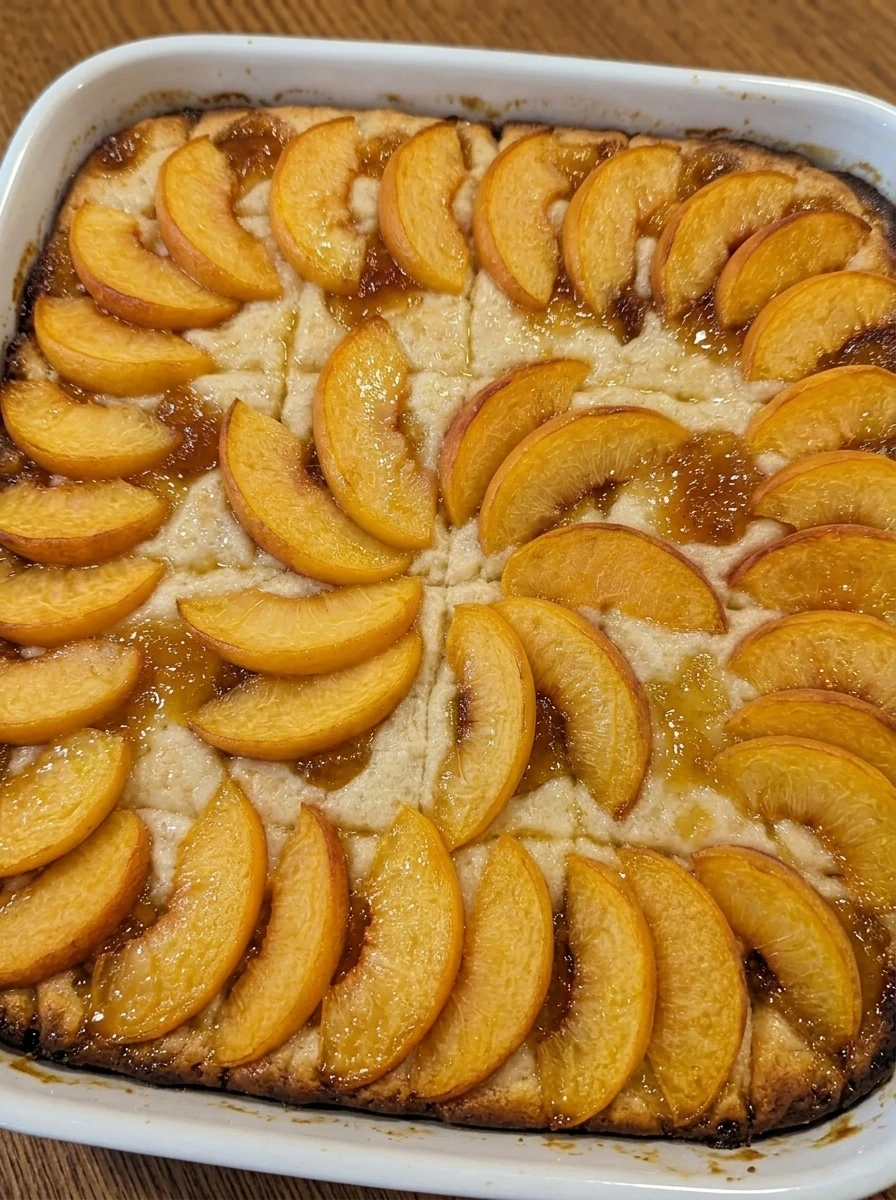
After baking, the biscuit dough transforms into a pan of golden biscuit squares with deeper buttery edges and glossy peach swirls across the top. The fresh peach slices look soft and lightly set, while the scored lines still guide the portions. Set the finished Peach Butter Swim Biscuits in the white ceramic baking dish and serve them warm and ready to enjoy. The final look should be rich, golden, tender, and clearly finished, with peach color on top and buttery shine around the sides.
Tip: Use the scored lines as your guide when cutting and serving the biscuits warm.
Pro Tips
- Use cold buttermilk so the dough stays thick and easy to spread.
- Do not overmix the dough or the biscuits can turn dense instead of tender.
- Warm the peach preserves slightly if you want easier, cleaner swirls.
- Score the dough before baking so the finished biscuits separate neatly.
Storage Instructions
Store leftover Peach Butter Swim Biscuits in an airtight container in the fridge for up to 4 days. For longer storage, wrap portions well and freeze them for up to 2 months, then thaw in the fridge overnight before reheating. To reheat, warm them in the oven or microwave until heated through, and keep in mind that the peach topping is best enjoyed while still fresh and glossy.
Frequently Asked Questions
Can I use canned peaches instead of fresh peach slices?
Yes, you can use canned peaches if that is what you have. Just drain them well and pat them dry so they do not add too much extra moisture to the top of the biscuits. Thin slices work best because they settle nicely into the dough without making the surface heavy.
What is the texture of butter swim biscuits supposed to be?
Butter swim biscuits are meant to be soft, tender, and rich with buttery edges. The inside should look fluffy and moist rather than dry or crumbly. The butter around the dough helps create that classic rich texture and golden finish.
Can I make Peach Butter Swim Biscuits ahead of time?
Yes, you can mix the dry ingredients ahead and slice the peaches in advance for easier prep. For the best texture, assemble and bake the biscuits closer to serving time. If you do bake them ahead, warm them gently before serving so the buttery texture comes back nicely.
Can I use peach jam instead of peach preserves?
Yes, peach jam works well in this recipe. Preserves usually give you a little more fruit texture, while jam creates a smoother swirl across the top. Either one will still give the biscuits sweet peach flavor and a glossy finish.
Final Thoughts
So there you go. A recipe that is simple enough for a weekday breakfast but good enough to serve at a brunch gathering.
I have made these Peach Butter Swim Biscuits more times than I can count and they never disappoint. Save this one, share it with a friend, and let me know in the comments if you made any fun changes.
I am always curious to see how people put their own spin on things.
Print
Peach Butter Swim Biscuits
- Total Time: 45 minutes
- Yield: 4 servings
Description
Looking for the best Peach Butter Swim Biscuits? This one is quick, easy, and simple with soft, fluffy layers and sweet peach flavor in every bite. Whether you are after a healthy breakfast idea or a simple brunch bake, this delivers every time. Great for weeknight dinner sides, meal prep, holiday brunch, potluck tables, and party spreads. Save this easy Peach Butter Swim Biscuits recipe for your next brunch!
Ingredients
- 2 1/2 cups all purpose flour
- 2 tablespoons granulated sugar
- 1 tablespoon baking powder
- 1 teaspoon salt
- 1/2 teaspoon ground cinnamon
- 2 cups buttermilk
- 1 teaspoon vanilla extract
- 1/2 cup unsalted butter, melted
- 3/4 cup peach preserves
- 1 medium fresh peach, thinly sliced
Instructions
- Add the flour, sugar, baking powder, salt, and cinnamon into a white ceramic baking dish sized for mixing. At this stage the ingredients are still separate in places, with the white flour taking up most of the dish and the finer ingredients sitting in small piles across the surface. Once everything is added, the top looks powdery and dry with soft tan specks of cinnamon scattered throughout. Nothing is wet yet, and the mixture should still look completely raw and unmixed.
- Whisk the dry ingredients until the cinnamon and leavening are evenly distributed through the flour. The mixture changes from separate piles into one uniform pale cream mixture with tiny warm brown flecks throughout. The surface should look loose, soft, and evenly blended from edge to edge. It is still fully raw and dry, but it now looks ready to take in the liquid ingredients evenly.
- Pour the buttermilk and vanilla over the dry ingredients in the same dish. The liquid pools around the flour first, creating creamy white patches and damp streaks that begin to soak into the mixture. Visually, the dish now shows a clear contrast between the dry flour blend and the wet dairy mixture. Everything is still uncooked, but the ingredients are set up for the dough to come together in the next stage.
- Stir the wet and dry ingredients together until no large dry patches remain. The mixture changes into a thick, shaggy dough that looks sticky, soft, and slightly lumpy rather than smooth. You should be able to see the dough holding its shape in the dish while still looking moist. The color becomes a pale creamy beige, and the texture looks hearty and spoonable with no signs of heat or cooking.
- Transfer the dough out briefly if needed, then pour the melted butter into a clean white ceramic baking dish, coating the bottom completely. The butter forms a glossy yellow layer that gathers lightly at the edges. This stage should look rich and shiny, with the dish clearly lined in liquid butter. It is still uncooked, but this butter layer is what gives butter swim biscuits their signature rich finish and crisp looking edges later on.
- Spoon the biscuit dough into the buttered dish and gently spread it into an even layer. As it settles, butter becomes visible around the perimeter, while the dough surface looks thick, pale, and softly textured. The dough should now fill the dish from corner to corner in one solid layer. It remains raw and soft, but the arrangement makes the recipe look more like a true pan of biscuits rather than a mixing bowl of dough.
- Use a knife to cut shallow lines through the dough, marking it into even squares. The surface changes visually from a smooth layer into a neatly sectioned grid, which helps with portioning later. The cuts should be visible but not messy, and a little butter may rise into the lines. Everything is still raw, but now the dough clearly looks organized and ready for the peach topping.
- Spoon the peach preserves across the scored dough in small dollops. The bright peach topping creates glossy orange gold patches that sit on top of the pale dough and make the dish look immediately more . Because the preserves are thicker than the dough, they stay visible on the surface instead of sinking in completely. At this stage the biscuits are still uncooked, but the peach flavor is now clearly built into the top layer.
- Drag a knife through the preserves in a few gentle passes to create loose peach swirls across the top. The surface now shows ribbons of orange gold running through the pale dough without fully blending in. Visually, this is the stage where the biscuits start to get their signature marbled look. The dough is still raw and soft, and the peach topping stays glossy with defined streaks and pockets.
- Lay the thin peach slices over the swirled surface, spacing them so each section gets a bit of fruit. The top becomes more dimensional, with soft curved slices adding a fresh peach color and shape over the glossy preserves. At this point the whole dish looks complete and ready for the final bake stage, even though the mixture is still visibly uncooked. You should see pale dough, glossy peach streaks, and tender fresh slices all clearly layered in the dish.
- Let the assembled dish rest briefly so the dough relaxes and the butter settles around the edges. During this time the top looks slightly smoother, and the peach swirls and slices settle more naturally into place. This is still an uncooked stage, but it helps the dough look more even and cohesive before baking. The butter remains visible at the edges, while the surface looks moist and ready for the oven.
- After baking, the biscuit dough transforms into a pan of golden biscuit squares with deeper buttery edges and glossy peach swirls across the top. The fresh peach slices look soft and lightly set, while the scored lines still guide the portions. Set the finished Peach Butter Swim Biscuits in the white ceramic baking dish and serve them warm and ready to enjoy. The final look should be rich, golden, tender, and clearly finished, with peach color on top and buttery shine around the sides.
Notes
Pro Tips:
- Use cold buttermilk so the dough stays thick and easy to spread.
- Do not overmix the dough or the biscuits can turn dense instead of tender.
- Warm the peach preserves slightly if you want easier, cleaner swirls.
- Score the dough before baking so the finished biscuits separate neatly.
Storage: Store leftover Peach Butter Swim Biscuits in an airtight container in the fridge for up to 4 days. For longer storage, wrap portions well and freeze them for up to 2 months, then thaw in the fridge overnight before reheating. To reheat, warm them in the oven or microwave until heated through, and keep in mind that the peach topping is best enjoyed while still fresh and glossy.
- Prep Time: 15 minutes
- Cook Time: 30 minutes
- Category: Breakfast
- Cuisine: American