This Easy Chicken Wrap recipe is an easy, comforting meal that comes together so quickly with tender chicken, crisp veggies, and a creamy flavorful sauce! With soft tortillas, fresh crunchy fillings, and a wrap that slices up beautifully.
We love busy days because it means that easy meals like this Easy Chicken Wrap are back on the table. Simple meals, especially those that are healthy and nourish our bodies, are my favorite kinds of recipes!
Ingredients
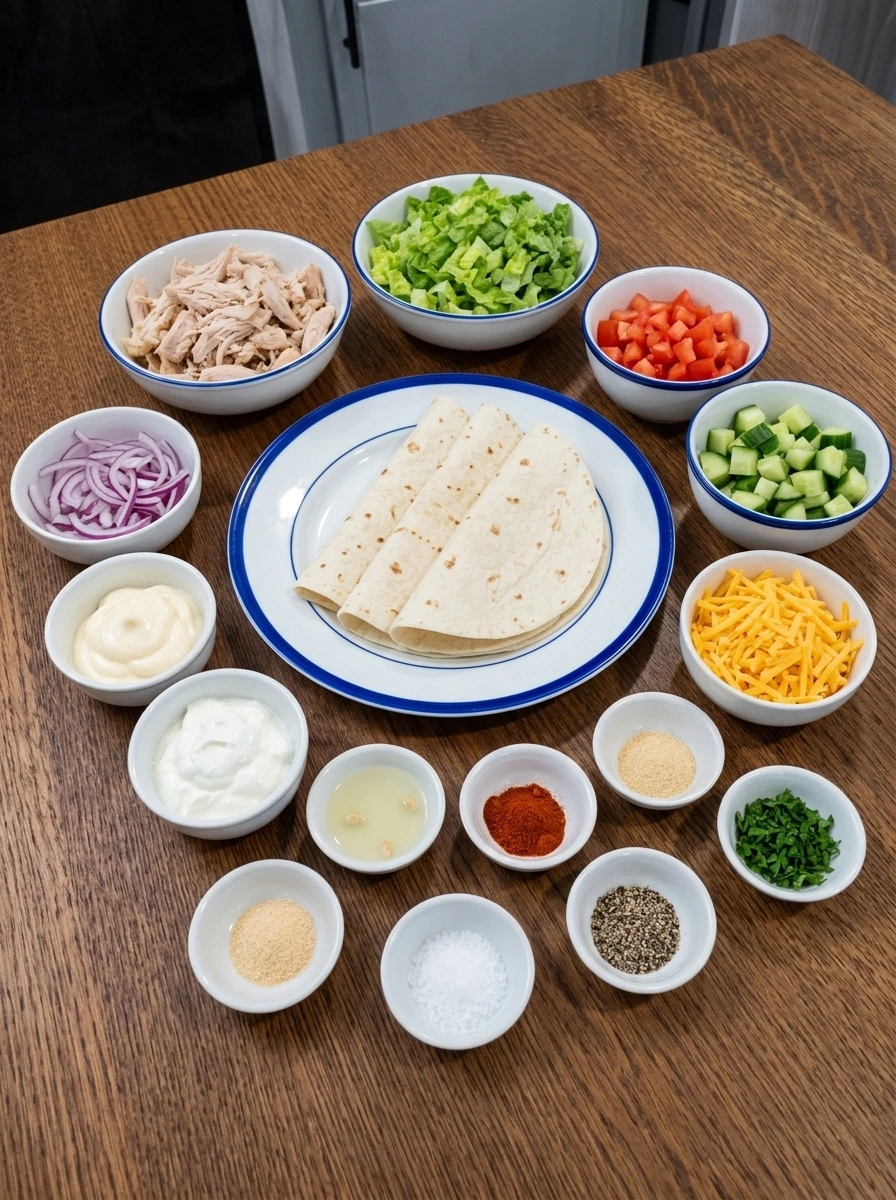
Here’s what I use for this recipe and you can always make substitutions if you prefer.
- large flour tortillas: These hold all the fillings together and make the wrap soft, flexible, and easy to roll.
- cooked chicken breast: This adds the hearty protein base and keeps the wrap filling and satisfying.
- romaine lettuce: It brings a crisp fresh crunch that balances the creamy filling.
- tomato: Tomato adds juicy freshness and bright color to every bite.
- cucumber: This gives the wrap extra crunch and a cool refreshing flavor.
- red onion: Red onion adds a little sharpness and color that livens up the filling.
- shredded cheddar cheese: Cheddar adds creamy richness and helps the filling taste extra savory.
- mayonnaise: This forms the creamy base of the quick wrap sauce.
- plain Greek yogurt: Greek yogurt lightens the sauce while adding a smooth tangy flavor.
- lemon juice: A little lemon juice brightens the filling and balances the creamy ingredients.
- garlic powder: This adds mellow savory flavor throughout the sauce and chicken.
- paprika: Paprika adds warm color and mild smoky depth to the chicken mixture.
- salt: Salt sharpens the flavor of the chicken, vegetables, and sauce.
- black pepper: Black pepper adds a light bite that rounds out the filling.
- fresh parsley: Parsley adds fresh color and a clean finish to the assembled wraps.
Tools You’ll Need
- cutting board: For chopping the vegetables and preparing the fillings.
- chef’s knife: Use a sharp knife for clean, even cuts.
- mixing bowls: Needed for the vegetables, chicken, and sauce.
- spoon or spatula: Helpful for mixing and spreading the sauce.
Instructions
Step 1: Chop the fresh vegetables
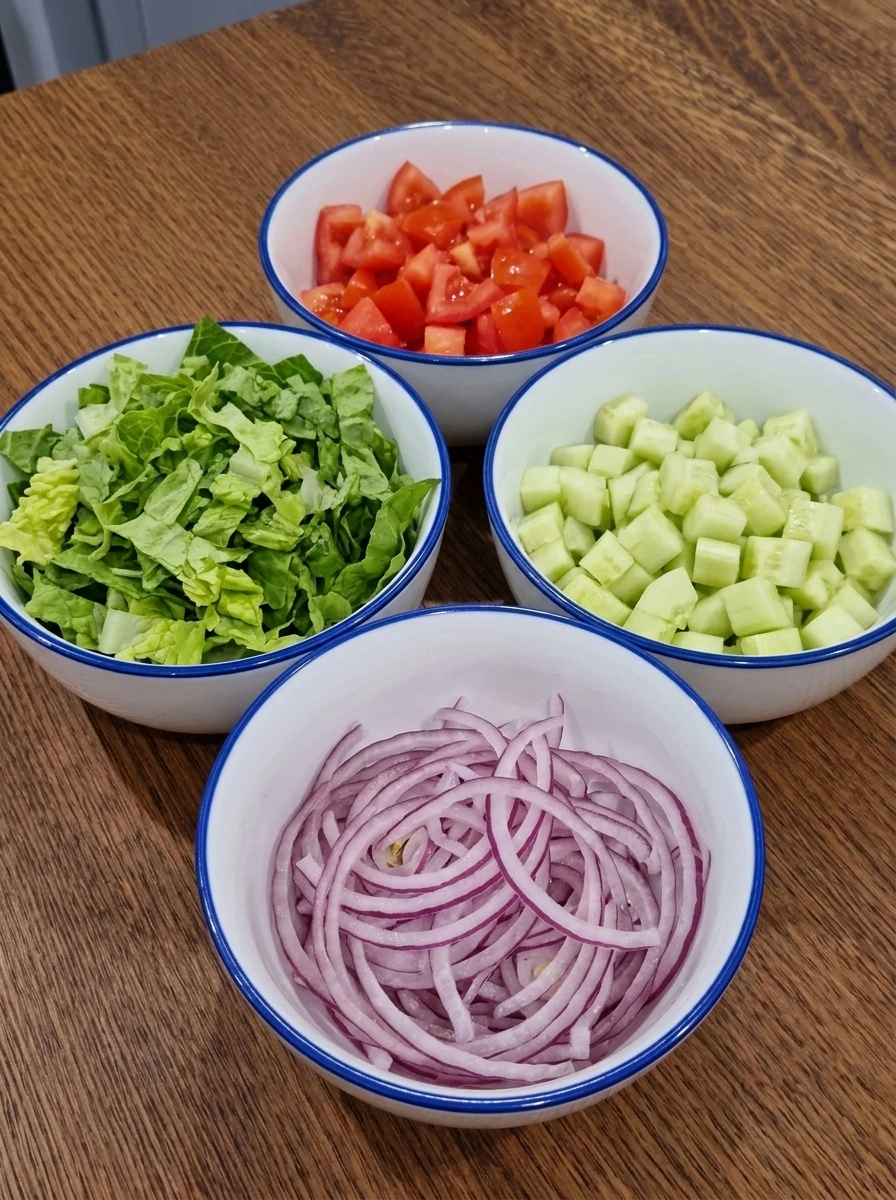
Start by chopping the romaine into bite sized pieces so it looks crisp, light, and fluffy in the bowl. Dice the tomato and cucumber into small even pieces, and slice the red onion into very thin strips so everything will layer neatly inside the wrap. At the end of this step, the vegetables should look fresh, colorful, and clearly separated. You will have bright green lettuce, juicy red tomato, pale green cucumber, and thin purple onion ready to add texture and color to the filling.
Tip: Cut the vegetables small so the wraps roll tightly and slice cleanly.
Step 2: Shred and season the chicken
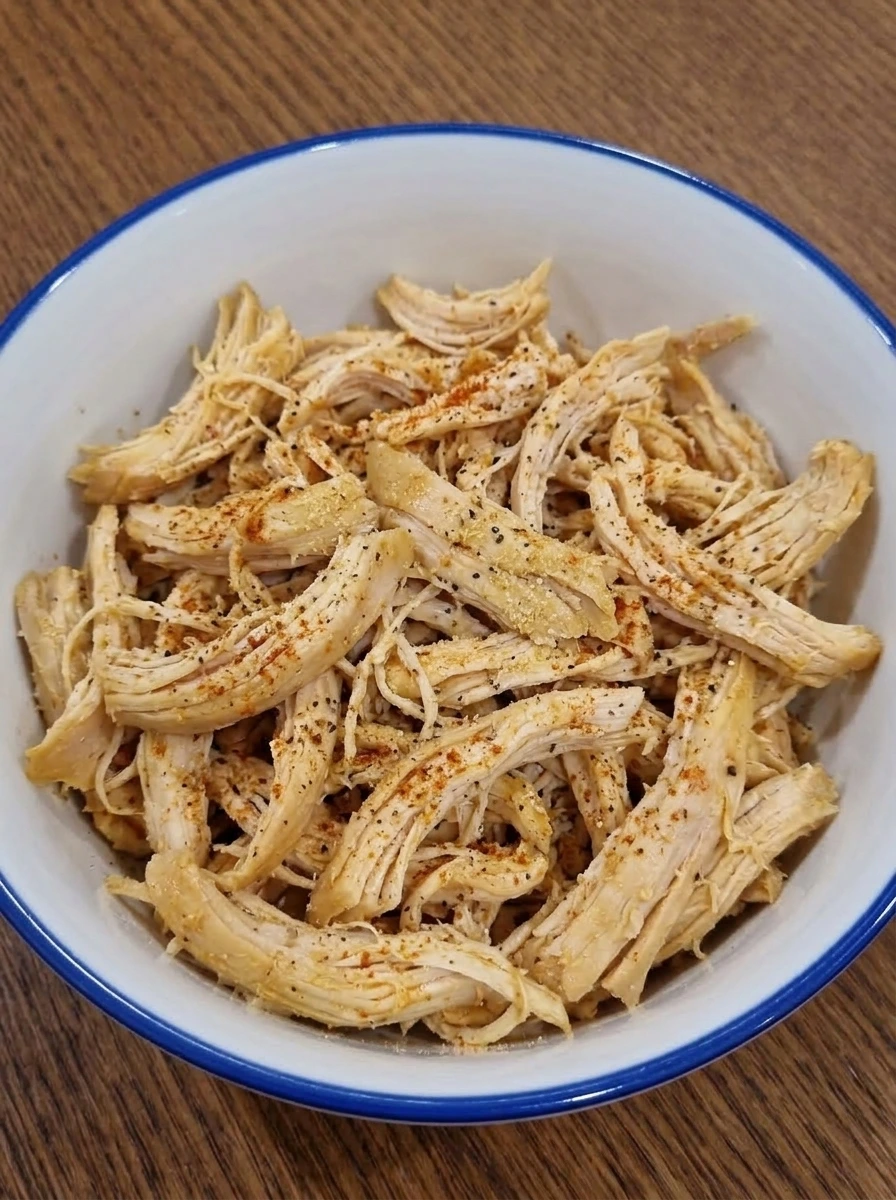
Place the cooked chicken breast in a white ceramic bowl and pull it into thin shreds so it looks soft and easy to layer. Sprinkle in the paprika, garlic powder, salt, and black pepper, then toss until the seasoning lightly coats the chicken and gives it a warmer golden color. Once mixed, the chicken should still look tender and moist, but now more evenly colored with the spices throughout. The shreds should be loose instead of clumped, which makes the filling easier to spread across each tortilla.
Tip: Use finely shredded chicken so it spreads evenly from edge to edge.
Step 3: Mix the creamy wrap sauce
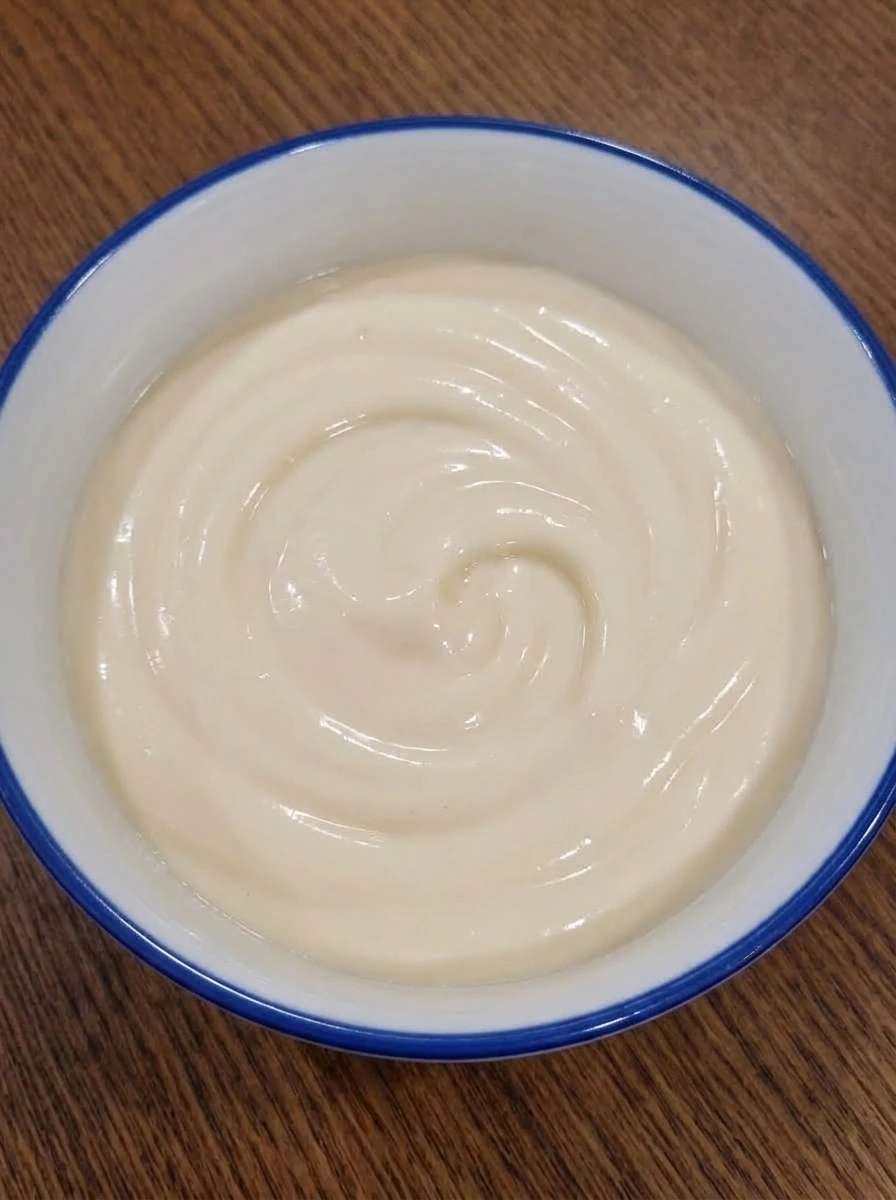
In a small white ceramic bowl, add the mayonnaise, Greek yogurt, and lemon juice. Stir until the mixture becomes smooth, pale, and creamy, with no streaks left between the ingredients. The finished sauce should look thick enough to spread but still soft and glossy. Its pale color and smooth texture will help coat the chicken and add moisture without making the wrap look heavy.
Tip: Stir until completely smooth so the sauce spreads evenly in every wrap.
Step 4: Coat the chicken with part of the sauce
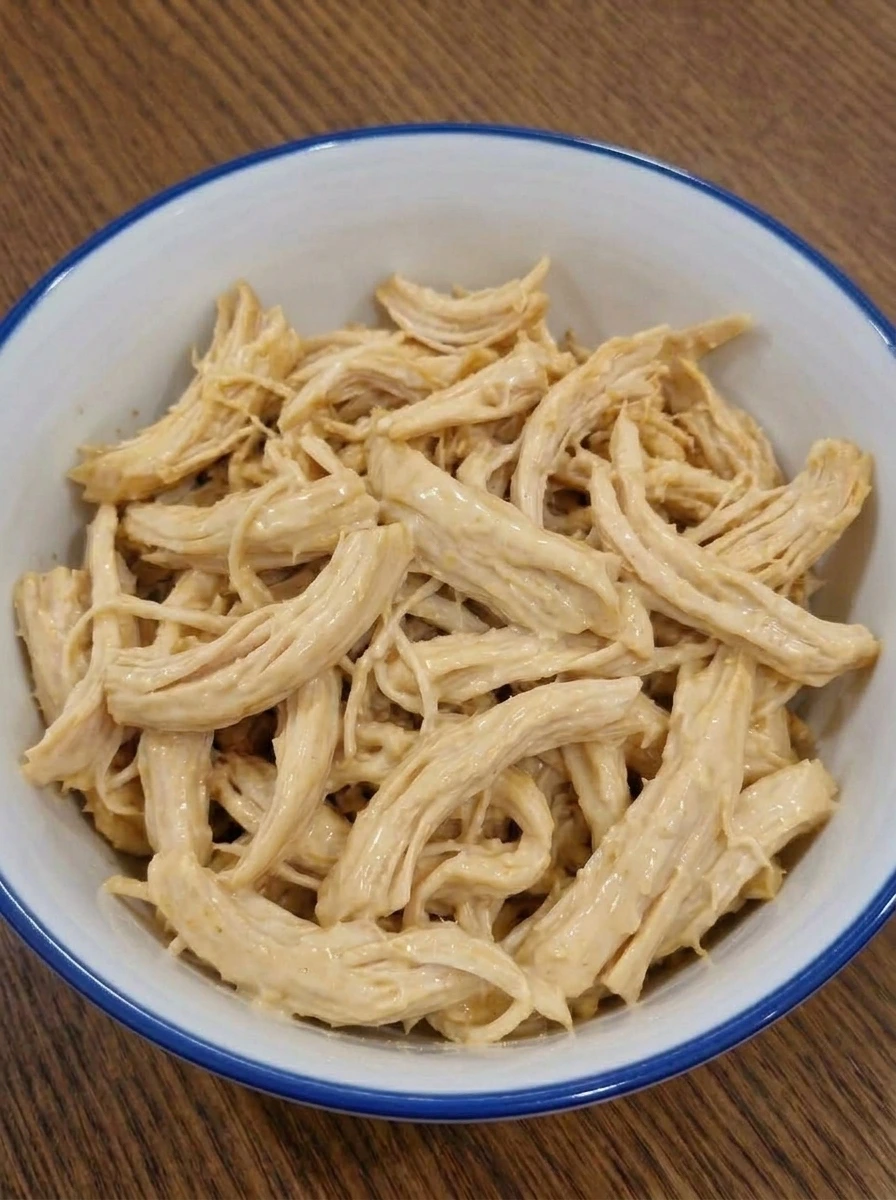
Spoon part of the creamy sauce over the seasoned chicken and mix until the shreds look lightly coated. The goal is not to drench the chicken, but to give it a glossy, creamy finish that helps it stay tender inside the wrap. After mixing, the chicken should look slightly paler and smoother from the sauce, with the seasoning still visible throughout. It should hold together lightly while still remaining fluffy and easy to spoon onto the tortillas.
Tip: Save some sauce for spreading directly on the tortillas before filling.
Step 5: Lay out the tortillas and add the base layers
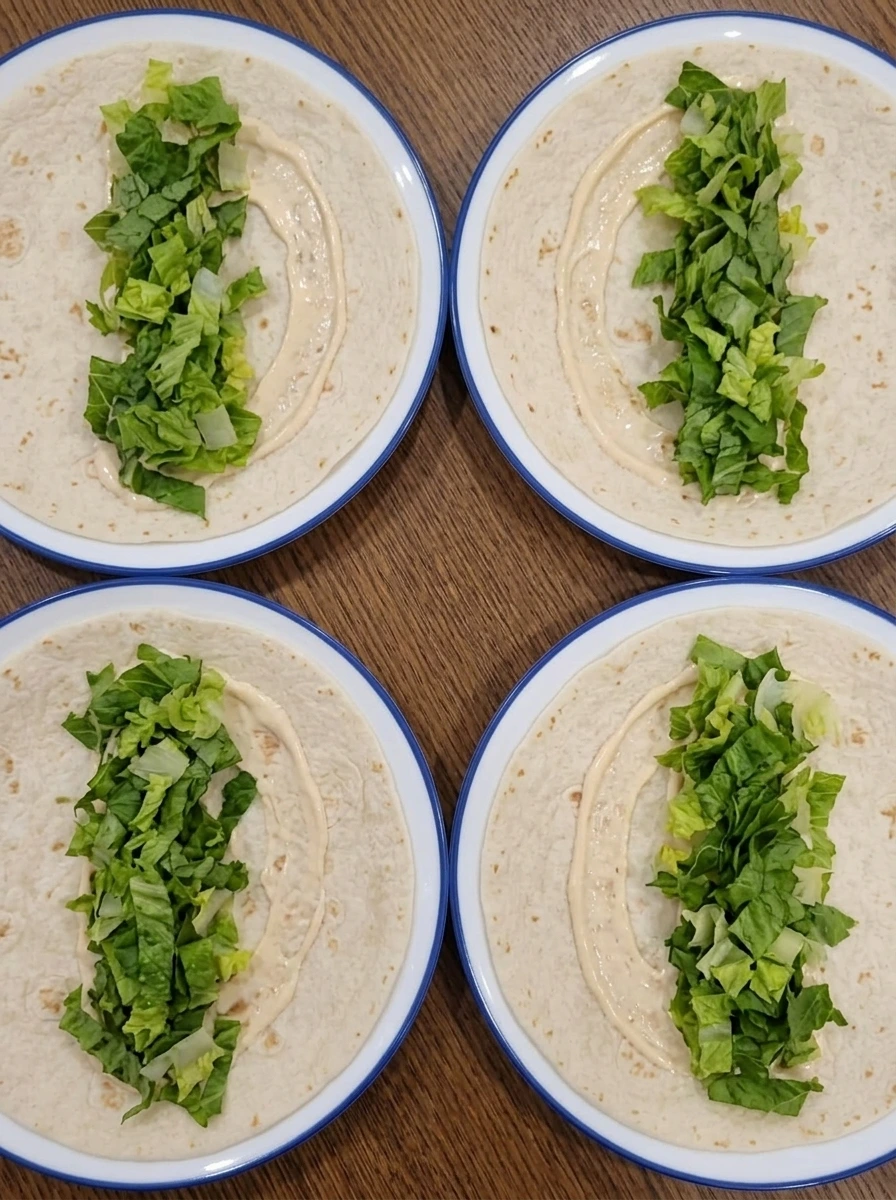
Place the flour tortillas flat on white ceramic plates with blue rims so they are ready to fill. Spread a thin layer of the remaining sauce down the center of each tortilla, then add a line of chopped romaine to create the first crisp base. At this stage, the tortillas should still look soft and flexible, with a neat strip of creamy sauce and lettuce through the middle. Keeping the filling centered makes the final wraps easier to fold and keeps the edges clean.
Tip: Leave a border around the edges so the filling stays inside when rolled.
Step 6: Add the chicken, vegetables, and cheese
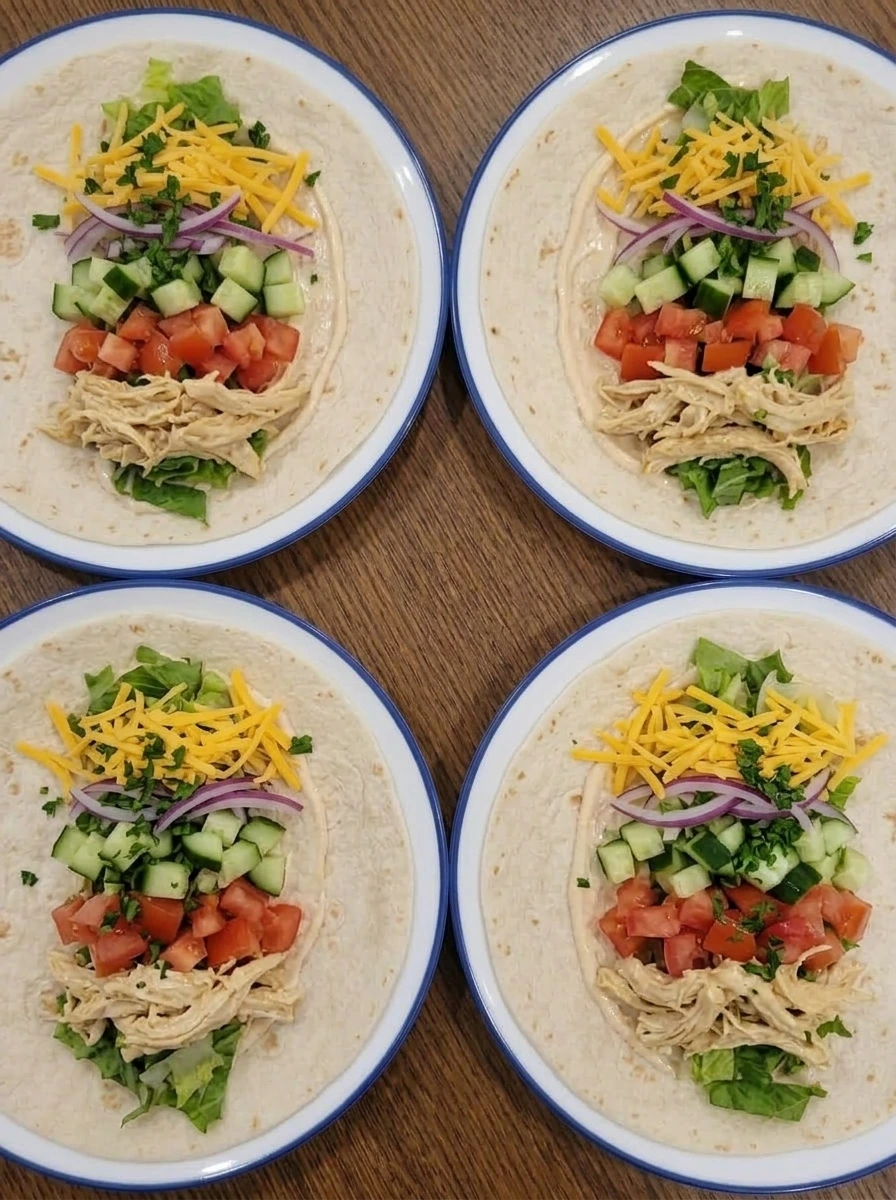
Spoon the creamy chicken mixture over the lettuce in an even line, then top with diced tomato, diced cucumber, thin red onion, and shredded cheddar. Finish with a light sprinkle of chopped parsley so the filling looks colorful, fresh, and balanced from end to end. Once layered, the wraps should look full but not overstuffed. You should clearly see the different textures in the center, from the creamy chicken and shredded cheese to the juicy tomato and crisp cucumber.
Tip: Keep the filling in a narrow mound so the wraps stay tight when rolled.
Step 7: Roll, rest, and slice the wraps

Fold the sides of each tortilla inward over the filling, then roll each one tightly into a firm wrap. Let them rest seam side down for a minute so they hold their shape, then slice each wrap in half to reveal the colorful layers inside. By the end of this step, the wraps should look compact, neat, and easy to handle. The cut sides should show a clean cross section of chicken, lettuce, tomato, cucumber, onion, cheese, and sauce tucked inside the soft tortilla.
Tip: Resting the wraps seam side down helps them stay closed for slicing.
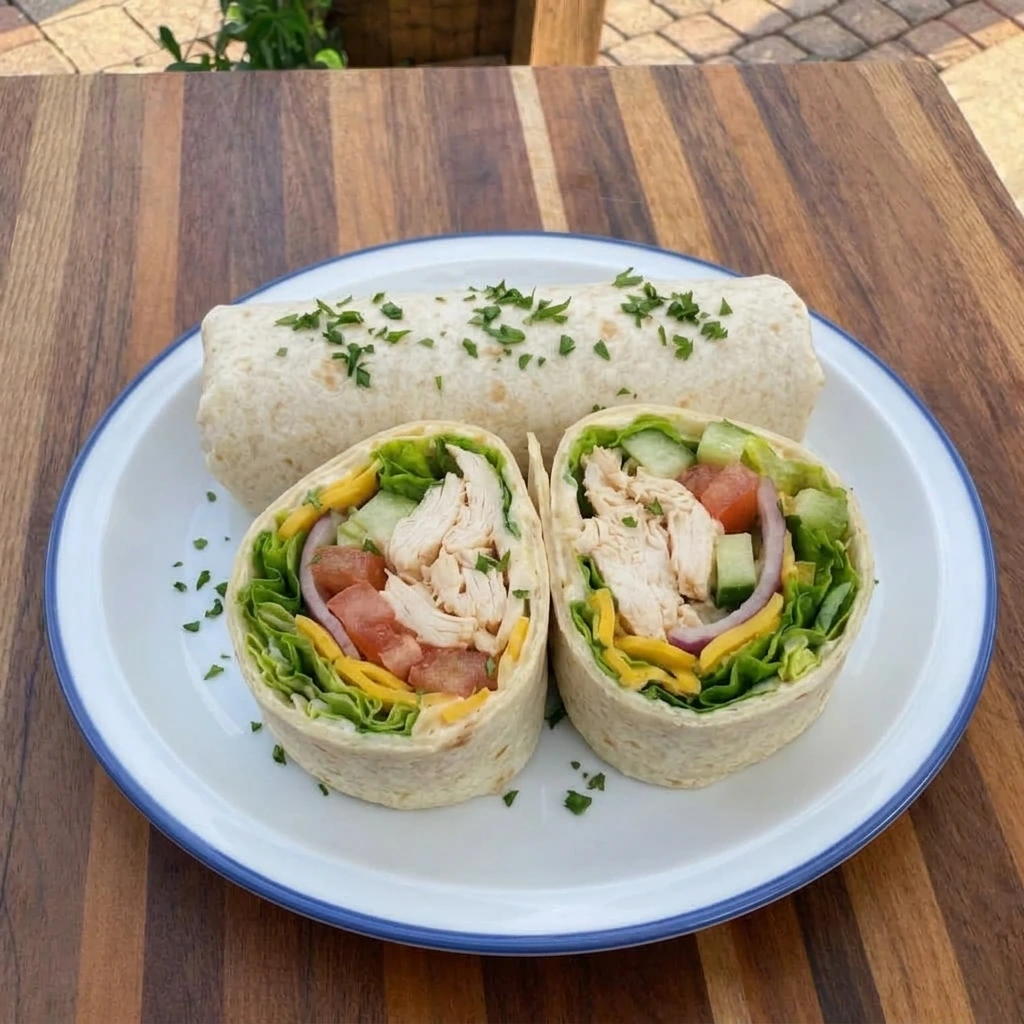
Step 8: Plate and garnish the finished wraps
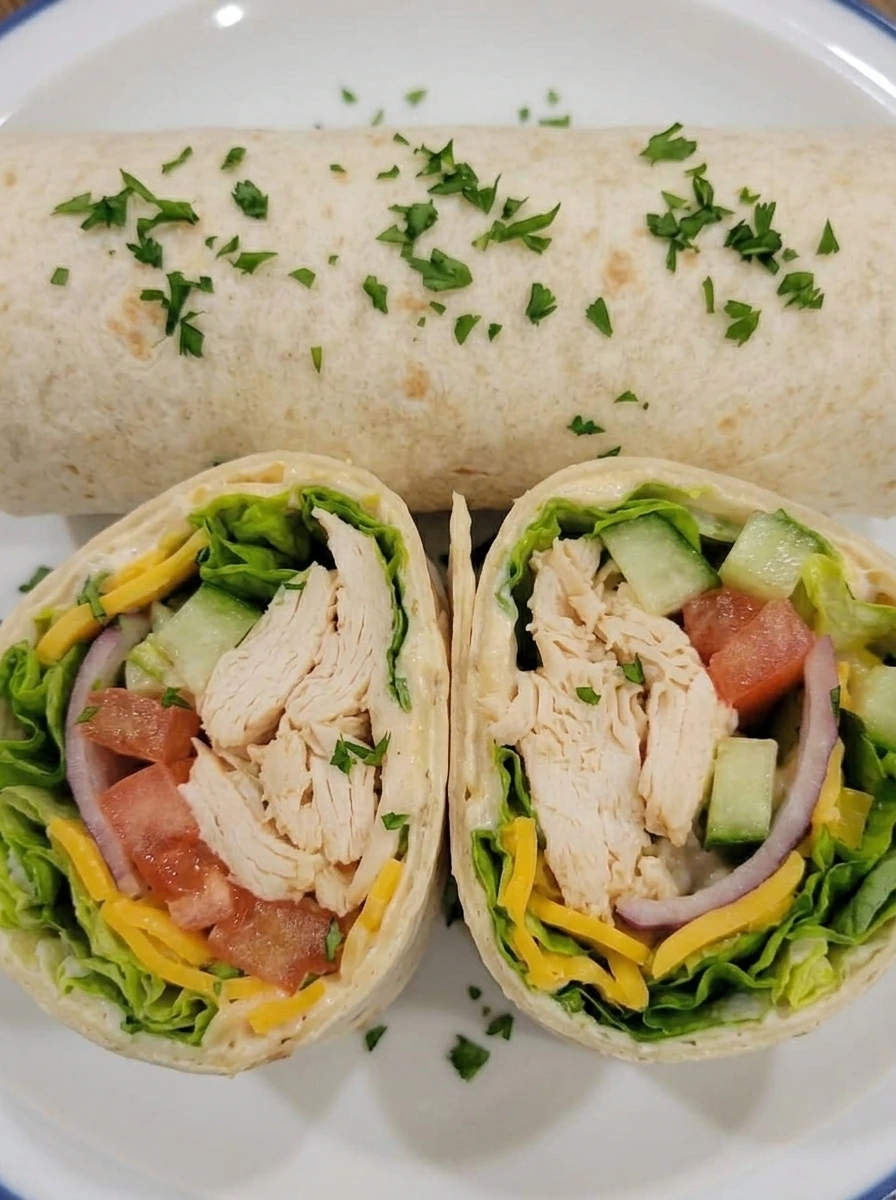
Arrange the sliced wrap halves on a round white ceramic plate with a narrow blue rim, placing the cut sides facing up so the layers are easy to see. Add the remaining whole wrap or extra halves beside them, then sprinkle a little chopped parsley over the top for a fresh finish. The final dish should look bright, tidy, and ready to serve. You should see the soft tortilla wrapped around the creamy chicken filling and crisp vegetables, all neatly plated for lunch or dinner.
Tip: Face the cut sides upward so the colorful filling stands out on the plate.
Pro Tips
- Use cooked chicken that is well chilled or just slightly cool for the neatest wrap slices.
- Dry the lettuce and tomato well so the filling stays fresh and the tortillas do not get soggy.
- Do not overfill the tortillas or they will split when you roll them.
- Slice the wraps with a sharp knife and wipe the blade between cuts for a cleaner presentation.
Storage Instructions
Store leftover wraps tightly wrapped in the refrigerator for up to 2 days. For the freshest texture, keep the filling and tortillas separate and assemble just before serving. Freezing is possible for the chicken filling by itself for up to 2 months, but the fresh vegetables and assembled wraps do not freeze well because they lose their crisp texture. To reheat, warm only the chicken filling separately if desired, then assemble the wraps with fresh vegetables and tortillas before serving.
Frequently Asked Questions
Can I make these chicken wraps ahead of time?
Yes, these wraps work very well for make ahead meals. For the best texture, keep the chopped vegetables and sauce separate until shortly before assembling if you want them especially crisp. If the wraps are already assembled, wrap them tightly and store them in the fridge for up to one day.
What kind of chicken works best for this recipe?
Cooked chicken breast is a great choice because it shreds easily and has a mild flavor that pairs well with the creamy sauce. Rotisserie chicken also works well and saves time on busy days. Just make sure the chicken is fully cooked before using it in the wrap.
Can I change the vegetables in the wrap?
Absolutely, this recipe is very flexible and easy to adjust. You can swap in shredded carrots, bell peppers, spinach, or even cabbage if that is what you have on hand. Try to keep the vegetables chopped small so the wraps still roll tightly and hold together well.
How do I keep the wrap from falling apart?
The best way is to avoid overfilling and to keep all of the ingredients centered in a narrow line. Folding the sides in first helps keep the smaller fillings from slipping out the ends. Letting the rolled wraps rest seam side down for a minute also helps them stay closed before slicing.
Final Thoughts
If you try this recipe, I really hope you love it as much as my family does. It has become one of those meals we just keep coming back to, no matter the season.
Drop a comment below and let me know how yours turned out. And if you are looking for more easy dinner ideas, make sure to bookmark this page.
I am always adding new recipes that are simple, satisfying, and perfect for busy weeknights.
Print
Easy Chicken Wrap
- Total Time: 20 minutes
- Yield: 4 servings
Description
Looking for the best easy chicken wrap? This one is quick, easy, and full of fresh flavor with tender chicken, crisp veggies, and a simple creamy filling. Whether you are after a healthy lunch idea or a simple weeknight dinner, this delivers every time. Great for meal prep, holiday lunches, potluck trays, brunch spreads, or a casual party. Save this easy chicken wrap for your next weeknight dinner!
Ingredients
- 4 large flour tortillas
- 2 cups, shredded cooked chicken breast
- 2 cups, chopped romaine lettuce
- 1 medium, diced tomato
- 1 small, diced cucumber
- 1/4 cup, thinly sliced red onion
- 1 cup shredded cheddar cheese
- 1/3 cup mayonnaise
- 1/4 cup plain Greek yogurt
- 1 tablespoon lemon juice
- 1/2 teaspoon garlic powder
- 1/2 teaspoon paprika
- 1/2 teaspoon salt
- 1/4 teaspoon black pepper
- 2 tablespoons, chopped fresh parsley
Instructions
- Start by chopping the romaine into bite sized pieces so it looks crisp, light, and fluffy in the bowl. Dice the tomato and cucumber into small even pieces, and slice the red onion into very thin strips so everything will layer neatly inside the wrap. At the end of this step, the vegetables should look fresh, colorful, and clearly separated. You will have bright green lettuce, juicy red tomato, pale green cucumber, and thin purple onion ready to add texture and color to the filling.
- Place the cooked chicken breast in a white ceramic bowl and pull it into thin shreds so it looks soft and easy to layer. Sprinkle in the paprika, garlic powder, salt, and black pepper, then toss until the seasoning lightly coats the chicken and gives it a warmer golden color. Once mixed, the chicken should still look tender and moist, but now more evenly colored with the spices throughout. The shreds should be loose instead of clumped, which makes the filling easier to spread across each tortilla.
- In a small white ceramic bowl, add the mayonnaise, Greek yogurt, and lemon juice. Stir until the mixture becomes smooth, pale, and creamy, with no streaks left between the ingredients. The finished sauce should look thick enough to spread but still soft and glossy. Its pale color and smooth texture will help coat the chicken and add moisture without making the wrap look heavy.
- Spoon part of the creamy sauce over the seasoned chicken and mix until the shreds look lightly coated. The goal is not to drench the chicken, but to give it a glossy, creamy finish that helps it stay tender inside the wrap. After mixing, the chicken should look slightly paler and smoother from the sauce, with the seasoning still visible throughout. It should hold together lightly while still remaining fluffy and easy to spoon onto the tortillas.
- Place the flour tortillas flat on white ceramic plates with blue rims so they are ready to fill. Spread a thin layer of the remaining sauce down the center of each tortilla, then add a line of chopped romaine to create the first crisp base. At this stage, the tortillas should still look soft and flexible, with a neat strip of creamy sauce and lettuce through the middle. Keeping the filling centered makes the final wraps easier to fold and keeps the edges clean.
- Spoon the creamy chicken mixture over the lettuce in an even line, then top with diced tomato, diced cucumber, thin red onion, and shredded cheddar. Finish with a light sprinkle of chopped parsley so the filling looks colorful, fresh, and balanced from end to end. Once layered, the wraps should look full but not overstuffed. You should clearly see the different textures in the center, from the creamy chicken and shredded cheese to the juicy tomato and crisp cucumber.
- Fold the sides of each tortilla inward over the filling, then roll each one tightly into a firm wrap. Let them rest seam side down for a minute so they hold their shape, then slice each wrap in half to reveal the colorful layers inside. By the end of this step, the wraps should look compact, neat, and easy to handle. The cut sides should show a clean cross section of chicken, lettuce, tomato, cucumber, onion, cheese, and sauce tucked inside the soft tortilla.
- Arrange the sliced wrap halves on a round white ceramic plate with a narrow blue rim, placing the cut sides facing up so the layers are easy to see. Add the remaining whole wrap or extra halves beside them, then sprinkle a little chopped parsley over the top for a fresh finish. The final dish should look bright, tidy, and ready to serve. You should see the soft tortilla wrapped around the creamy chicken filling and crisp vegetables, all neatly plated for lunch or dinner.
Notes
Pro Tips:
- Use cooked chicken that is well chilled or just slightly cool for the neatest wrap slices.
- Dry the lettuce and tomato well so the filling stays fresh and the tortillas do not get soggy.
- Do not overfill the tortillas or they will split when you roll them.
- Slice the wraps with a sharp knife and wipe the blade between cuts for a cleaner presentation.
Storage: Store leftover wraps tightly wrapped in the refrigerator for up to 2 days. For the freshest texture, keep the filling and tortillas separate and assemble just before serving. Freezing is possible for the chicken filling by itself for up to 2 months, but the fresh vegetables and assembled wraps do not freeze well because they lose their crisp texture. To reheat, warm only the chicken filling separately if desired, then assemble the wraps with fresh vegetables and tortillas before serving.
- Prep Time: 20 minutes
- Cook Time: 0 minute
- Category: Lunch
- Cuisine: American