Seriously, no joke, this is the best creamy tuna salad recipe. It’s the one my mom, and before that, my grandma has made for years. It’s a classic recipe with simple, delicious ingredients. Flaky tuna is mixed with crisp celery, onions, sweet pickles, and a creamy mayo dressing.
Perfect for sandwiches or lettuce wraps with some potato chips on the side! A classic creamy tuna salad recipe is one of my go-to easy lunches. Not only does it make for a super delicious meal, but it’s packed with protein and keeps me satisfied for hours. Also, there’s no complicated methods or ingredients needed.
And meal prep’s a cinch. I often make a batch of this salad on Sunday to enjoy for a meal and a snack on Monday and Tuesday. With just a few basic ingredients probably already in the fridge and pantry, you can whip up a bowl for sandwiches or even scoop it into half an avocado or lettuce wraps for a fancy and low carb dish!
Ingredients
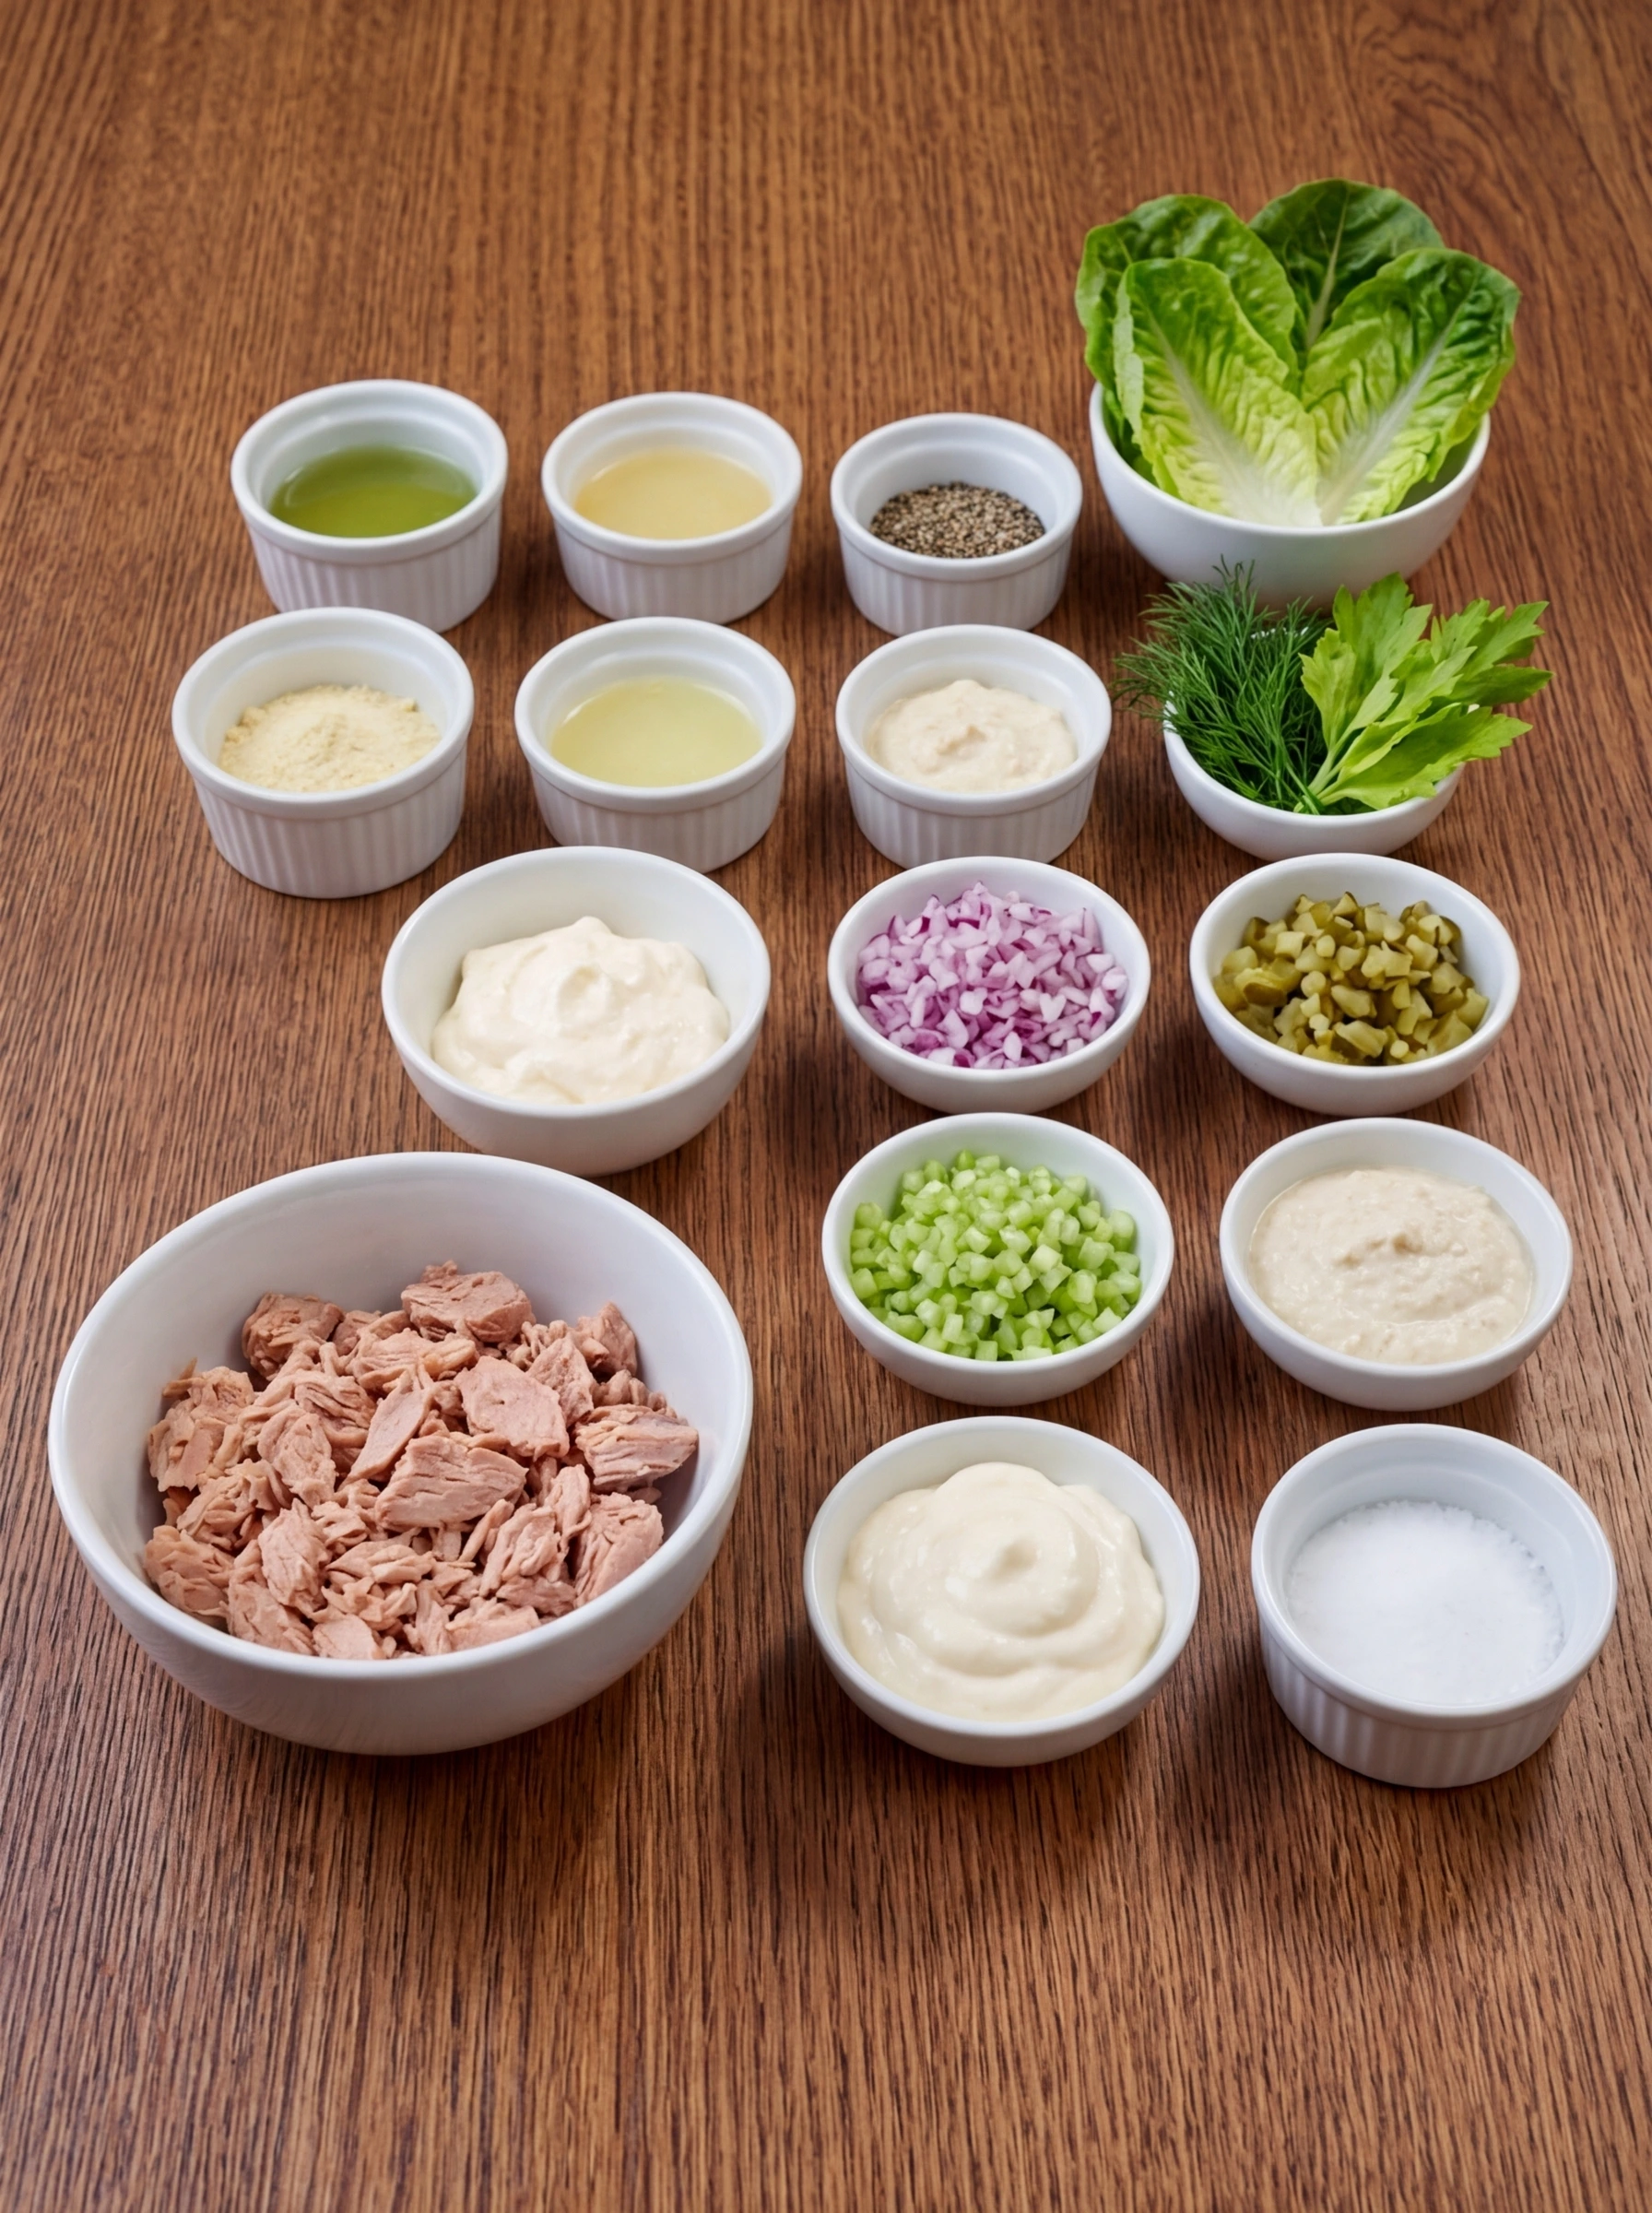
Here’s what I use for this recipe and you can always make substitutions if you prefer.
- canned tuna in water: This is the hearty base of the salad and gives it a flaky, protein packed texture.
- mayonnaise: Mayonnaise makes the salad rich, smooth, and creamy.
- celery: Celery adds a fresh crunch that balances the creamy dressing.
- red onion: Red onion brings a little sharpness and color to every bite.
- sweet pickles: Sweet pickles add tangy sweetness and extra texture.
- pickle juice: A splash of pickle juice loosens the dressing and boosts the tangy flavor.
- Dijon mustard: Dijon gives the dressing a subtle zip and depth.
- fresh lemon juice: Lemon juice brightens the salad and keeps it tasting fresh.
- fresh dill: Fresh dill adds a clean herb flavor that works beautifully with tuna.
- salt: Salt sharpens and rounds out the overall flavor.
- black pepper: Black pepper adds a gentle bite and seasoning balance.
- lettuce leaves: Lettuce leaves make a crisp base for serving the finished tuna salad.
- extra dill or celery leaves: This simple garnish adds a fresh finish to the plated dish.
Tools You’ll Need
- can opener: Needed to open the tuna cans.
- mixing bowls: Use one for the tuna and one for the dressing.
- cutting board: For chopping the vegetables and herbs.
- chef’s knife: A sharp knife makes the small cuts easier.
- measuring cups and spoons: For accurate dressing proportions.
- whisk: Helps smooth out the dressing quickly.
- spoon or spatula: For folding the tuna salad together gently.
Instructions
Step 1: Drain and flake the tuna
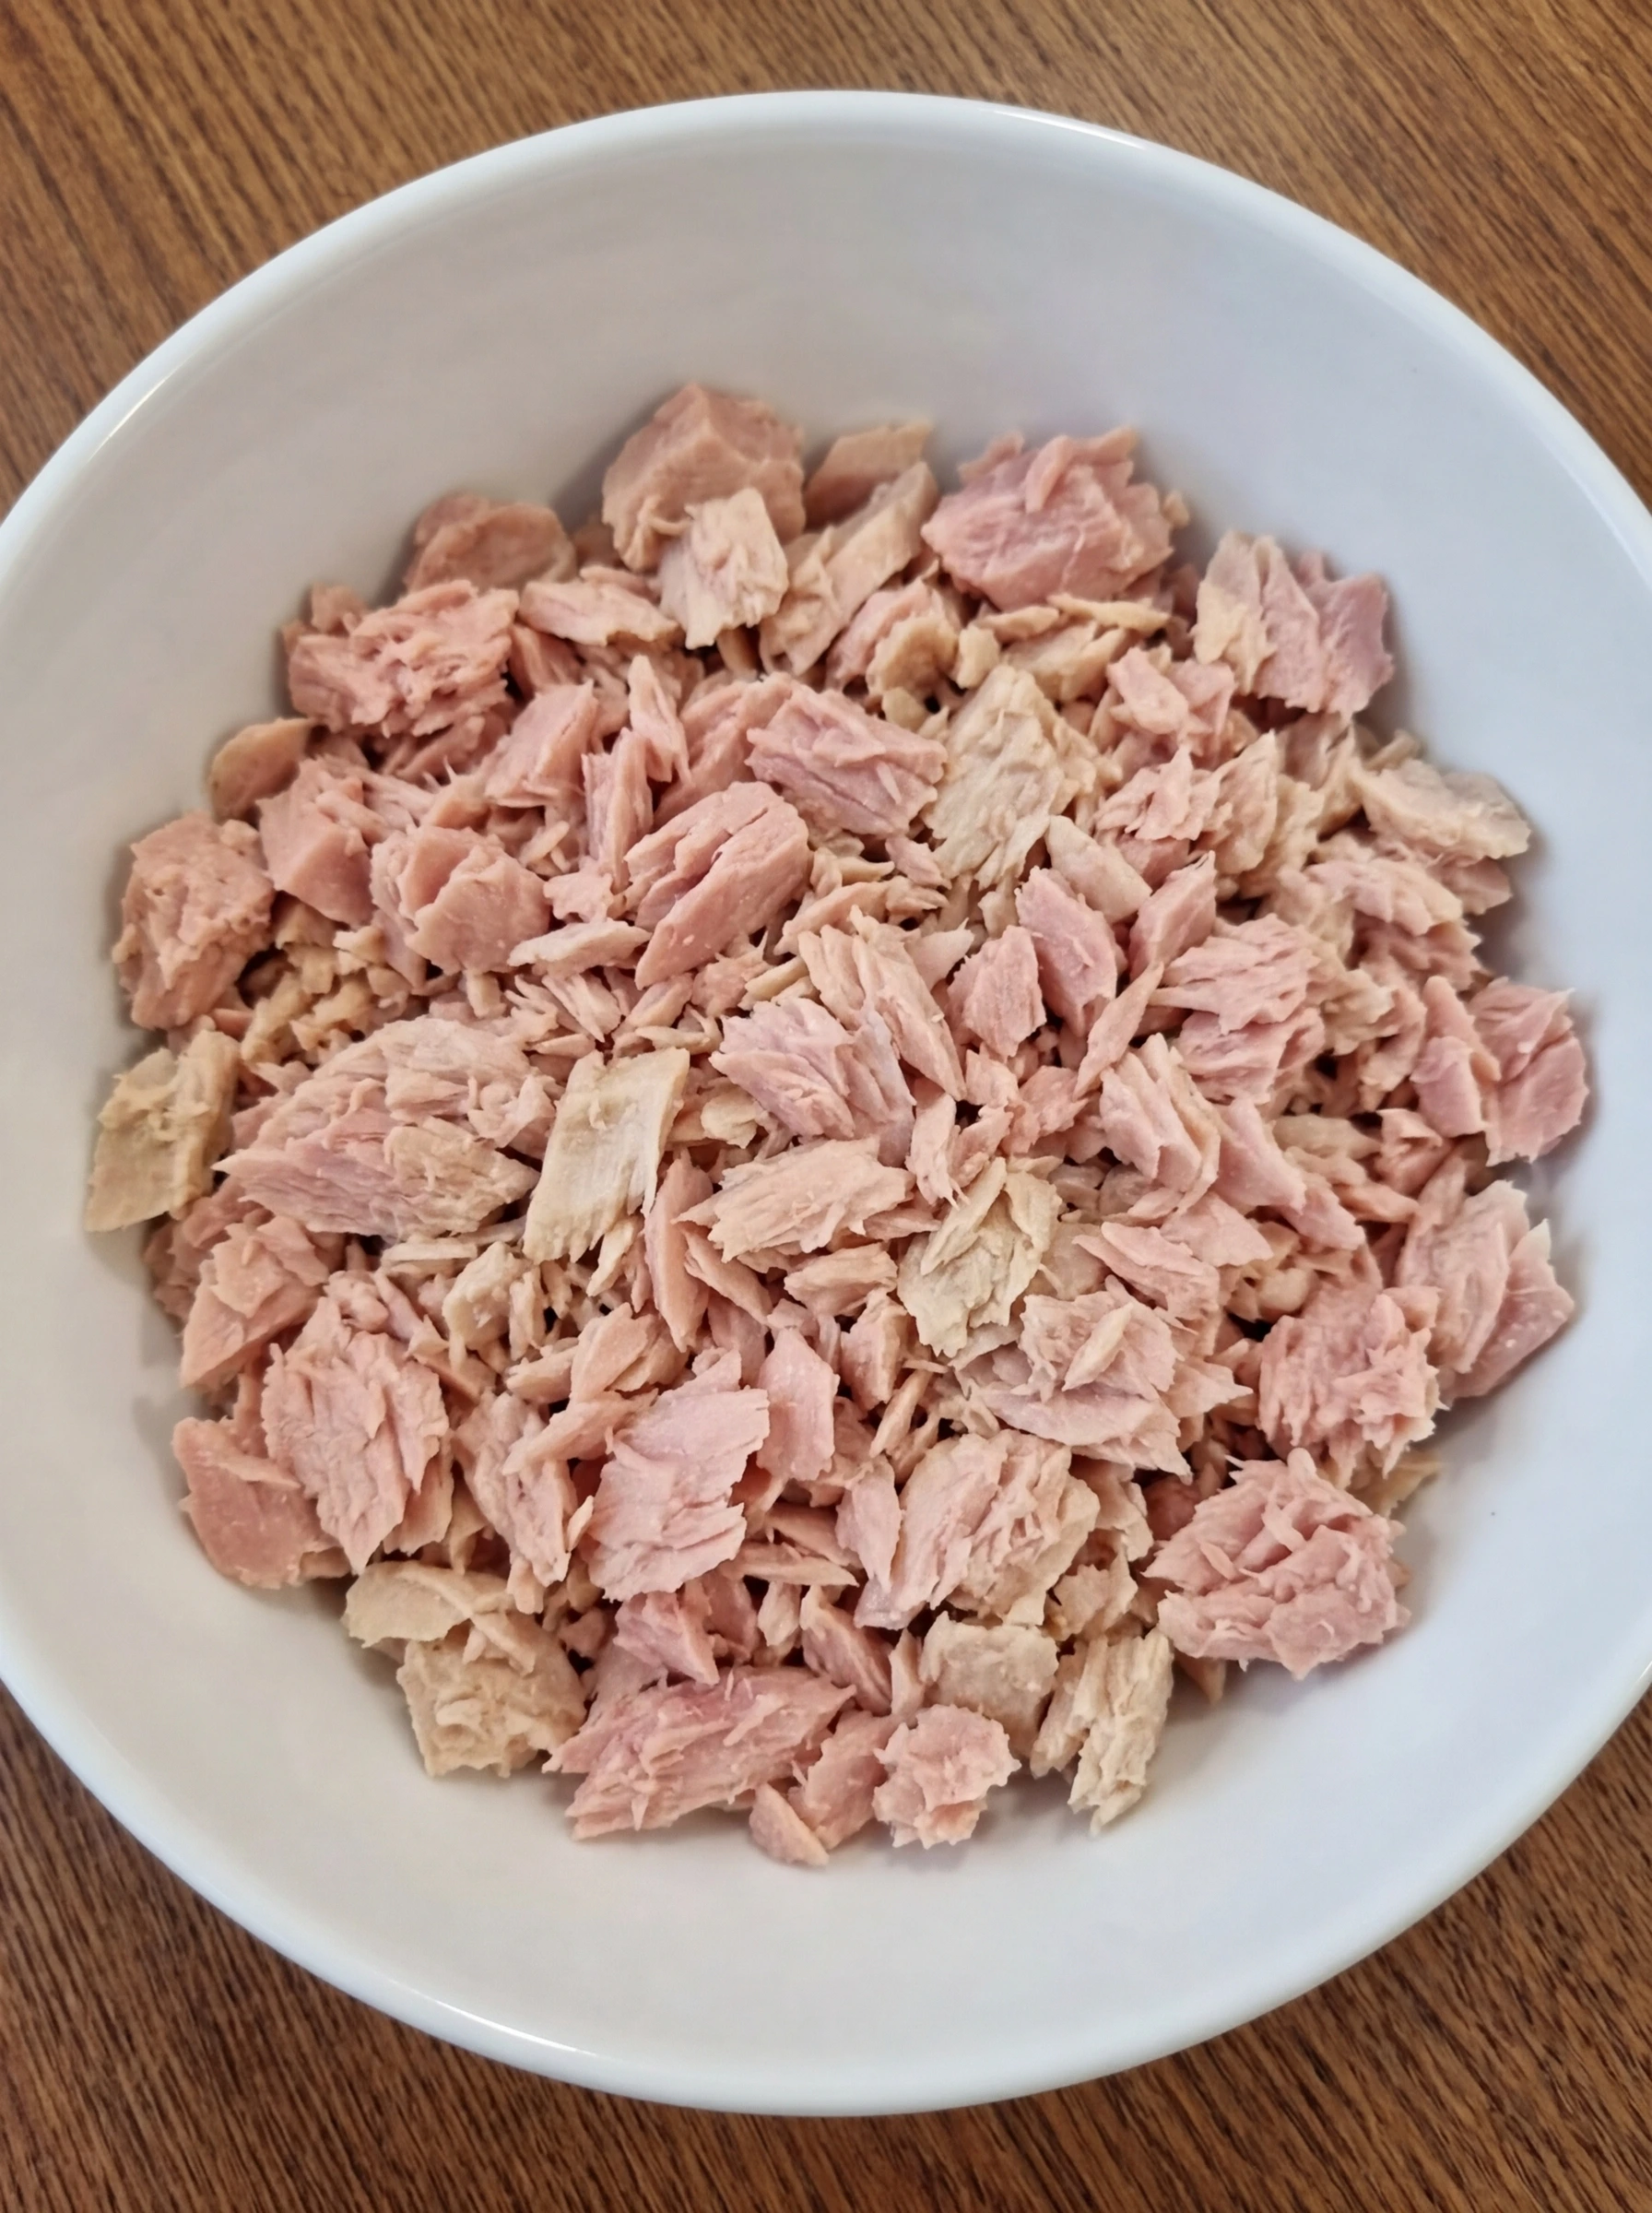
Open the cans of tuna and drain away all the liquid, then transfer the tuna to a round white ceramic bowl. Use a fork to gently break it apart so the fish looks light, flaky, and evenly separated instead of packed in firm chunks. At this stage, the tuna should look moist but not watery, with soft pale pieces spread loosely through the bowl. This first step sets up the texture of the whole salad, so the mixture stays creamy instead of soggy later on.
Tip: Press out extra liquid well so the dressing stays thick and creamy.
Step 2: Chop the crunchy mix-ins

Finely chop the celery, red onion, sweet pickles, and fresh dill into small even pieces, then place them into the same round white ceramic bowl over the flaked tuna. The bowl should now show a mix of pale tuna with bright green celery, purple red onion, glossy green pickles, and soft flecks of dill. Everything is still completely uncooked, but the salad starts to look colorful and more textured at this point. The small cuts make each spoonful balanced, so no single ingredient takes over the bowl.
Tip: Keep the pieces small so the salad mixes smoothly and is easy to scoop.
Step 3: Measure the creamy dressing ingredients
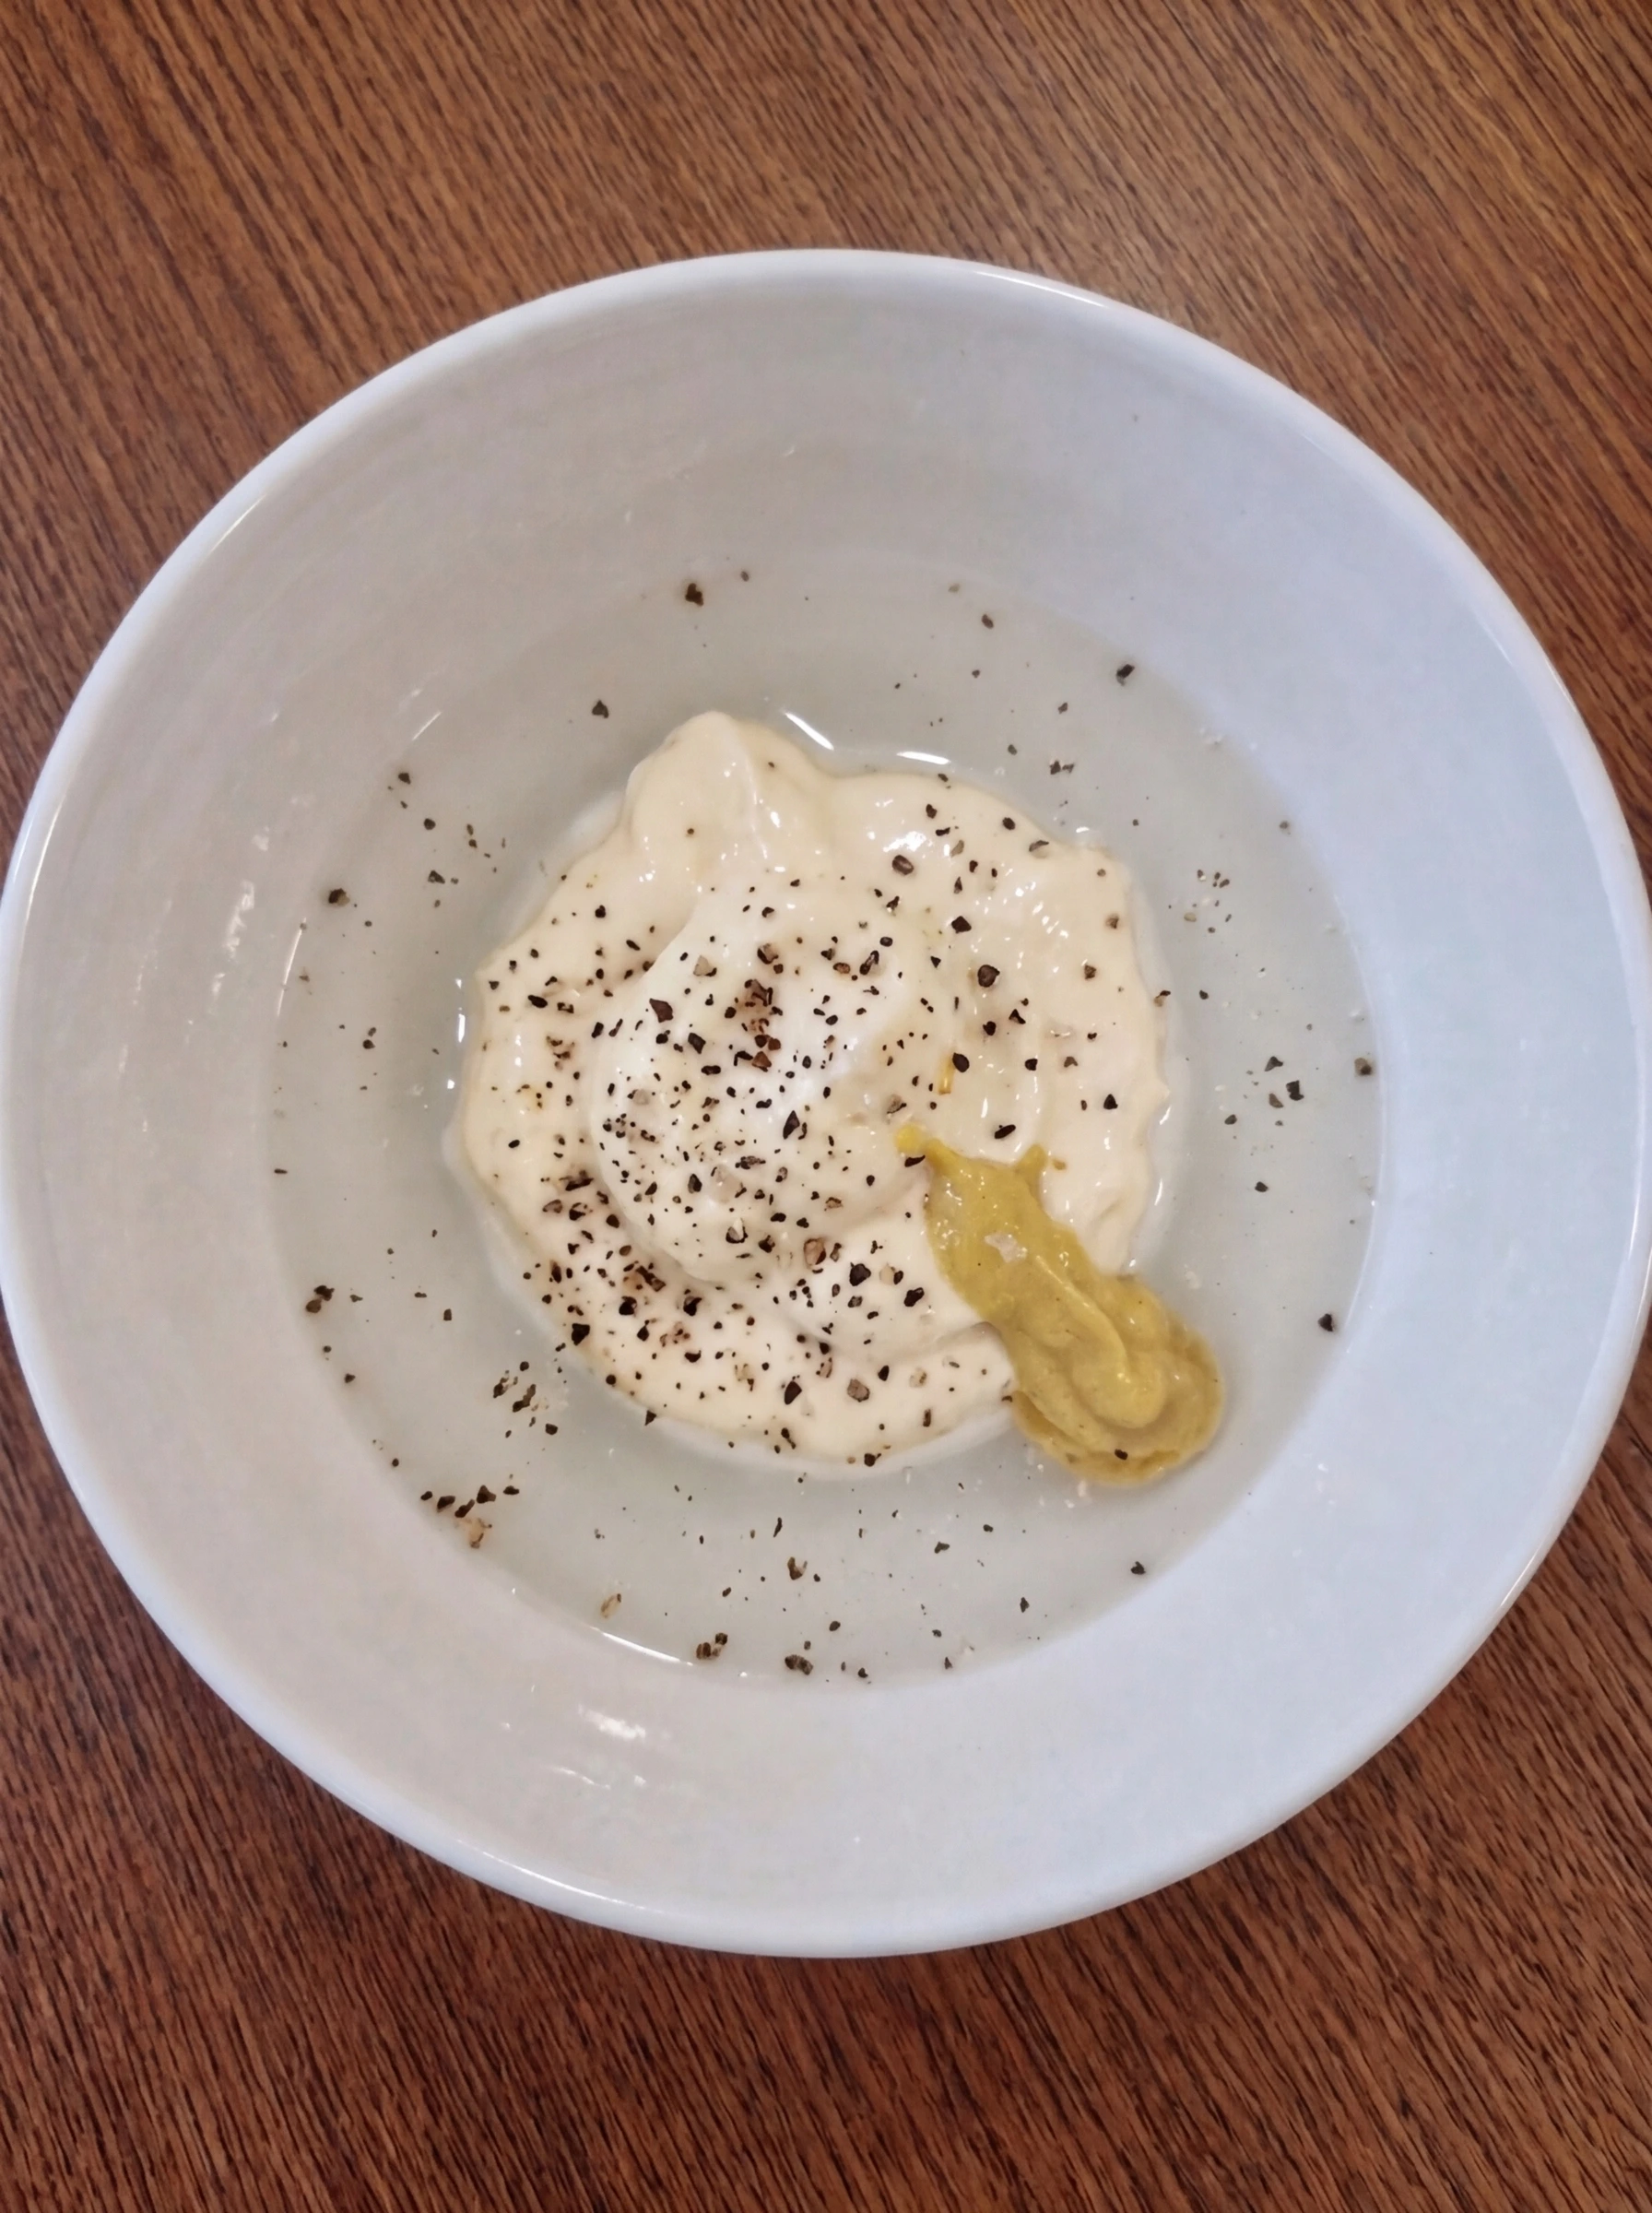
Add the mayonnaise, pickle juice, Dijon mustard, lemon juice, salt, and black pepper into a second round white ceramic bowl. The ingredients should sit in visible layers, with the mayo thick and pale, the pickle juice and lemon juice glossy around it, and the mustard adding a yellow streak through the center. This step keeps the seasoning measured and ready before mixing, which helps the salad come together evenly. The bowl should look simple but full of contrast, with creamy and liquid ingredients clearly visible before they are whisked.
Tip: Measure the liquid ingredients carefully so the dressing does not get too loose.
Step 4: Whisk the dressing until smooth
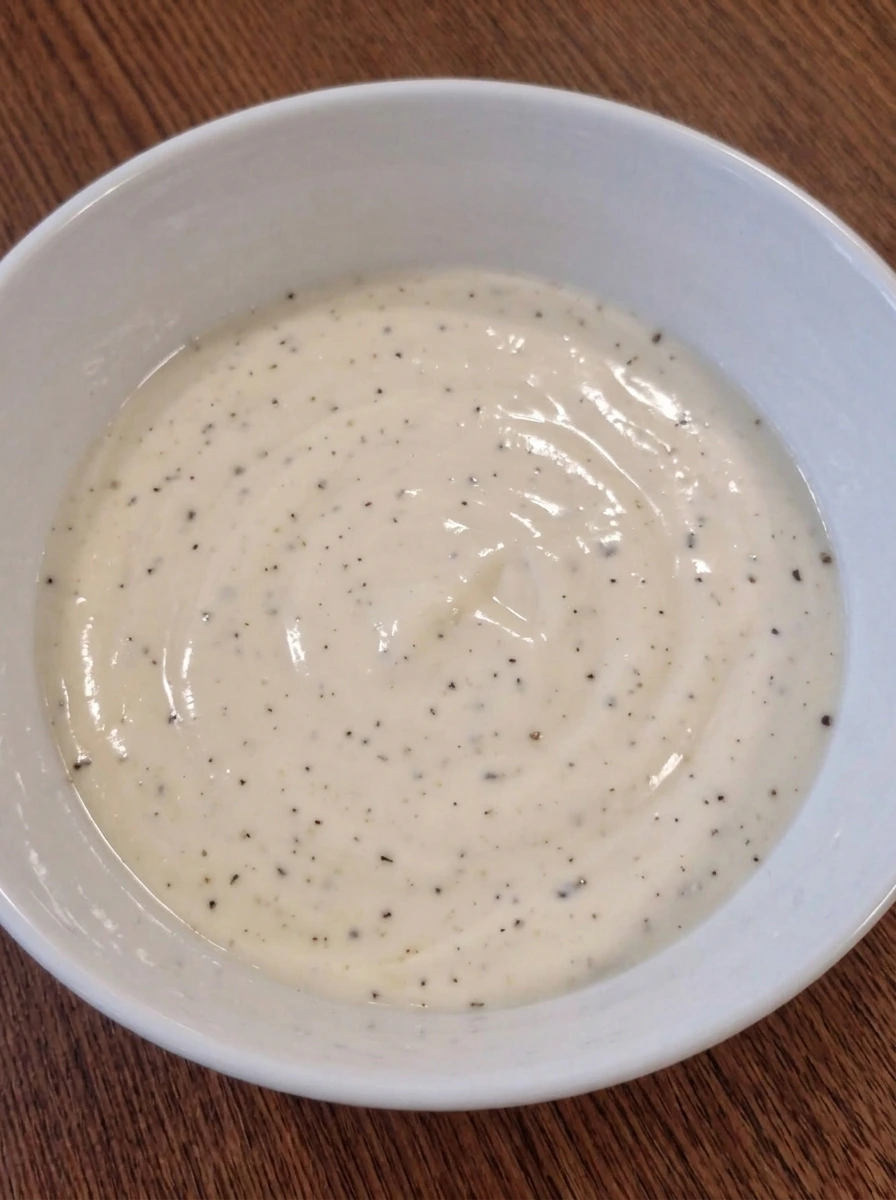
Whisk the mayonnaise mixture until it turns into a smooth, pale, creamy dressing with no streaks left behind. The mustard, juices, and seasonings should disappear into the mayo, creating a glossy mixture that looks thick enough to cling to the tuna without running. Visually, the dressing should now look uniform and silky with a soft sheen across the top. This separate mixing step helps keep the final salad evenly coated instead of patchy or overworked.
Tip: Whisk just until smooth so the dressing stays thick and glossy.
Step 5: Combine the tuna mixture with the dressing
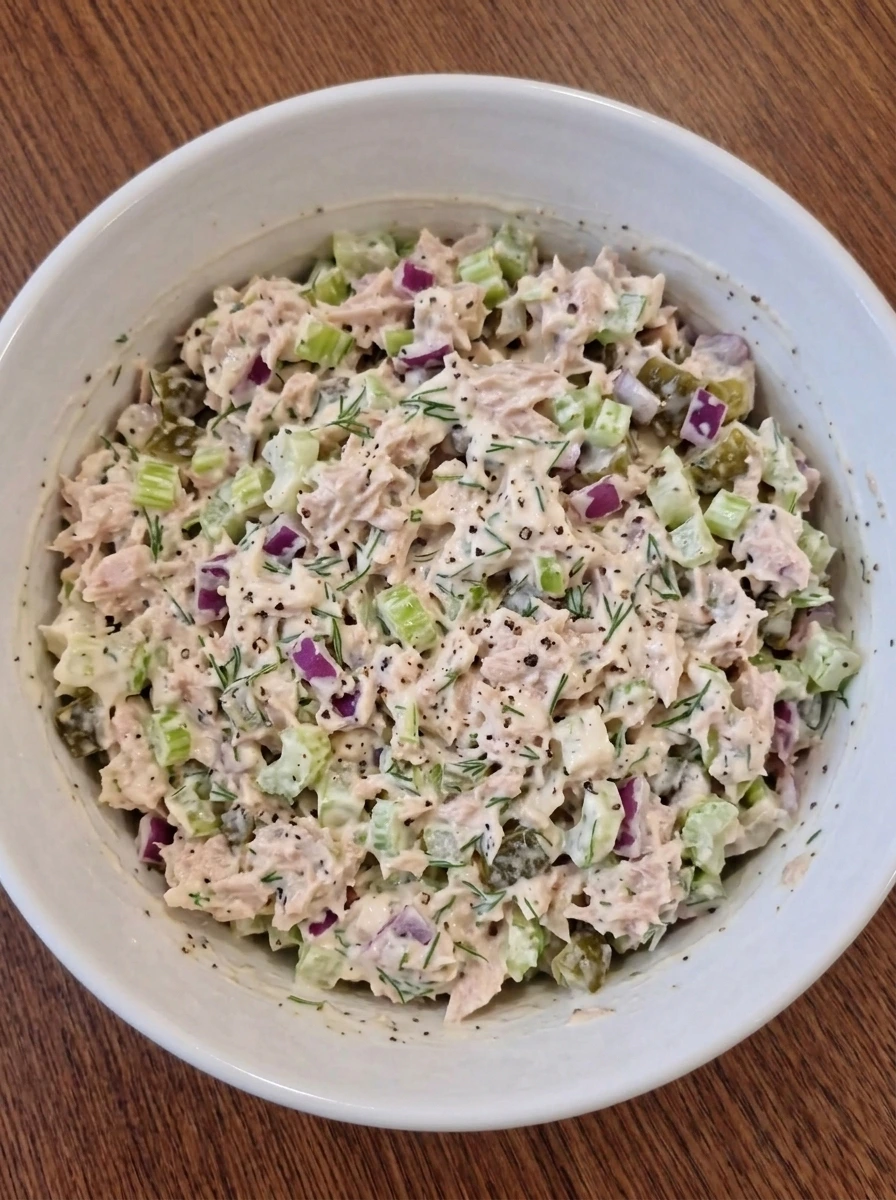
Pour the smooth dressing over the bowl of tuna, celery, onion, pickles, and dill. Use a spoon or spatula to fold everything together gently so the dressing coats every bit of tuna and every chopped vegetable without smashing the flakes too much. Once mixed, the salad should look creamy and cohesive, with the pale dressing clinging to the tuna while little bits of green, purple, and pickle pieces remain visible throughout. The texture should still look chunky and spoonable, not mashed or wet.
Tip: Fold gently so the tuna keeps some texture instead of turning pasty.
Step 6: Rest the salad to let the flavors settle
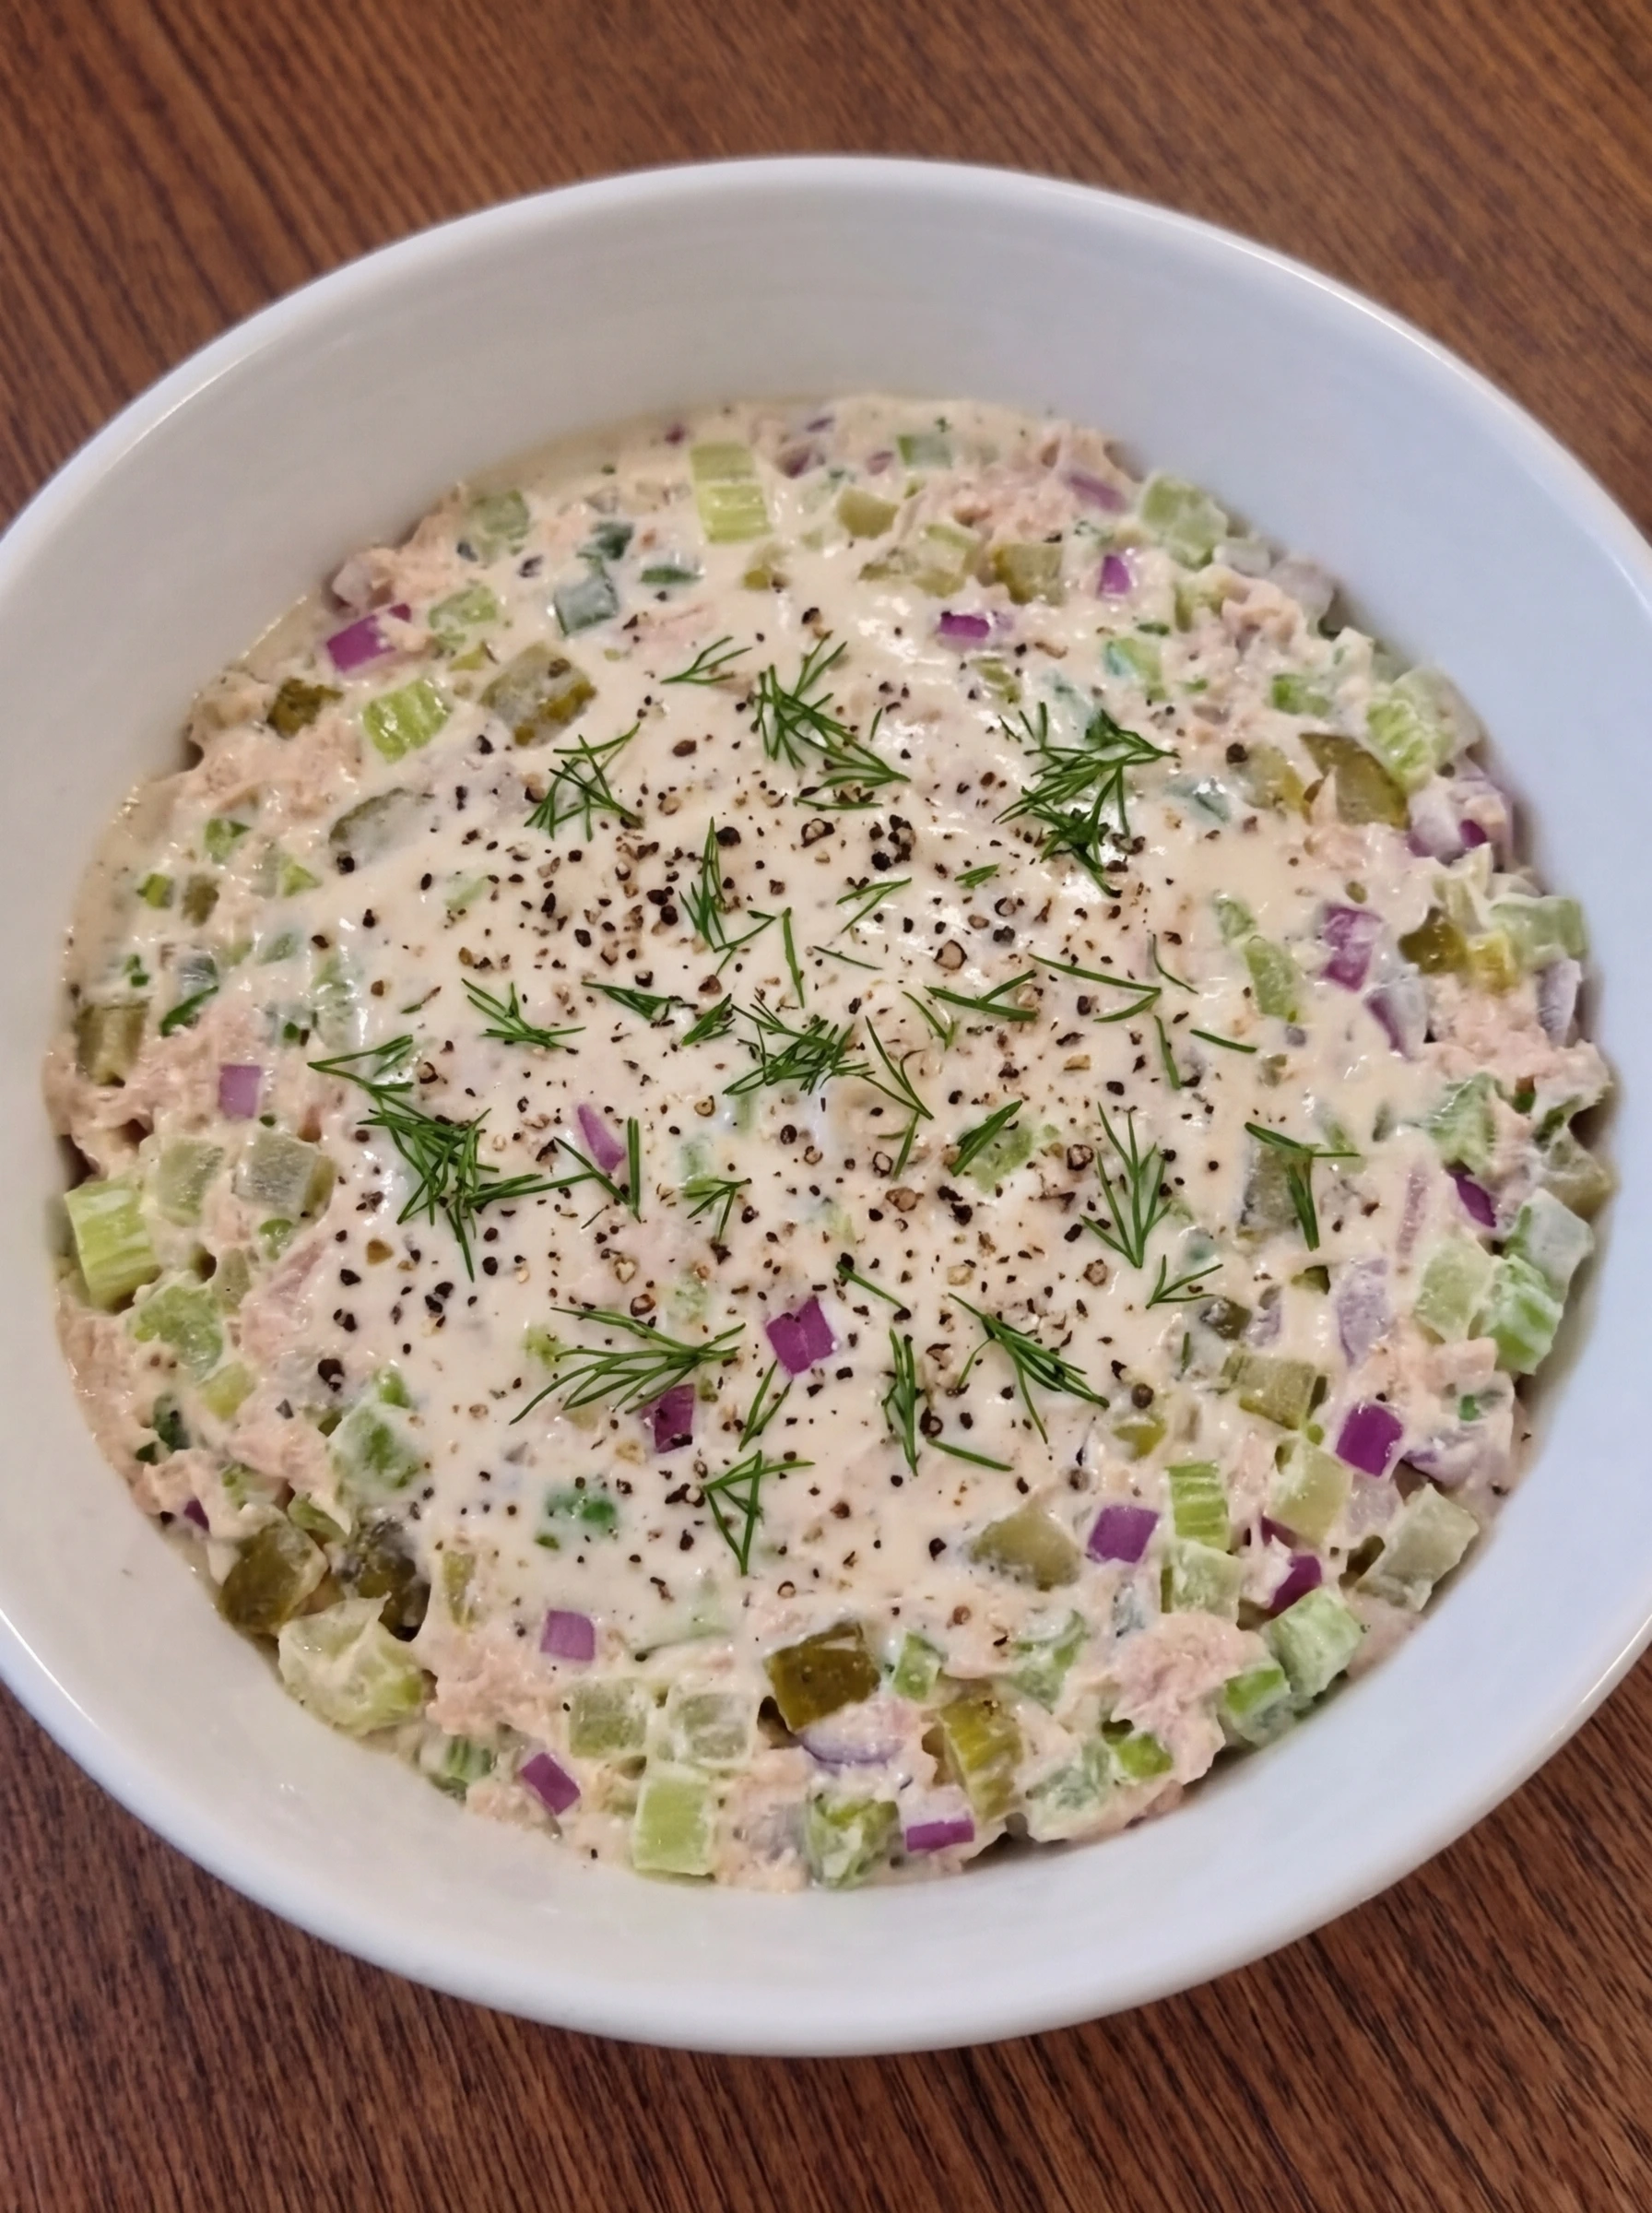
Let the mixed tuna salad sit in the round white ceramic bowl for about 10 minutes. During this short rest, the dressing settles into the tuna and chopped vegetables, and the overall mixture looks slightly more unified and creamy. The salad should still look fresh and uncooked, but the texture becomes a bit more cohesive and spoonable as the ingredients relax together. You will notice the surface looks smoother and the flavors are better distributed from edge to edge.
Tip: A short rest makes the salad taste more balanced and gives it a better texture.
Step 7: Arrange the lettuce and spoon on the salad
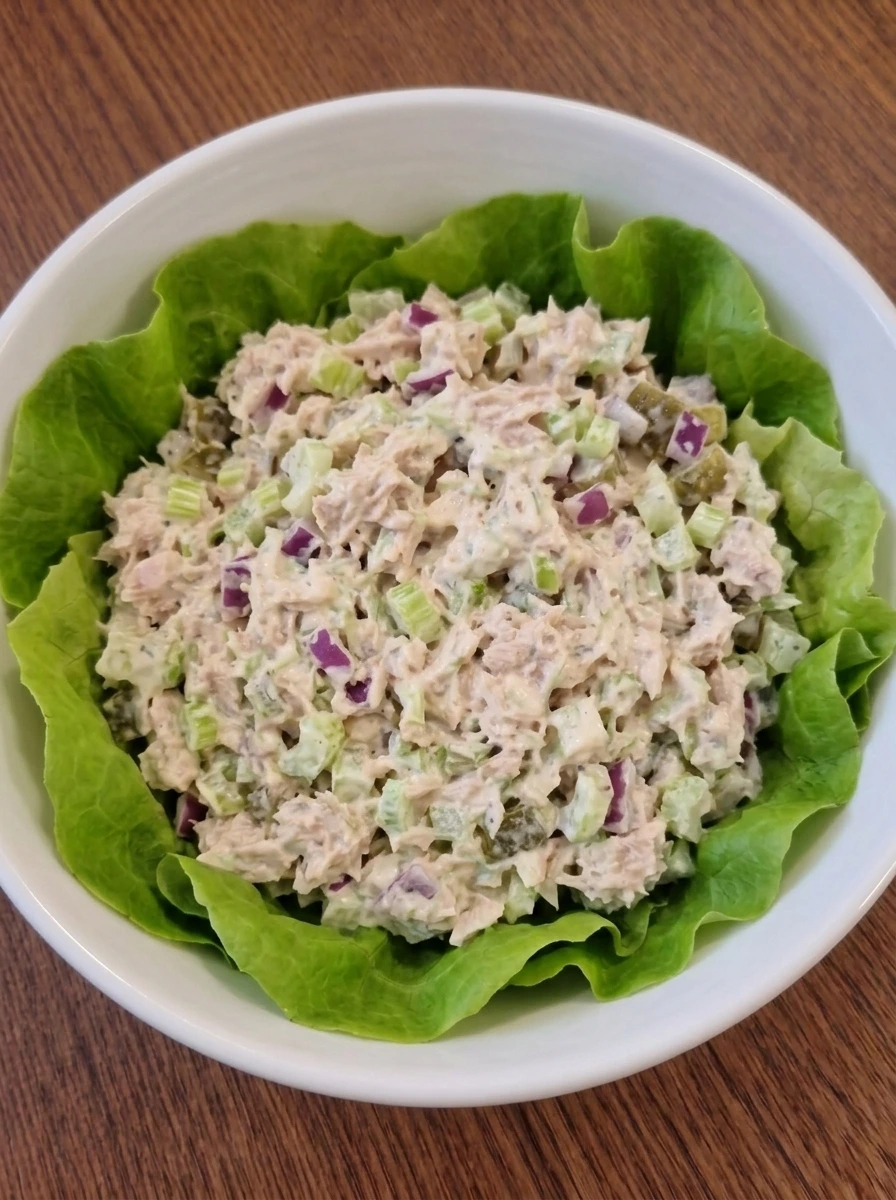
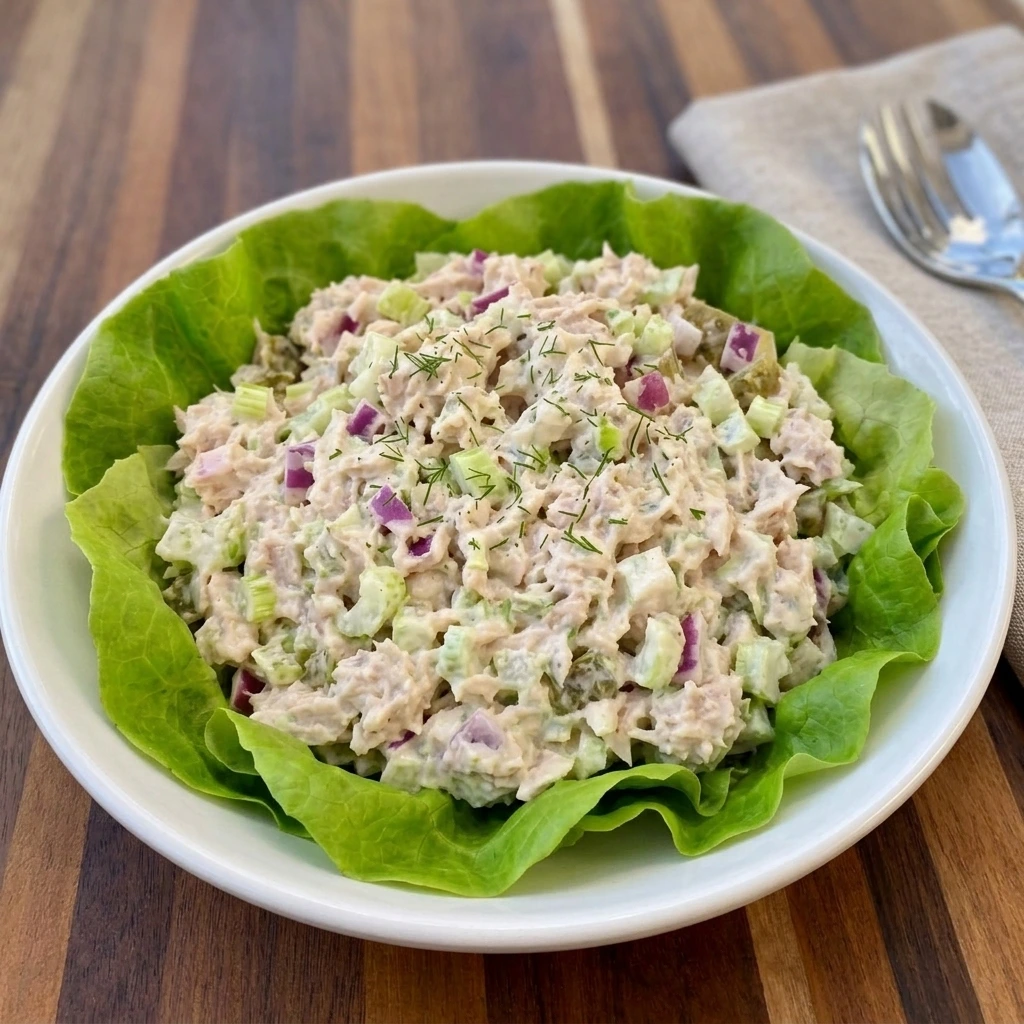
Place the lettuce leaves into a round white ceramic bowl so they form a fresh base, then spoon the rested tuna salad neatly on top. Shape it into a generous mound so the bowl looks full and tidy, with the creamy mixture sitting above the crisp lettuce. At this point, the final serving starts to take shape. The contrast between the pale creamy tuna and the bright green lettuce makes the bowl look fresh, balanced, and ready for the finishing touch.
Tip: Use a spoon to mound the salad neatly so it looks full and inviting.
Step 8: Finish with a fresh garnish and serve
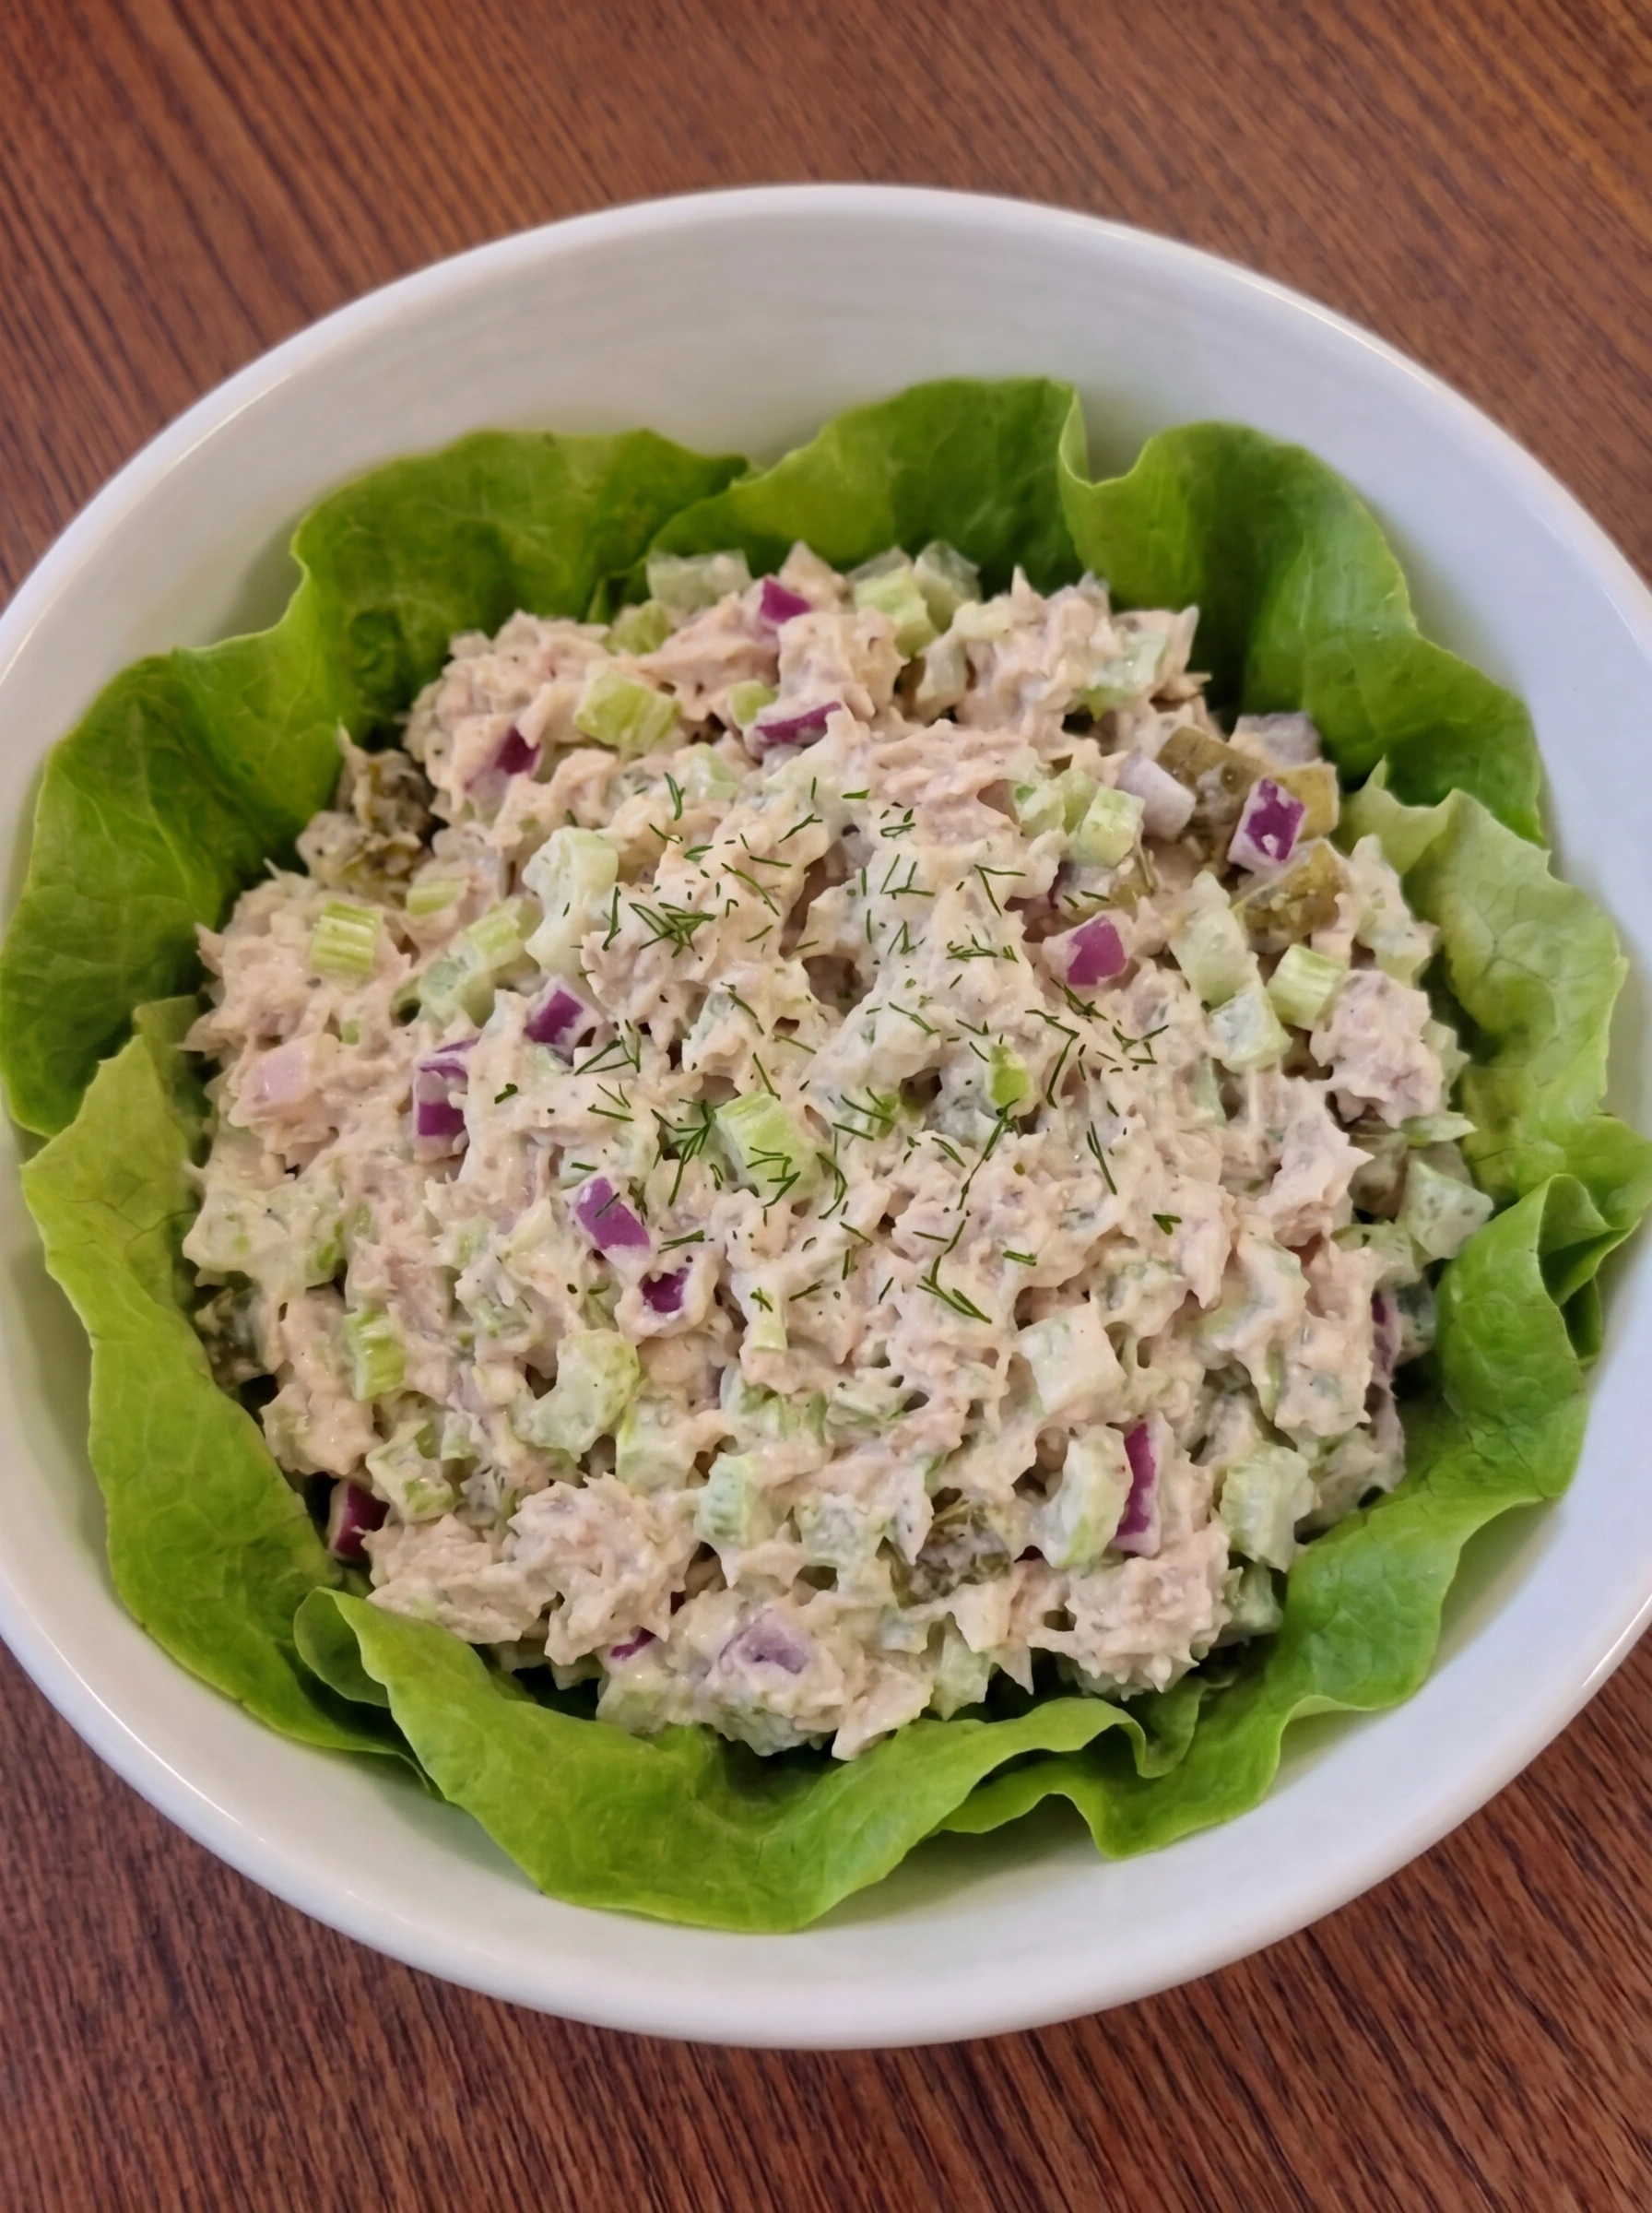
Scatter extra dill or celery leaves over the top of the plated tuna salad for a simple fresh finish. The final bowl should look creamy, chunky, and bright, with a clean garnish that adds color without covering up the texture of the salad. Now the dish is fully assembled and ready to serve. You can enjoy it straight from the bowl, pile it into sandwiches, or scoop it into wraps, but this final plated version is complete and ready for the table.
Tip: Keep the garnish light so the creamy texture of the salad stays the star.
Pro Tips
- Drain the tuna very well so the salad stays creamy instead of watery.
- Chop the celery, onion, and pickles finely for a better texture in every bite.
- Mix the dressing separately first so the seasonings are evenly distributed.
- Let the salad rest for a few minutes before serving so the flavors blend together.
Storage Instructions
Store creamy tuna salad in an airtight container in the fridge for up to 3 days. For the freshest texture, keep the garnish and lettuce separate until serving. Freezing is not recommended because the mayonnaise dressing can separate and turn watery after thawing. This recipe is meant to be enjoyed cold, so there is no need to reheat it, and serving it chilled keeps the texture at its best.
Frequently Asked Questions
Can I make creamy tuna salad ahead of time?
Yes, this is a great make ahead recipe. It actually tastes even better after a little time in the fridge because the flavors settle together. Just give it a gentle stir before serving so the dressing looks smooth and creamy again.
What can I serve with creamy tuna salad?
You can serve it in sandwiches, wraps, lettuce cups, or with crackers. It is also really good spooned over greens or tucked into halved avocados. Since the salad is rich and creamy, simple sides like fruit, chips, or sliced vegetables work especially well.
Can I use a different kind of onion or pickles?
Absolutely, you can adjust both to your taste. Green onion or a small amount of white onion will work if you do not have red onion. Dill pickles can replace sweet pickles if you want a more savory and tangy flavor.
How do I keep tuna salad from getting watery?
The biggest step is draining the tuna very thoroughly before mixing. It also helps to avoid adding too much lemon juice or pickle juice at once. If the salad still loosens after chilling, stir in a small spoonful of mayonnaise to thicken it back up.
Final Thoughts
This is the kind of recipe I wish I had found years ago. It would have saved me so many rushed lunch moments.
But now that I have it, I make it all the time and I think you will too. If you enjoyed this, check out some of my other popular recipes on the blog.
And leave a comment, I read every single one and it really makes my day.
Print
Creamy Tuna Salad
- Total Time: 15 minutes
- Yield: 4 servings 1x
Description
Looking for the best creamy tuna salad? This one is quick, easy, and wonderfully creamy with crisp bites in every forkful. Whether you are after a healthy lunch idea or a simple potluck favorite, this delivers every time. Great for weeknight dinner, meal prep, holiday gatherings, brunch, and party spreads. Save this easy creamy tuna salad for your next potluck, lunch prep, or casual brunch with friends and family!
Ingredients
- 2 cans, 5 ounces each canned tuna in water
- 1/3 cup mayonnaise
- 2 stalks, finely chopped celery
- 1/4 cup, finely chopped red onion
- 1/4 cup, finely chopped sweet pickles
- 1 tablespoon pickle juice
- 1 teaspoon Dijon mustard
- 1 teaspoon fresh lemon juice
- 1 tablespoon, finely chopped fresh dill
- 1/4 teaspoon salt
- 1/4 teaspoon black pepper
- 4 leaves lettuce leaves
- 1 tablespoon extra dill or celery leaves
Instructions
- Open the cans of tuna and drain away all the liquid, then transfer the tuna to a round white ceramic bowl. Use a fork to gently break it apart so the fish looks light, flaky, and evenly separated instead of packed in firm chunks. At this stage, the tuna should look moist but not watery, with soft pale pieces spread loosely through the bowl. This first step sets up the texture of the whole salad, so the mixture stays creamy instead of soggy later on.
- Finely chop the celery, red onion, sweet pickles, and fresh dill into small even pieces, then place them into the same round white ceramic bowl over the flaked tuna. The bowl should now show a mix of pale tuna with bright green celery, purple red onion, glossy green pickles, and soft flecks of dill. Everything is still completely uncooked, but the salad starts to look colorful and more textured at this point. The small cuts make each spoonful balanced, so no single ingredient takes over the bowl.
- Add the mayonnaise, pickle juice, Dijon mustard, lemon juice, salt, and black pepper into a second round white ceramic bowl. The ingredients should sit in visible layers, with the mayo thick and pale, the pickle juice and lemon juice glossy around it, and the mustard adding a yellow streak through the center. This step keeps the seasoning measured and ready before mixing, which helps the salad come together evenly. The bowl should look simple but full of contrast, with creamy and liquid ingredients clearly visible before they are whisked.
- Whisk the mayonnaise mixture until it turns into a smooth, pale, creamy dressing with no streaks left behind. The mustard, juices, and seasonings should disappear into the mayo, creating a glossy mixture that looks thick enough to cling to the tuna without running. Visually, the dressing should now look uniform and silky with a soft sheen across the top. This separate mixing step helps keep the final salad evenly coated instead of patchy or overworked.
- Pour the smooth dressing over the bowl of tuna, celery, onion, pickles, and dill. Use a spoon or spatula to fold everything together gently so the dressing coats every bit of tuna and every chopped vegetable without smashing the flakes too much. Once mixed, the salad should look creamy and cohesive, with the pale dressing clinging to the tuna while little bits of green, purple, and pickle pieces remain visible throughout. The texture should still look chunky and spoonable, not mashed or wet.
- Let the mixed tuna salad sit in the round white ceramic bowl for about 10 minutes. During this short rest, the dressing settles into the tuna and chopped vegetables, and the overall mixture looks slightly more unified and creamy. The salad should still look fresh and uncooked, but the texture becomes a bit more cohesive and spoonable as the ingredients relax together. You will notice the surface looks smoother and the flavors are better distributed from edge to edge.
- Place the lettuce leaves into a round white ceramic bowl so they form a fresh base, then spoon the rested tuna salad neatly on top. Shape it into a generous mound so the bowl looks full and tidy, with the creamy mixture sitting above the crisp lettuce. At this point, the final serving starts to take shape. The contrast between the pale creamy tuna and the bright green lettuce makes the bowl look fresh, balanced, and ready for the finishing touch.
- Scatter extra dill or celery leaves over the top of the plated tuna salad for a simple fresh finish. The final bowl should look creamy, chunky, and bright, with a clean garnish that adds color without covering up the texture of the salad. Now the dish is fully assembled and ready to serve. You can enjoy it straight from the bowl, pile it into sandwiches, or scoop it into wraps, but this final plated version is complete and ready for the table.
Notes
Pro Tips:
- Drain the tuna very well so the salad stays creamy instead of watery.
- Chop the celery, onion, and pickles finely for a better texture in every bite.
- Mix the dressing separately first so the seasonings are evenly distributed.
- Let the salad rest for a few minutes before serving so the flavors blend together.
Storage: Store creamy tuna salad in an airtight container in the fridge for up to 3 days. For the freshest texture, keep the garnish and lettuce separate until serving. Freezing is not recommended because the mayonnaise dressing can separate and turn watery after thawing. This recipe is meant to be enjoyed cold, so there is no need to reheat it, and serving it chilled keeps the texture at its best.
- Prep Time: 15 minutes
- Cook Time: 0 minute
- Category: Lunch
- Cuisine: American
Nutrition
- Serving Size: 1 serving