

I made this for the first time at a small Friendsgiving dinner when I had way too many desserts planned and barely any kitchen space left. The thing that saved me was keeping the filling simple and letting the crust bake slowly until it was just right. Since then, it’s become my favorite Friendsgiving Pie Party idea whenever I want a homemade dessert that feels special without adding extra stress.
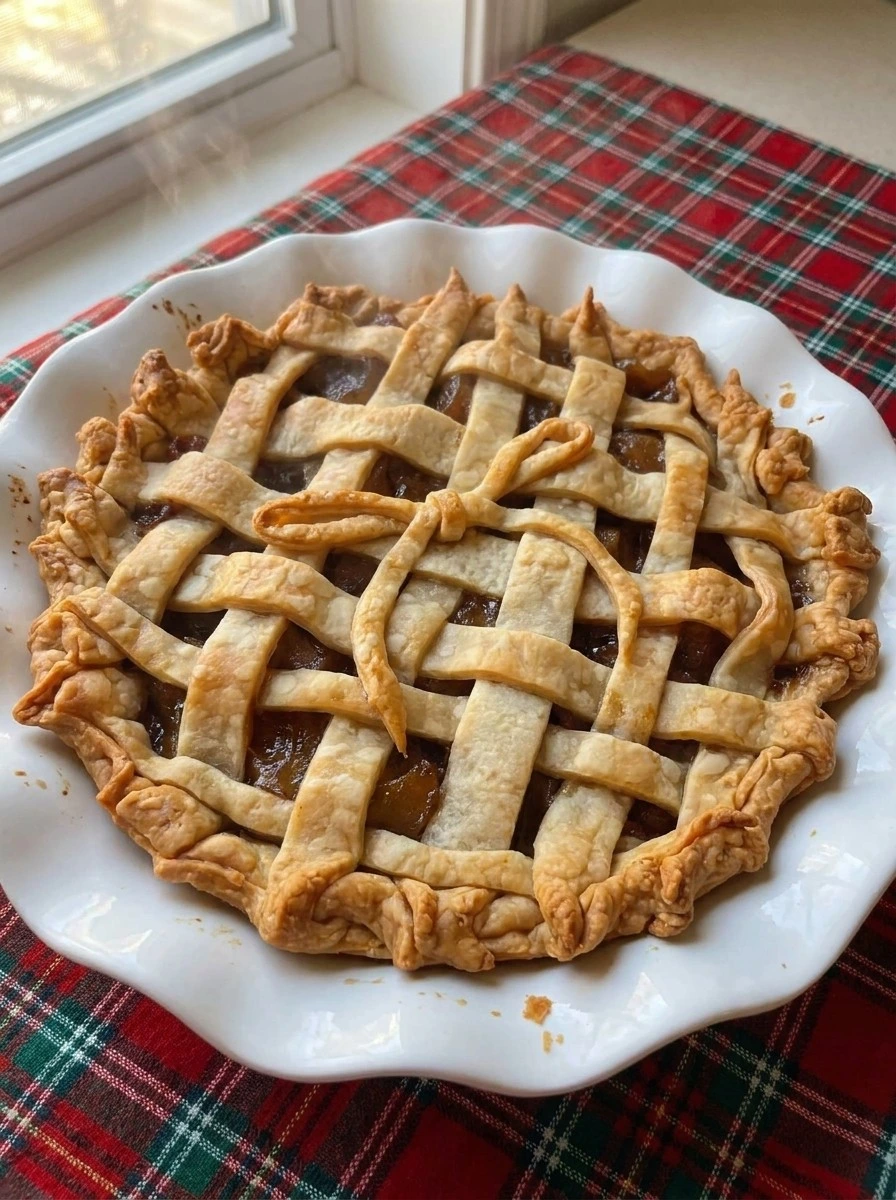
My family loves desserts that can sit right in the middle of the table and make everyone reach for a slice. I usually serve this with cozy fall favorites like Caramel Pear Crisp when we have extra guests because both desserts bring that warm, seasonal comfort. This Friendsgiving Pie Party recipe is all about flaky pastry, a rich filling, and those little homemade touches that make desserts feel memorable.
It’s not about creating a perfect bakery-style pie. It’s about making something everyone enjoys and always wants another slice of.
Ingredients
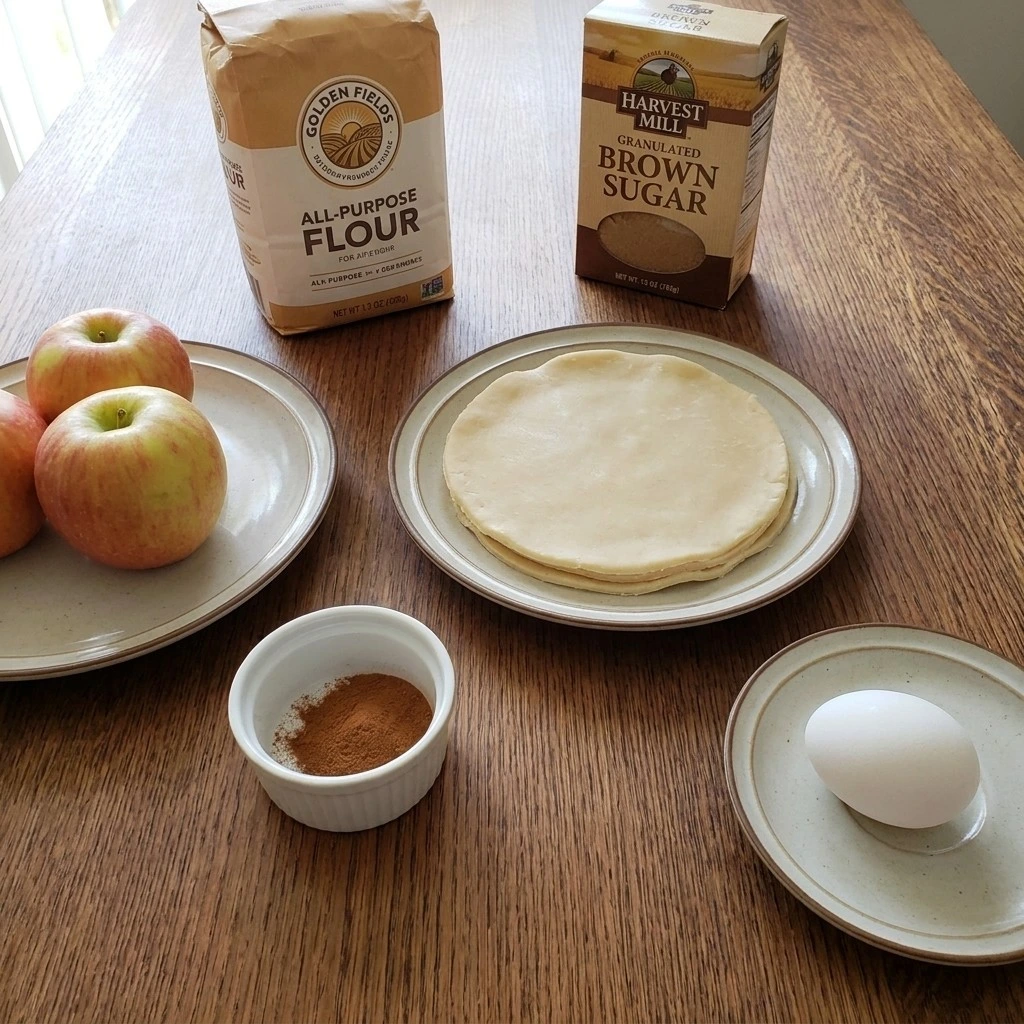
Here’s what I use for this recipe and you can always make substitutions if you prefer.
- pie crust: Prepared or homemade crust rolled thin for a flaky base and lattice top.
- apple: Sliced into uneven pieces to create texture and natural fruit layers.
- brown sugar: Adds sweetness and helps create a rich filling color.
- ground cinnamon: Adds warm spice throughout the fruit filling.
- all-purpose flour: Thickens the filling juices while baking.
- large egg: Whisked for brushing the crust with a golden finish.
- water: Mixed with egg for a lighter crust wash.
Tools You’ll Need
- 9-inch pie dish: A ceramic or glass 9-inch pie dish holds the filling evenly and prevents uneven crust baking, a shallow dish can dry the edges before the center sets.
- Large mixing bowl: A 4-quart bowl gives enough space to coat filling ingredients without spilling, a smaller bowl makes folding messy and uneven.
- Rolling pin: A smooth rolling pin helps create even dough thickness, rough shaping can cause thin spots that crack during baking.
Instructions
Step 1: Mix the pie filling
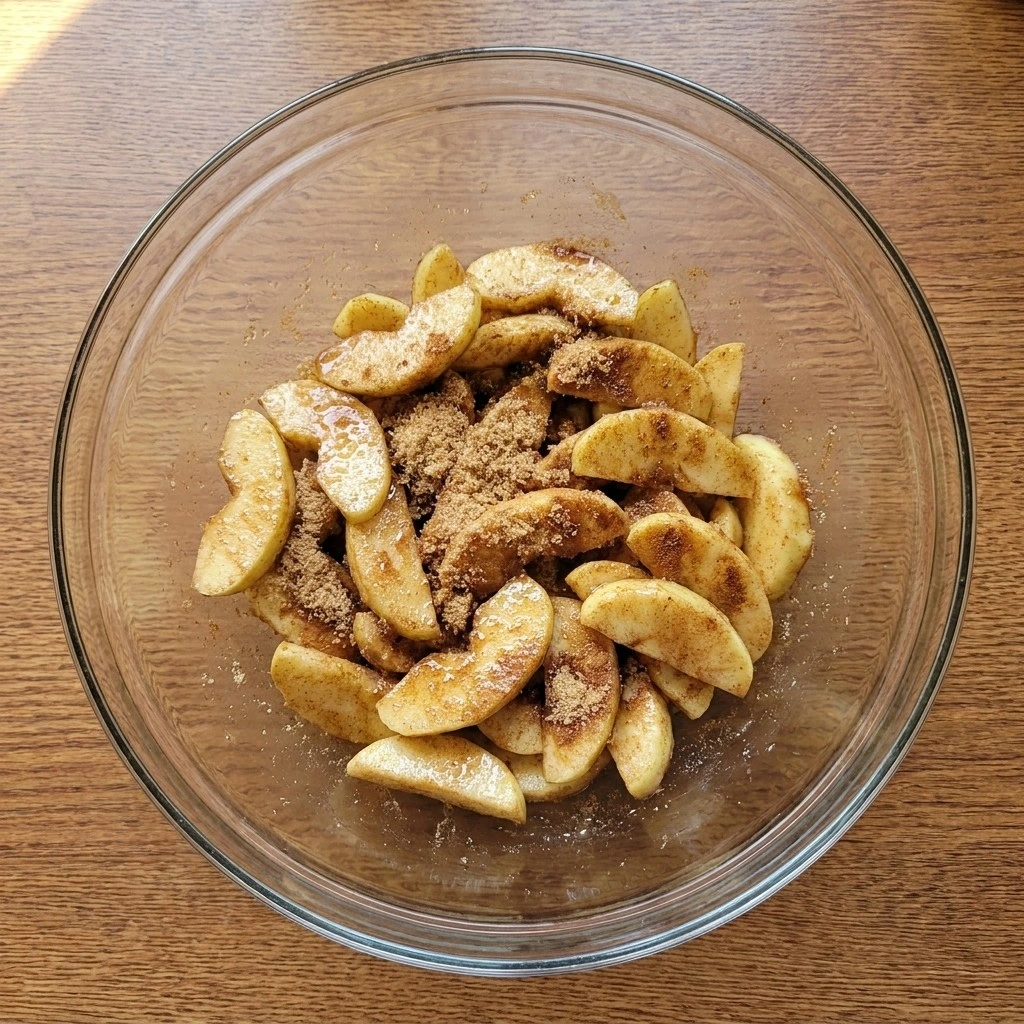
Preheat the oven to 375°F. Combine 2 cups apple slices, brown sugar, cinnamon and flour in a bowl at room temperature for 10 minutes before assembling. Fold gently with a rubber spatula using slow scooping motions until the filling coats evenly.
The mixture should look glossy and thick with sugar crystals beginning to dissolve. Then check the texture after exactly 10 minutes. You’ll see juices forming around the fruit and smell the warm cinnamon aroma.
Miss this resting window and the filling can become watery during baking. Resting 10 minutes helps the fruit release moisture before baking.
Tip: Keep the fruit pieces slightly uneven so the filling has a natural homemade texture instead of a uniform look.
Step 2: Layer the crust and filling
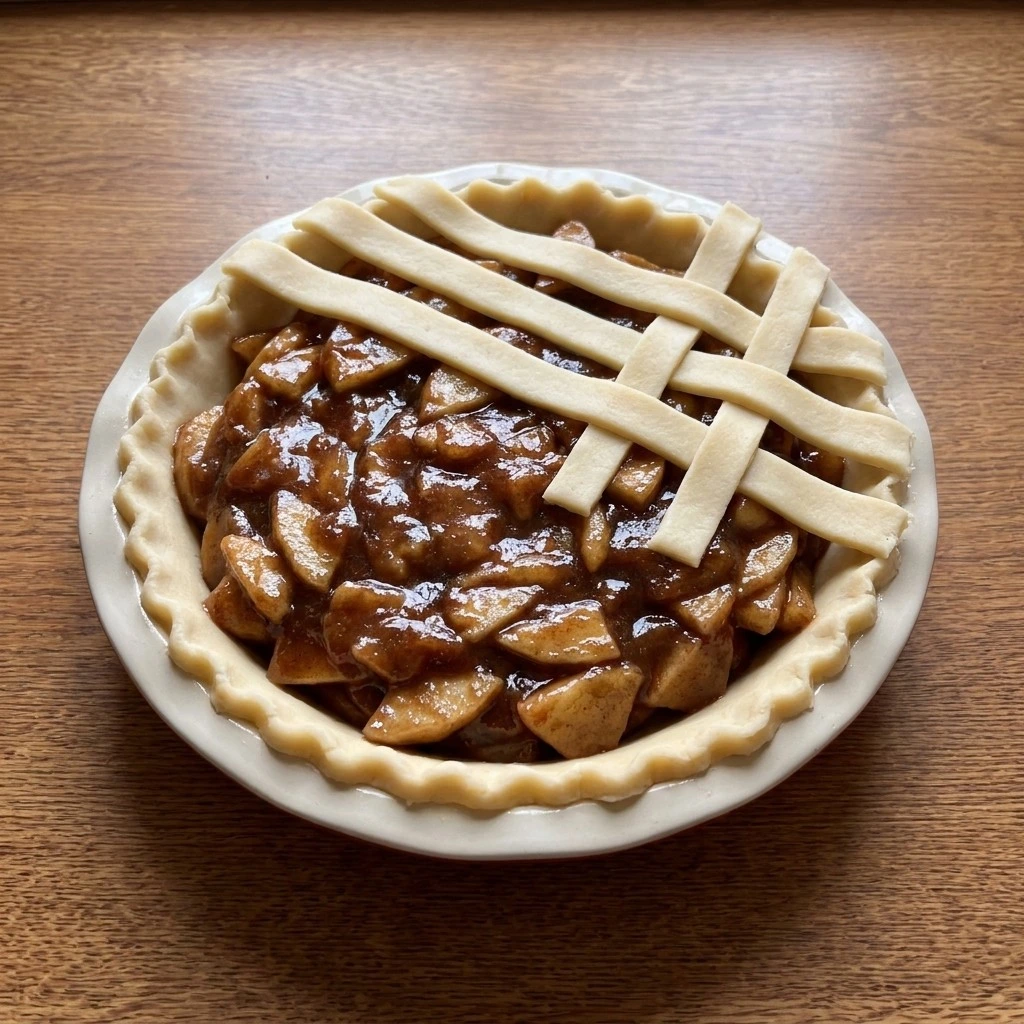
Place the prepared crust into a 9-inch pie dish and spread the filling evenly at room temperature for 8 minutes of assembly time. Press the dough gently against the edges and arrange the lattice strips with slight overlaps. (I tried making the strips perfectly even first, the pie looked less homemade.
The imperfect version always gets better reactions. ) The crust should hold its shape while the filling sits between the strips. You’ll notice the filling looks glossy and the dough feels firm but flexible.
Skip careful layering and the filling can leak through weak areas. A balanced lattice supports steam release and keeps the crust crisp.
Tip: Chill the assembled pie for 15 minutes before baking if the dough feels soft or sticky.
Step 3: Bake the assembled pie
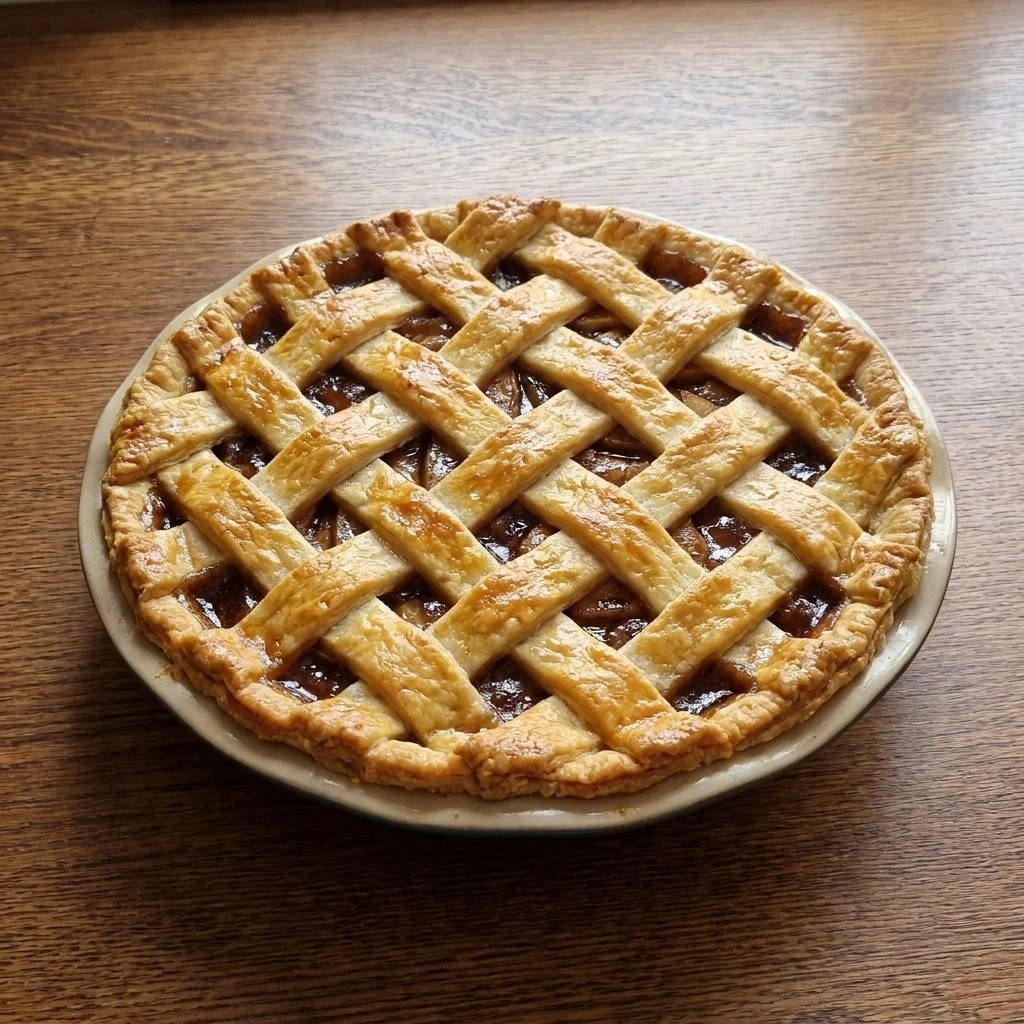
Bake the assembled pie at 375°F for 35 to 40 minutes until the crust turns golden. Rotate the dish halfway through using a careful turn at minute 20 for even color. The lattice should become crisp while the filling bubbles slowly underneath.
Watch for deep golden edges and small bubbling pockets in the center. You’ll smell the baked fruit and butter when it reaches the right stage. Go past 40 minutes and the crust edges may darken before the filling sets.
Bake at 375°F until golden, steady heat sets the filling without burning sugar.
Tip: Place foil loosely over darker crust edges after 25 minutes if they brown faster than the center.
Step 4: Cool and serve the pie
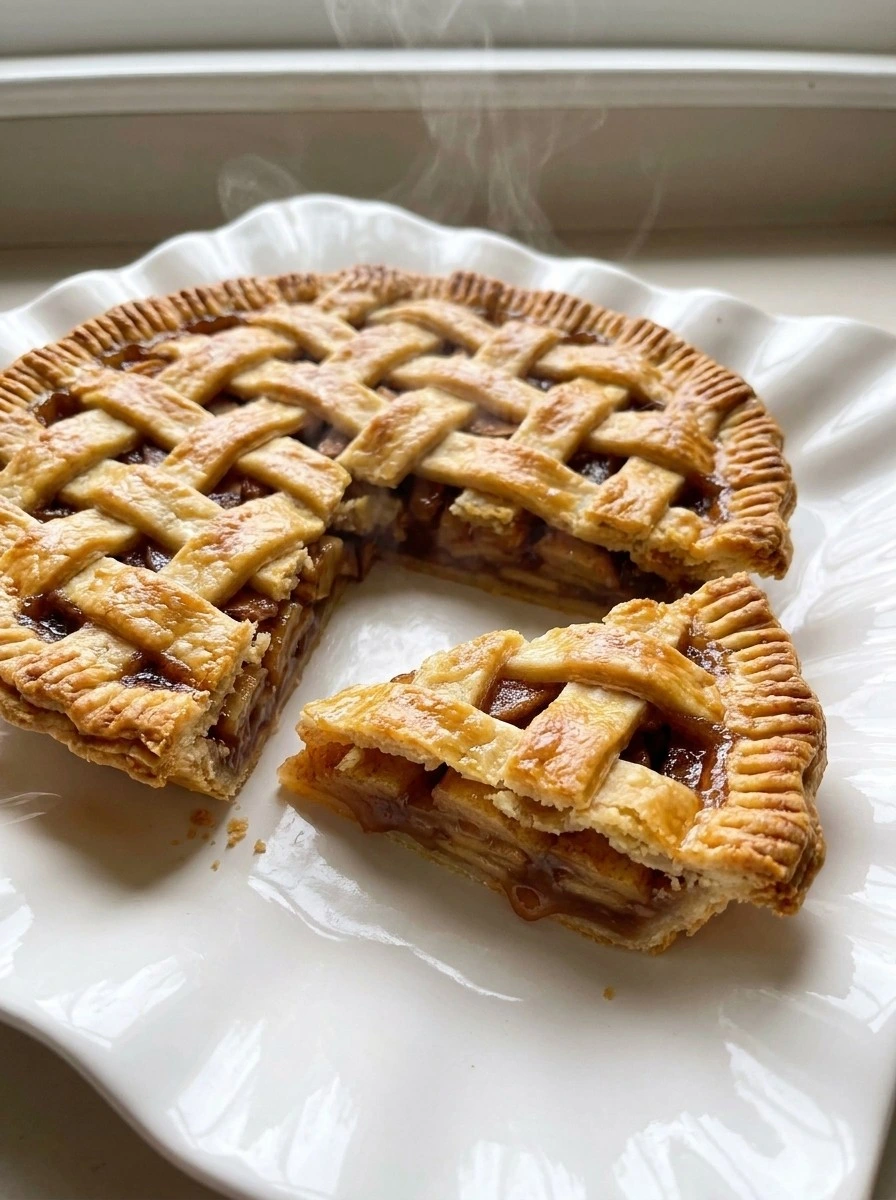
Cool the baked pie at room temperature for 2 hours before slicing. Use a gentle downward motion when cutting and let each slice rest for 5 minutes on the plate. The filling should stay together while the crust keeps its flaky layers.
You’ll see a firm center with glossy fruit pockets and hear a light crust crackle when slicing. (My first test cut too early and the filling spread across the plate. Waiting changed everything.
) Cooling 2 hours allows the filling structure to stabilize.
Tip: Serve slices slightly warm after resting because the texture stays soft without becoming runny.
Pro Tips
- Choose firm apples like Honeycrisp or Granny Smith because they hold their shape after 375°F baking for 35 to 40 minutes.
- Rest the assembled pie in the refrigerator for 15 minutes before baking so the crust keeps sharper lattice edges.
- Brush the crust wash in a thin layer using 1 large egg because heavy coating can create dark patches before the center browns.
- Bake the pie on the lower oven rack for the first 25 minutes because direct heat helps the bottom crust become crisp instead of soggy.
- Let the pie cool for at least 2 hours before slicing because the filling thickens as it rests and holds cleaner pieces.
- Add 1 cup of chopped pecans and 1 teaspoon of vanilla extract to create a richer nutty holiday pie variation.
- Replace half the apples with fresh cranberries for a tart Friendsgiving version with bright color and sharper flavor.
- Mix 1 teaspoon of pumpkin spice with the cinnamon for a warmer autumn-inspired filling that pairs well with whipped cream.
- Make mini pies by dividing the filling into 6-inch pie dishes and reducing the baking time to about 25 minutes at 375°F.
Storage Instructions
Keep the baked Friendsgiving Pie Party in an airtight container at room temperature for 2 days or refrigerate it for up to 4 days. You can freeze the whole pie or individual slices for up to 3 months.
Wrap each piece tightly with plastic wrap and foil before freezing to prevent freezer odors. Reheat slices at 325°F for 10 to 15 minutes until the crust feels crisp again.
Add a fresh spoonful of whipped cream after warming for a softer contrast. Discard the pie if you notice mold, sour smells, or a watery filling texture after storage.
Print
Friendsgiving Pie Party
- Total Time: 45 minutes
- Yield: 4 servings 1x
Description
This easy Friendsgiving Pie Party recipe brings together a quick and simple homemade pie idea for any holiday gathering. It’s one of the best healthy-ish dessert choices when you want a balanced sweet finish with a flaky crust and rich filling. The secret is a slow bake that keeps the center smooth while the top turns golden. Perfect for a holiday, potluck, brunch or party where guests love the warm smell and buttery texture.
Ingredients
- 2 rounds pie crust
- 6 medium apple
- 3/4 cup brown sugar
- 2 teaspoons ground cinnamon
- 3 tablespoons all-purpose flour
- 1 large egg
- 1 tablespoon water
Instructions
- Preheat the oven to 375°F. Combine 2 cups apple slices, brown sugar, cinnamon and flour in a bowl at room temperature for 10 minutes before assembling. Fold gently with a rubber spatula using slow scooping motions until the filling coats evenly. The mixture should look glossy and thick with sugar crystals beginning to dissolve. Then check the texture after exactly 10 minutes. You’ll see juices forming around the fruit and smell the warm cinnamon aroma. Miss this resting window and the filling can become watery during baking. Resting 10 minutes helps the fruit release moisture before baking.
- Place the prepared crust into a 9-inch pie dish and spread the filling evenly at room temperature for 8 minutes of assembly time. Press the dough gently against the edges and arrange the lattice strips with slight overlaps. (I tried making the strips perfectly even first, the pie looked less homemade. The imperfect version always gets better reactions.) The crust should hold its shape while the filling sits between the strips. You’ll notice the filling looks glossy and the dough feels firm but flexible. Skip careful layering and the filling can leak through weak areas. A balanced lattice supports steam release and keeps the crust crisp.
- Bake the assembled pie at 375°F for 35 to 40 minutes until the crust turns golden. Rotate the dish halfway through using a careful turn at minute 20 for even color. The lattice should become crisp while the filling bubbles slowly underneath. Watch for deep golden edges and small bubbling pockets in the center. You’ll smell the baked fruit and butter when it reaches the right stage. Go past 40 minutes and the crust edges may darken before the filling sets. Bake at 375°F until golden, steady heat sets the filling without burning sugar.
- Cool the baked pie at room temperature for 2 hours before slicing. Use a gentle downward motion when cutting and let each slice rest for 5 minutes on the plate. The filling should stay together while the crust keeps its flaky layers. You’ll see a firm center with glossy fruit pockets and hear a light crust crackle when slicing. (My first test cut too early and the filling spread across the plate. Waiting changed everything.) Cooling 2 hours allows the filling structure to stabilize.
Notes
Pro Tips:
- Choose firm apples like Honeycrisp or Granny Smith because they hold their shape after 375°F baking for 35 to 40 minutes.
- Rest the assembled pie in the refrigerator for 15 minutes before baking so the crust keeps sharper lattice edges.
- Brush the crust wash in a thin layer using 1 large egg because heavy coating can create dark patches before the center browns.
- Bake the pie on the lower oven rack for the first 25 minutes because direct heat helps the bottom crust become crisp instead of soggy.
- Let the pie cool for at least 2 hours before slicing because the filling thickens as it rests and holds cleaner pieces.
Storage: Keep the baked Friendsgiving Pie Party in an airtight container at room temperature for 2 days or refrigerate it for up to 4 days. You can freeze the whole pie or individual slices for up to 3 months. Wrap each piece tightly with plastic wrap and foil before freezing to prevent freezer odors. Reheat slices at 325°F for 10 to 15 minutes until the crust feels crisp again. Add a fresh spoonful of whipped cream after warming for a softer contrast. Discard the pie if you notice mold, sour smells, or a watery filling texture after storage.
- Prep Time: 15 minutes
- Cook Time: 30 minutes
- Category: Dessert
- Cuisine: American
Nutrition
- Serving Size: 426g
- Calories: 768
- Sugar: 77g
- Sodium: 388mg
- Fat: 24g
- Carbohydrates: 138g
- Fiber: 11g
- Cholesterol: 47mg
Frequently Asked Questions
Yes, you can assemble the pie up to 24 hours before baking. Keep it covered in the refrigerator and bake it directly from cold, adding about 5 extra minutes if the crust needs more color.
Store the baked pie in an airtight container at room temperature for 2 days or refrigerate it for up to 4 days. Cover the cut side tightly because exposed filling can dry out and lose its soft texture.
Watery filling usually happens when the apples release too much moisture or the pie is sliced before cooling. Let the filling rest with sugar for 10 minutes before baking and wait 2 hours after baking for the best set.
Yes, make two separate 9-inch pies instead of one oversized pie. Baking two pies keeps the crust-to-filling ratio balanced and allows each pie to bake evenly at 375°F.
Freeze the fully baked pie for up to 3 months by wrapping it tightly in plastic wrap and foil. Thaw it overnight in the refrigerator, then warm slices at 325°F for 10 to 15 minutes.
Serve each slice with whipped cream or vanilla ice cream after the pie cools for at least 2 hours. The creamy topping balances the warm cinnamon filling and flaky crust texture.
Final Thoughts
If you make this on a relaxed weekend afternoon with some music playing, just like I usually do, you’ll see why this Friendsgiving Pie Party has become a favorite in my house. The little tip I shared about letting the filling rest before baking really makes a difference.
It takes the pie from just okay to something everyone loves. Tag me when you make it because I’d love to see your homemade version.
My family always says this Friendsgiving Pie Party dessert disappears way faster than they expect, and honestly, it happens every single time.