This Classic Rice Krispie Treats recipe is packed with flavor and so easy to make. It is a budget friendly recipe that you can make in 15 minutes or less! Make this sweet and gooey treat for dessert today.
If you love nostalgic treats then you are going to love this Classic Rice Krispie Treats recipe. It is a simple homemade dessert that is chewy and buttery and hard to stop eating. With a warm marshmallow coating like this then you are going to want every last sticky bite.
If you are looking for other sweet and simple recipes like my Classic Rice Krispie Treats then why not also try marshmallow popcorn bars or no bake peanut butter cereal bars. Both of these recipes come together fast and that makes them perfect for a quick party treat.
Ingredients
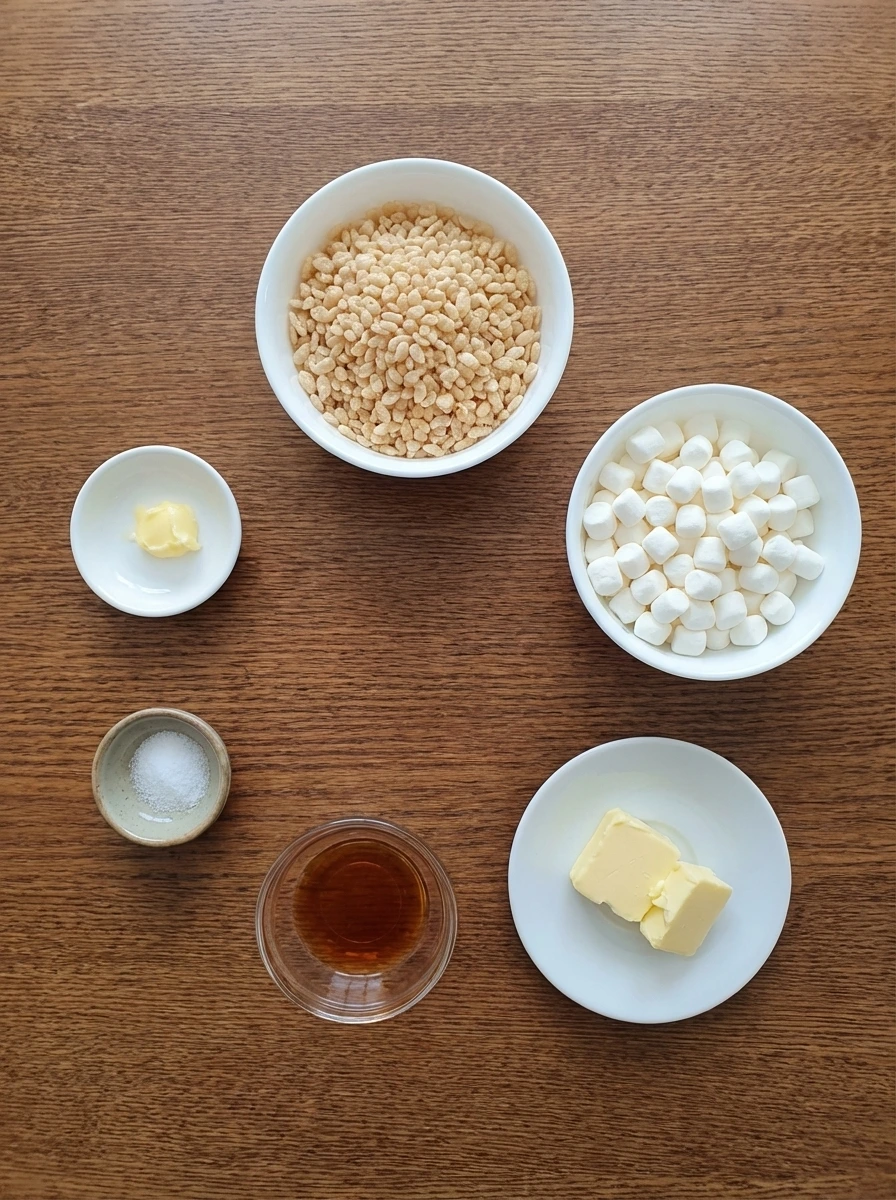
Here’s what I use for this recipe and you can always make substitutions if you prefer.
- Rice Krispies cereal: Provides the crisp structure and light crunch in every bar.
- Mini marshmallows: Melts into the sticky sweet binder that holds the cereal together.
- Unsalted butter: Adds rich flavor and helps the marshmallows melt smoothly.
- Vanilla extract: Rounds out the sweetness with warm bakery flavor.
- Fine salt: Balances the sweetness and sharpens the butter flavor.
- Extra butter for dish: Keeps the treats from sticking during shaping and cooling.
Tools You’ll Need
- Saucepan: Melts the butter and marshmallows into a smooth sticky base.
- Glass or ceramic baking dish: Holds the mixture in an even layer for cooling and cutting.
- Knife: Cuts the cooled slab into thick homemade bars.
Instructions
Step 1: Melt the butter with marshmallows

Butter and marshmallows turn from separate pieces into a soft glossy mass with streaks of yellow butter still peeking through and then fading as everything loosens together. The marshmallows look puffy at first and then they slump and stretch into a smooth sticky base with a faint cream color. Vanilla and salt blend into the warm mixture and the surface becomes shinier and more unified. A few tiny unmelted marshmallow bumps are fine here because they make the finished treats look homemade.
Tip: Stop as soon as the marshmallows melt so the mixture stays soft and easy to coat.
Step 2: Fold in the cereal

The cereal changes from dry and airy into a coated mixture as the marshmallow base clings to every piece. Some cereal still shows more clearly at the edges while the center looks heavier and stickier and that uneven coating gives the batch a natural homemade feel. As everything comes together the color shifts to a warmer cream tone with bright cereal pockets still visible. The mixture looks shaggy and irregular rather than perfectly smooth and that is exactly right.
Tip: Fold just until coated so the cereal keeps its crunch.
Step 3: Press the mixture into the baking dish
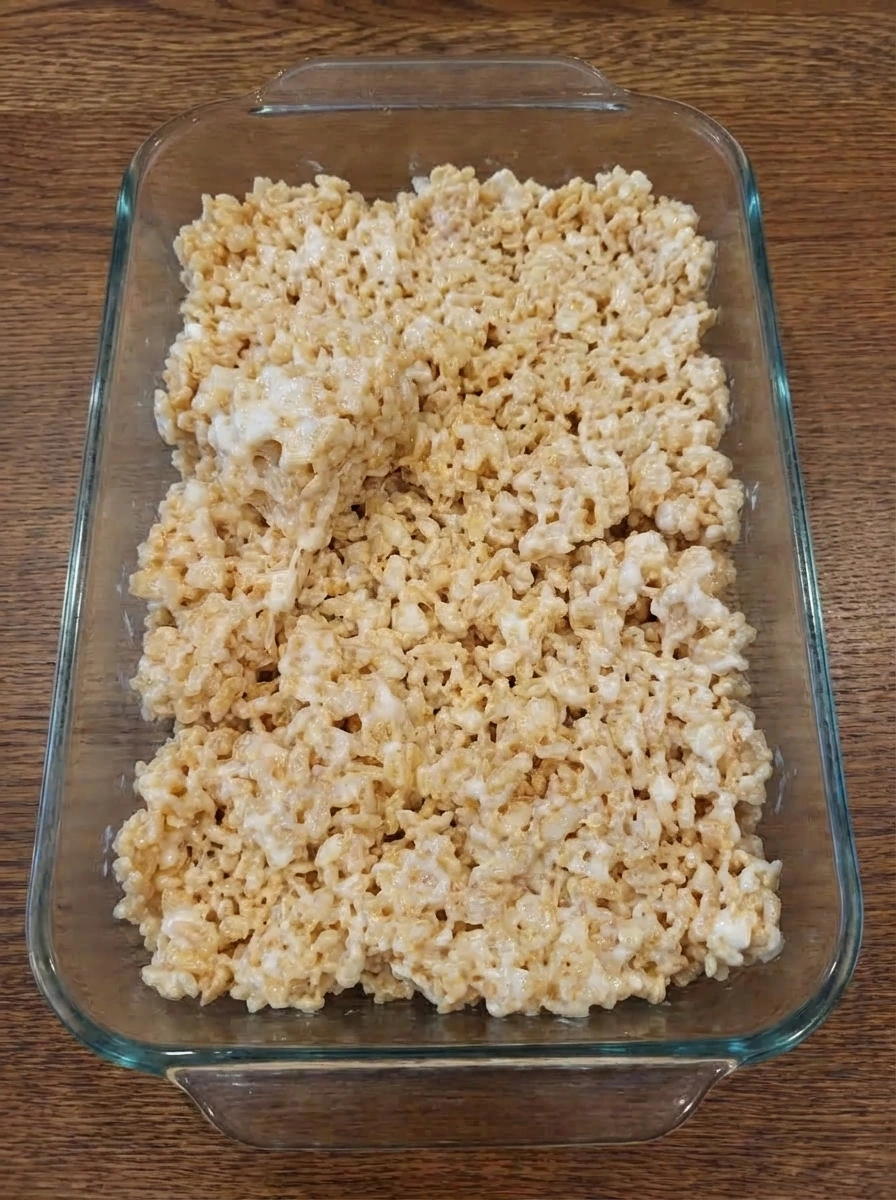
The sticky cereal mixture moves from loose mounds into one thick layer with shallow dimples and uneven edges. It spreads across the dish in a casual way with slight peaks and low spots instead of a flat compact sheet. As the top is gently pressed the surface becomes more connected while still showing natural spacing and overlapping cereal pieces. You want it snug enough to hold together and still light enough to stay chewy.
Tip: Press lightly so the bars do not turn dense and hard.
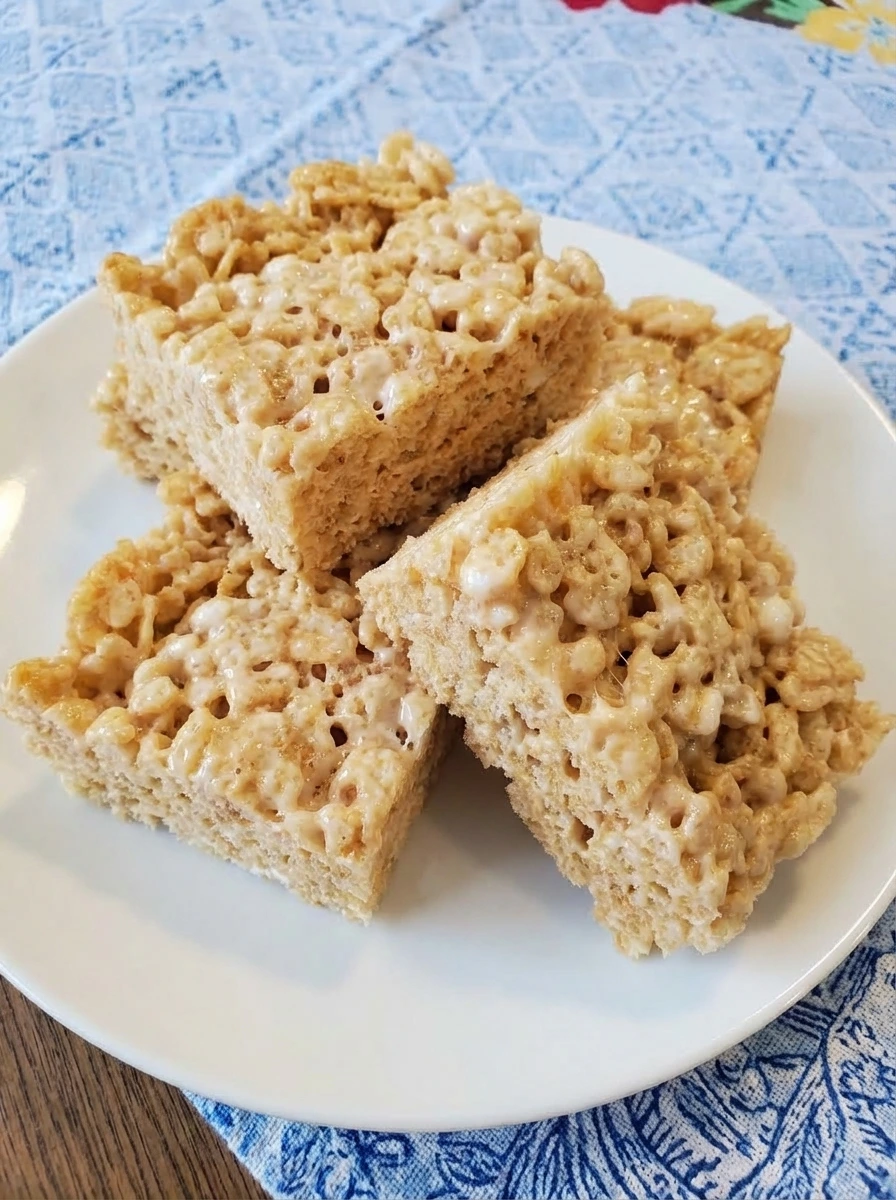
Step 4: Cut and serve the bars
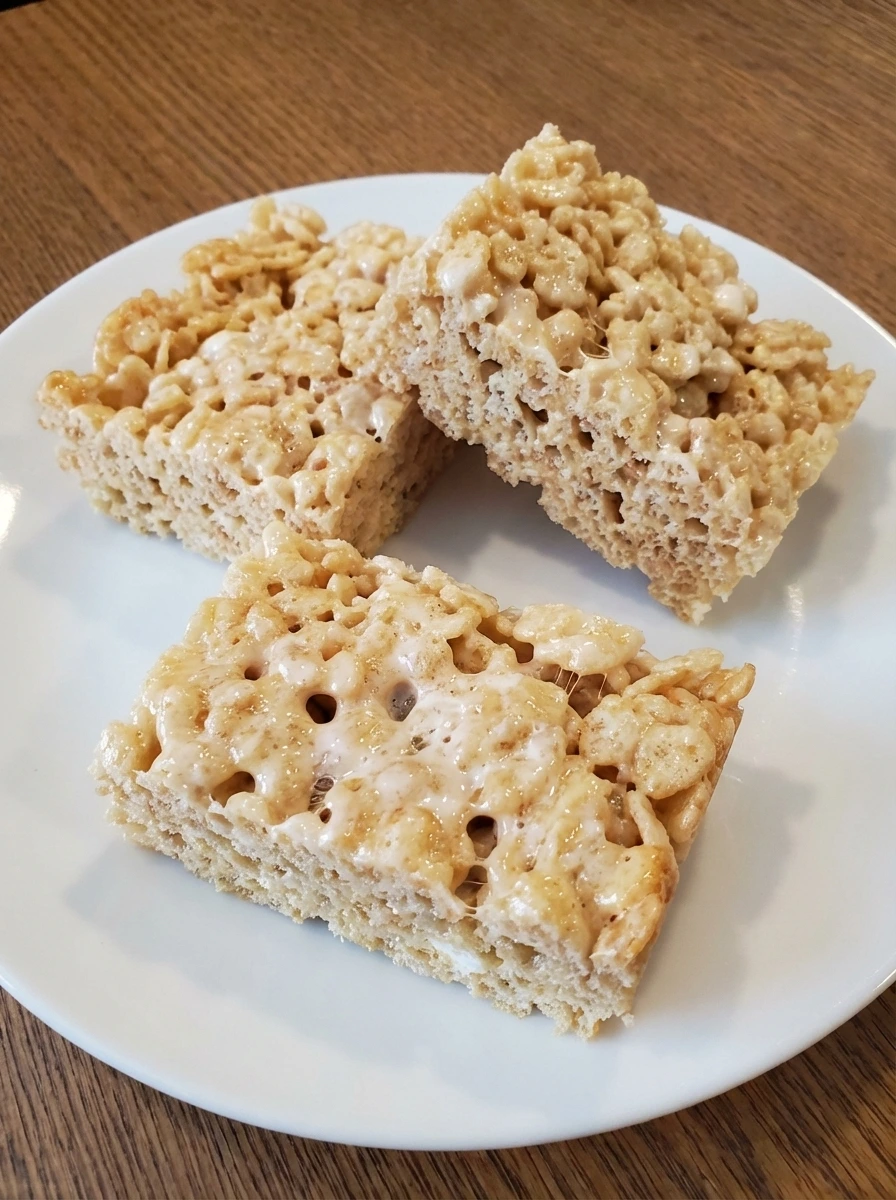
Once cooled the slab turns into thick bars with rough cut lines and visible marshmallow threads at the edges. The top looks lightly glossy while the inside shows a chewy packed texture with tiny gaps between cereal pieces and a few golden spots from the warm marshmallow base. On the plate the bars sit with slight overlap and uneven corners and that homemade look is part of the charm. The final texture is crisp at the edges and soft in the middle with no perfectly identical squares.
Tip: Let the slab cool fully before cutting for cleaner bars with soft centers.
Pro Tips
- Use fresh marshmallows for the softest pull and best texture.
- Grease the dish lightly so the slab lifts out easily.
- Do not overpack the mixture or the bars will lose their chew.
- Let the treats cool just until set so the centers stay tender.
Storage Instructions
Keep the bars in a tightly covered container at room temperature and place small sheets of parchment between layers if you stack them. They stay chewy best when they are kept away from heat and direct sun. For longer storage wrap individual bars and freeze them. Let them sit at room temperature until soft again before serving.
Frequently Asked Questions
Yes and they will work well although they may take a little longer to melt into a smooth mixture.
They usually turn hard when the marshmallows are overheated or when the cereal mixture is pressed too firmly into the dish.
Yes although it is best to wait until the mixture cools slightly so the add ins keep their shape instead of melting away.
They are best within two days and stay soft when stored tightly covered at room temperature.
Final Thoughts
If you try this recipe then I really hope you love it as much as my family does. It has become one of those treats we just keep coming back to no matter the season.
Drop a comment below and let me know how yours turned out. And if you are looking for more easy dessert ideas then make sure to bookmark this page.
I am always adding new recipes that are simple and satisfying and perfect for busy days.
Print
Classic Rice Krispie Treats
- Total Time: 15 minutes
- Yield: 12 servings 1x
Description
These Classic Rice Krispie Treats are the best easy dessert when you need quick and simple ideas that still feel fun and homemade. The buttery marshmallow coating turns crisp cereal into thick chewy bars with a soft pull and light crunch. They are a healthy feeling treat for sharing at a holiday or potluck or party because the method is fast and the ingredients are familiar and budget friendly and the results stay crowd pleasing every time.
Ingredients
- 6 cups Rice Krispies cereal
- 10 ounces Mini marshmallows
- 4 tablespoons Unsalted butter
- 1 teaspoon Vanilla extract
- 1 pinch Fine salt
- 1 teaspoon Extra butter for dish
Instructions
- Butter and marshmallows turn from separate pieces into a soft glossy mass with streaks of yellow butter still peeking through and then fading as everything loosens together. The marshmallows look puffy at first and then they slump and stretch into a smooth sticky base with a faint cream color. Vanilla and salt blend into the warm mixture and the surface becomes shinier and more unified. A few tiny unmelted marshmallow bumps are fine here because they make the finished treats look homemade.
- The cereal changes from dry and airy into a coated mixture as the marshmallow base clings to every piece. Some cereal still shows more clearly at the edges while the center looks heavier and stickier and that uneven coating gives the batch a natural homemade feel. As everything comes together the color shifts to a warmer cream tone with bright cereal pockets still visible. The mixture looks shaggy and irregular rather than perfectly smooth and that is exactly right.
- The sticky cereal mixture moves from loose mounds into one thick layer with shallow dimples and uneven edges. It spreads across the dish in a casual way with slight peaks and low spots instead of a flat compact sheet. As the top is gently pressed the surface becomes more connected while still showing natural spacing and overlapping cereal pieces. You want it snug enough to hold together and still light enough to stay chewy.
- Once cooled the slab turns into thick bars with rough cut lines and visible marshmallow threads at the edges. The top looks lightly glossy while the inside shows a chewy packed texture with tiny gaps between cereal pieces and a few golden spots from the warm marshmallow base. On the plate the bars sit with slight overlap and uneven corners and that homemade look is part of the charm. The final texture is crisp at the edges and soft in the middle with no perfectly identical squares.
Notes
Pro Tips:
- Use fresh marshmallows for the softest pull and best texture.
- Grease the dish lightly so the slab lifts out easily.
- Do not overpack the mixture or the bars will lose their chew.
- Let the treats cool just until set so the centers stay tender.
Storage: Keep the bars in a tightly covered container at room temperature and place small sheets of parchment between layers if you stack them. They stay chewy best when they are kept away from heat and direct sun. For longer storage wrap individual bars and freeze them. Let them sit at room temperature until soft again before serving.
- Prep Time: 10 minutes
- Cook Time: 5 minutes
- Category: Dessert
- Cuisine: American