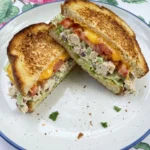
This Crispy Grilled Cheese Sandwich recipe is an easy comforting lunch that comes together so quickly with buttery bread! With crisp golden edges and a gooey melted center and a simple seasoned spread.

We love cool days because it means that easy meals like this Crispy Grilled Cheese Sandwich are back on the table. Comfort foods especially those that are healthy and nourish our bodies are my favorite kinds of meals.
Ingredients
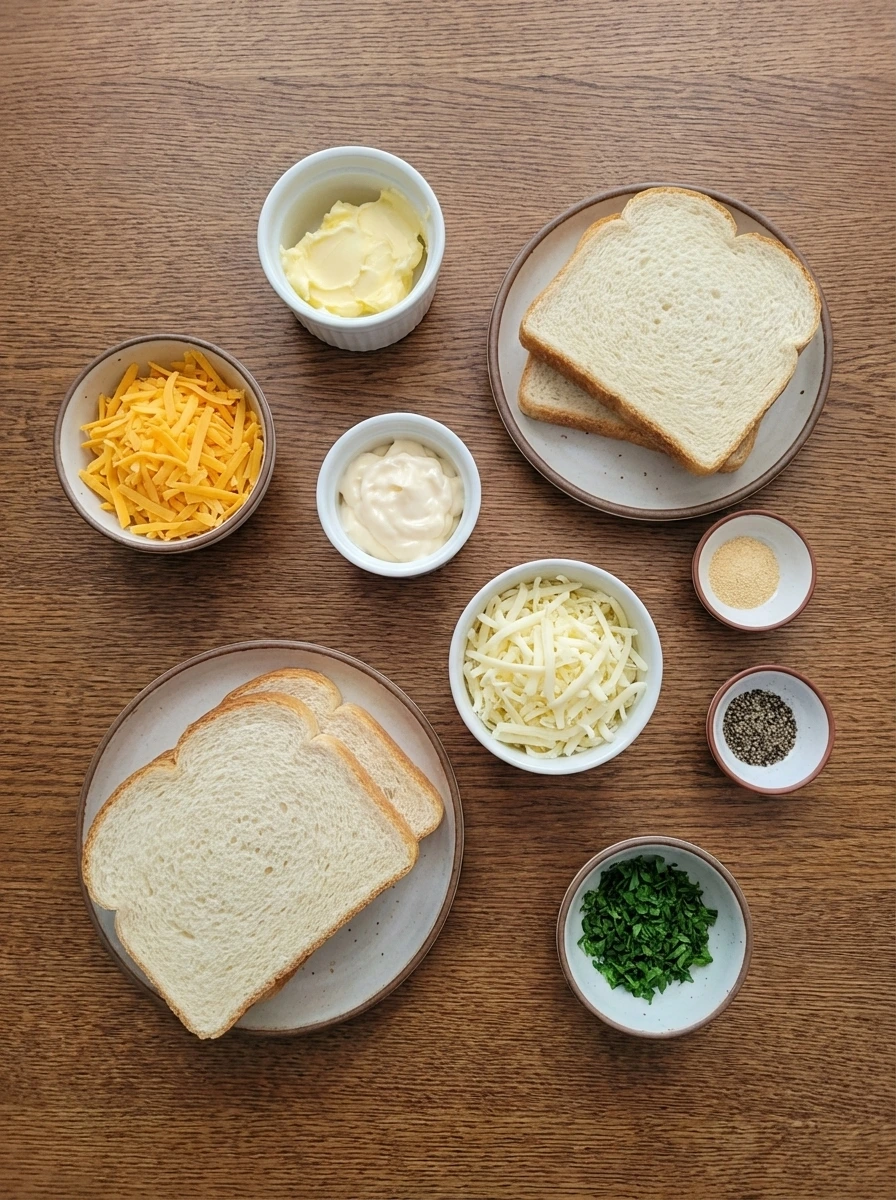
Here’s what I use for this recipe and you can always make substitutions if you prefer.
- sandwich bread: forms the crisp outer layers
- sharp cheddar cheese: adds bold flavor and rich melt
- low moisture mozzarella cheese: adds stretchy gooey texture
- unsalted butter: helps the bread turn golden and crisp
- mayonnaise: adds extra browning and crunch to the spread
- garlic powder: gently seasons the outside
- black pepper: adds light warmth
- chopped parsley: fresh garnish for the plated sandwiches
Tools You’ll Need
- mixing bowl: for combining the cheese or the spread
- small ramekin: for the seasoned butter mixture
- knife: for slicing cheese and cutting the sandwiches
- spatula: for turning the sandwiches gently
- skillet: for browning the sandwiches until crisp
Instructions
Step 1: Slice and measure the cheese
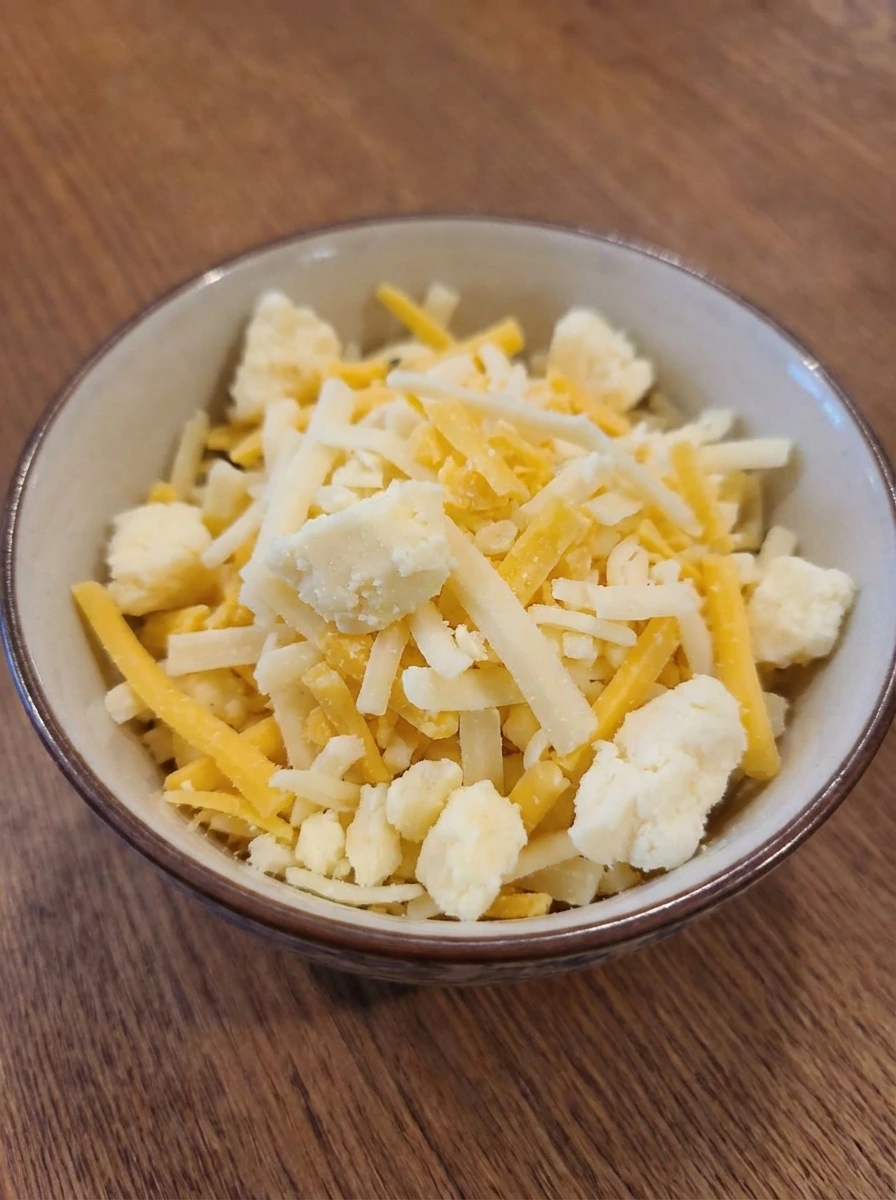
Cut or shred the cheddar and mozzarella into loose uneven pieces and measure them into one bowl. The cheese should look fluffy and varied instead of perfectly uniform so it melts in natural patches later.
Tip: A mix of smaller shreds and a few larger pieces gives the center a more homemade melt.
Step 2: Mix the seasoned spread
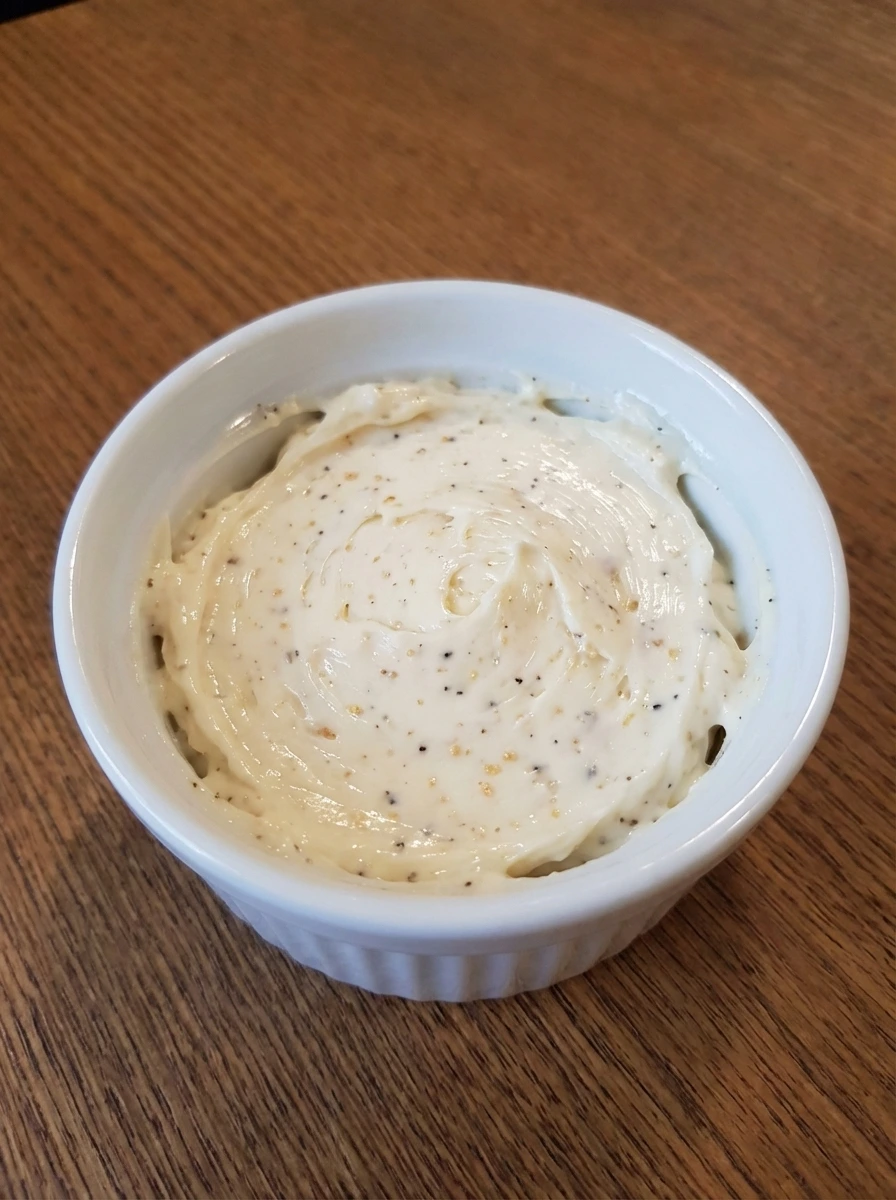
Add the softened butter and mayonnaise to a small bowl then sprinkle in the garlic powder and black pepper. Stir until the mixture looks creamy and lightly speckled with seasoning with soft streaks still visible as it comes together.
Tip: Do not overmix until perfectly smooth because a few soft streaks help the spread look natural.
Step 3: Coat the bread slices

Lay out the bread slices and spread the seasoned mixture over one side of each slice. The coating should be uneven in a realistic way with soft edges and a few thinner spots rather than perfect coverage.
Tip: Spread all the way near the edges so the crust browns well while still keeping the layer thin.
Step 4: Assemble the sandwiches
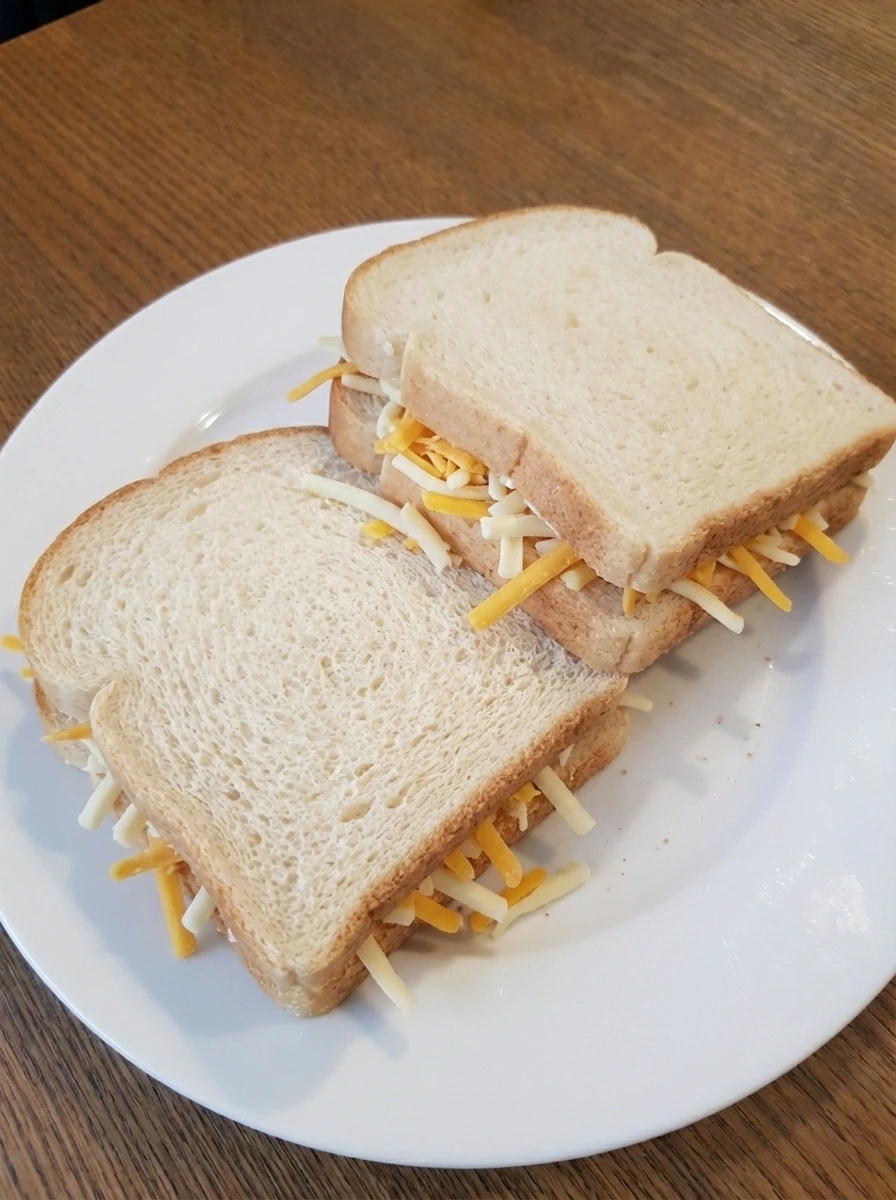
Turn the coated bread so the plain sides face up then scatter the cheddar and mozzarella over four slices. The cheese should be loosely layered with small gaps and slight mounds then top with the remaining bread so the sandwiches look full but not perfectly even.
Tip: Let a few cheese shreds sit closer to the edges for crisp cheesy spots after cooking.
Step 5: Arrange and begin the first side
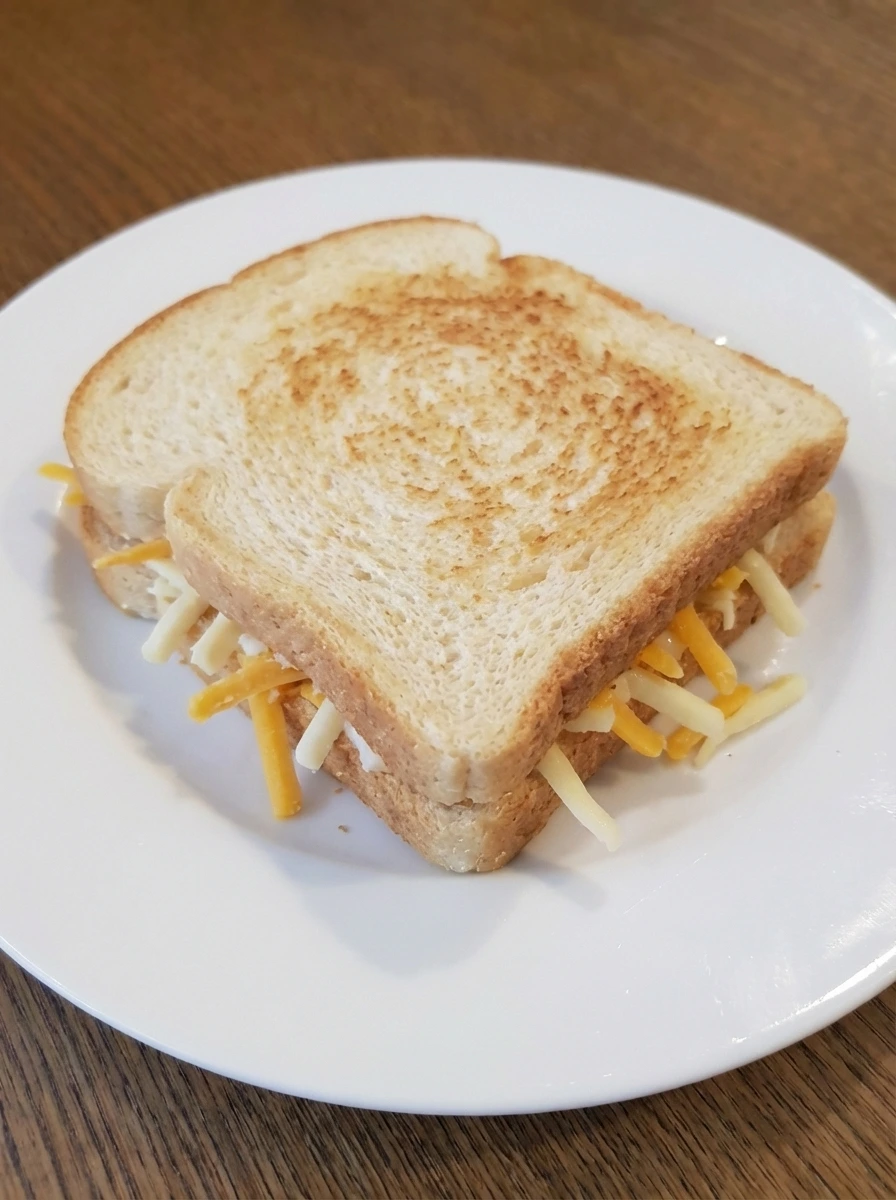
Place the sandwiches so the coated sides begin to soften against the heat. The bread will first look pale and buttery then gradually take on patchy light gold areas while the cheese inside starts to relax and settle.
Tip: Press very lightly so the bread makes full contact while still keeping the sandwich thick.
Step 6: Brown the first side fully
Continue until the underside becomes a deeper golden brown with a few darker edges and a crisp surface. The filling will look slightly compressed and some cheese may begin to melt unevenly toward the seam.
Tip: Look for color variation instead of one flat shade because that is where the best crisp texture comes from.
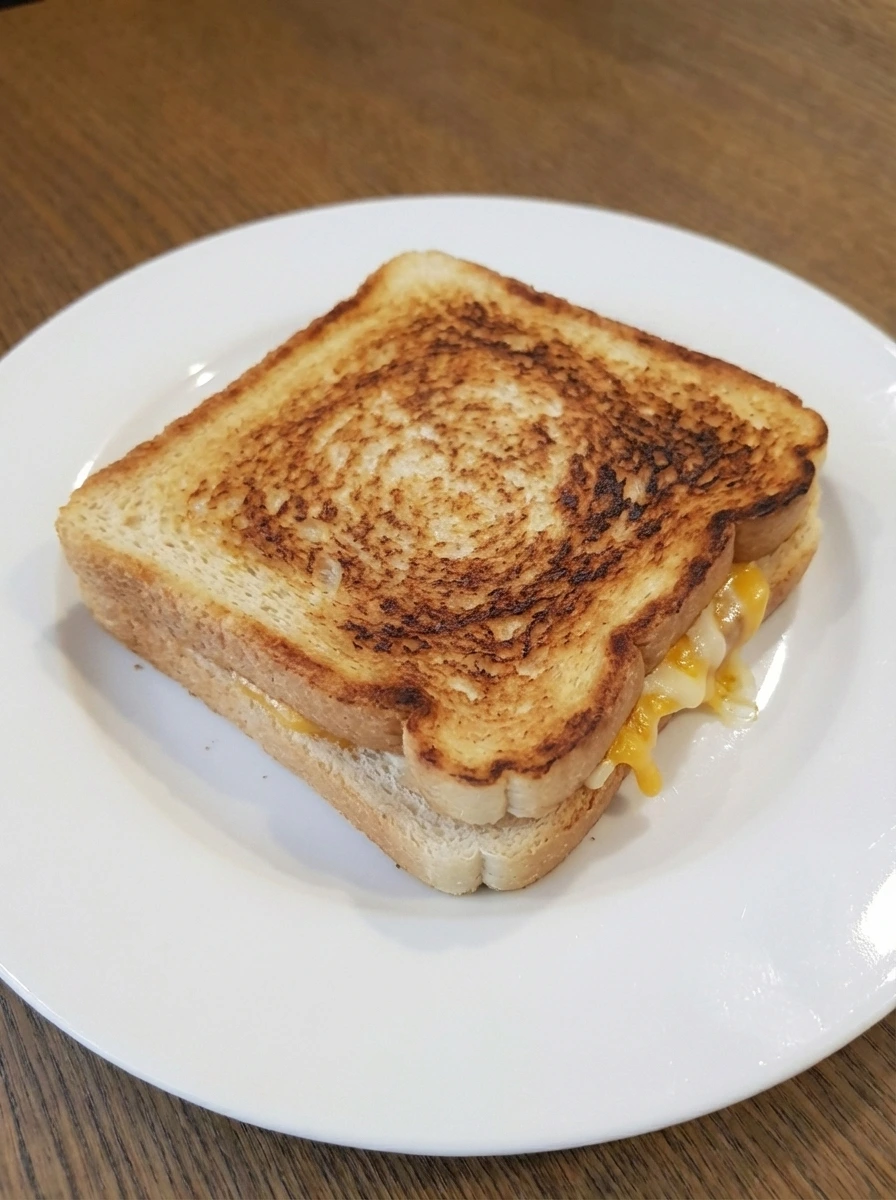
Step 7: Flip and melt the center
Turn the sandwiches and let the second side brown while the cheese melts further. The bread should become evenly crisp with natural irregular browning and the center should turn gooey with cheddar and mozzarella melting in uneven ribbons.
Tip: A gentle press after flipping helps the filling melt into the corners without squeezing it all out.
Step 8: Rest slice and plate
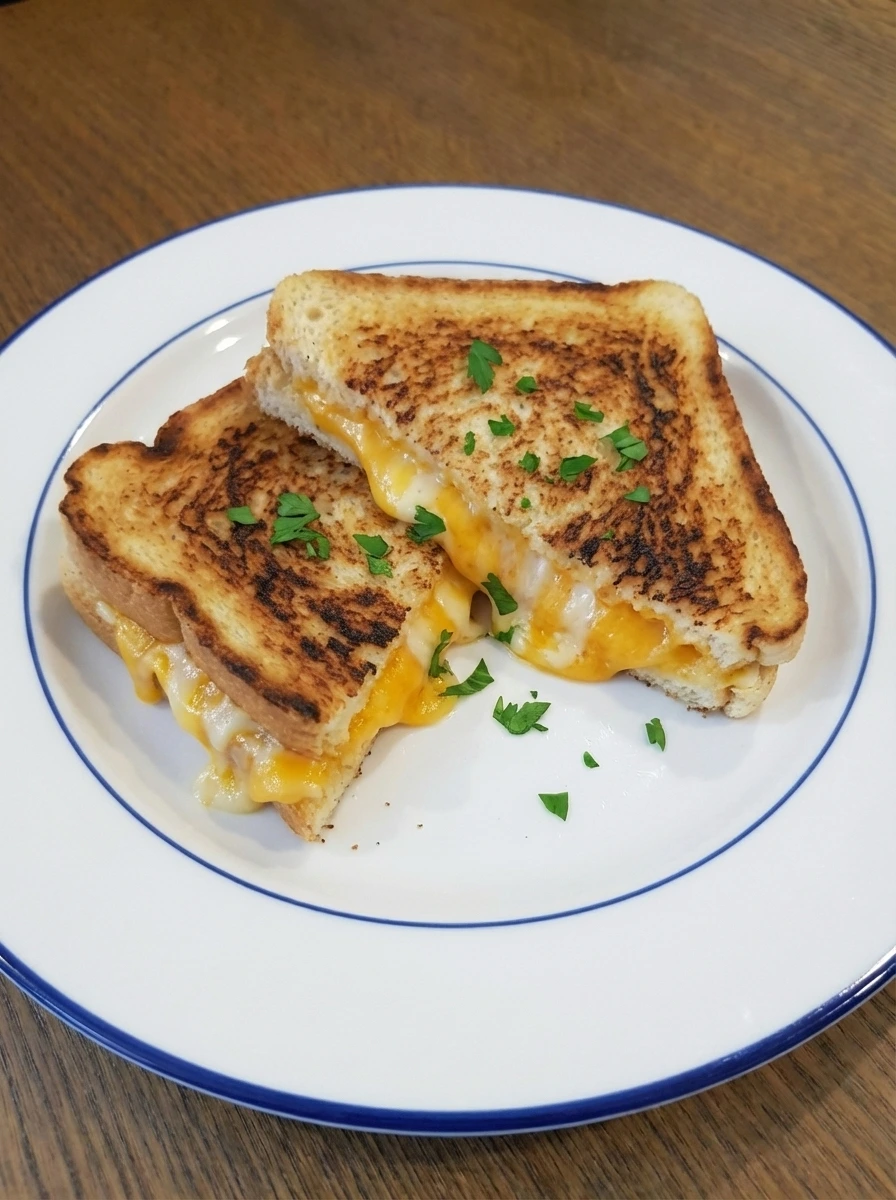
Let the sandwiches rest briefly so the melted cheese thickens just enough to hold while still staying soft and stretchy. Slice each sandwich into uneven halves then plate them with slight overlap and finish with a loose scatter of chopped parsley. The final dish should look fully cooked and ready to serve with crisp golden bread and irregular melted cheese showing at the edges. The color should be warm and appetizing with natural homemade variation across each piece.
Tip: A short rest keeps the filling luscious instead of running out too fast when sliced.
Pro Tips
- Use two cheeses so the flavor stays rich while the melt stays stretchy.
- Spread the outside thinly so the bread crisps instead of turning greasy.
- Layer the cheese loosely so it melts in irregular pockets rather than one dense block.
- Rest the sandwich for a minute before slicing so the cheese stays gooey but does not flood the plate.
Storage Instructions
Store cooled sandwiches in an airtight container for up to 2 days. Reheat until the bread turns crisp again and the cheese melts back to a gooey center.
Frequently Asked Questions
What is the best bread for a Crispy Grilled Cheese Sandwich?
A sturdy sandwich loaf or thick cut white bread works best because it crisps well and holds the melted filling without falling apart.
Can I use only one kind of cheese?
Yes you can use all cheddar or all mozzarella though a mix gives better flavor and a more stretchy center.
How do I keep the sandwich crisp?
Use a thin layer of the spread and cook until each side is deeply golden then let the sandwich rest briefly before serving.
Can I make these ahead for meal prep?
They are best fresh though you can assemble the sandwiches ahead and brown them just before serving for the best texture.
Final Thoughts
If you try this recipe I really hope you love it as much as my family does. It has become one of those sandwiches we just keep coming back to no matter the season.
Drop a comment below and let me know how yours turned out. And if you are looking for more easy lunch ideas make sure to bookmark this page.
I am always adding new recipes that are simple satisfying and perfect for busy weeknights.
Print
Crispy Grilled Cheese Sandwich
- Total Time: 20 minutes
- Yield: 4 servings 1x
Description
This easy Crispy Grilled Cheese Sandwich is packed with quick ideas for a simple lunch or the best healthy comfort food upgrade. It turns basic bread and cheese into a golden melty favorite that works for weeknight dinner and meal prep and holiday brunch and potluck tables and casual party snacks. The outside stays crisp while the center turns gooey which makes every bite warm and satisfying for busy days.
Ingredients
- 8 slices sandwich bread
- 8 ounces sharp cheddar cheese
- 4 ounces low moisture mozzarella cheese
- 4 tablespoons softened unsalted butter
- 2 tablespoons mayonnaise
- 1/4 teaspoon garlic powder
- 1/8 teaspoon black pepper
- 1 tablespoon chopped parsley
Instructions
- Cut or shred the cheddar and mozzarella into loose uneven pieces and measure them into one bowl. The cheese should look fluffy and varied instead of perfectly uniform so it melts in natural patches later.
- Add the softened butter and mayonnaise to a small bowl then sprinkle in the garlic powder and black pepper. Stir until the mixture looks creamy and lightly speckled with seasoning with soft streaks still visible as it comes together.
- Lay out the bread slices and spread the seasoned mixture over one side of each slice. The coating should be uneven in a realistic way with soft edges and a few thinner spots rather than perfect coverage.
- Turn the coated bread so the plain sides face up then scatter the cheddar and mozzarella over four slices. The cheese should be loosely layered with small gaps and slight mounds then top with the remaining bread so the sandwiches look full but not perfectly even.
- Place the sandwiches so the coated sides begin to soften against the heat. The bread will first look pale and buttery then gradually take on patchy light gold areas while the cheese inside starts to relax and settle.
- Continue until the underside becomes a deeper golden brown with a few darker edges and a crisp surface. The filling will look slightly compressed and some cheese may begin to melt unevenly toward the seam.
- Turn the sandwiches and let the second side brown while the cheese melts further. The bread should become evenly crisp with natural irregular browning and the center should turn gooey with cheddar and mozzarella melting in uneven ribbons.
- Let the sandwiches rest briefly so the melted cheese thickens just enough to hold while still staying soft and stretchy. Slice each sandwich into uneven halves then plate them with slight overlap and finish with a loose scatter of chopped parsley. The final dish should look fully cooked and ready to serve with crisp golden bread and irregular melted cheese showing at the edges. The color should be warm and appetizing with natural homemade variation across each piece.
Notes
Pro Tips:
- Use two cheeses so the flavor stays rich while the melt stays stretchy.
- Spread the outside thinly so the bread crisps instead of turning greasy.
- Layer the cheese loosely so it melts in irregular pockets rather than one dense block.
- Rest the sandwich for a minute before slicing so the cheese stays gooey but does not flood the plate.
Storage: Store cooled sandwiches in an airtight container for up to 2 days. Reheat until the bread turns crisp again and the cheese melts back to a gooey center.
- Prep Time: 10 minutes
- Cook Time: 10 minutes
- Category: Lunch
- Cuisine: American
Nutrition
- Serving Size: 1 serving